The International Space Station orbits the Earth just over once every hour but it’s often only visible for a few minutes in the night sky before disappearing again.
In this project, we create a beacon that tracks the ISS space station and alerts you when it’s coming into view. It uses a web service to get its position from the NASA data. We use the Raspberry Pi Sense Hat add-on board for Pi4 because it has some great features for creating cool effects on its 8 x 8 RGB LED display using Python.
When the ISS is out of sight, the Sense Hat display throbs with a moving pattern. As the space station gets closer, the display changes to show its current heading. Finally, as the ISS comes into view, the display changes to red alert! This makes it easy to go outside and view the ISS as it passes over-head.
1. Get your Pi ready
- Start by attaching the Pi4 to the OKdo case using the 4 screws provided. Then screw the metal standoffs to the bottom of the POE Hat.
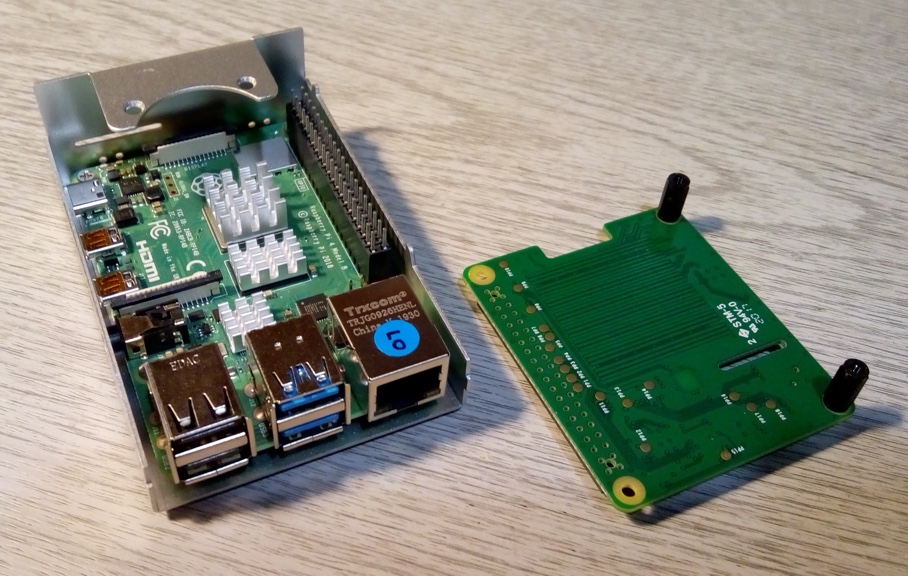
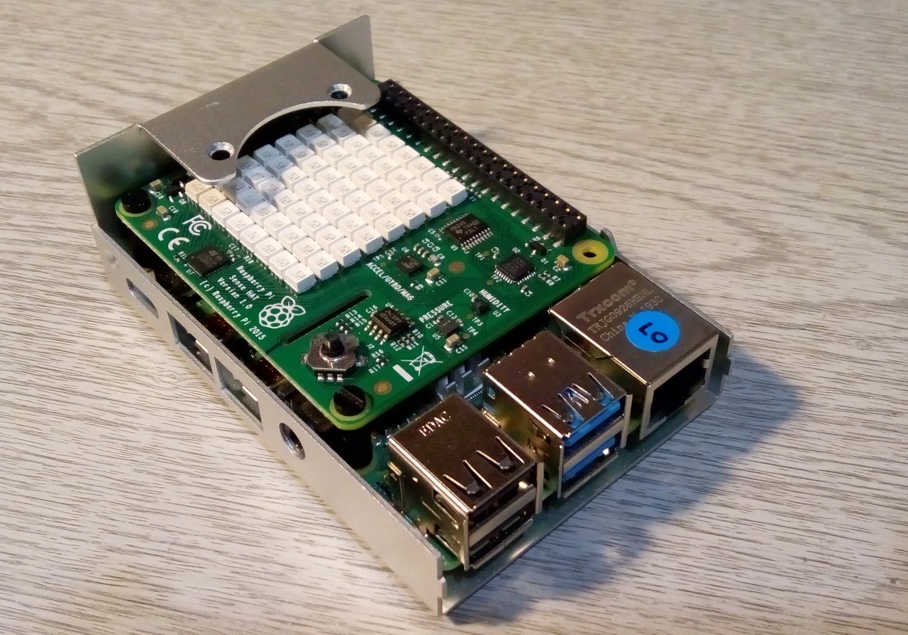
- Slide the Sense Hat under the case fan support and rotate it into position over the GPIO header connector. Make sure all the connector pins are aligned before applying light pressure to snap the board into place as shown below:
Don’t fit the fan supplied with the OKdo kit. The Pi4 is designed to operate without active cooling so this will not damage the board.
- Ensure that you have the latest version of Raspbian installed on your SD card. You can learn how to do it here
- Due to current compatibility issues when using Sense Hat on the Pi 4, after flashing your micro SD card, you’ll need to open config.txt from it with a text editor, add the line shown below at the bottom of the file and save it:
hdmi_force_hotplug=1- Insert the SD card into the Pi.
- Connect monitor, mouse and keyboard to your Pi, then power on. The Sense Hat should flash and then change to a multi-coloured pattern as the Pi starts up. The standard desktop will appear on your monitor where you can run through the setup as directed.
2. Install Python packages
This project uses a Python package to calculate the radial distance between two points on the Earths surface using the Haversine formula.
- Install the package from the official Python code repository, PyPi by clicking the Terminal icon in the Menu bar and entering the following command:
pip3 install haversine

PyPi contains over 200k open-source Python packages. If you need some specific Python code, search there to see if someone has already written a module. You can also upload your own code to help others.
3. Tracking the ISS
- Open Thonny on your Pi from the Programming menu and enter the following:
from sense_hat import SenseHat
import time
import threading
import requests
from math import sin, cos, atan2, degrees, radians
from haversine import haversine

home = (51.7836, -1.4854)  # Set home co-ordinates as degrees N, degrees E
out_of_sight = 2000  # Trigger distances in km
getting_closer = 800

red = (255, 0, 0)  # RGB colours
orange = (255, 165, 0)
b = (0, 0, 0)  # Off
f = green = (0, 255, 0)
url = "http://api.open-notify.org/iss-now.json"  # IIS Json location service
earths_radius = 6371.0088  # Earths radius in Kilometres

two_by_two = [
    b, b, b, b, b, b, b, b,
    b, b, b, b, b, b, b, b,
    b, b, b, b, b, b, b, b,
    b, b, b, f, f, b, b, b,
    b, b, b, f, f, b, b, b,
    b, b, b, b, b, b, b, b,
    b, b, b, b, b, b, b, b,
    b, b, b, b, b, b, b, b
]

six_by_six = [
    b, b, b, b, b, b, b, b,
    b, f, f, f, f, f, f, b,
    b, f, b, b, b, b, f, b,
    b, f, b, b, b, b, f, b,
    b, f, b, b, b, b, f, b,
    b, f, b, b, b, b, f, b,
    b, f, f, f, f, f, f, b,
    b, b, b, b, b, b, b, b
]


def get_iss_coords():
    """Get latest IIS latitude and longitude as tuple
       Don't query server more than every 5 seconds"""
    global iss
    while True:
        try:
            coords = requests.get(url).json()  # Json response
            iss = (float(coords['iss_position']['latitude']),
                   float(coords['iss_position']['longitude']))
        except:
            pass
        time.sleep(5)


def compass_bearing(coordA, coordB):
    """Return bearing between two co-ordinates (Degrees)"""
    latA, latB, long_diff = (radians(coordA[0]),
                            radians(coordB[0]),
                            radians(coordB[1] - coordA[1]))
    x, y = (sin(long_diff) * cos(latB),
            cos(latA) * sin(latB) - (sin(latA) * cos(latB) * cos(long_diff)))
    return round((degrees(atan2(x, y)) + 360) % 360)


def compass_quadrant(bearing):
    """Return a compass quadrant from bearing"""
    if bearing < 90:
        quad = 'NE'
    elif bearing < 180:
        quad = 'SE'
    elif bearing < 270:
        quad = 'SW'
    else:
        quad = 'NW'
    return quad


def pulse_matrix(colour, delay=1):
    for matrix in two_by_two, six_by_six:
        sense.set_pixels(matrix)
        time.sleep(delay)


def update_display():
    distance = haversine(home, iss)  # Haversine dist between two points (km)
    bearing = compass_bearing(home, iss)
    quadrant = compass_quadrant(bearing)
    print(f'Distance from home: {round(distance)} km')
    print('Co-ordinates:', iss)
    print(f'Bearing: {bearing} degrees')
    print('Quadrant:', quadrant)
    if distance > out_of_sight:
        pulse_matrix(green)
    elif distance > getting_closer:
        sense.show_message(quadrant, text_colour=orange, scroll_speed=0.2)
    else:  # Red alert - in view!!
        sense.show_message(quadrant, text_colour=red, scroll_speed=0.2)

iss = (0, 0)  # ISS co-ordinates
t = threading.Thread(target=get_iss_coords)  # Get ISS position concurrently
t.daemon = True
t.start()
sense = SenseHat()
sense.set_rotation(180)  # Rotate display
try:
    while True:
        update_display()
finally:
    sense.clear()  # Turn lights off when leaving!
- Change the “home” variable to match your own location’s co-ordinates. Specify Latitude relative to North followed by Longitude relative to East. South and West coordinates are negative. The South Pole (90.0000° S, 45.0000° E) would be: home = (-90.0, 45.0)
- Save the file
At the top of the code listing are the imports for the Sense Hat, managing threads and web server requests, plus maths and haversine modules for performing the trigonometry.
Then come the definitions and constants referred to in the following functions. The matrix definitions are Python Lists laid out to visualise the LED patterns that will be displayed.
Open-notify.org is a web service that returns a JSON response containing the latest ISS co-ordinates. The position is given as latitude and longitude coordinates, projected on a point on the Earth’s surface. Because the time taken to complete updates varies, this is run in its own thread in the background. It communicates with the main process via the global variable named “iss”.
Don’t access the open-notify service more than once every 5 seconds, as more frequent requests might overload the service!
The main process loop runs update_display() continuously – this, in turn, calls the haversine function, computing the distance to the ISS using the latest position information. A compass bearing to the ISS’ position is also calculated by the compass_bearing() function. It’s converted to one of the NE/SE/SW/NW quadrants by the compass_quadrant() function, indicating the direction in which the ISS will come into view.
All this information is used to decide how to update the display using the latest distance information.
A final clause is used to clear the LED display when the program stops running.
4. Run the code
Note: Change the “home” variable to match your own location’s co-ordinates. Specify Latitude relative to North followed by Longitude relative to East. South and West coordinates are negative. The South Pole (90.0000° S, 45.0000° E) would be:
home = (-90.0, 45.0)
Click Run in Thonny to test that everything is working. The LED display should start to pulse in Green indicating the ISS is out of sight. As the Space Station approaches, the display will change to show the compass quadrant where the ISS will appear. This starts as Orange text and changes to Red as the ISS comes into view.
The shell window shows the actual information used in the calculations as it gets updated.
When the display turns red, if you look in that direction, on a clear night you should see a very bright “star” like object moving at 27,000 km/hr across the sky, that’s the ISS!
Note: To stop the program choose “Interrupt execution” (Ctrl+C) in the Run menu. This will clear the display
Summary
If you are a space technology fan, this is a great project to help you spot the ISS when it’s visible in your night sky.
The project uses useful coding techniques that can be employed in many projects, for example running processes in their own threads. This is typical when the Pi needs to update a display smoothly.
It also shows how to import Python modules, giving you access to complicated functionality without having to write the code yourself. This can speed up development and leaves you to focus on your own code.
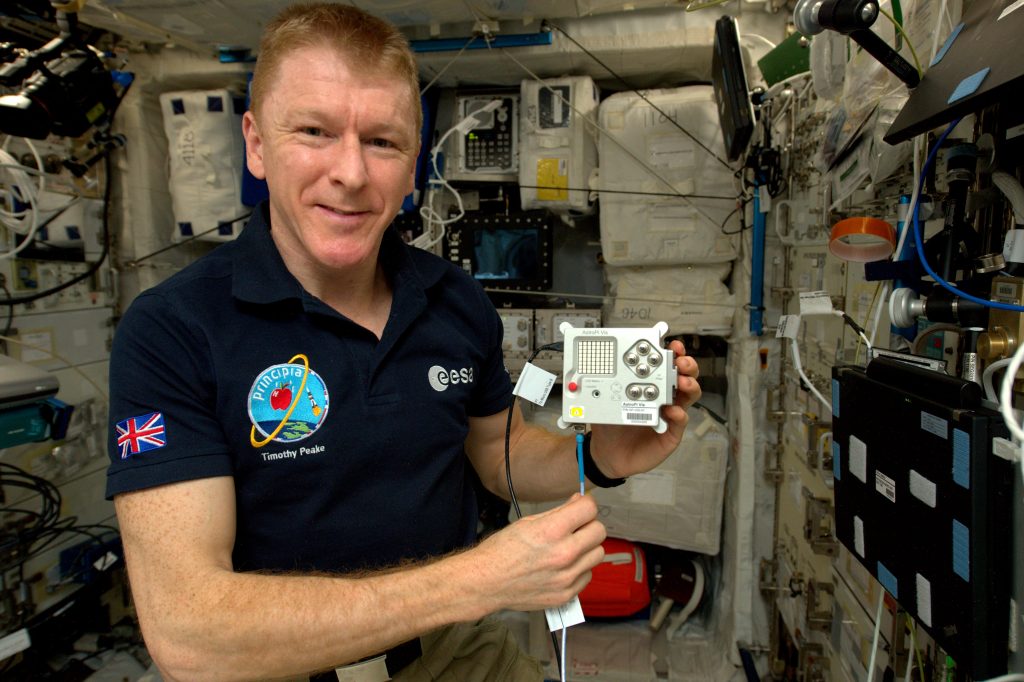
Have fun and we hope you manage to see the ISS – it’s amazing and the Astro-Pi is actually up there on board!
Like what you read? Why not show your appreciation by giving some love.
From a quick tap to smashing that love button and show how much you enjoyed this project.

