Build a secure Mosquitto MQTT edge gateway for IIoT applications based on ROCK 4SE
Author: Peter Milne, engineer and Linux advocate with more SBCs than an Apollo 11 landing craft.
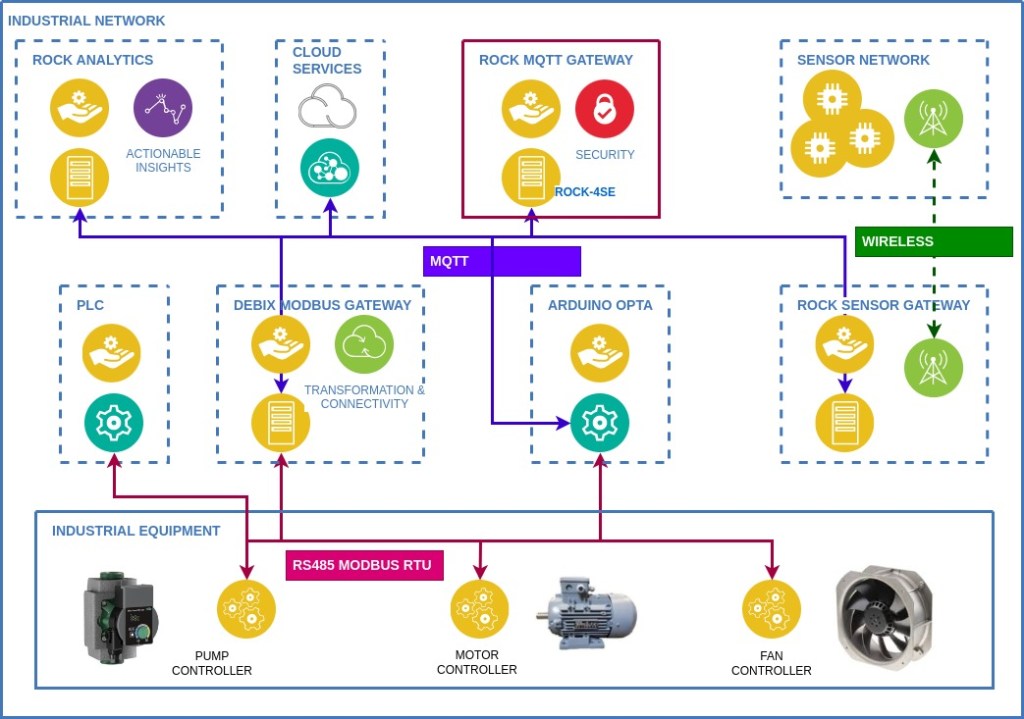
This is the first in a series of projects that sets ROCK boards in an industrial context showcasing how to build innovative IIoT solutions that can integrate into existing industrial automation, smart agriculture and building management infrastructure or form the building blocks for new solutions.
We will be demonstrating ROCK, Debix and Arduino Pro products using industry standard protocols like Modbus, RS485, MQTT and wireless to interoperate with industrial PLC’s and sensor networks. Each project can be used stand-alone for a specific use case, or as part of a network of devices as shown in the diagram below.
In this project we build out a secure, high-performance MQTT gateway based on the ROCK 4SE SBC forming the communications hub for all the other system components in our example implementation. Although this is just one part of the overall system it can be used in any situation where a secure MQTT communications gateway is required.
We cover building a custom Debian OS including using Device Tree Overlays, configuring and testing a Mosquitto MQTT broker and securing the network using certificate authentication and encryption over MQTTS / TLS.
Step 1: Hardware
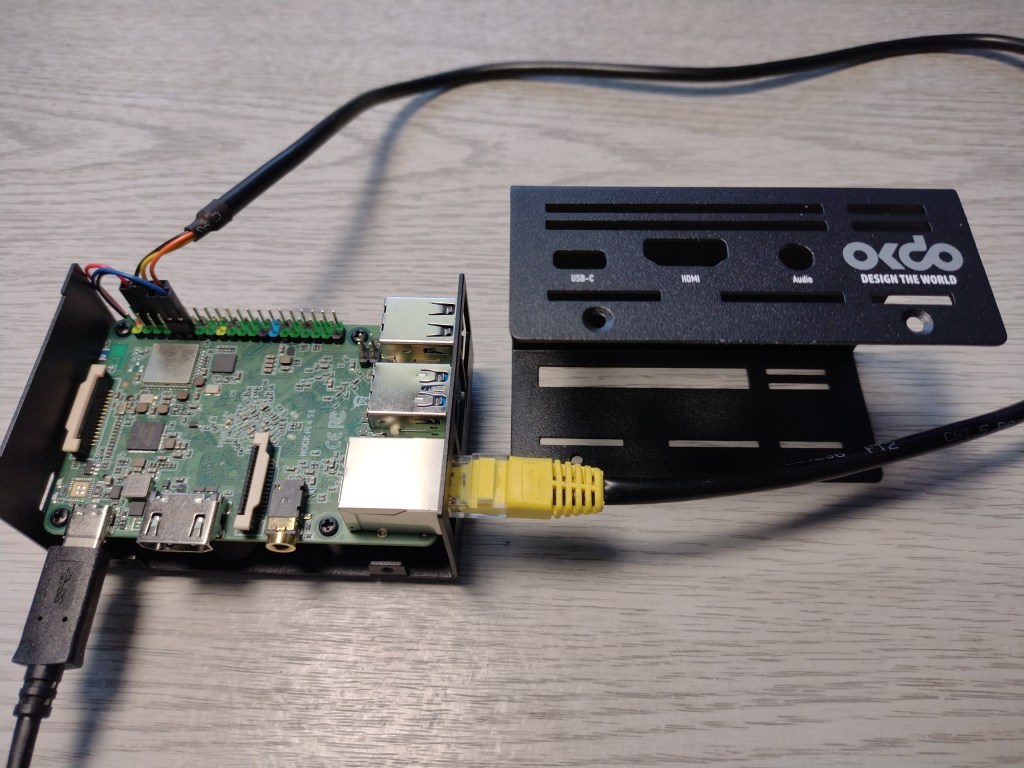
We have chosen the ROCK 4SE for our MQTT gateway due to its fast Hexa-core Arm® CPU with 4GB of RAM memory and Gigabit Ethernet connectivity.
The board supports running the Linux Operating System (OS) and application software on eMMC storage which is secure and durable storage for production, or on SD card to ease development.
To aid configuration we connect to the board’s Serial Console using a USB-to-Serial and Linux host running Minicom. The board is also set up for remote access over SSH using an Ethernet connection to the LAN.
To protect the board we use the specially designed aluminium enclosure from OKdo which comes with a CPU heatsink and PWM controlled fan. The whole unit is powered with a 35W QC power supply designed for the ROCK range, connected to the USB-C input.
Step 2: Overlays
For a production system we want an OS tailored to our specific application with the minimum of software needed to run it. Using the Radxa build tools we can create a custom version of Debian Bullseye with an up to date kernel and command line interface (CLI). We can also add in a fan driver overlay for active cooling as an example of how to create overlays for the ROCK.
All the details of how to use the Rbuild system can be found in our Building ROCK OS Images project.
A Device Tree Overlay utilising the existing pwm-fan driver already built into the kernels is added like this:
- Clone the Radxa Overlay project
- Create an overlay file named rock-4-pwm-fan.dts in the arch/arm64/boot/dts/rockchip/overlays/ directory with the following contents:
/dts-v1/;
/plugin/;

#include <dt-bindings/thermal/thermal.h>
#include <dt-bindings/interrupt-controller/arm-gic.h>
#include <dt-bindings/interrupt-controller/irq.h>

/* 	Add an external PWM fan to GPIO pin-11 GPIO4_C2	 (gpio-146) */

&pwm0 {
    status = "okay";
};

&{/} {
        fan0: pwm-fan {
            compatible = "pwm-fan";
            #cooling-cells = <2>;
            fan-supply = <&vcc5v0_sys>;
            pwms = <&pwm0 0 40000 0>;
            cooling-levels = <255 255 255 255 255>;
        };
};

&soc_thermal {
	trips {
		fan_on: fan_on {
			temperature = <40000>;
			hysteresis = <2000>;
			type = "active";
		};
	};

	cooling-maps {
		map3 {
			trip = <&fan_on>;
			cooling-device = <&fan0 THERMAL_NO_LIMIT THERMAL_NO_LIMIT>;
		};
	};
};
- In the same directory, add an entry to the Makefile at the RK3399 section so that the overlay will be compiled to a dtbo binary:
dtb-$(CONFIG_CLK_RK3399) +=
	…
	rock-4c-plus-raspi-7inch-touchscreen.dtbo
	rock-4-pwm-fan.dtbo
- Commit the changes to your repo and make a note of your commit checksum using the log command – for example:
$ git log
commit 57d0188f9050608f4dce712dbddcd5a5a474a1f8
Step 3: Kernel Build
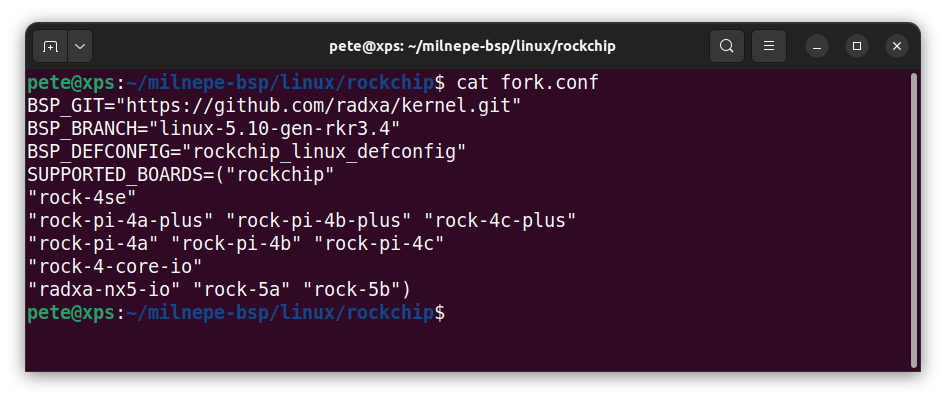
Now change directory to your clone of the BSP project – we are going to build the kernel using the Rockchip configuration as this supports the ROCK-4SE board with a 5.10 kernel version. This can be seen in the file ../linux/rockchip/fork.conf
- Edit the bash script ../linux/rockchip/0001-common/overlays.sh adding a line to point to your overlays project using the commit reference from above. Comment out the original reference to the Radxa source – this will pull in the fan overlay when the kernel is built:
custom_source_action() {
    git_source https://github.com/milnepe/overlays.git 57d0188f9050608f4dce712dbddcd5a5a474a1f8
    #git_source https://github.com/radxa/overlays.git 647c6c1cddaab027a71738d7bc6f4752a1bfa8b9
    cp -r $SCRIPT_DIR/.src/overlays/arch $TARGET_DIR
}
- Now build the kernel for the ROCK 4SE which will pull in your version of the overlays project in the process:
$ ./bsp linux rockchip rock-4seTip: Once you have built the kernel you can recompile just the overlays using the –dtb switch
Step 4: OS Image Build
The BSP project outputs a series of .deb packages, one of them containing the kernel image and another the kernel headers. These must be transferred to the Rbuild project to build a complete OS image suitable for flashing to SD / eMMC media.
- Copy the packages from bsp to rbuild and change into the rbuild directory:
$ cp linux-headers-5.10.110-1-rockchip_5.10.110-1_arm64.deb ~/rbuild/
$ cp linux-image-5.10.110-1-rockchip_5.10.110-1_arm64.deb ~/rbuild/
$ cd ~/rbuild
- Run rbuild using the -k switch to pull in the custom kernel packages:
$ ./rbuild -k linux-image-5.10.110-1-rockchip_5.10.110-1_arm64.deb
rock-4se bullseye cli
- This produces an image file in the rbuild directory which can be flashed to an SD card:
rock-4se_debian_bullseye_cli.img
- Before placing the SD card in the ROCK, mount the FAT partition and edit the file txt to enable ssh (comment out the disable_service ssh line) and edit the locale line for your locale so it looks similar to this:
# Disable enabled services
#disable_service ssh
…
# Configure locale
update_locale en_GB.UTF-8
Now the SD card can be inserted into the ROCK and the board powered on. You should be able to see the boot process in the Serial Console on your host machine using a terminal running Minicom.
- Remote login to the Rock via the Serial Console using the default login credentials: username: radxa, password: radxa
- Overlays are disabled by default so the fan overlay must be enabled by renaming the dtbo:
sudo mv /boot/dtbo/rock-4-pwm-fan.dtbo.disabled /boot/dtbo/rock-4-pwm-fan.dtbo- Using vi add an entry in the boot config file /boot/extlinux/extlinux.conf like this:
label l0
        menu label Debian GNU/Linux 11 (bullseye) 5.10.110-1-rockchip
        linux /boot/vmlinuz-5.10.110-1-rockchip
        initrd /boot/initrd.img-5.10.110-1-rockchip
        fdtdir /usr/lib/linux-image-5.10.110-1-rockchip/
        fdtoverlays /boot/dtbo/rock-4-pwm-fan.dtbo
- Reboot the board and when it comes up again the fan overlay should load and the fan will start running.
- You can check the temperature of the cpu and gpu cores with the following command:
$ cat /sys/class/thermal/thermal_zone*/temp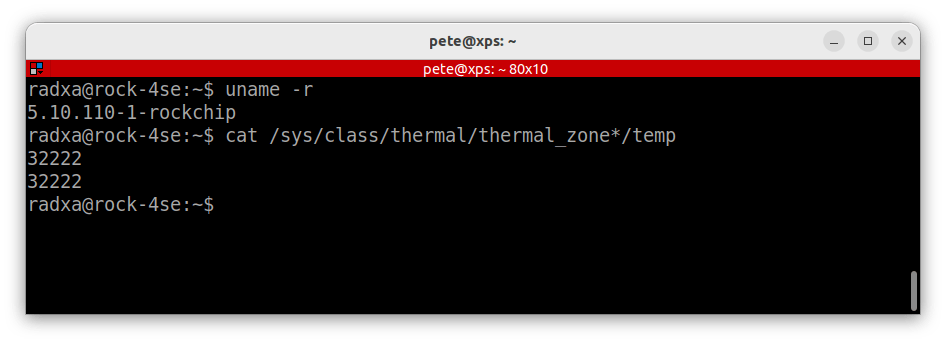
At this point your ROCK 4SE should have a bootable Debian Bullseye OS with active fan cooling, ready to start configuration as an MQTT gateway.
Step 5: MQTT Broker
There are a number of MQTT broker applications available for Linux SBC’s so we are choosing Eclipse Mosquitto™. It is a lightweight Open Source MQTT broker written in C with excellent documentation and both community and commercial support and it is available under a permissive Eclipse Public License so there are no restrictions for commercial use.
Full details of the project can be found on the Mosquitto website.
Debian already has a package available for Arm64 so it can be installed with apt. The following commands will install the package and dependencies before configuring it to start on boot-up:
$ sudo apt update
$ sudo apt install mosquitto
By default, the mosquitto broker does not do a lot until you add some configuration but we can check that it is up and running at this point:
$ systemctl status mosquito.service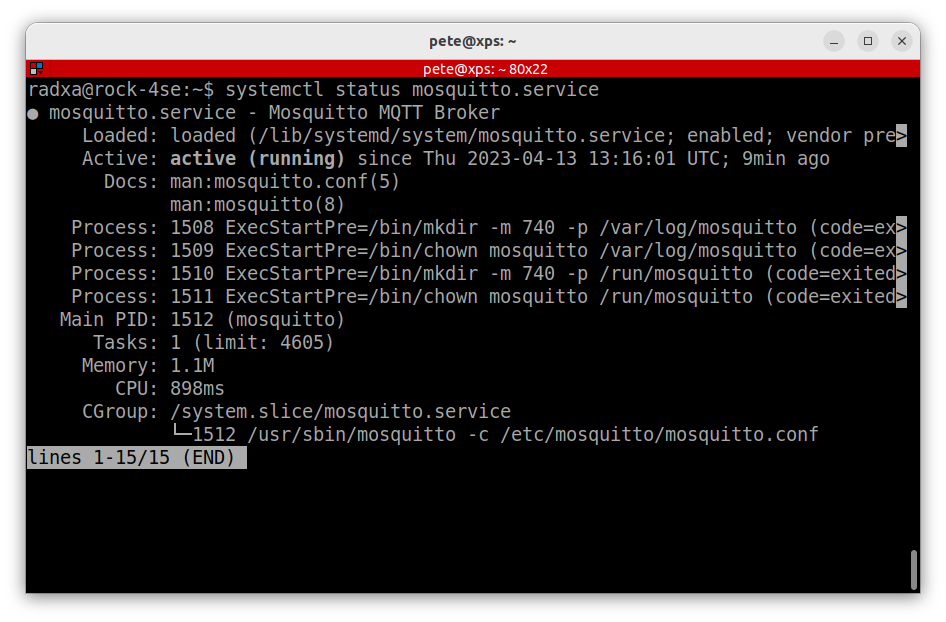
Step 6: MQTT Testing
Now we can configure mosquitto to do a basic test making sure that we can send and receive data over MQTT using our new broker from remote clients.
Mosquitto’s default configuration file is in /etc/mosquitto/mosquitto.conf – don’t ever edit this file or you will lose your changes if you update the package. Instead create a new config file in /etc/mosquitto/conf.d that will overlay the default configuration so you only need to add in any new settings or override any existing ones.
Each setting is detailed on the Mosquitto website.
The filename is user-defined but must end in .conf:
$ sudo vi /etc/mosquitto/conf.d/broker.conf- Enable anonymous access on the default MQTT port 1883 by adding the following settings:
# Enable settings by listener
per_listener_settings true
# Allow anonymous access on port 1883
listener 1883
allow_anonymous true
- Each time you change the config the mosquitto service must be restarted:
$ sudo systemctl restart mosquitto.serviceNow that the broker is configured, using your host machine make sure that you have the mosquitto-clients package installed, which includes a command-line publisher and subscriber client:
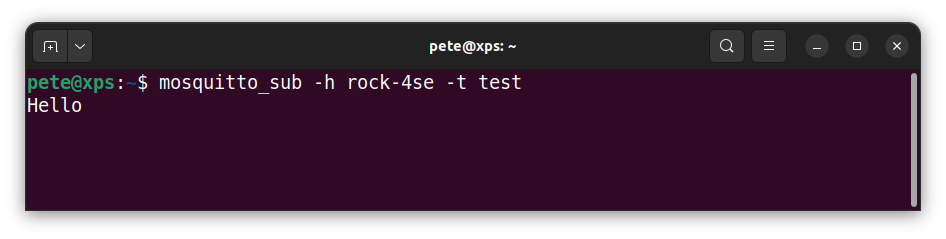
$ sudo apt install mosquitto-clients- Open a terminal and subscribe to the test topic – specify the hostname or IP of the broker and the user-defined topic. It defaults to port 1883:
$ mosquitto_sub -h rock-4se -t test- Then open a second terminal instance and publish a message to the test topic by adding the message parameter:
$ mosquitto_pub -h rock-4se -t test -m "Hello"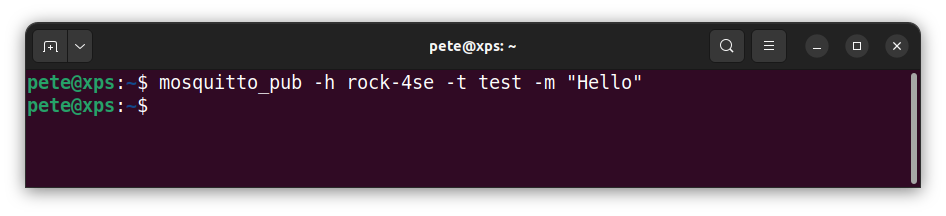
- You should see the message output in the subscriber to prove that everything is working ok.
Step 7: MQTTS Over TLS
Now we have proved that our mosquitto broker is up and running and that remote clients are able to publish and subscribe to messages, we can turn to securing the installation.
As usual there are several options when it comes to security – all the details can be found in the documentation on the Mosquitto website.
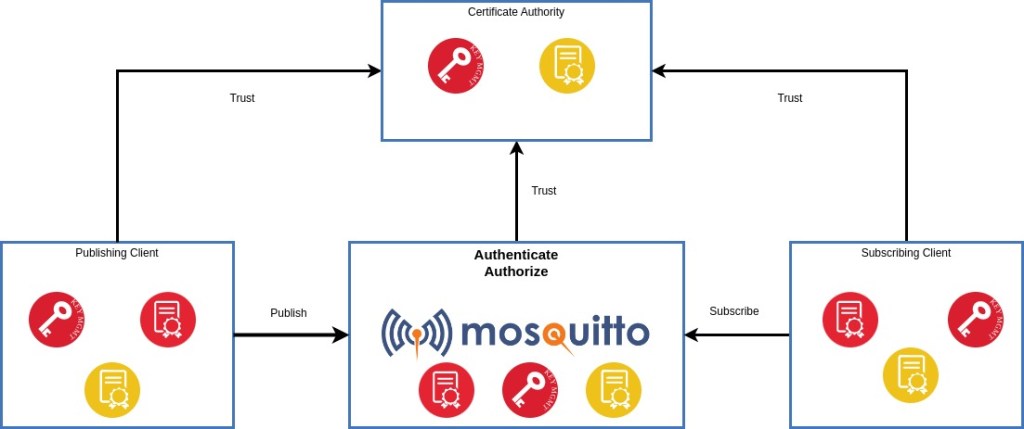
In this instance, we are going to demonstrate MQTT over TLS with client certificates. This provides a very high level of security where each connection to the broker is encrypted end-to-end and only clients with certificates signed by the trusted Certificate Authority are allowed to connect.
To do this we will create our own Certificate Authority (CA) with a Self Signed Certificate hosted on a secure PC. There are also free and commercial CA’s that can be used to automate this process for networks with large numbers of devices.
Tip: Make sure to do this on a PC that is secure so that the integrity of the keys and certificates can be maintained.
OpenSSL can be used to create all the necessary keys and certificates as well as handling certificate signing requests. The Chain Of Trust for the CA, broker and clients is shown in the diagram.
Step 8: Certificate Authority
To create the Certificate Authority setup a secure directory structure on a host PC where the relevant keys and certificates can be created and stored. They can then be securely copied to the relevant devices.
CA’s require a Private Key and a self-signed Root Certificate. The CA Root Certificate is distributed to each device to establish the Chain Of Trust. Because each device’s certificate is signed by the CA and the device has a copy of the CA Root Certificate, it can be sure that the device it is communicating with is authentic.
- Create a secure location for the Certificate Authority files on the host PC as root:
$ sudo -s
# mkdir -p /srv/ca/certs
# cd /srv/ca/certs
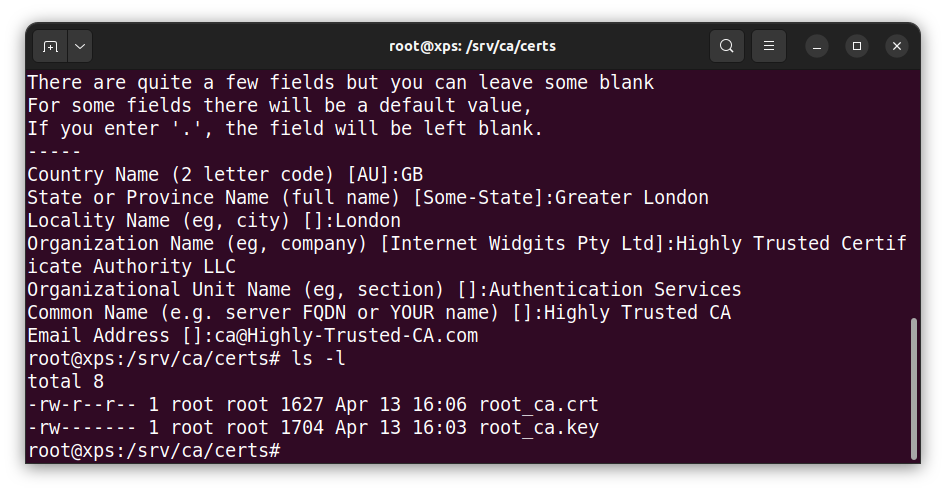
- Generate a key and root certificate for our own Highly Trusted Certificate Authority (without password):
# openssl req -new -x509 -days 365 -extensions v3_ca -nodes -keyout root_ca.key -out root_ca.crt
+++++++++++++++++++++++++++++++++++++++++++++++++
-----
You are about to be asked to enter information that will be incorporated
into your certificate request.
What you are about to enter is what is called a Distinguished Name or a DN.
There are quite a few fields but you can leave some blank
For some fields there will be a default value,
If you enter '.', the field will be left blank.
-----
Country Name (2 letter code) [AU]:GB
State or Province Name (full name) [Some-State]:Greater London
Locality Name (eg, city) []:London
Organization Name (eg, company) [Internet Widgits Pty Ltd]:Highly Trusted Certificate Authority LLC
Organizational Unit Name (eg, section) []:Authentication Services
Common Name (e.g. server FQDN or YOUR name) []:Highly Trusted CA
Email Address []:ca@Highly-Trusted-CA.com
Tip: The Common Name (CN) must not be the same as for clients.
The output is the root certificate root_ca.crt (publicly readable, writable only for root) which will get distributed to all the devices and key file root_ca.key (root read & write only) which must be kept secure and held on the CA device only:
Step 9: Broker Certificates
Now we need to generate a Private Key for the broker and a Certificate Signing Request to submit for signing by the CA.
- Create a working location for the broker files in the CA directory:
# mkdir -p /srv/ca/broker
# cd /srv/ca/broker
- Generate a new broker Private Key and Certificate Signing Request (without password)
# openssl req -new -newkey rsa:2048 -nodes
-keyout broker.key -out broker.csr
-subj "/CN=rock-4se"
Tip: CN must be FQDN of broker as this authenticates the server
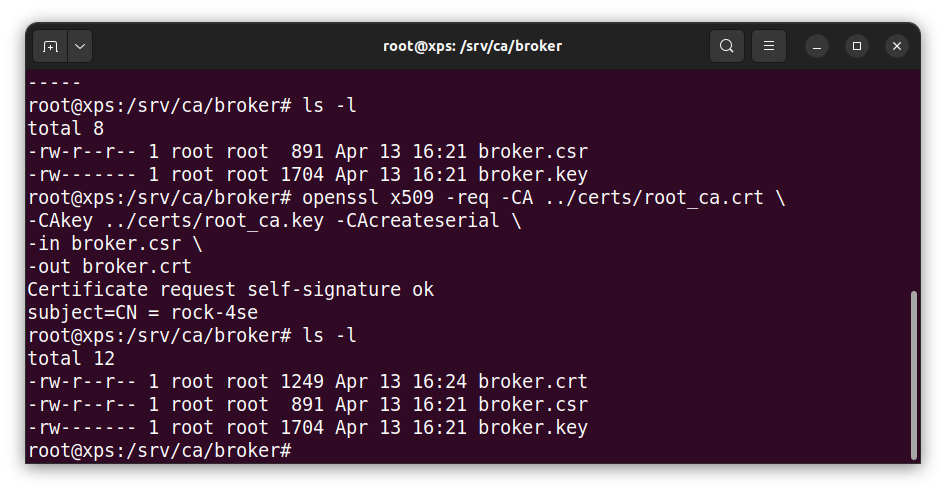
This generates the Private Key broker.key and a Certificate Signing request file broker.csr
- Pass the Certificate Signing Request csr file to the Certificate Authority to generate the signed certificate:
# openssl x509 -req -CA ../certs/root_ca.crt
-CAkey ../certs/root_ca.key -CAcreateserial
-in broker.csr -out broker.crt
This generates the Signed Certificate file broker.crt which can be securely distributed to the broker along with the Private Key broker.key and a copy of the CA Root Certificate root_ca.crt.
Now we need to get the broker Private Key and Signed Certificate along with a copy of the CA Root Certificate onto the ROCK.
- On the host copy the root certificate, broker certificate and private key to the ROCK in the radxa users home directory via ssh:
# cd /srv/ca
# scp certs/root_ca.crt broker/broker.crt broker/broker.key radxa@rock-4se:~/
- On the broker move the root certificate to the mosquitto CA certificate store and change ownership to root:
$ sudo mv root_ca.crt /etc/mosquitto/ca_certificates/
$ sudo chown root:root /etc/mosquitto/ca_certificates/root_ca.crt
- Move the broker private key and certificate to the mosquitto certificate store and change the ownership to mosquitto:
$ sudo mv broker.crt broker.key -t /etc/mosquitto/certs/
$ sudo chown mosquitto:mosquitto /etc/mosquitto/certs/broker.*
Now the broker has all the correct keys and certificates in place – it just remains to configure secure access which is done in a later step.
Step 10: Client Certificates
In a similar way to the broker, we now need to generate client keys and a signed certificate on the CA host machine that we will use to test secure remote access.
- Create a client directory in the CA store:
# mkdir -p /srv/ca/client01
# cd /srv/ca/client01
- Create a client Private Key and Certificate Signing Request:
# openssl req -new -newkey rsa:2048 -nodes
-keyout client01.key -out client01.csr
-subj "/CN=client01"
Tip: You can use a meaningful Common Name here.
- Submit the request to the CA:
# openssl x509 -req -CA /srv/ca/certs/root_ca.crt
-CAkey /srv/ca/certs/root_ca.key -CAcreateserial
-in client01.csr -out client01.crt
Now setup a client working directory under your normal user to run tests from and copy the client Private Key and Signed Certificate – the ownership should be changed to your user:
$ mkdir -p ~/client01
$ cd  ~/client01
$ sudo cp /srv/ca/client01/client01.key .
$ sudo cp /srv/ca/client01/client01.crt .
$ sudo chown $USER:$USER client01.*
Now the test client has access to the correct keys and certificates.
Step 11: MQTTS Testing
Before testing, the broker must be configured to add secure access over TLS with client certificates.
- Edit the config file /etc/mosquitto/conf.d/broker.conf so that it looks like the following – this will block anonymous access on port 1883 and only allow certificate authentication on port 8883. The end-to-end traffic is securely encrypted and only clients with a valid certificate are able to connect:
# Allow each listener its own settings
per_listener_settings true
# Default unencrypted port
listener 1883
allow_anonymous false

# Default encrypted port
listener 8883
certfile /etc/mosquitto/certs/broker.crt
keyfile /etc/mosquitto/certs/broker.key
cafile /etc/mosquitto/ca_certificates/root_ca.crt
tls_version tlsv1.3
require_certificate true
use_identity_as_username true
- Restart mosquitto:
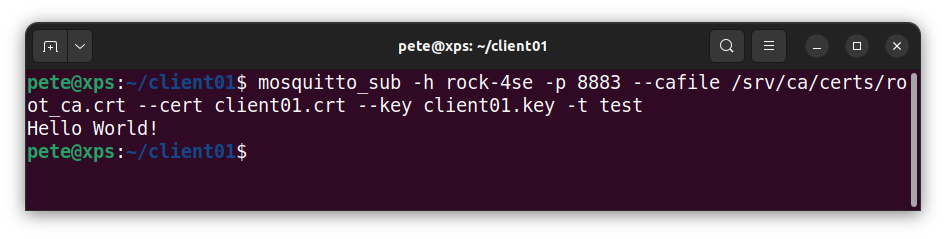
$ sudo systemctl restart mosquitto.service- On the host machine start a secure client from the client01 directory subscribed to the test topic:
$ cd ~/client01
$ mosquitto_sub -h rock-4se -p 8883
--cafile /srv/ca/certs/root_ca.crt --cert client01.crt --key client01.key
-t test
- Publish using the same secure client from the host machine:
$ mosquitto_pub -h rock-4se -p 8883
--cafile /srv/ca/certs/root_ca.crt --cert client01.crt --key client01.key
-t test -m "Hello World!"
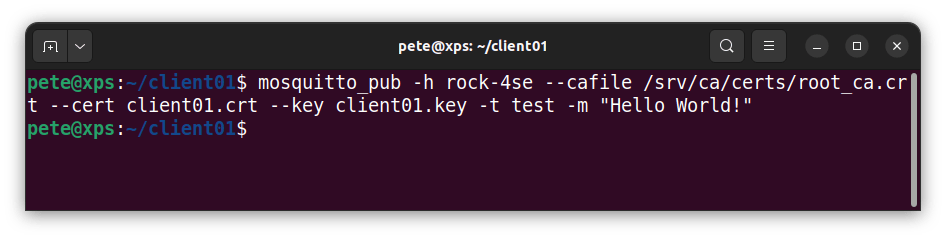
You should see the message output in the subscriber client.
We should also check that that anonymous access is denied – the connection should be refused.
$ mosquitto_sub -h rock-4se -p 1883 -t test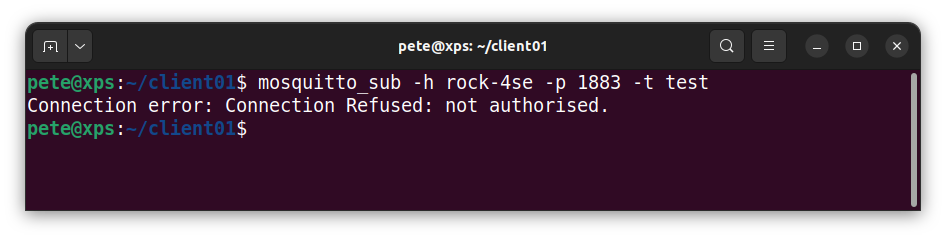
Step 12: Troubleshooting
There are a lot of files that all need to be in the correct filesystem location and with the right file ownership and permissions. Most issues will be to do with errors in one or more of these cases.
Both the broker and the client need read access to a copy of the CA Root Certificate and they must also be able to read their own Private Key (.key) and Signed Certificate (.crt) files.
If you are getting Connection Refused errors check the path to the key and certificate files are correct and that the user has the required ownership and access rights. For example, on the broker the Private Key and Signed Certificate files must be owned by the mosquitto user.
There is a log on the broker in /var/log/mosquitto/mosquitto.log that may be able to help diagnose any issues – this is only accessible as root.
For security reasons, It is also important that the Private Key files have read & write access only for the owner and the CA Root Certificate must be owned by root but any user should have read access.
Summary
In this project we have shown how to setup a secure MQTT gateway based on the ROCK 4SE. This is the first component in a series of project builds demonstrating ROCK products in an industrial context. However each component is stand alone and can be used within your own system architecture or application domain.
We showed how to build a targeted custom OS based on Debian with an overlay to control an active cooling fan using the Radxa build tools.
Following that we installed the Mosquitto MQTT broker and secured it to use MQTT over TLS with client certificates, a very secure way to ensure end-to-end data encryption with securely authenticated client access.
In the next project we will be showing how to build an MQTT / Modbus gateway for integrating to PLCs.
References:
Building Linux OS Images and Customising your Kernel with ROCK


Let’s invent the future together
What’s your challenge? From augmented reality to machine learning and automation, send us your questions, problems or ideas… We have the solution to help you design the world. Get in touch today.
Looking for something else? Discover our Blogs, Getting Started Guides and Projects for more inspiration!
Like what you read? Why not show your appreciation by giving some love.
From a quick tap to smashing that love button and show how much you enjoyed this project.

