Build the latest Linux operating system (OS) images and customise your kernel with Radxa’s new build system.
Author: Peter Milne, engineer and Linux advocate with more SBCs than an Apollo 11 landing craft.
If you need to incorporate your own software or system overlays and tweaks into a custom image for your ROCK board the Radxa build tools can ease the way.
In this project we cover rbuild – the image building tool and bsp which helps you build the latest supported kernels.
It’s assumed you know some common Linux commands and the basics of using Git source code management but the rest will be explained in detail.
Step 1: Linux Dev Host
Unless you have a lot of time on your hands, you will need a fairly powerful Linux host with plenty of RAM and a large SSD running Debian or Ubuntu (Arch and Manjaro are supported) to build the kernel and Operating System images.
It may be possible to use a VM on another platform but this is not officially supported.
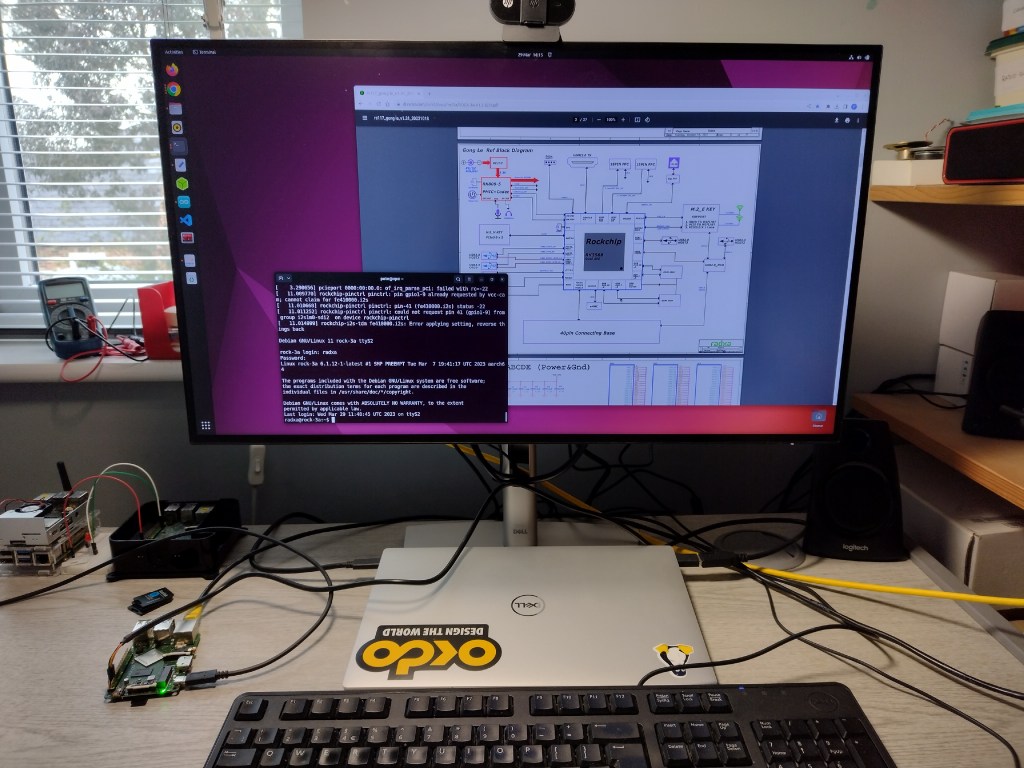
The host system used to test this project is a Dell XPS laptop with 12 CPU cores / 32GB RAM / 2TB SSD running Ubuntu 22.04 (Jammy). It can build the Linux kernel in about 5 mins on a good day.
In addition to the standard OS installation the following packages need to be installed on your host:
sudo apt update

sudo apt install -y build-essential crossbuild-essential-arm64 gcc-arm-none-eabi git u-boot-tools cpio multipath-tools jq docker.io bison flex libssl-dev python2 ruby swig python2-dev minicom

sudo gem install fpm
rbuild runs docker as an unprivileged user so let’s add our user to the docker group:
sudo usermod -a -G docker $USER

sudo systemctl enable docker

sudo reboot
Now we can test that Docker is working as expected:
docker run hello-world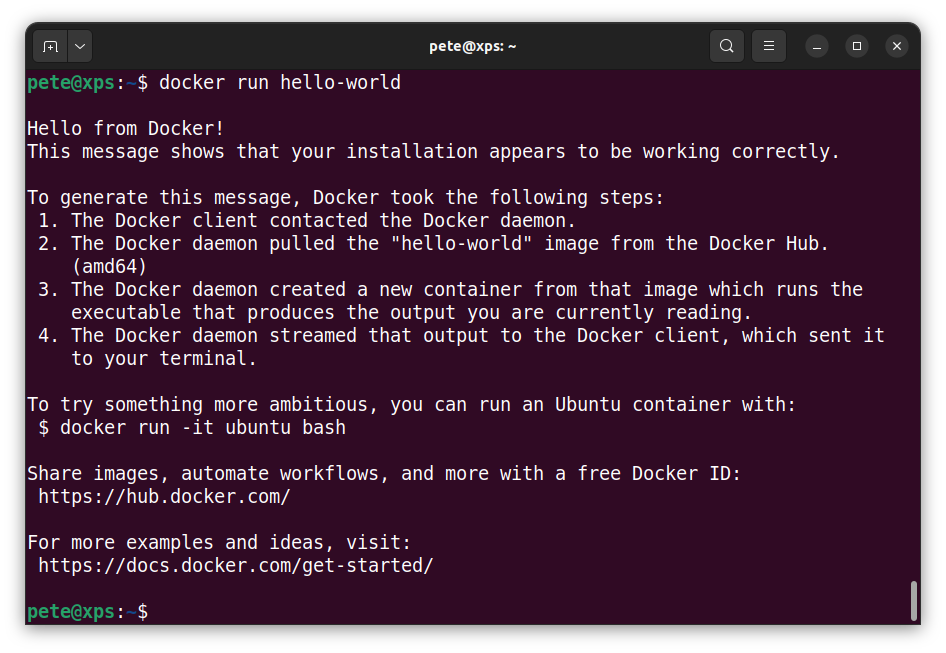
Docker documentation is available on the Docker Website if you have any issues.
Once the docker test has passed your host should be all setup to run rbuild!
Step 2: Target Board
rbuild can build Linux OS images for any of the ROCK boards. In this project we are building an image for the ROCK 3A which is our target board.
Tip: Substitute the board of your choice here – the process is the same
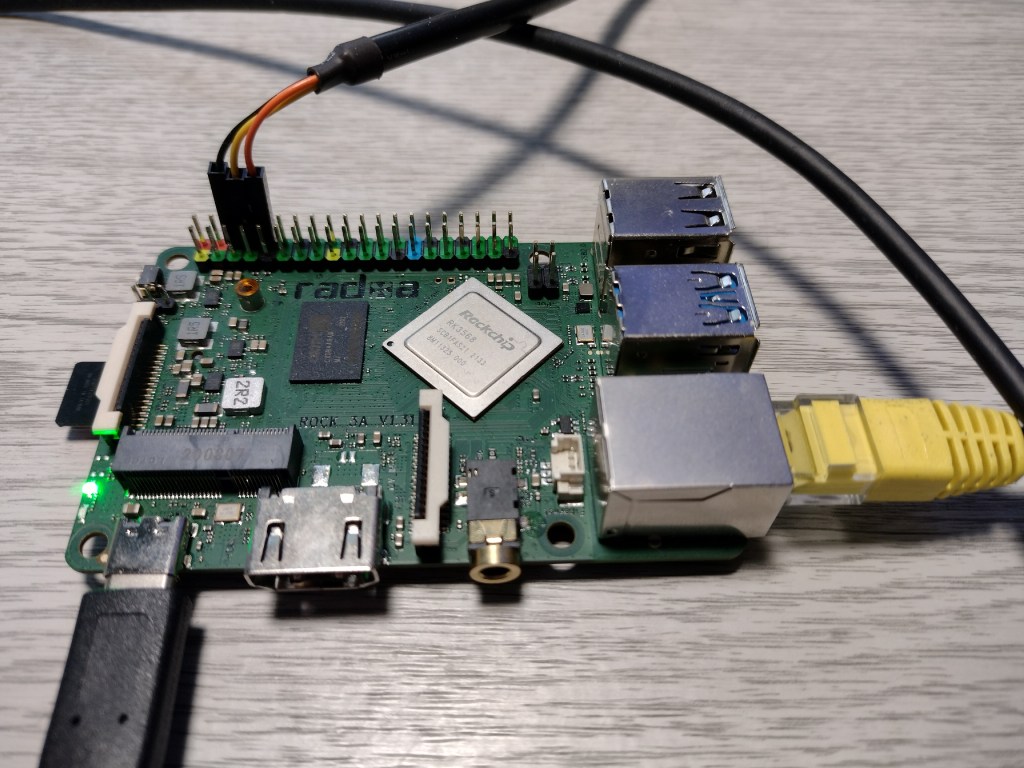
To build a basic CLI image (which is recommended as a first build) you will need a USB-to-Serial adapter cable connected to the serial pins on the ROCK and the USB connector on your host. This will allow you to attach your host to the ROCK and observe the boot process in a serial terminal, helping you to debug any issues. You will also be able to login if the board boots successfully.
The baud rate for ROCK boards serial console is 1.5Mbps – not all adapters can handle that speed.
| ROCK | USB-to-Serial |
| Pin 6 (GND) | Black |
| Pin 8 (TX) | Yellow |
| Pin 10 (RX) | Orange |
Tip: Some ROCK boards (ROCK 4C+) have a max tolerance of 3.14V on the TX/RX pins – the USB-to-Serial cable recommended above is safe to use with any of the ROCK boards
Connect a good quality QC power supply to the USB-C port. Whilst there are many low cost power supplies available, they can lead to strange and difficult to diagnose boot issues due to voltage fluctuations. So save yourself some grief and get a good one with a suitable quality cable.
We also connect an optional Ethernet cable which will allow you to install extra packages directly to the target if required.
Tip: The power supply recommended above is the one I use and has been tested with all the ROCK boards
Step 3: Serial Terminal
Minicom works well with the ROCK boards for interacting with the serial console. Writing a configuration script saves time and makes sure your settings are correct.
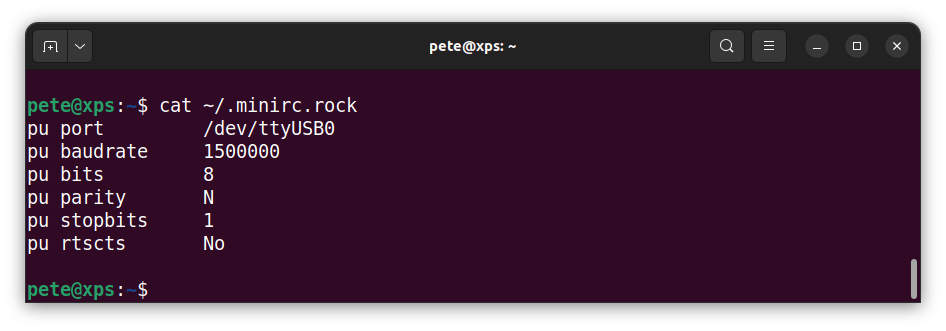
Enter the following into a file named .minirc.rock in your home directory on your host, using your favourite editor. Change the port setting if your ROCK board enumerates on a different port when its connected:
pu port 	/dev/ttyUSB0

pu baudrate	1500000

pu bits	8

pu parity	N

pu stopbits	1

pu rtscts	No
Now you can start Minicom with the following command from the terminal:
minicom rockUser CTRL+A to open the menu and then X to exit.
Step 4: Rbuild
rbuild is the image builder tool provided by Radxa who are the manufacturer of ROCK boards. It is still in rapid development and there are no releases or stable branches yet so the main branch is regularly broken.
For this reason, I recommend you fork the project to your own repo giving you a stable base to work from. You will also be able to save your own changes and submit pull requests (PR’s) back to Radxa. The downside is that you will probably need to sync the Radxa commits from upstream into your own fork from time to time to benefit from improvements and bug fixes.
You will need your own GitHub account. You can sign up on the Github Website.
Once your account is setup and you have enabled remote access, login and navigate to the Radxa rbuild repo.
Press the Fork button at the top of the screen and follow the instructions to create your own fork. Full details are can be found on the Fork repo section of the Github website.
From your fork, clone the repo to your local host. This is the URL of my fork, you will need to change it to your own fork and suitable local directory:
git clone git@github.com:milnepe/rbuild.git milnepe-rbuildNow change into the directory and run rbuild with no arguments. This will display all the options and supported boards available.
cd milnepe-rbuild/

./rbuild
Now lets run a test build using the default settings for the board in the form:
./rbuild <board> [distro] [flavour]
Where the name of the board, the distro and the flavour are copied from the rebuild output above. So to build a Debian Bullseye CLI image for the ROCK 3A use:
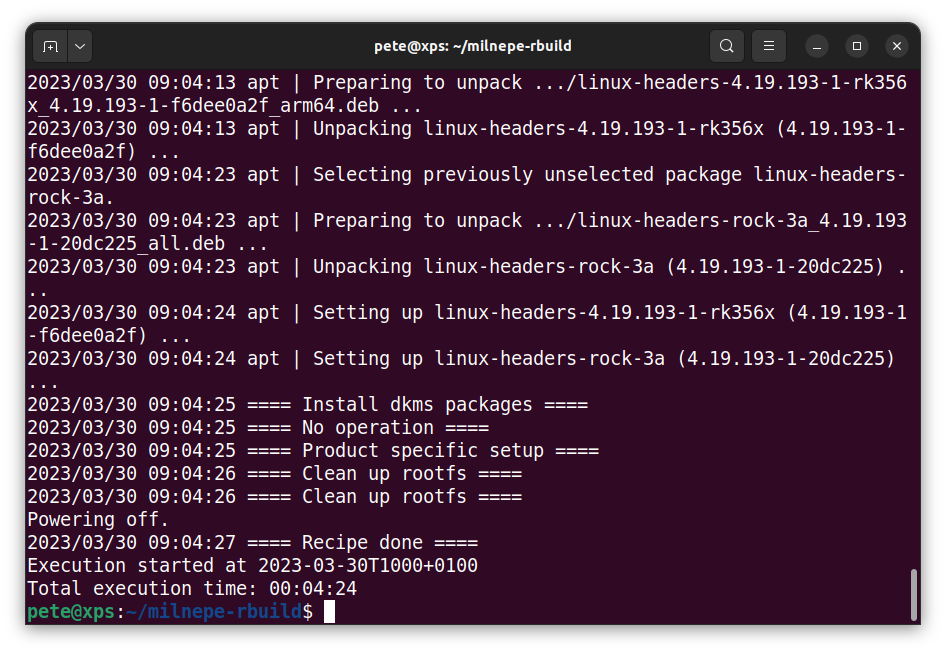
./rbuild rock-3a bullseye cliThe first time you run a new build the docker image will download before the kernel build process starts up. Once the kernel has been built, the distro packages need to be pulled in and the system image built. The process will utilise most of the resources available on the machine. This is time to take a coffee break or go and do something completely different for a while, depending on how fast your build system is.
The next time you run the build it will be much quicker. My system takes about 5 mins which is acceptable.
Step 5: Booting
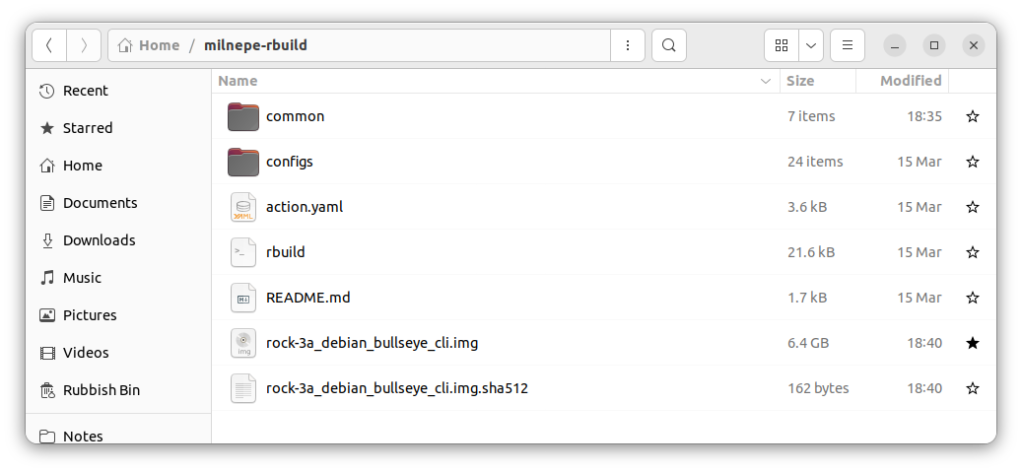
Currently the ROCK 3A build is set to kernel 4.19. If all went well you will have an image file suitable for flashing to SD or eMMC media and a SHA sum of the image, dumped in the build directory.
Flash the image rock-3a_debian_bullsey_cli.img to your media using balenaEtcher.
Before removing the media, open /dev/sda1 which is mounted as the config directory. In there you will see two files, before.txt and config.txt.
Open before.txt and comment out the line that disables ssh (so you will be able to login over ssh) and set the locale line to your preferred locale. For me it’s en_GB:
#   disable_service <systemd unit name>

#disable_service ssh

disable_service smbd

disable_service nmbd

…

#   update_locale <locale>

update_locale en_GB.UTF-8
Tip: make a copy of before.txt and save it on your host as it is deleted on first boot
config.txt can be used to run commands on every boot, for this example we are leaving it blank.
Now unmount the media and put it into the ROCK board then open a terminal on your host and start minicom:
minicom rock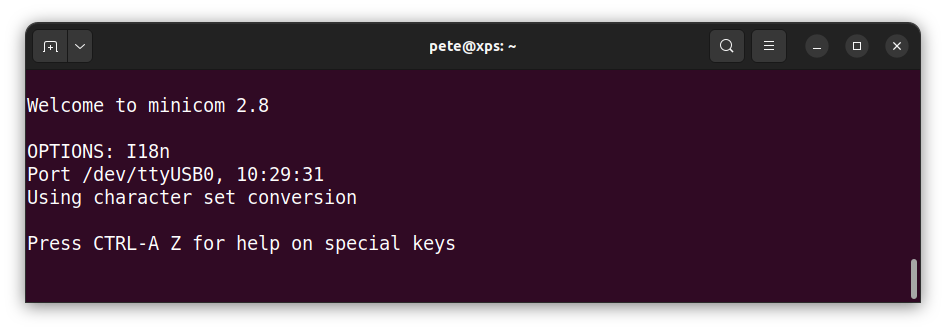
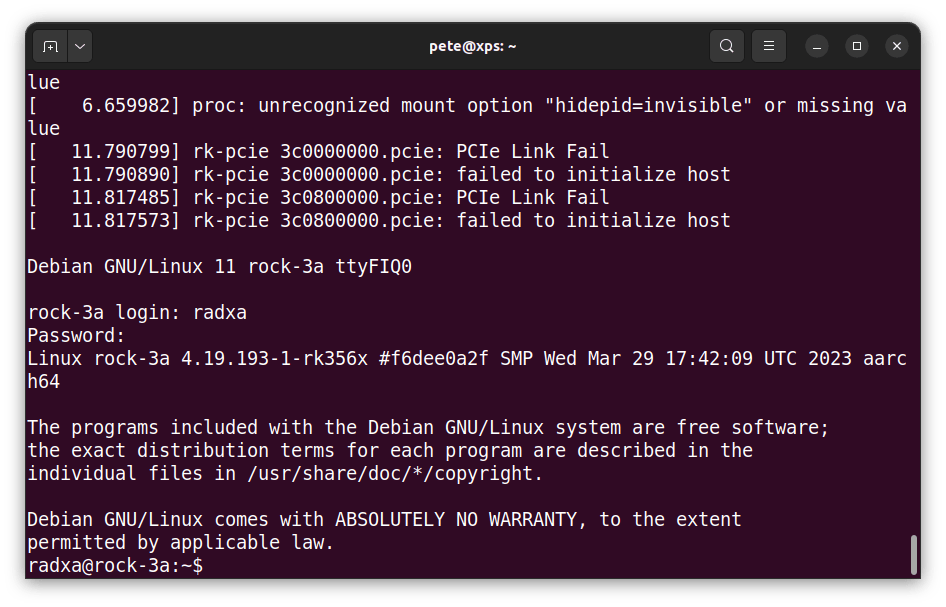
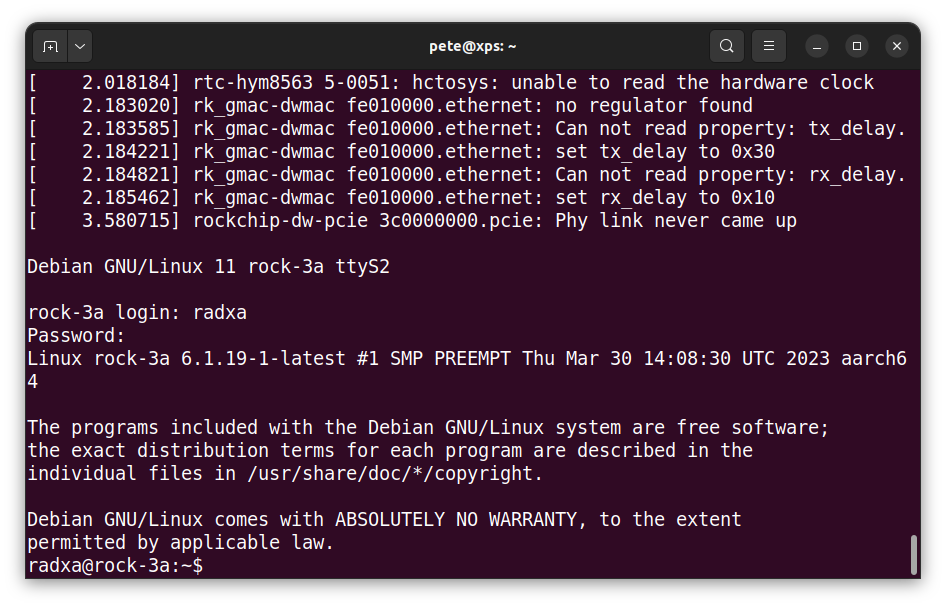
Connect the power supply to the ROCK and the boot sequence will start, which you can observe in the console.
The green power LED should turn on and after a few seconds the blue heartbeat LED will flash to show the OS is running. If all goes well you will be presented with the login prompt.
Login with the default user radxa and password radxa.
The kernel version is displayed and you are given a command line prompt as the radxa user. Have a look round and then power down safely with:
sudo poweroffCongratulations you have just successfully built your first ROCK Linux operating system!
Tip: If you have any issues that you can’t resolve open an issue on the Radax Rbuild repo and if you provide good information they will usually resolve it quickly for you
Step 6: Other Builds
If you want to try out Ubuntu or the other desktop versions just run rbuild again with the relevant parameters.
Try this to get a Debian image with a lovely Plasma KDE desktop:
./rbuild rock-3a bullseye kdeThis might take a bit longer to build as there are a lot more packages and configuration steps in the build pipeline, but it’s well worth the wait. Obviously you will need to attach a keyboard, mouse and HDMI monitor to appreciate your handiwork.

Step 7: BSP
As well as building the standard supported images, Radxa also provides a Board Support Package tool bsp to build newer Linux kernel versions, depending on the board model.
The project is available on GitHub and again I recommend creating your own fork especially if you want to make changes to customise your kernels.
Open the Radxa BSP repo and fork it to your own repo in a similar way to rbuild.
Now clone it to your local host and change into the local directory. This is my repo so change it to match your own URL and local directory:
git clone git@github.com:milnepe/bsp.git milnepe-bsp

cd milnepe-bsp
Before running bsp for the first time the submodule needs to be initialled and updated. You also need to run the update after synching your fork:
git submodule init

git submodule update
Now run bsp without any parameters:
./bspThis will output all the various options and parameters that can be used with bsp and also the supported linux editions. These can be investigated by opening the relevant fork.conf file in the bsp/linux/<edition> directory.
So for the latest edition we can see that the kernel version is v6.1.12 and the ROCK 3A is supported:
cat linux/latest/fork.conf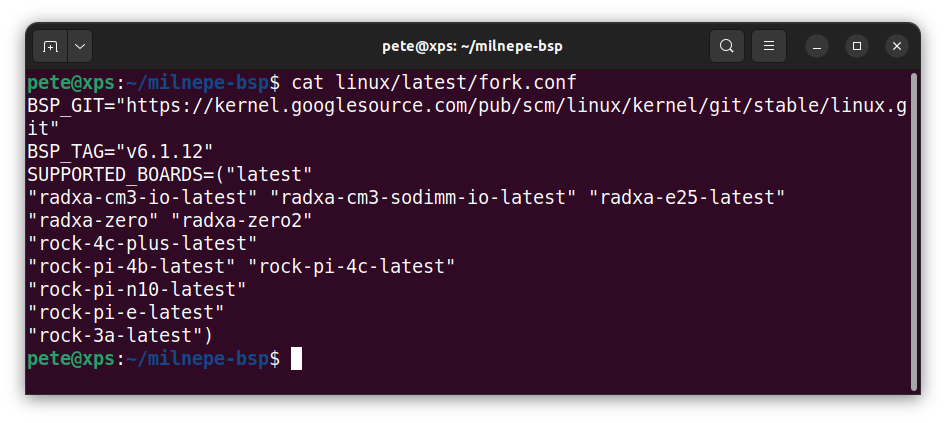
Let’s build the latest kernel for the ROCK 3A board:
./bsp linux latestThis creates a hidden directory .src and pulls in the kernel and u-boot sources before commencing the build, which takes about 10 mins on my machine.
Once the build completes you will end up with a whole load of .deb package files in the build directory. You will need the kernel package and the matching header package for the next step. They are the two largest files and for this example they are:
- linux-headers-6.1.19-1-latest_6.1.19-1_arm64.deb (~8MB)
- linux-image-latest_6.1.19-1_all.deb (~27MB)
Tip: If you are having trouble building, try to sync your repo, resolving any merge conflicts and then delete the .src directory so it can be rebuilt.
Step 8: Custom OS
Now that we have built a new kernel it can be integrated into an OS image using rbuild with the -k switch. This tells rbuild to use the supplied kernel / header packages when it builds the image. It has the following syntax:
./rbuild -k <your-kernel-package>.deb <board> [distro] [flavour]
So to build a Debian CLI image with the latest kernel we first need to copy the kernel image and header packages from the bsp build directory to the rbuild directory:
cd ../milnepe-rbuild/

cp ../milnepe-bsp/linux-headers-6.1.19-1-latest_6.1.19-1_arm64.deb . cp ../milnepe-bsp/linux-image-6.1.19-1-latest_6.1.19-1_arm64.deb .
Now rbuild can be run supplying the new kernel:
./rbuild -k linux-image-6.1.19-1-latest_6.1.19-1_arm64.deb rock-3a bullseye cliThis will output the image file rock-3a_debian_bullseye_cli.img which you can flash to your media then boot the board:
Summary
If you want to produce custom images for your ROCK board containing your own packaged software or overlays and tweaks, you need to be able to build your own system images and sometimes configure the kernel.
Radxa supports both of these cases with the rbuild tool for building OS images and the bsp tool for building kernels.
This project shows how to use both of these open source projects to build the latest OS image for the ROCK 3A but the same process can be used to build images for any of the ROCK boards.
References:
![]()


Let’s invent the future together
What’s your challenge? From augmented reality to machine learning and automation, send us your questions, problems or ideas… We have the solution to help you design the world. Get in touch today.
Looking for something else? Discover our Blogs, Getting Started Guides and Projects for more inspiration!
Like what you read? Why not show your appreciation by giving some love.
From a quick tap to smashing that love button and show how much you enjoyed this project.

