How to Run a Kodi Media Centre on your ROCK 4 SE SBC with LibreELEC OS
Author: Peter Milne, engineer and Linux advocate with probably more SBCs than a Chandrayaan-3 moon lander.
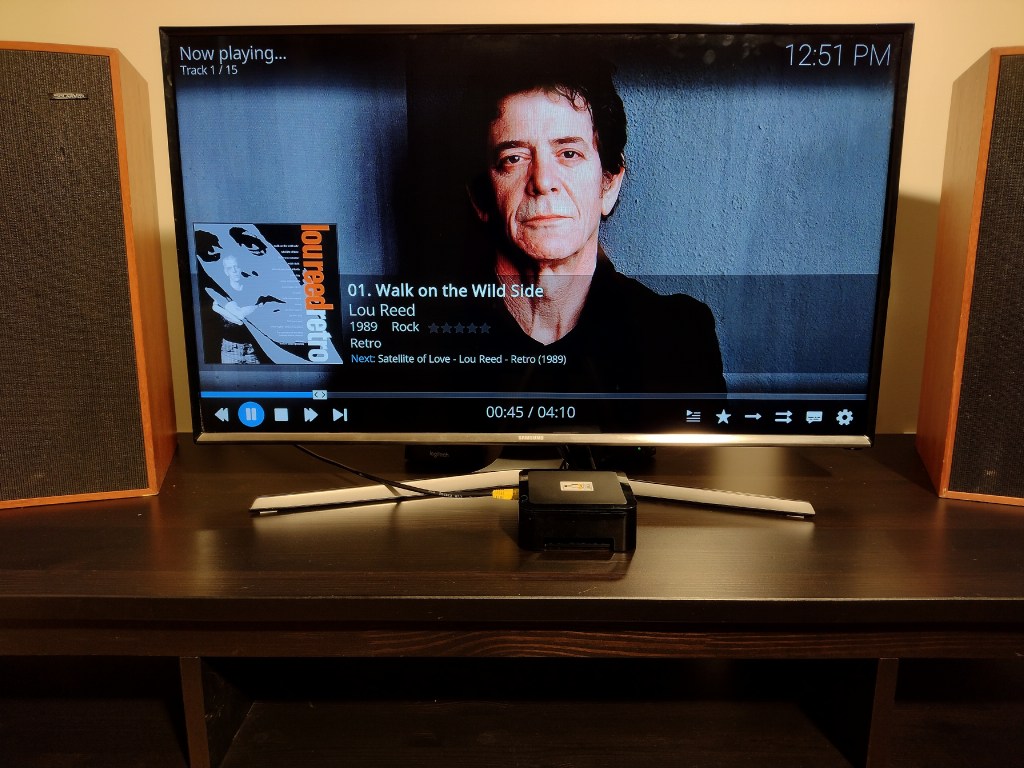
If you’re like me and have a stash of audio CDs, a half-decent audio system and a collection of pictures and videos that are scattered over various devices, it’s time to get organised and build yourself a ROCK 4 Media Centre to bring everything together so you can control it all from the comfort of your TV. You can build this project on both ROCK 4 SE or ROCK 4C+ single board computers.
LibreELEC is one of the unofficial Operating Systems (OS) for the ROCK, and it is a complete OS that is dedicated to running Kodi Media Centre. Although it’s possible to install Kodi manually, flashing SD media with LibreELEC makes it a really simple process, and you get a nicely configured media centre as a result, making the most out of the ROCK’s audio and video playback hardware.
Kodi Media Centre consolidates all kinds of digital media like music collections, photos, videos, film collections and streaming services so that you can play them from your TV using a remote control.
In a previous project, we showed how to build a Samba File Server using a ROCK 4SE to share files and media across lots of different devices.
This is the recommended approach, and in this project, we will connect the File Server to our dedicated ROCK 4 SE Media Centre to play back the media on the TV and audio system. That way, you will get excellent performance from both the File Server and the Media Centre.
Licence: Various – see Debian licence info here
Step 1: Download OS
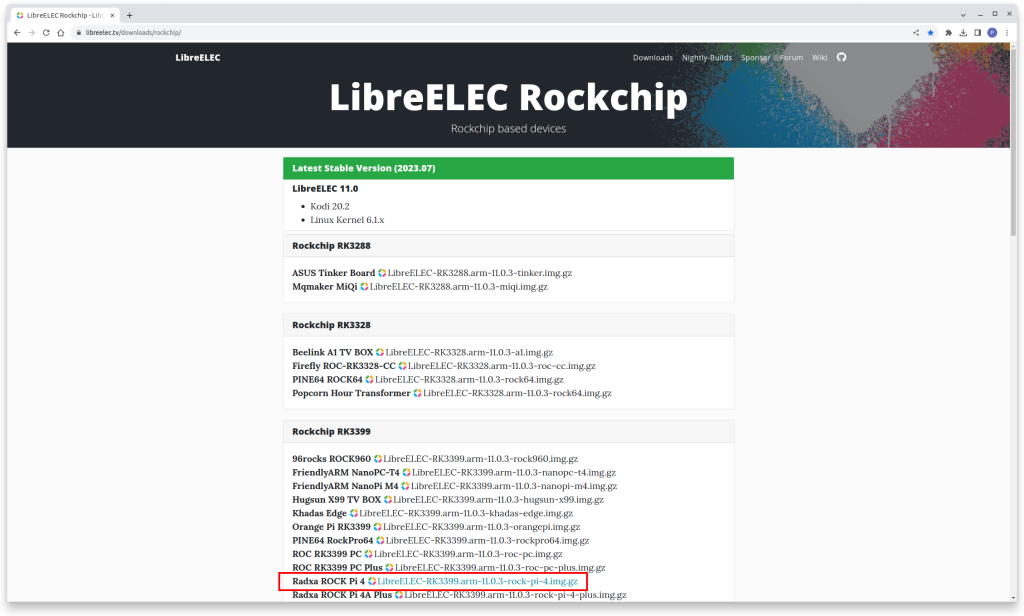
Download the latest stable version of LibreELEC (11.0) that supports Kodi 20.2. You can do this using either a Windows, Mac or Linux host PC or laptop. Save the image file to somewhere convenient on your storage. We used the Downloads directory:
- Visit the downloads page, and in the latest Stable Version, click the Radxa ROCK Pi 4 link
- Allow the image file to download – it is about 130 MB in size
- The filename will be similar to this depending on the version date: LibreELEC-RK3399.arm-11.0.3-rock-pi-4.img.gz
- There is no need to expand the compressed file.
Step 2: Imaging software
Special purpose imaging software is required to flash the image to the SD card. We recommend balenaEtcher, which is available on either Windows, Mac or Linux. It also performs a validation check on the flashed image:
- Visit the download page at balenaEtcher and install the version for your host PC operating system.
Step 3: Flash SD card
Now, everything is ready to flash the OS image onto a microSD card. Use a good quality, branded, 32GB card. We use SanDisk Ultra cards, which are fast, durable and reliable.
- Insert the SD card into a card reader on your host PC
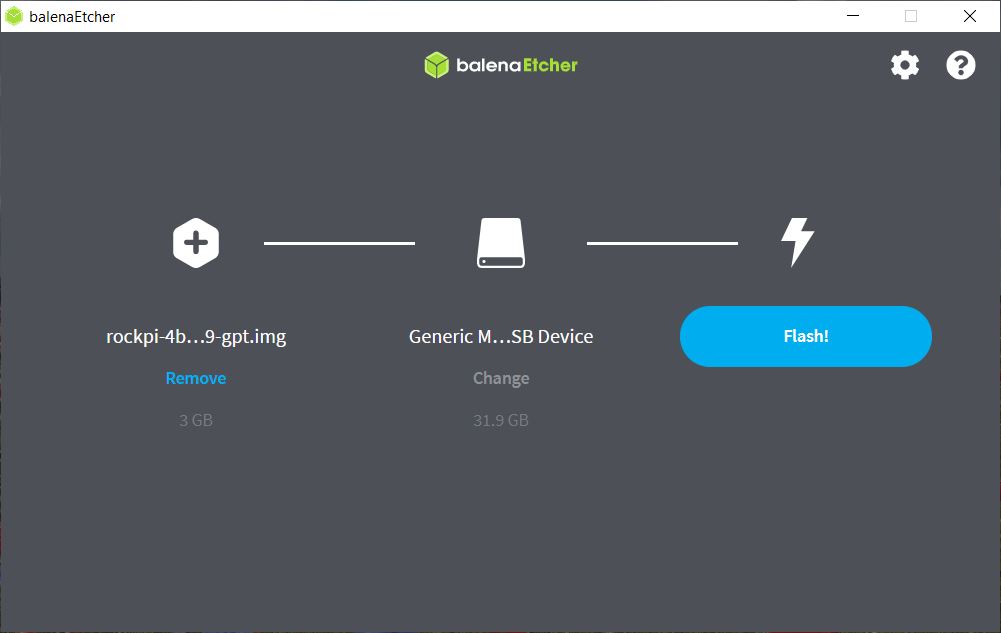
- Open balenaEtcher and select the OS image you downloaded in Step 1
- Select the SD card to flash – be careful to choose the correct one
- Click the Flash button
- Wait for the imaging and validation process to complete, then eject the SD card and remove it from your host PC.
Tip: If your system asks you to format the card at any time, just click cancel.
Step 4: Connect TV
Once the SD card is prepared, connect up your ROCK 4 board. We recommend attaching a keyboard and mouse for the setup process, which can be removed later. Kodi will work with a TV Remote that uses the Consumer Electronics Control (CEC) protocol.
Streaming video requires fast networking, so for best performance, we recommend connecting via Ethernet, but if you have a good WiFi signal, that will also work:
- Temporarily connect a keyboard and mouse to the USB 2.0 (Black) sockets
- Attach an HDMI cable to the HDMI output and your TV / Monitor
- Connect a CAT5 Ethernet cable to the Ethernet port and your internet Router / Switch
- Carefully insert the SD card into the card socket with the gold pins on the card facing upwards
- Connect the power supply to the USB-C socket, but do not plug it in yet.
Step 5: First Boot
Check that everything is prepared as in the steps above. Turn on your TV and plug in the power supply to boot your ROCK.
- The green power LED will turn on
- After a few seconds, the LibreELEC boot screen will appear, followed by the Kodi startup screen
- You will be asked to configure WiFi, SSH and Samba – skip this to start with
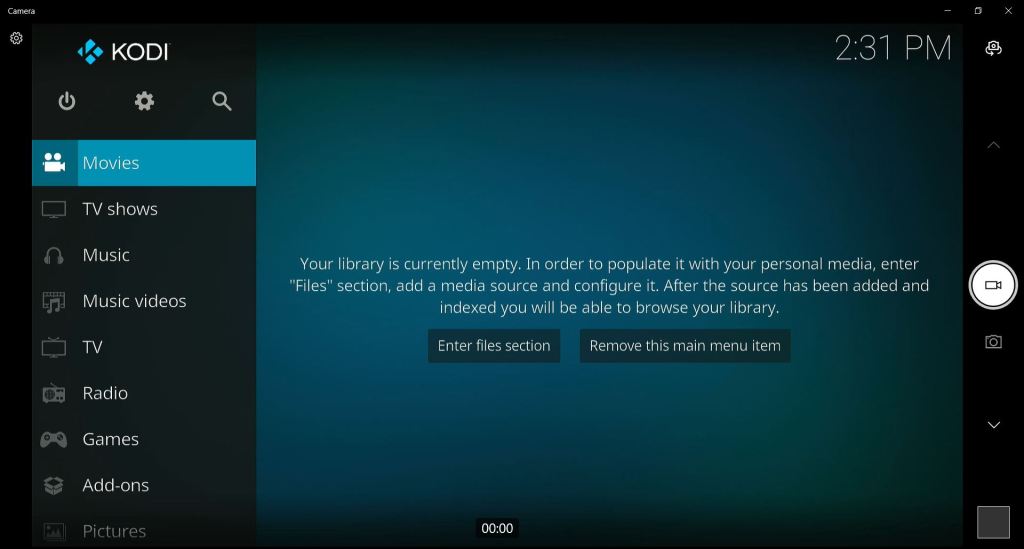
- An empty main screen will display, waiting for you to configure all your media sources.
Step 6: Pictures
Adding different types of media like images, audio, and video follows a similar process. Each media type has its own section in the sidebar on the main screen for Music, Pictures and Video. Before you can view any of your content, you need to add a media source to each section.
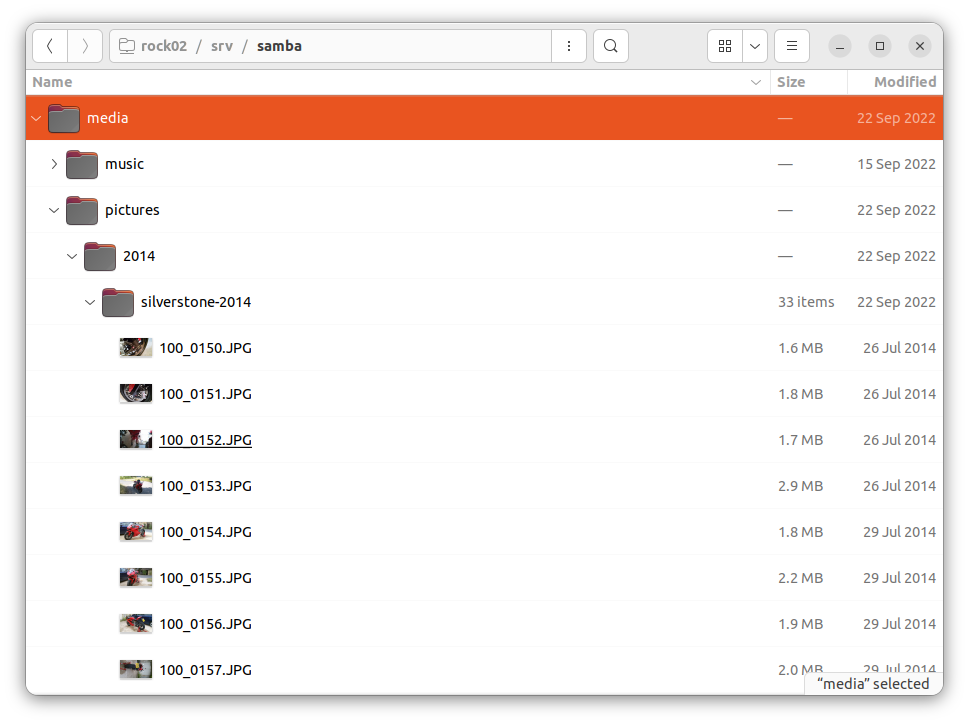
Getting Kodi to display your media effectively depends a lot on how you organise your directories and files. All our media are stored on a separate Samba File server (hostname rock02), and the path to the share is smb://rock02/media. Each media class is stored in a separate sub-directory, one for Music, Pictures and Videos to match the Kodi categories.
Our images are stored in subdirectories by year and then by topic, so we have a structure like this:
Before you can display your pictures, you have to add a media source for that type of media.
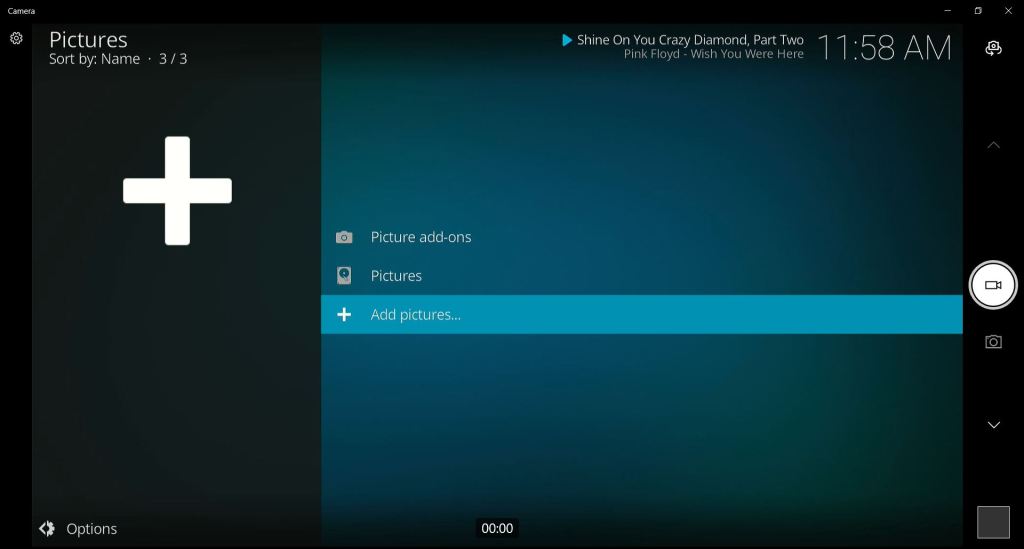
- Click the Pictures item in the main screen sidebar
- In the Pictures screen, click Add Pictures…
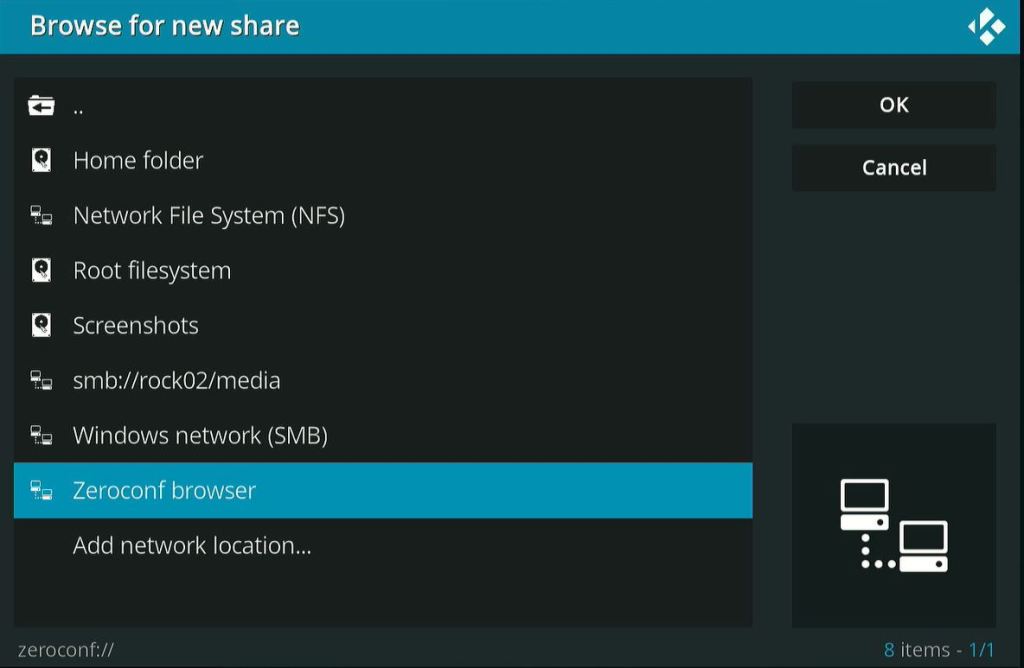
- Click Browse in the Add picture source pop-up
- Choose the Zeroconf browser
- Select your SMB share
- Click the name of your share
- Enter the Samba username and password for the share
- Slide the radio button on for Remember for this path
- Browse to the top level directory where your pictures are stored – ours is called pictures
- Click OK
- Enter a name for your picture source – we called ours mypictures
- Click OK
- Now press ESC and return to the main screen.
The picture feature is just a file browser. From the main screen, navigate to a directory containing a group of images – thumbnails will be displayed on the screen.
- Click on individual pictures to display them full screen or select Options from the sidebar and select Slideshow – The slideshow will start with zooming and panning transitions.
If you start playing music before showing your pictures, you will get the tracks playing in the background for your slideshow – nice!
Step 7: Music
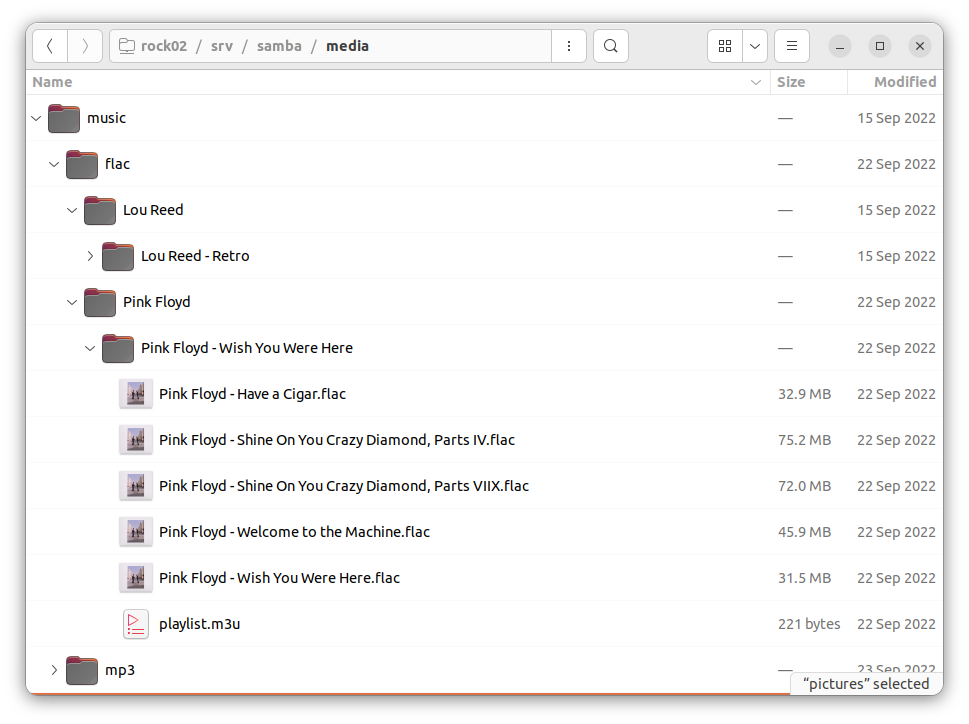
Music can be added to your library in a similar way to pictures. All my ripped CD albums are stored on the SAMBA file server in the structure shown below. I have some albums stored in high-quality Flac format, which gives great sound quality when played through the ROCK’s audio output to an external amplifier. You also get automatic Album cover art and background images when you index your collection.
Other files are stored as lossy MP3 format, which is more compressed and isn’t such high quality, but it is suitable for streaming to a mobile device, for example. This is the same quality you get from most online music services.
From the main screen, click Music, then Add Music and select Browse.
- Click Zeroconf and browse to the top level directory where your music is stored
- Click OK and Add the media from this source
- Select Options and set the system to pull in album art when indexing.
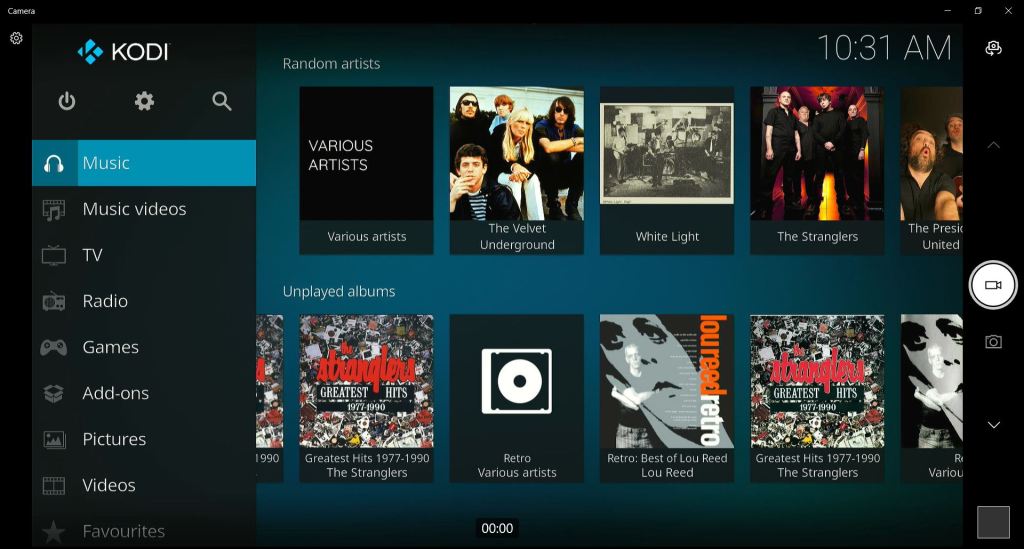
Kodi will then index your music collection, adding album art and creating categories for Artist, Albums, Tracks etc.
Tip: Kodi is very flexible about how you organise your music collection, but make sure it’s consistent.
Step 8: Videos
Again, adding video media follows similar steps to adding music and picture sources.
Organise your own videos into folders. I created a main directory under media-named videos and then created subdirectories for the year and topic. When you add a source, you need to add the lowest level of sub-directory, the one containing the actual video files.

- From the main screen, click Videos and select Files, then Add Videos
- Use the Zeroconf browser to navigate to your lowest level directory (silverstone in the example above)
- Click OK.
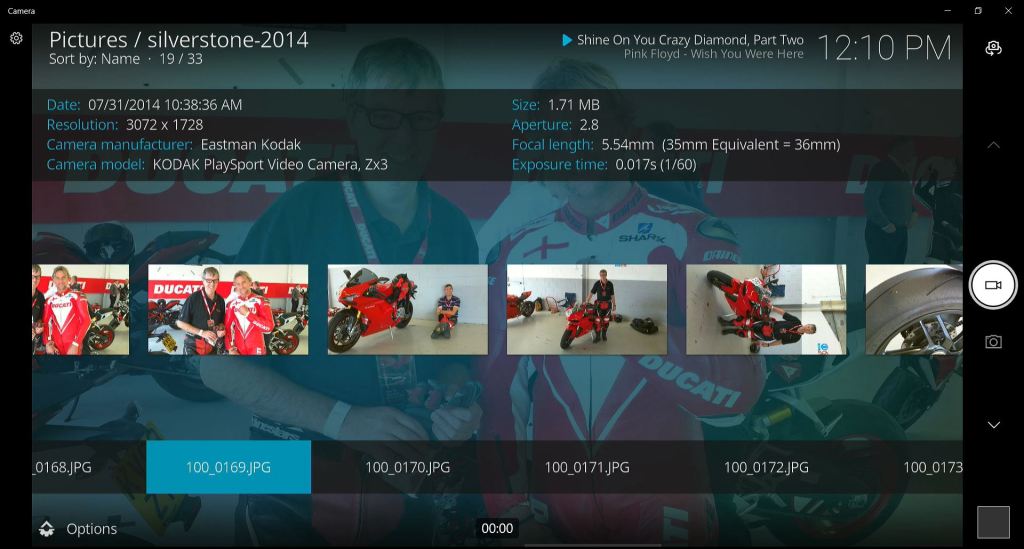
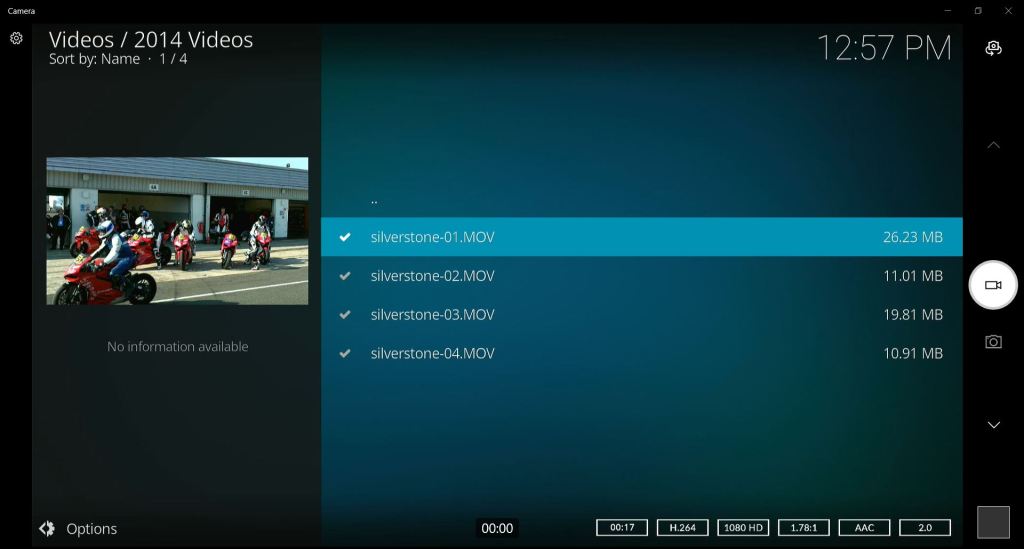
Now, when you go back to the main menu, you will see each video folder listed. If you select one, a list of videos will display along with a thumbnail in the sidebar and information about the video length, encoding and codec in the footer.
If you have a collection of Films, Kodi will index them and fetch cover information from its database when you add them.
Tip: The Kodi documentation has a complete section on how to organise your video collection.
Step 9: Add ons
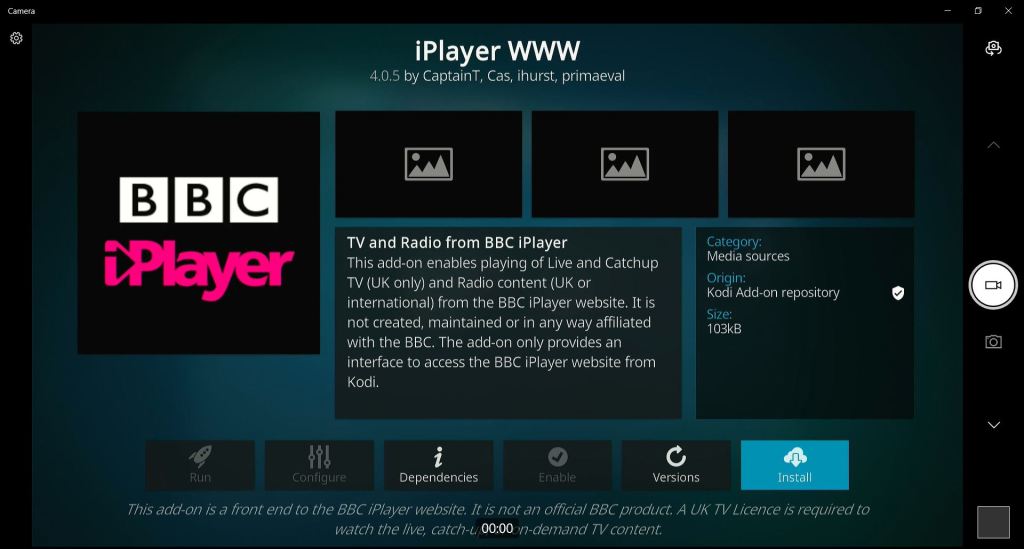
Loads for official and unofficial add-ons are available in Kodi, giving you access to free and paid content services like Netflix, YouTube and many others. I added the BBC iPlayer Add-on from the official Kodi repository:
- From the main screen, select Add-ons and Search
- Enter iPlayer in the Search box
- Select the Media Source listed for iPlayer
- The Add-on page will display information about the add-on and its source – Select Install
- Click OK, and the add-on will download and install.
When it’s finished, go back to the main menu, and you will see a new iPlayer icon added to the add-ons screen. You can now navigate all the channels and content on the BBC, much like in the iPlayer app. The advantage of using Kodi is you get smooth, hardware accelerated playback on the ROCK.
Step 10: WiFi
If you have good WiFi, you may be able to connect to the network this way.
Clicking the gear icon on the main menu gives access to the System settings.
- From the main screen, select Gear Icon -> System -> LibreELEC
- Click Connections from the side bar and select the WiFi network you want to connect to
- When the pop-up opens just add your WiFi password and click OK.
You can now disconnect the Ethernet cable, and the system will use WiFi connectivity from now on.
Tip: If your IP address changes, you can edit the media sources by right clicking on them.

Step 11: Audio
The ROCK 4 SE has a high-quality DAC accessible via the audio jack. If you have a decent pair of powered speakers or an audio amp, you can get great quality audio by selecting this channel in preference to HDMI through your TV.
- Connect a pair of powered speakers or audio amp to the audio jack
- From the main screen, select the Gear icon, then System
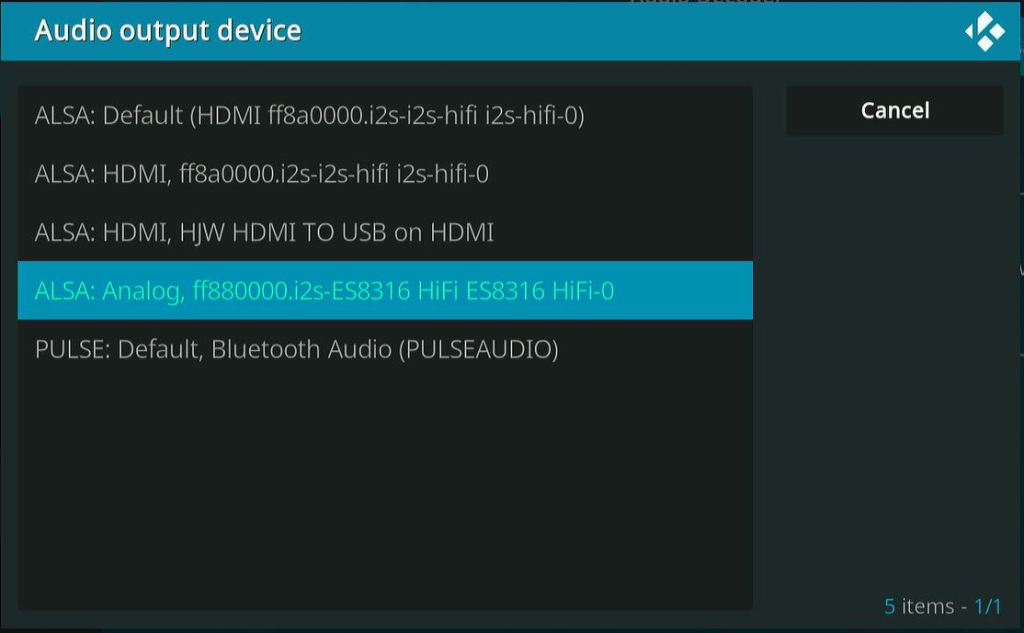
- Select Audio from the sidebar and Audio Output Device
- Select the ALSA Analog device from the list.
Audio will now play through the Audio jack and your speakers.
Step 12: Shutdown
Always shut Kodi down using the Power button in the top left hand corner of the main screen – if you don’t do this, you risk corrupting your SD card!

Summary
Kodi is an amazing Media Centre for bringing together all forms of digital media, making them accessible from your TV and LibreELEC OS makes installing and setting it up on the ROCK a breeze, making the best of the audio and video playback features of the ROCK hardware.
In this project, we showed how to install LibreELEC and set up Kodi, adding media sources from a Samba server and installing the BBC iPlayer streaming service as an add-on example.
If you take time to organise your media files well, you can build a media collection, bringing together all your photos and audio or video files scattered around on various devices so that you can really enjoy them from the comfort of your TV.
References
![]()


Let’s invent the future together
What’s your challenge? From augmented reality to machine learning and automation, send us your questions, problems or ideas… We have the solution to help you design the world. Get in touch today.
Looking for something else? Discover our Blogs, Getting Started Guides and Projects for more inspiration!
Like what you read? Why not show your appreciation by giving some love.
From a quick tap to smashing that love button and show how much you enjoyed this project.

