In this project, we’ll show you how to make a mural that triggers sounds when touching different areas. We created a series of animals that trigger their own sounds. You can easily tweak this project to accommodate your own design using up to 12 different sounds.
1. Draw your mural
-
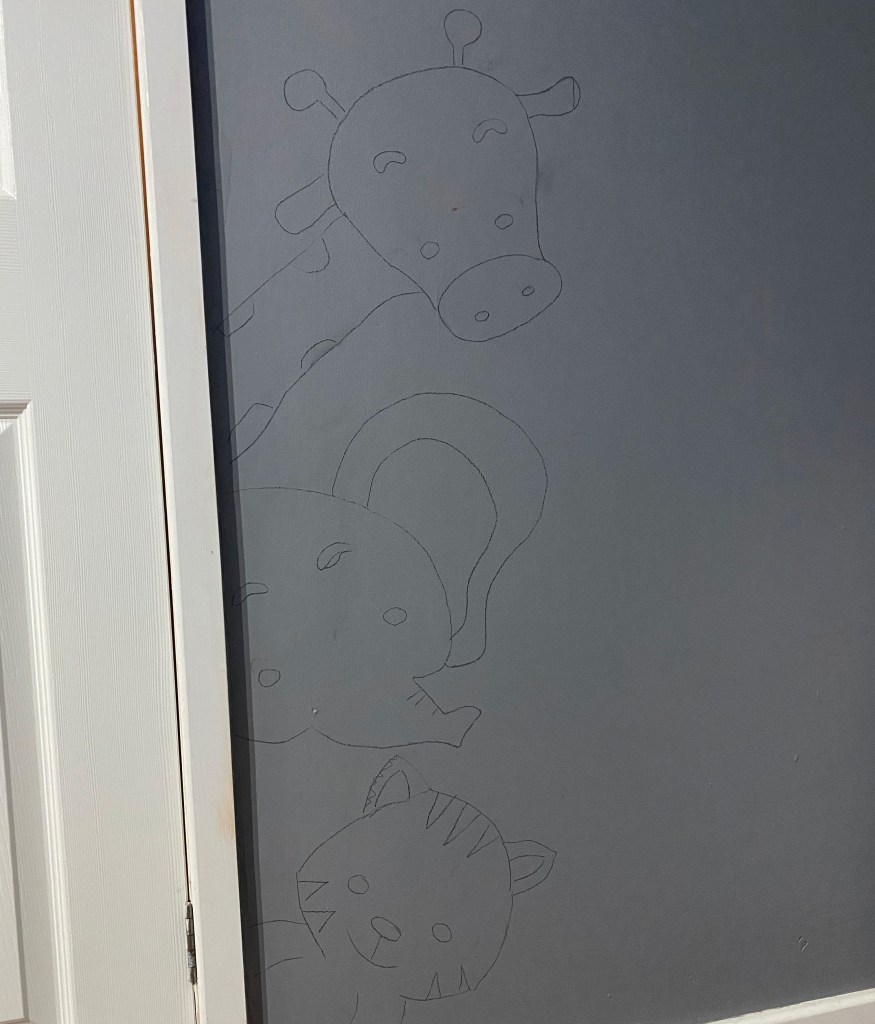
Draw the shapes you want on the wall with a pencil. I used a projector to give me some outlines to trace.
2. Lay copper tape to the animals
-
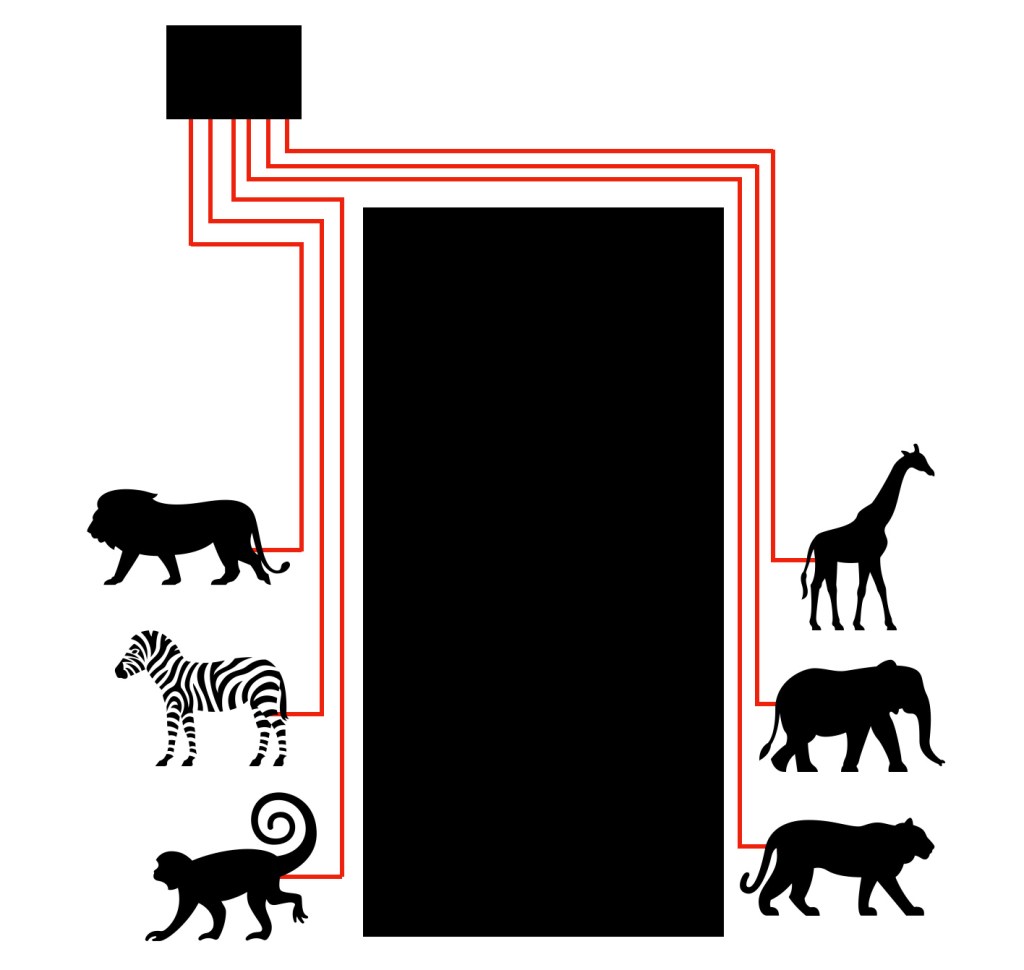
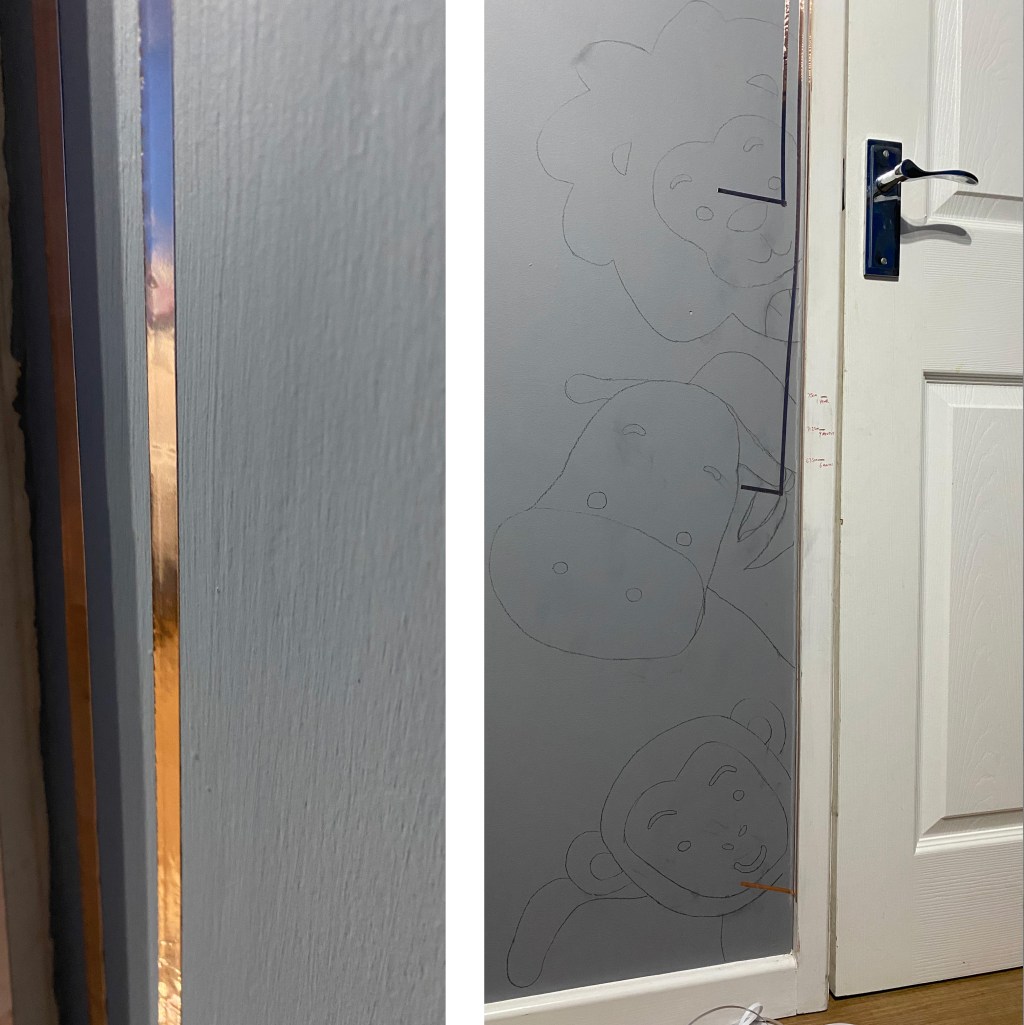
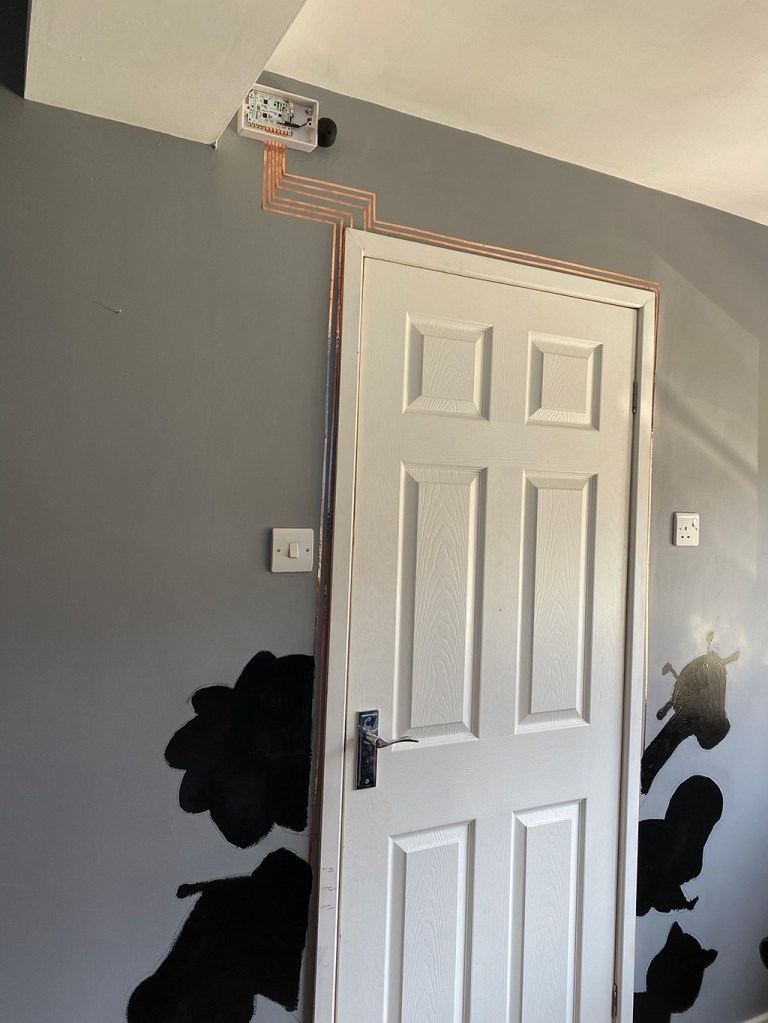
Placed the copper tape making sure that where possible you use a single strip. It’s important that where you join together two bits of copper tape you overlap it sufficiently to get a good connection. Make sure that each of your animals has its own separate copper tape connection that does not touch or overlap the other animals’ connections. This is how I laid out my tape. The copper wire is in red, the rectangle in the top left is where the hardware will be placed.
You want to use as few joints between the copper tape as possible. Think of each join as a potential weak connection. The less you have of these the better. Make sure each piece is well stuck down. You can use superglue for any that peel up if your wall has a porous surface.
3. Paint with Bare Conductive Electric Paint
- Fill in the outlines of each of the animals with a thick layer of Bare Conductive Electric Paint. Ensured there’s some copper tape under the paint too, to guarantee that each shape had a really good electrical connection.
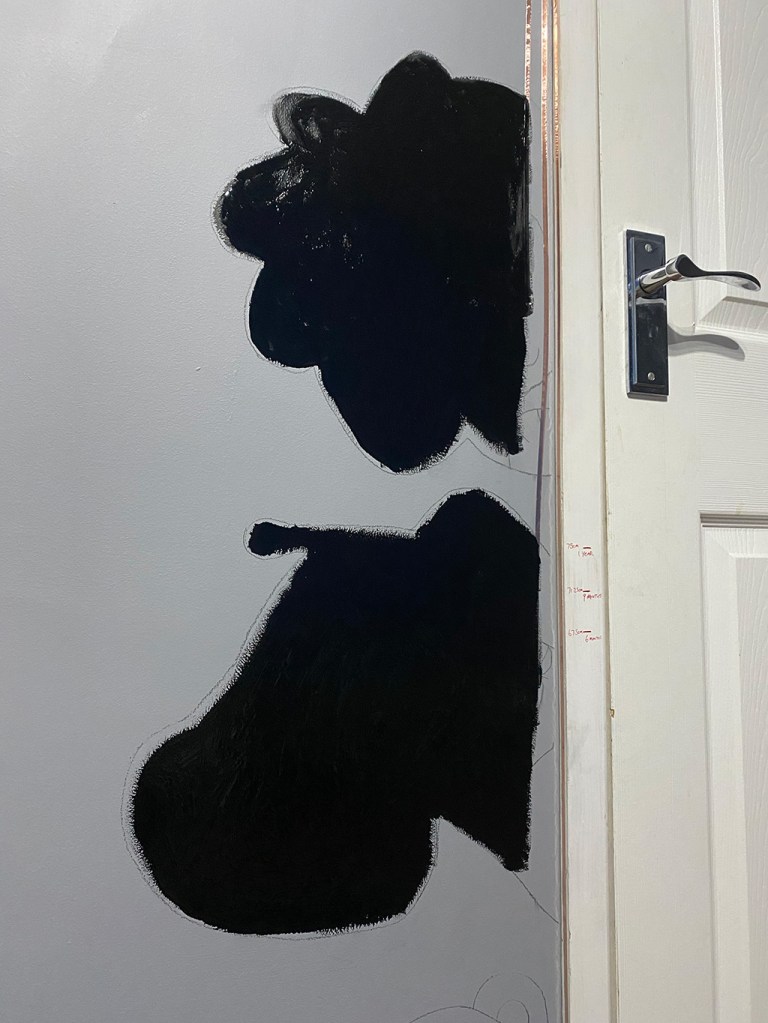
- Wait for the paint to dry. It won’t work unless it’s completely dry.
Check that each of the animal sensors is working by doing the following:
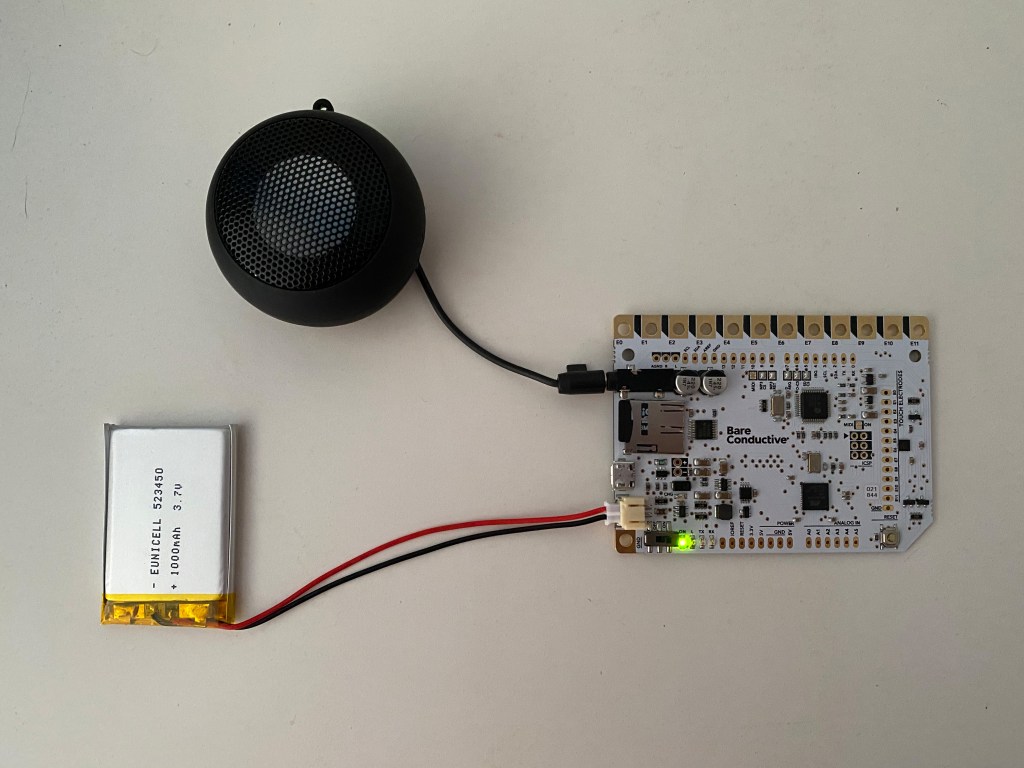
- Connect the speaker to the Touch Board and power it using the USB cable.
- Turn the board on using the built-in switch.
- Connect a crocodile clip from the end of the copper tape to one of the Touch Board’s electrodes which are labelled E0 to E11.
- Press RESET on the Touch Board (don’t forget to do this!) and then touch an animal, this should trigger one of the default sounds already on the Touch Board. Repeat the process to test every animal.
- Once you’re happy with the connections, use a clear lacquer to seal the Electric Paint. This is important as the paint is water-soluble.
4. Configure the Touch Board
The Touch Board from Bare Conductive is plug and play, but for this mural, you’ll need to upload the code for proximity sensors as we want the sensors to react to the light touch of a baby. Touch Board is programmed using the Arduino IDE which is a free software.
- On your host computer, go to https://www.arduino.cc/en/main/software and download the correct IDE for your operating system if you don’t already have it.

- Connect the Touch Board to your computer via USB.
- Plug in your headphones or powered speaker to the board and switch it on.
- Start up Arduino IDE and open the Proximity demo from File>Sketchbook>Touch Board Examples>Proximity_MP3.
- Ensure that Bare Conductive Touch Board is selected under Tools>Board and that Bare Conductive Touch Board is selected under Tools>Port.
- Upload Proximity_MP3 to the Touch Board by clicking on the right-pointing arrow on the top left of the Arduino iDE window.
The RX and TX LEDs on the Touch Board will flash and the Arduino IDE will display “Done Uploading” once finished.
5. Powering the Touch Board
We want the mural to be self-contained, meaning that it runs without being plugged to a laptop or socket. The Touch Board has an onboard LiPo charging circuit that charges the battery while it’s powered via a USB cable at a safe rate of 200mA, which also extends the battery’s life. The “CHG” LED will light up when the battery is being charged. It will also automatically stop charging once the battery is full. This is indicated by the orange “CHG” LED turning off.
- Connect a 3.7V LiPo battery with a JST PH series connector to the Touch Board.
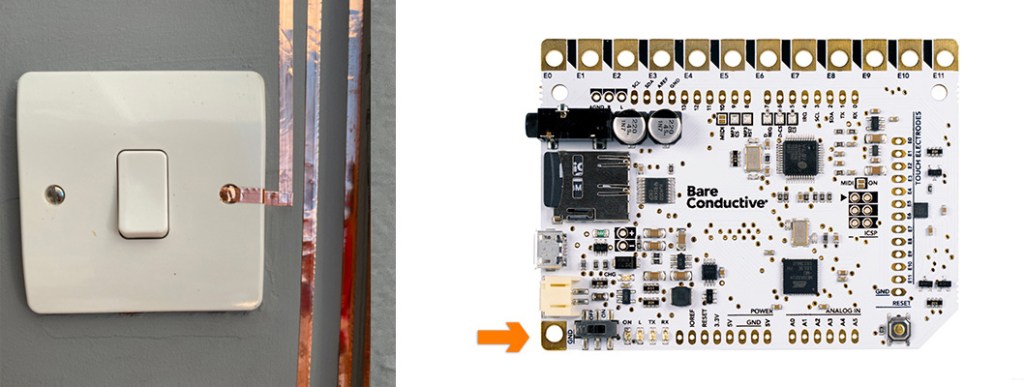
- Create a ground connection for the Touch Board by connecting the screw on a light switch or a radiator with copper tape. This will connect to the corner electrode marked GND on the Touch Board.
6. Set up your sounds
The Touch Board comes with some preloaded sounds on the micro SD card but you’ll want to load your own. You can record them yourself or get some open-source sounds from something like https://freesound.org/ . Make sure that they are in mp3 format.
- Source or make your sounds. For this project, we used 6 different ones which were triggered by electrodes E1 to E6 on the Touch Board.
- Load the on to the micro SD card replacing the default ones using the following naming convention:
TRACK000.mp3 for electrode E0
TRACK001.mp3 for electrode E1
TRACK002.mp3 for electrode E2 etc…
7. Mount the board to the wall
- Fully charge the battery.
- Fix the electrical box to the wall. Depending on how durable you want this to be you could glue it or screw it on.
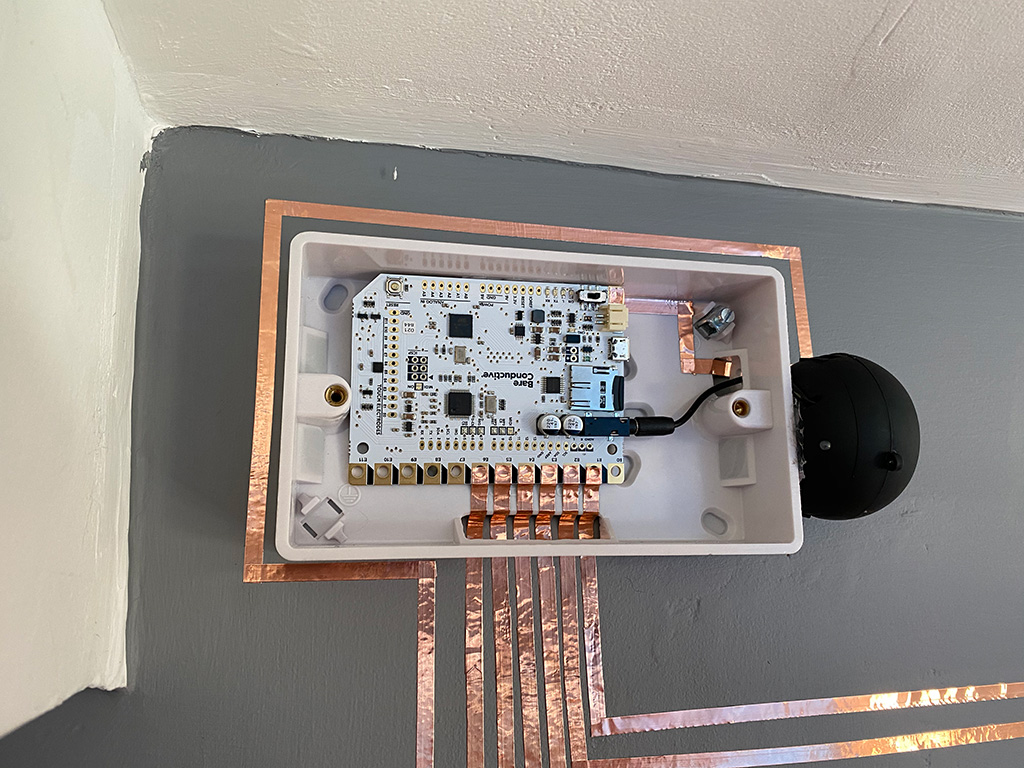
- Place the Touch Board inside the box and secure it in place with hot glue or double-sided tape.
- Attach the speaker to the outside using hot glue or similar and connect it to the Touch Board.
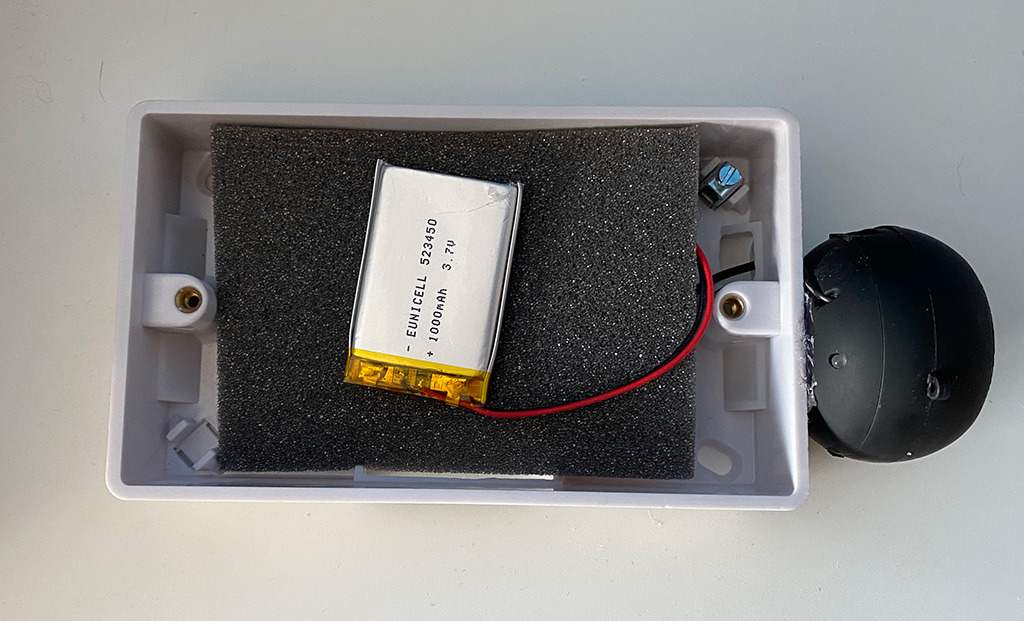
- Connect the battery and place it in the box. You can isolate the battery from the Touch Board by using some foam.
- Feed the copper tape through drilled out slots in the box and connect it to the appropriate electrodes. E1 to E6 for the animals and GND for the ground connection.
- Press Reset on the Touch Board. This is a necessary step after attaching anything to the Touch Board.
- Once everything is in the box test it by touching the painted sensors. If all is good close the box.
8. Paint the mural
- Cover the copper tape with PVC electrical tape.
- Painted the animal detail using coloured acrylic paints. It is important that the lacquer has dried completely before doing this. You will still find that the first layer has a black tinge to it. Lighter colours may need three or four layers and dark colours will need at least two. Make sure that the acrylic paint dries completely in-between each layer. You might see the acrylic paint crackle slightly on the first layer, but as you build up the layers this will disappear.
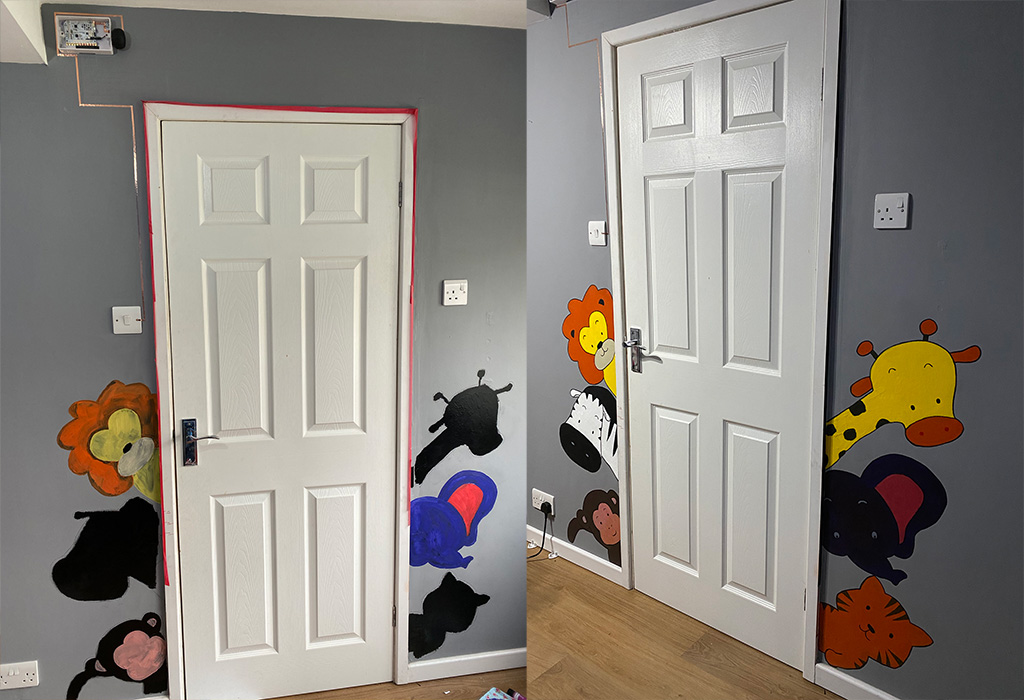
- Paint over the black electrical tape with the same colour as the wall.
- Use a permanent marker to outline the animals and draw the facial features.
- Sealed it with a final coat of clear lacquer
The mural is complete!
Like what you read? Why not show your appreciation by giving some love.
From a quick tap to smashing that love button and show how much you enjoyed this project.

