This project will enable you to work on your PI directly from your home PC or laptop, making extra peripherals unnecessary.
1. Get your Pi ready
- Ensure that you have the latest version of Raspbian flashed on a micro SD card. You can learn here how to do it.
2. Enable SSH connection
- Eject your freshly flashed micro SD card and re-insert it in your host computer
Note: after the micro SD card is flashed, it contains 2 partitions which appear as 2 separate drives in Windows . /boot is a FAT partition and can be read by Windows – the other is a Linux partition which Windows can’t read
- On the micro SD card, create a file called ssh in the boot partition, NOT the boot directory in the main partition of the SD card. You can do this by right-clicking in the boot partition and selecting New/Text Document. Ensure the file has no extension, as Windows will automatically add .txt to it
Now when the Pi is booted, it activates the SSH connection
3. Pi WiFi configuration
- On the micro SD card , create a file called wpa_supplicant.conf in the boot partition using the same method described above. Again, ensure that there is no .txt extension added to the file’s name
- Open wpa_supplicant.conf and paste the following code into it
country=uk
update_config=1
ctrl_interface=/var/run/wpa_supplicant

network={
 scan_ssid=1
 ssid="<Wifi network name>"
 psk="<wifi network password>"
}- In the line starting with ssid, replace <Wifi network name> with the name of your wifi’s ssid, for example, MyHomeNetwork
- In the line starting with psk, replace <wifi network password> with the password of your router
4. Pi remote connection configuration
- Download and install Advanced IP Scanner to your host computer. Open it and click on Start to list all IPs allocated on your network
- Eject the micro SD card from your host computer, insert it in your Pi and start it up
- Run Advanced IP Scanner again and note the new IP listed, in my case 192.168.1.13
- Download PuTTY and open it
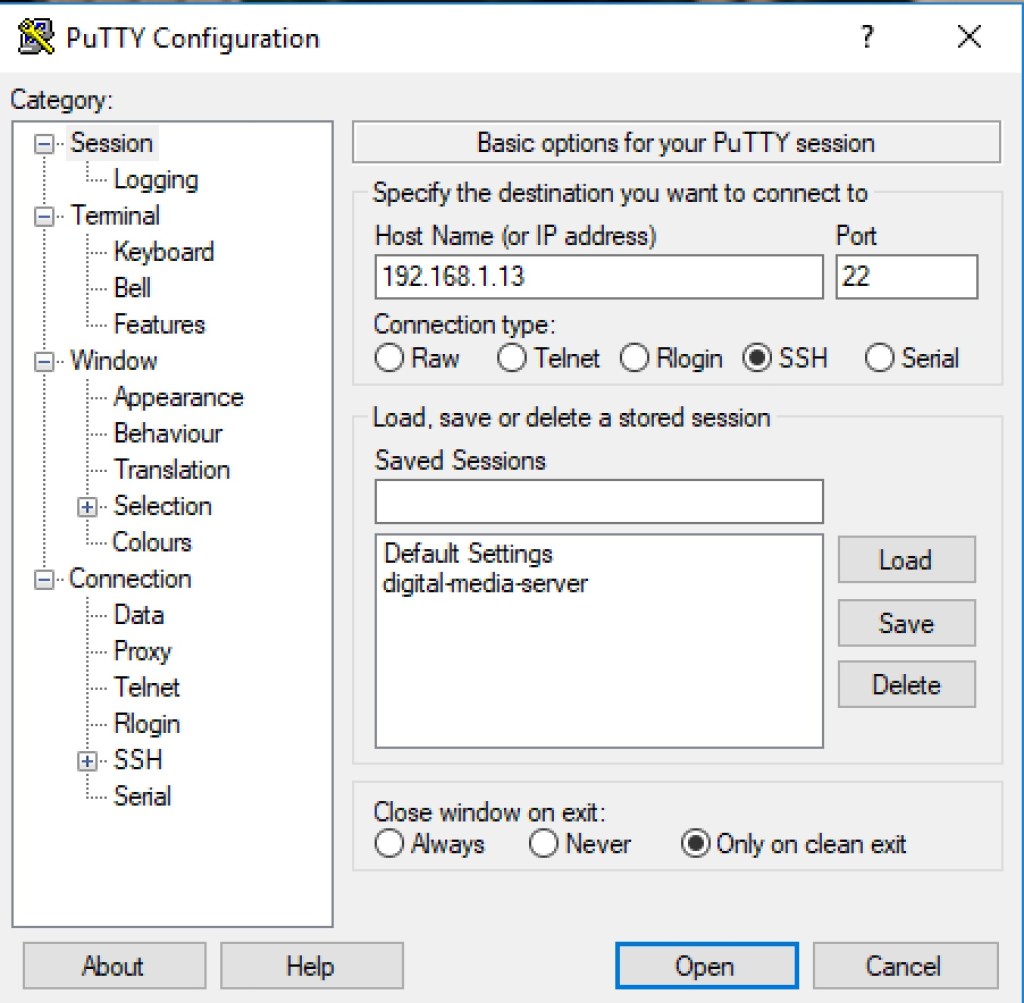
- Paste your Pi’s IP address into the Host Name field in PuTTY
- Click Open, you’ll see the following screen on your laptop, this is your Pi access window:
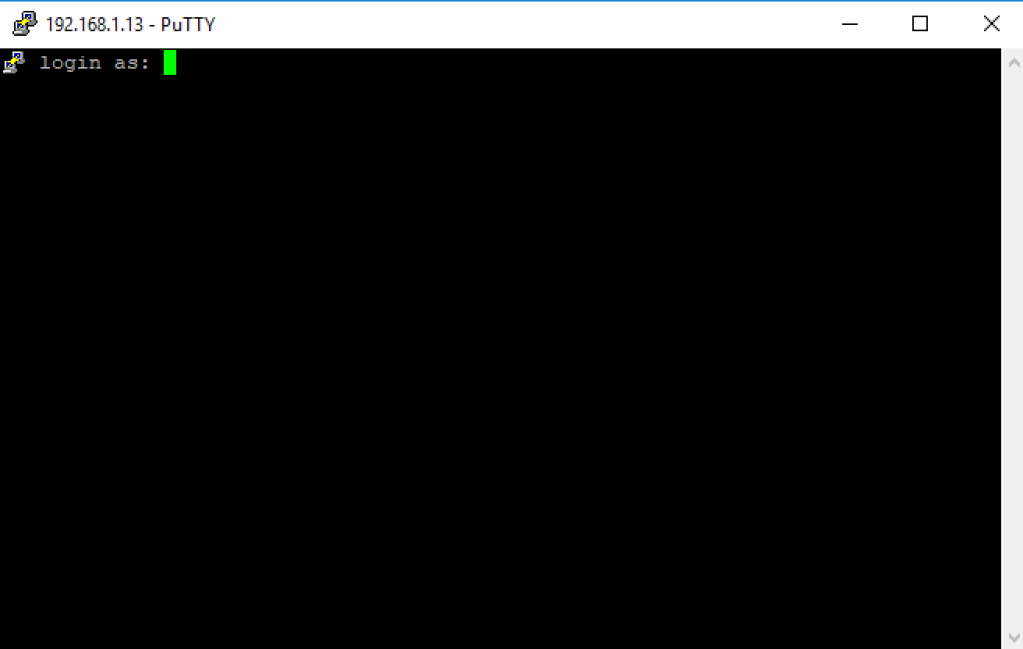
- Login to your Pi with your user name and password, if you haven’t changed them, the defaults are user name: pi, password: raspberry
5. VNC server
- To connect to the Pi remotely, we need first to install a VNC server. To do this , type the following commands into the Terminal window followed by Return after each one:
sudo apt update
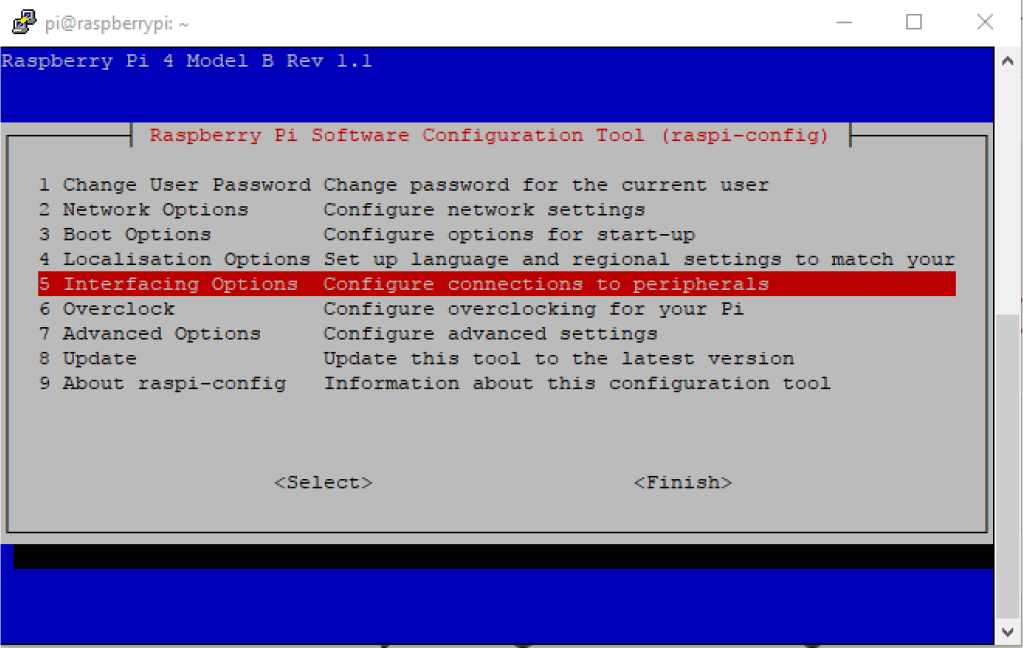
sudo apt install realvnc-vnc-server realvnc-vnc-viewer- Enable VNC Server using the Raspberry Pi Configuration Tool. To do this type the following command followed by Return:
sudo raspi-config- In the following screen, navigate to Interfacing Options and press Return
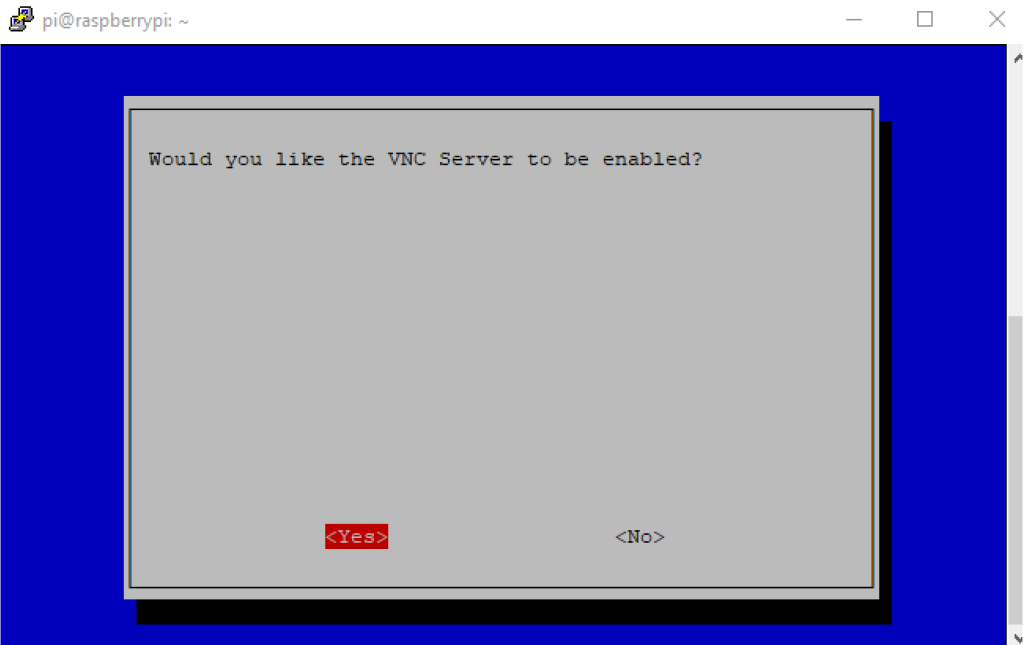
- Scroll down to select VNC and press Return

- When prompted select Yes and press Return
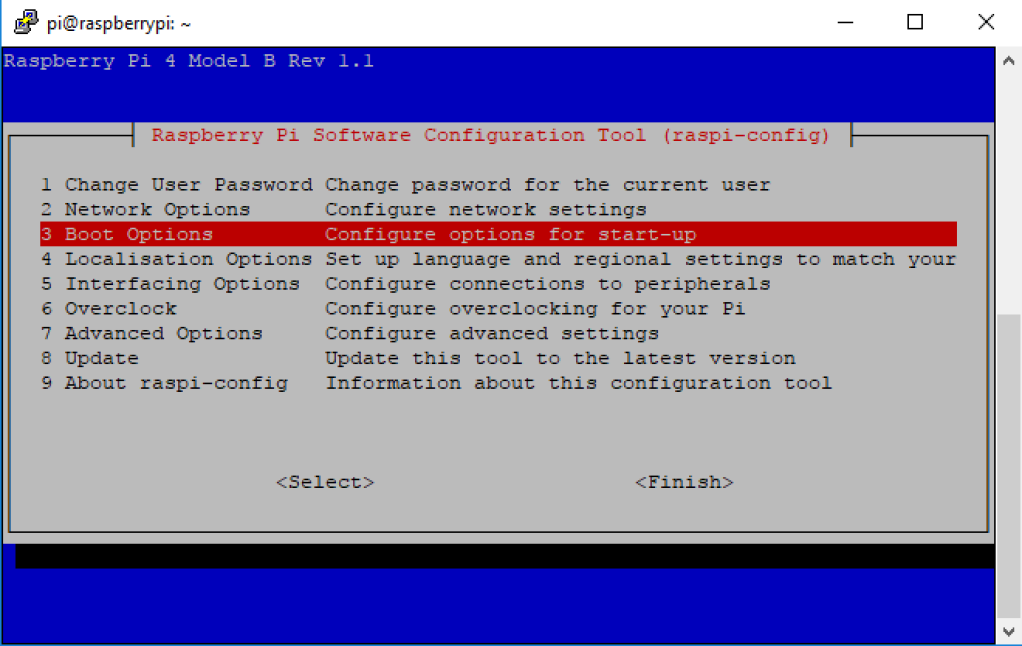
- Select Boot Options and press Return
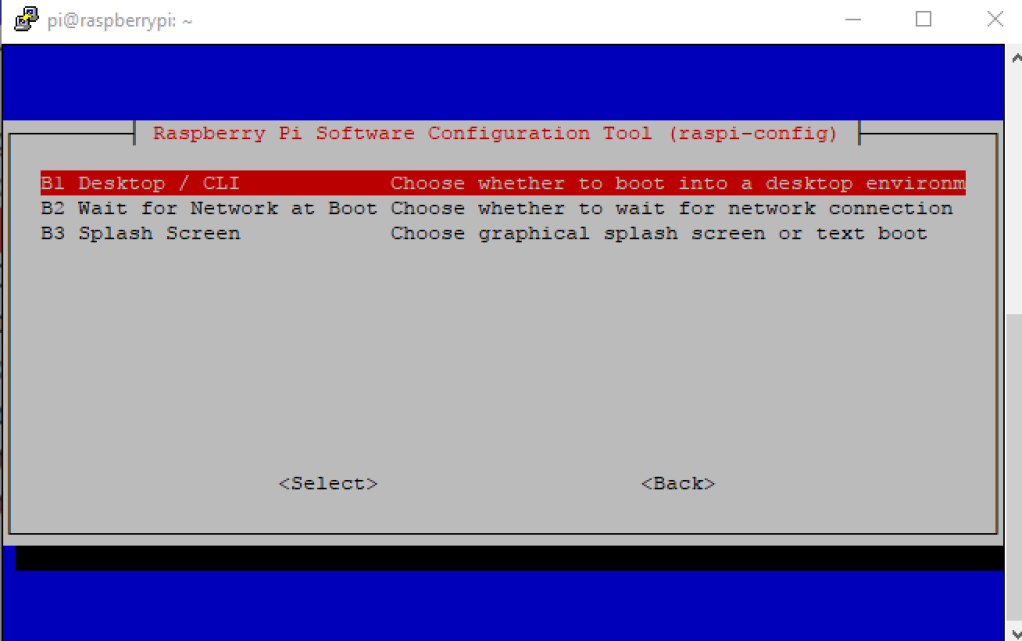
- Select Desktop CLI and press return
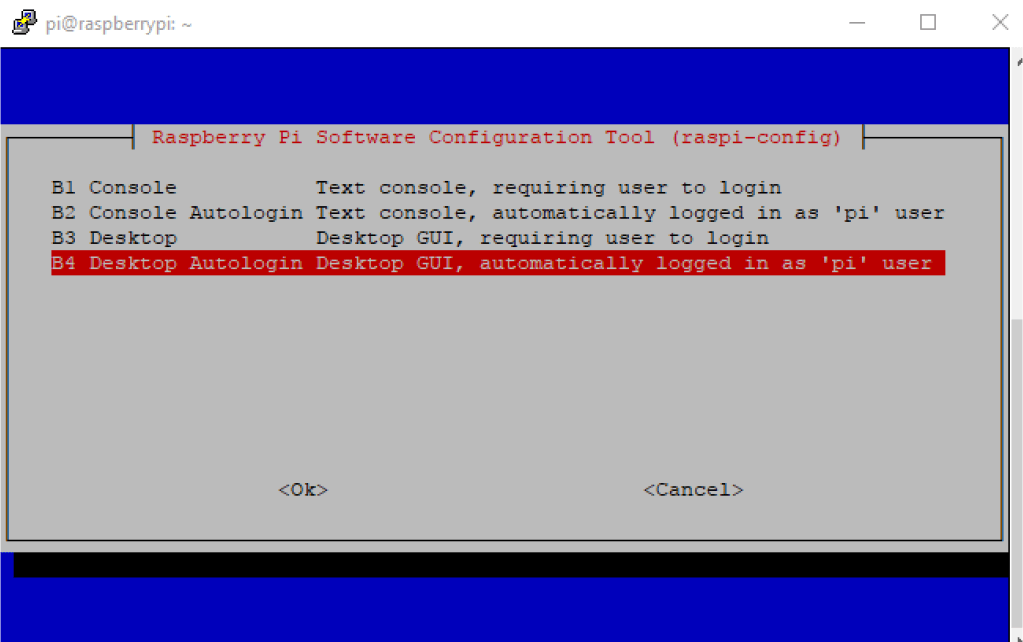
- Select Desktop Autologin Desktop GUI,… and press Return
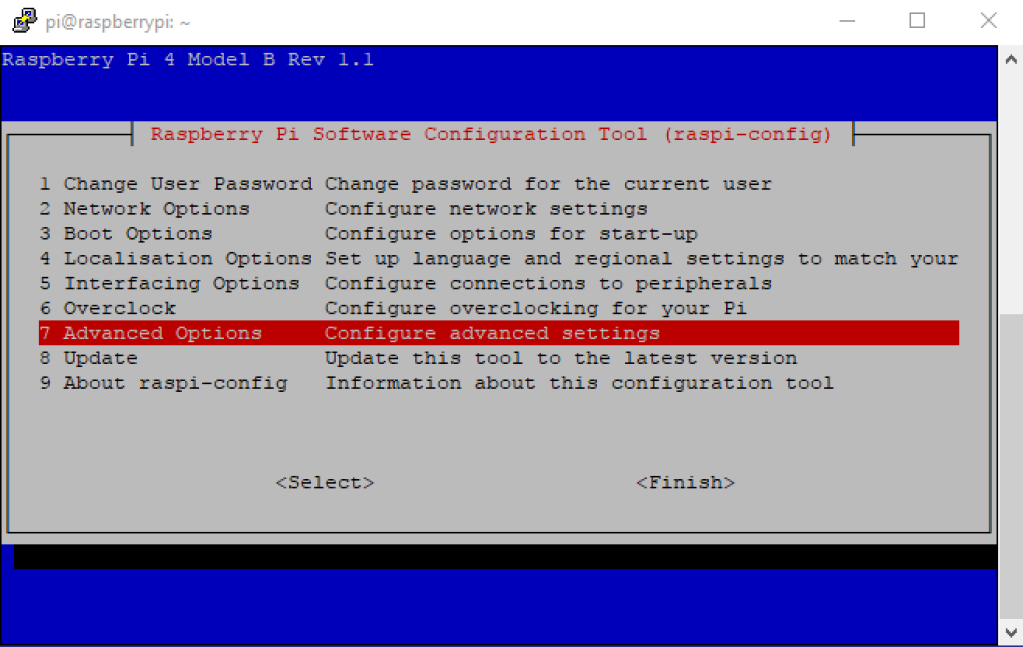
- Select Advanced Options and press Return
- Select Resolution and press Return
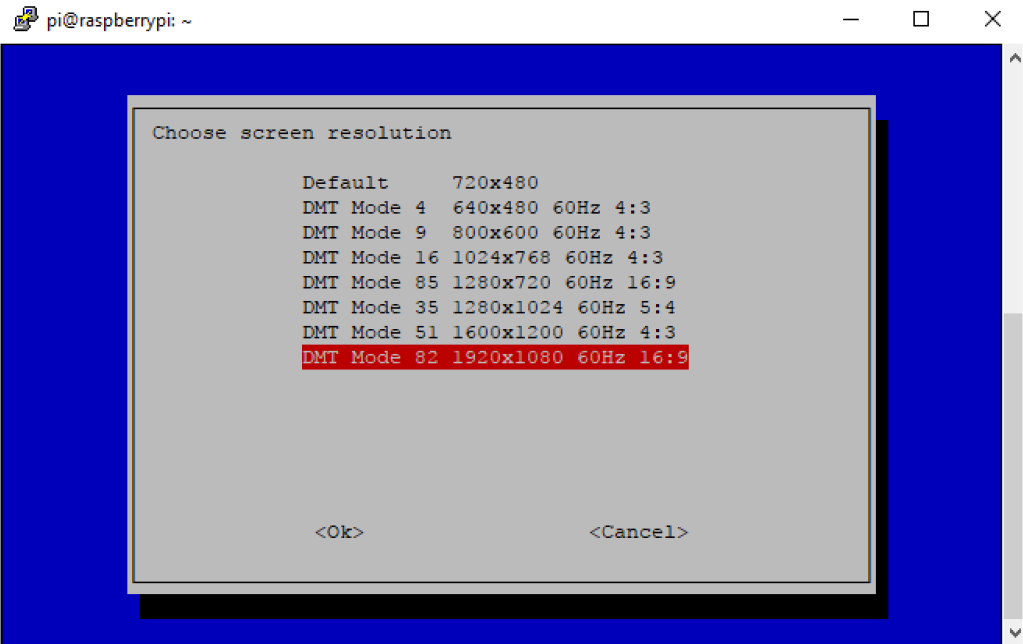
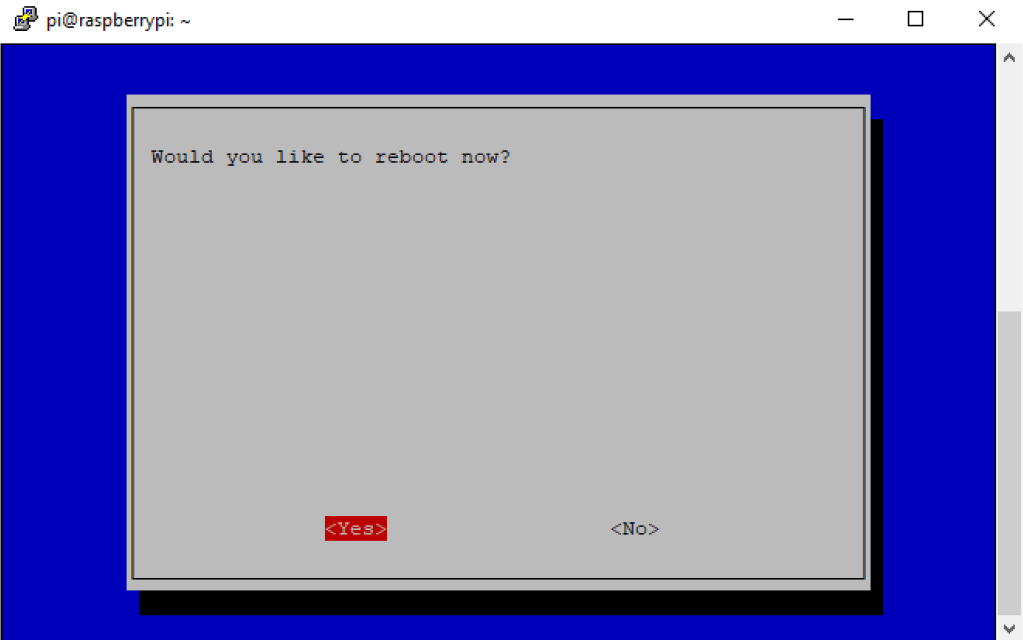
- When asked if you want to reboot, select Yes and press Return. Putty will inform you that the session has been terminated
- Download and install VNC Viewer
- Open VNC Viewer
- Run Advanced IP Scanner again and note your Pi’s IP address as it might have changed
- Enter your Pi’s IP address in the address bar and click Return
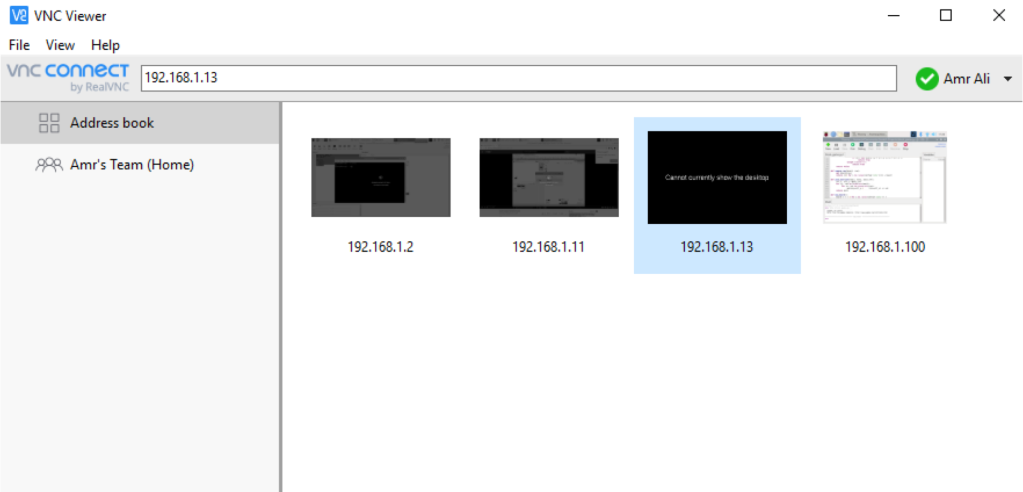
- Enter your Pi’s user name and password when prompted
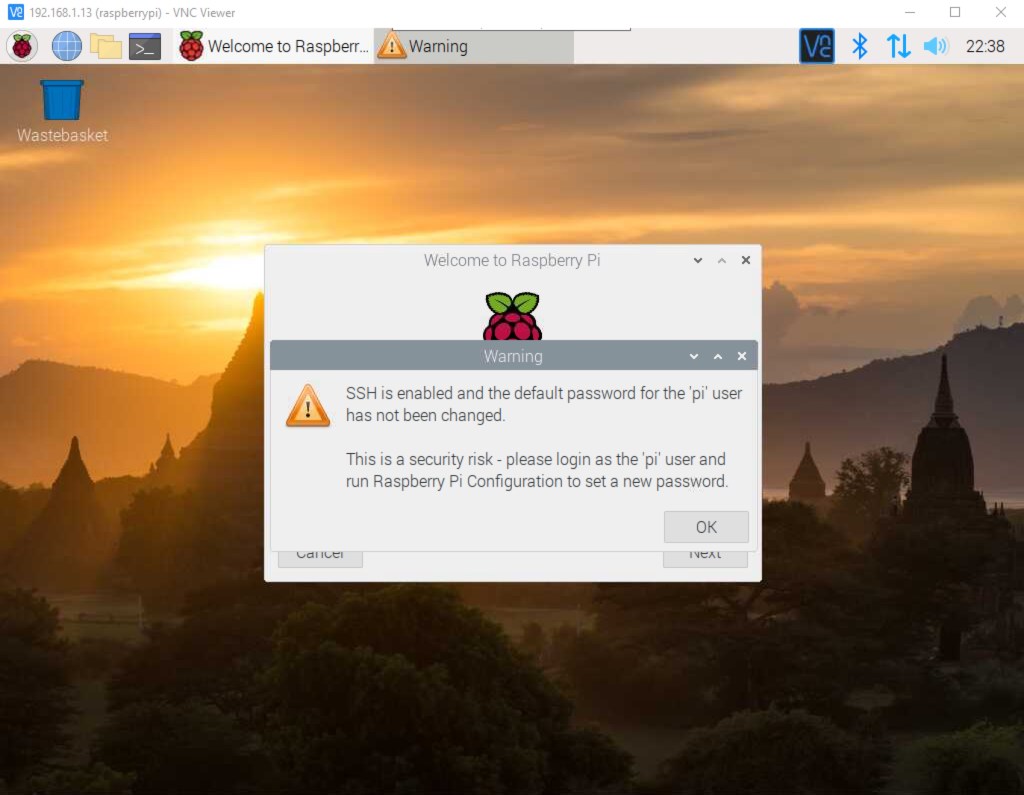
You will now see the Pi’s welcome screen on your host computer.
At this point, you have configured the Pi for remote login and usage without keyboard, mouse or screen
6. Configure static IP
Every time you power on the Pi, it will, most probably, acquire a new IP address from your network. To avoid having to repeat the IP scanner step every time, we can assign the Pi a static IP address.
- Open Terminal on the Pi and enter the following command to open dhcpd.conf in Nano text editor:
sudo nano /etc/dhcpcd.conf- Scroll to the bottom of dhcpd.conf and paste the following:
interface eth0


static ip_address=192.168.1.13/24

static routers=192.168.1.1

static domain_name_servers=192.168.1.1


interface wlan0


static ip_address=192.168.1.13/24

static routers=192.168.1.1

static domain_name_servers=192.168.1.1
- The static IP is the one after “static ip_adress”, change the last number (13) to any number between 2 and 254 ensuring the number you choose is not used by another device on the network
- Exit nano by typing Ctrl+X
- Type Y and press enter
- Restart your Pi by entering the following command
sudo rebootYour Pi will now use the same IP address every time you connect to it
By using different IP addresses you can have multiple Pi’s connected at the same time.
Like what you read? Why not show your appreciation by giving some love.
From a quick tap to smashing that love button and show how much you enjoyed this project.

