A randomiser MIDI controller can be a great tool to create drones and textures using music software. In this project, you’ll learn the basics of how to use Bare Conductive Electric Paint and a Touch Board to create a lo-fi system to create randomness.
1. Paint the circuit
- Disassemble your frame and take out the glass, we won’t be needing it.
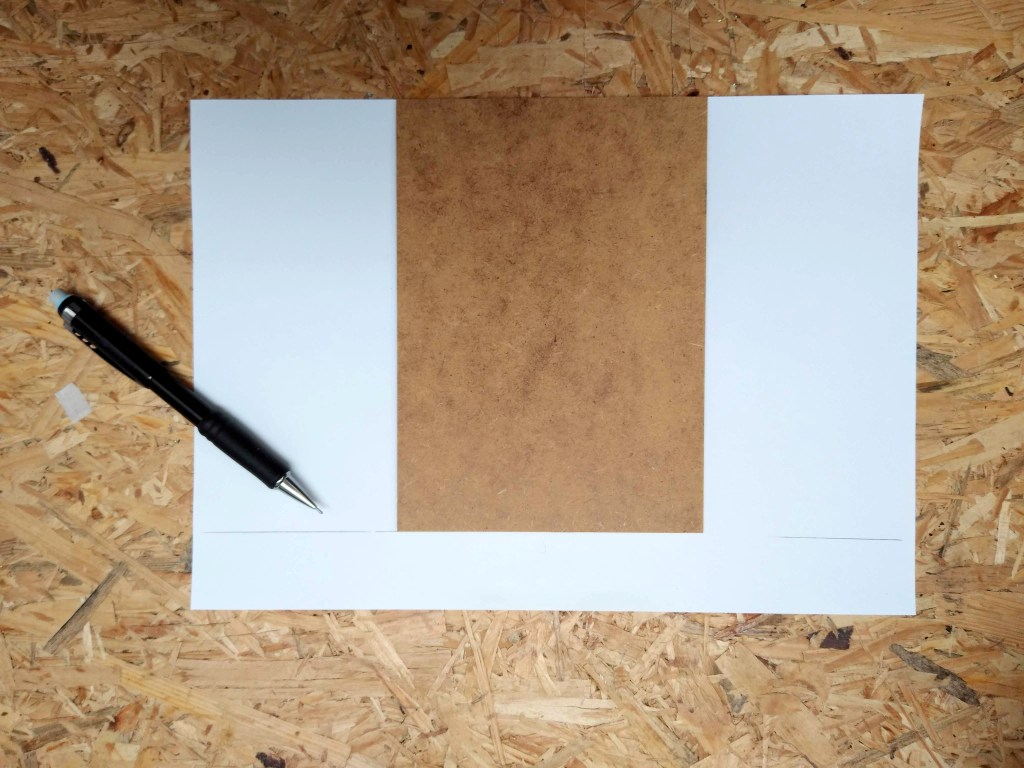
- Use the frame’s back panel as a template to cut a piece of paper so that its height is the same as the frame’s backing and wide enough to fully wrap around it.
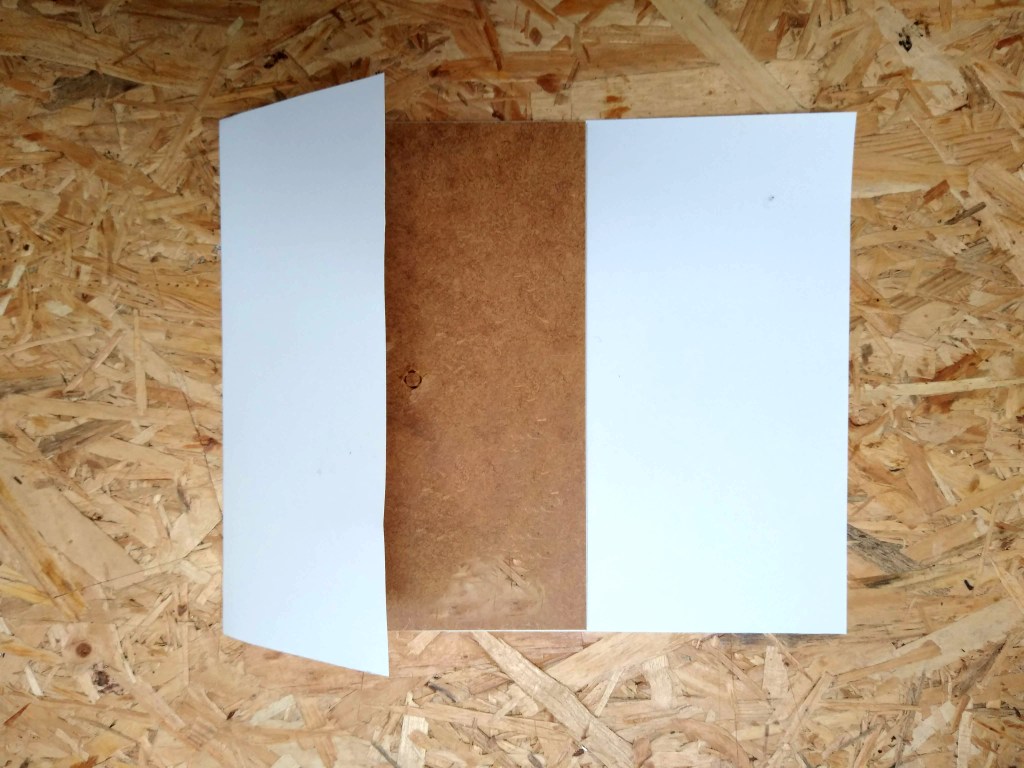
- Wrap the paper around the frame’s backing and gently secure it with tape. We will be taking the tape off later on so don’t press on it too hard.
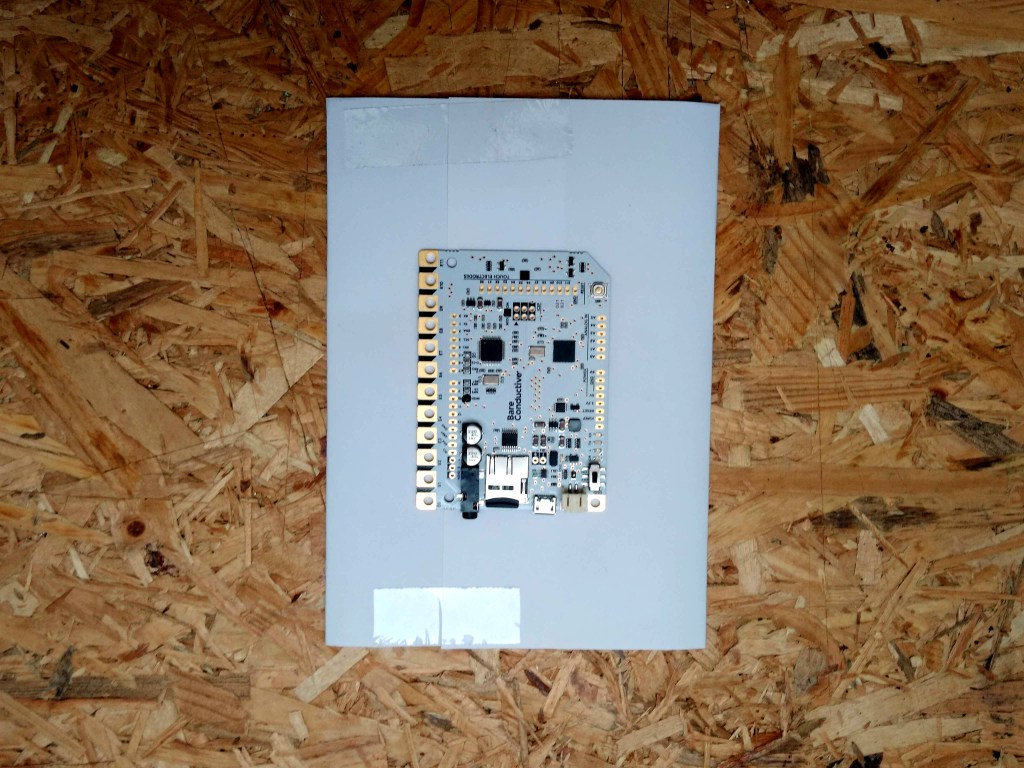
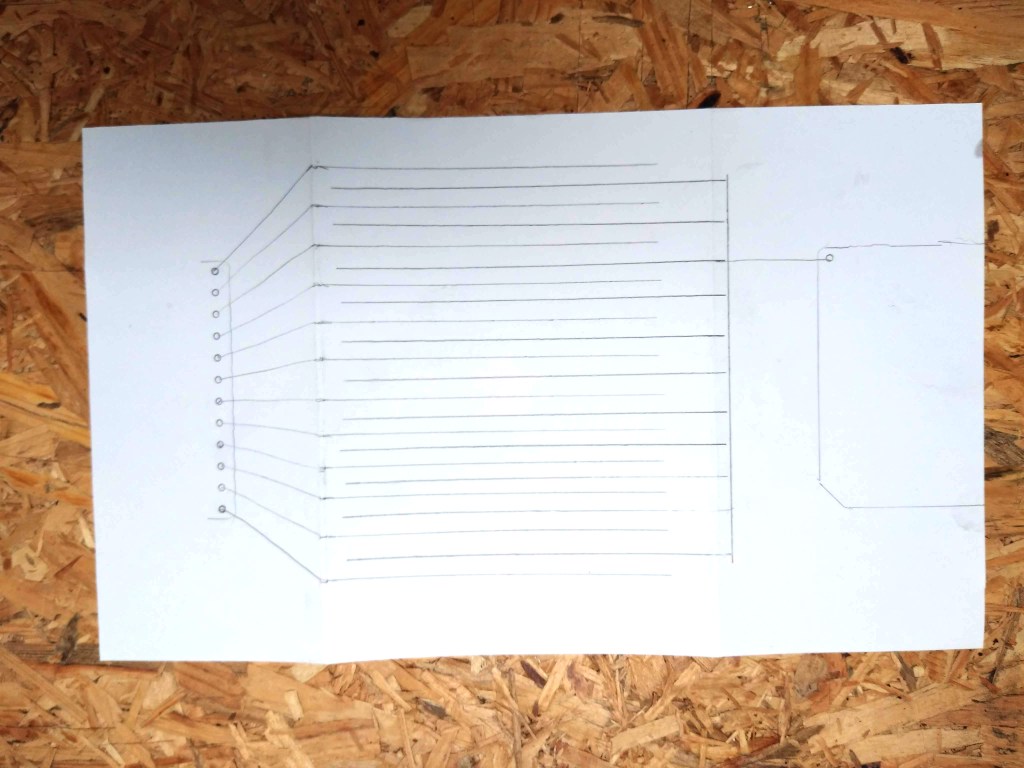
- Place the Touch Board over the folded paper and trace around it with a pencil, marking all the holes in the contact and ground points of the board.
- Draw lines from all the contact points to the edges of the paper as shown below.
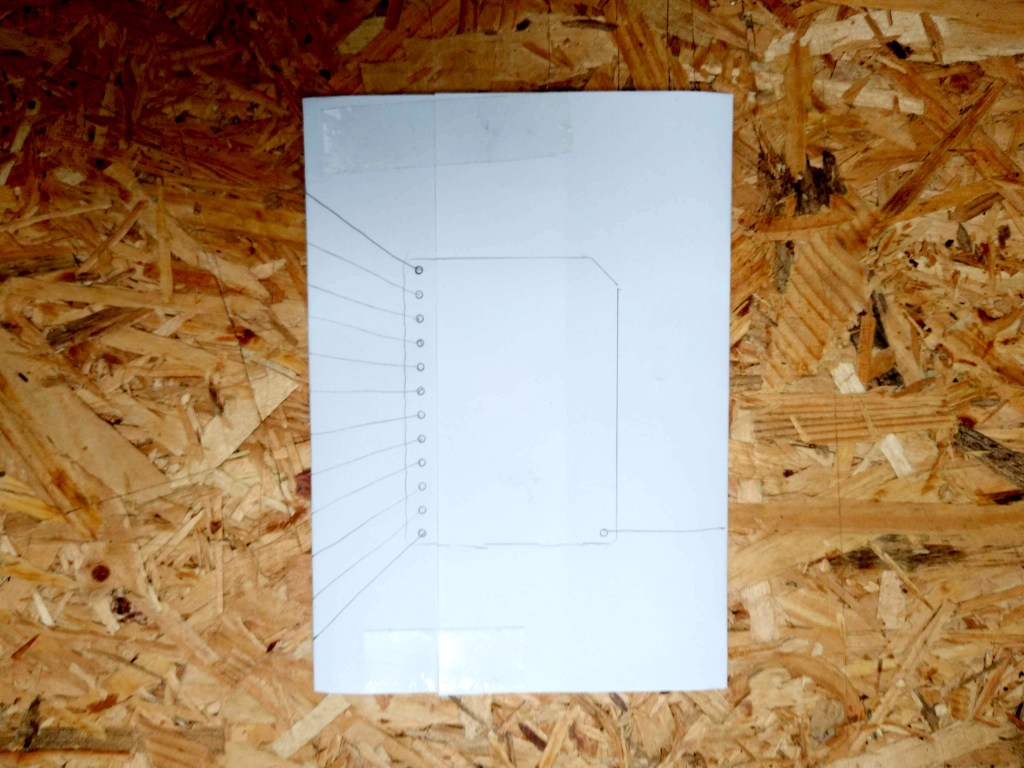
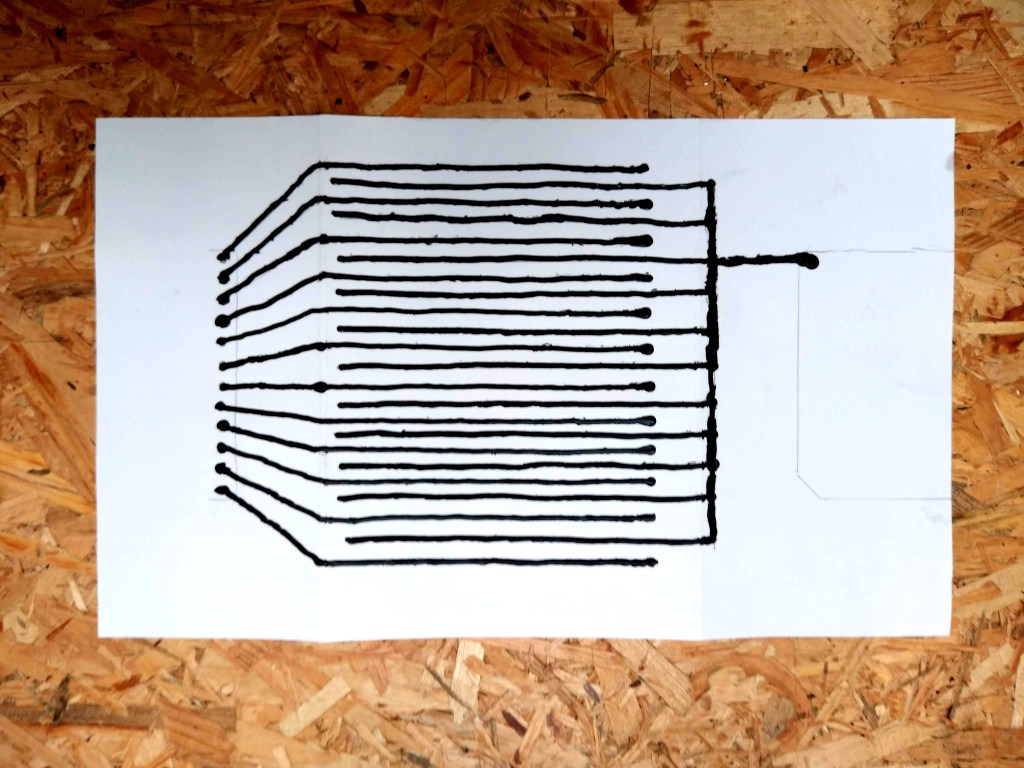
- Carefully peel off the sticky tape, separate the paper from the frame’s backing and open it up.
- Complete the lines from the contact points as shown below.
- Using the tube of Electric paint, go over the lines ensuring that the ones on the left don’t touch any other lines and connecting all the ones coming from the right with a fork shape as shown below.
It’s a good idea to get a feel for the flow of paint from the tube before painting the circuit.
- Let the circuit dry completely. This should take 10-15mins depending on the thickness of the paint application.
2. Assemble the circuit
- Wrap your painted circuit around the frame’s backing and secure it tightly using double-sided sticky tape along the seam. You can reinforce the joint with sticky tape on the outside but ensure that it’s not touching the electric paint.
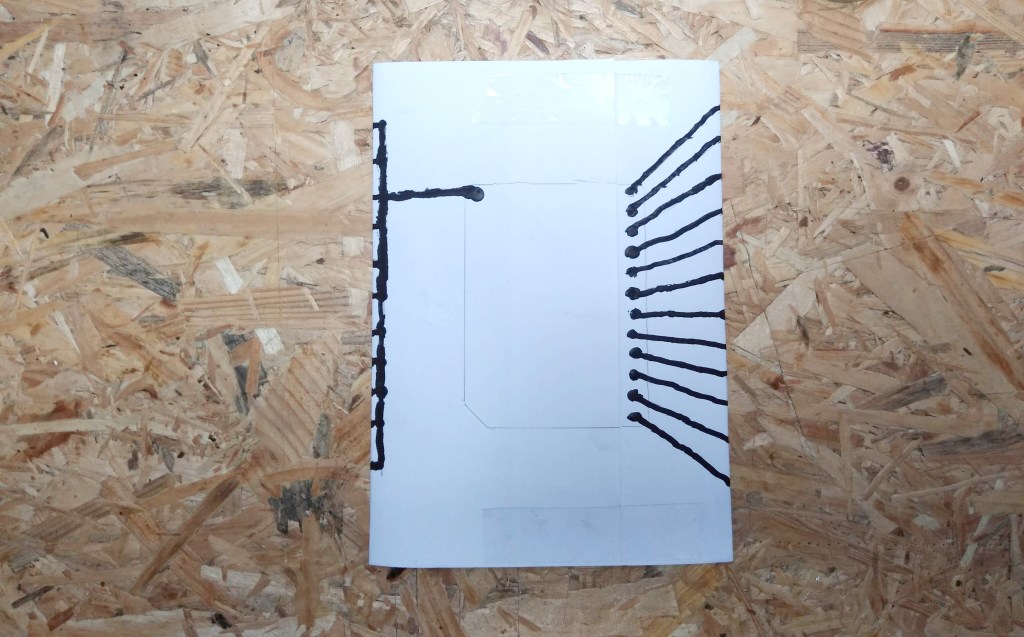
- Insert the frame’s backing and circuit into the frame. The side with the Touch Board’s outline should be facing the back of the frame.
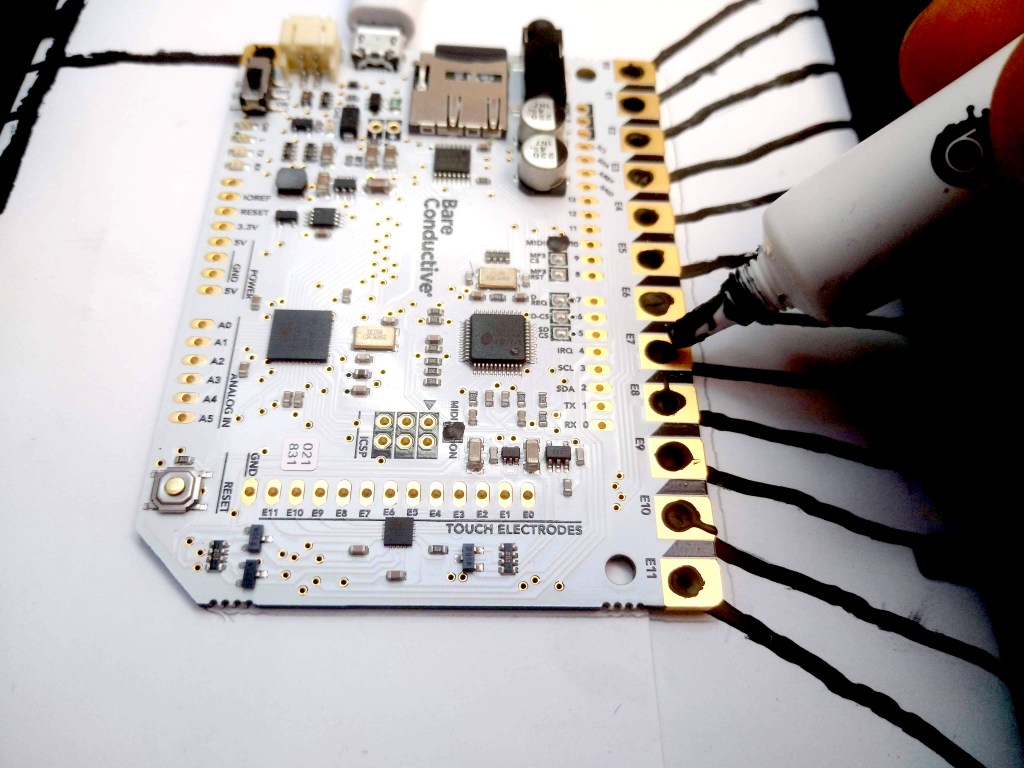
- Place the Touch Board on its outline and secure it with double-sided tape ensuring that all the contact points are aligned with the electric paint’s starting points.
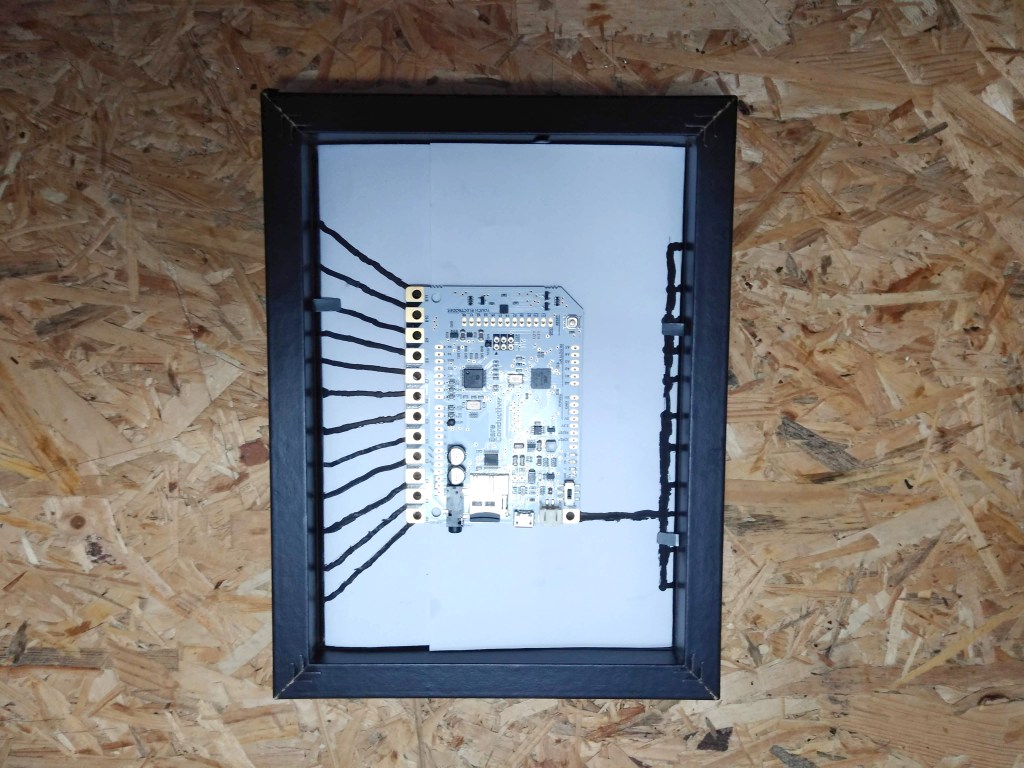
- Put a blob of electric paint in each of the holes of the Touch Board’s contact points, ensuring that it’s not overflowing and causing a short circuit while still having good connectivity with the contact point and the line underneath.
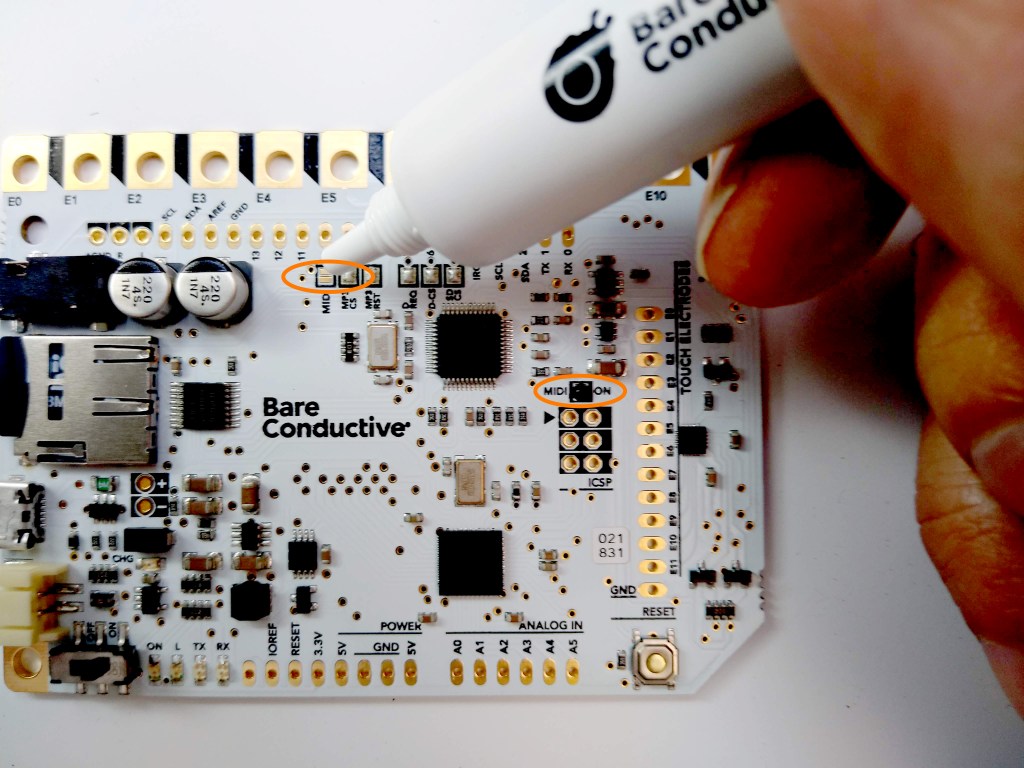
- Put a small blob of electric paint on the Touch Board’s pads marked MIDI.
- Allow the paint to dry completely.
3. Programme the Touch Board
- Connect the micro USB cable to the Touch Board and your host computer.
- Download the appropriate Touch Board installer from the following links:
Windows
MacOs
Linux 32-bit
Linux 64-bit - Run the installer.
- On your host computer Open Arduino IDE which you can download from here.
- In Arduino IDE go to File>Sketchbook>Touch Board Examples>Midi_interface.
- Power up your Touch Board using the built-in switch.
- In the Arduino IDE go to Tools>Board and select Bare Conductive Touch Board (USB MIDI, Ipad compatible)
- Upload Midi_interface to the Touch Board by clicking on the right-pointing arrow in the Arduino IDE.
- The Touch Board’s LED’s will flash and settle once the upload is done.
4. Play
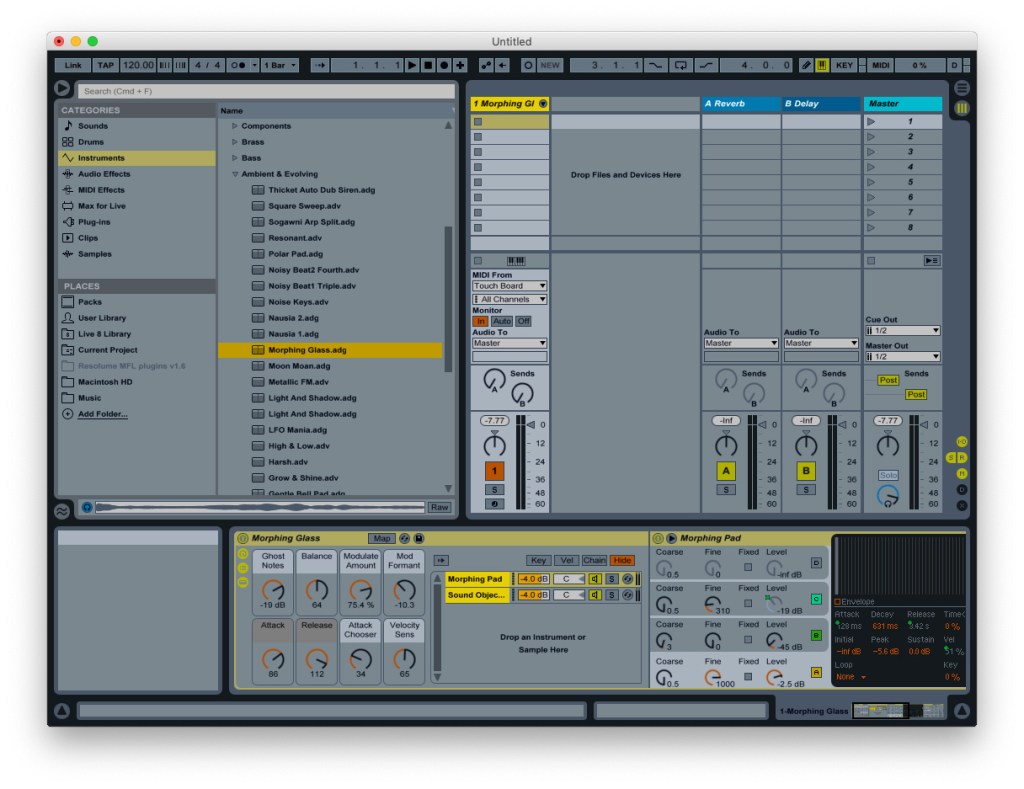
Your controller is now ready to be used, you’ll need to configure it to work with your chosen MIDI-enabled software. The following example is for Ableton Live.
- On your host computer open Ableton.
- On a MIDI track go to MIDI from and select Touch Board.
- Load a MIDI instrument to your track, we find that instruments under the Ambient and evolving category work great, it’s also advisable to use a polyphonic instrument.
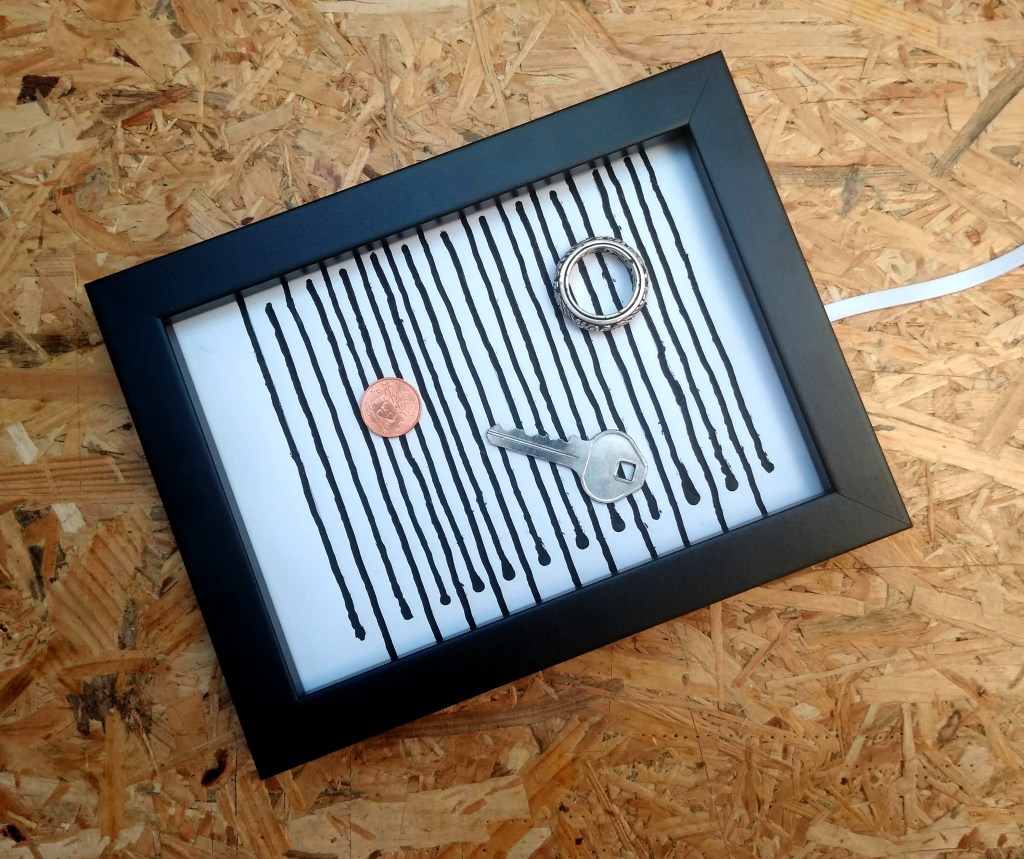
- Grab some small metallic objects like coins, keys, ball bearings… the only requisite is that they are large enough to bridge between 2 lines. Chuck them into the frame!
- Listen to your creation! you can instantly change the output by simply moving the objects, dropping more in or shaking the frame.
- You can also use your fingers to touch the lines and trigger sounds.
Do More
This project can be tweaked to infinity. You can start by editing the code and changing the MIDI notes being output or modifying and adjusting the sensitivity of the circuit. You could also use moving objects as triggers, for example, a wind-up toy. If you’re using non-metallic objects you’ll need to cover their contact surfaces with electric paint. You can also experiment with different line patterns but remember to avoid short circuits.
Like what you read? Why not show your appreciation by giving some love.
From a quick tap to smashing that love button and show how much you enjoyed this project.

