Have fun with this rainbow painter. Ever written your name with a sparkler? Seen long-exposure photos of cities at night where the car tail-lights leave long streaks of light across the scene? Using the same principles you can make a rainbow painting magic wand out of addressable LEDs and a Gemma microcontroller.
1. Set up the board
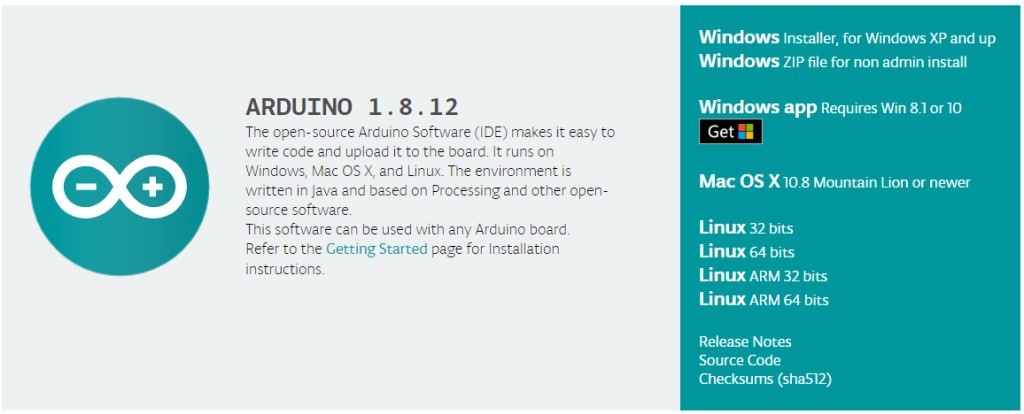
To programme the Gemma, we’ll be using the Arduino IDE.
- On your host computer, go to https://www.arduino.cc/en/main/software and download the correct IDE for your operating system if you don’t already have it.
- Once downloaded, install the package by opening it and following any prompts.
- Open Arduino IDE, on the top menu, go to Tools> Board and then Board Manager. A Dialogue box opens. Type “Gemma” in the search box and press enter to reveal Arduino AVR Boards.
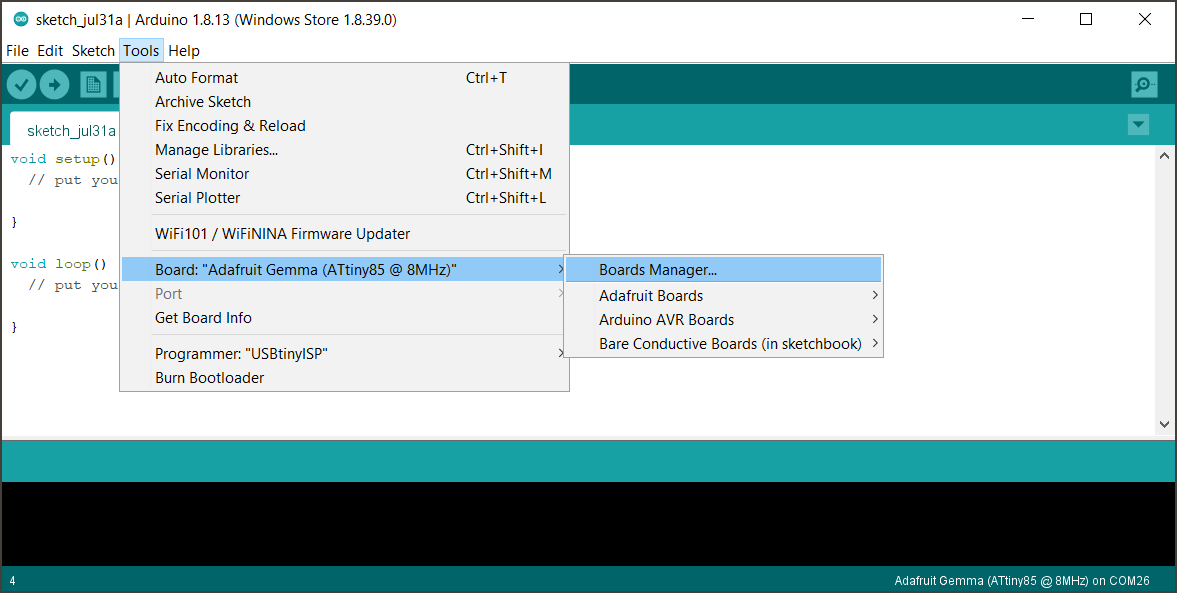
- Select the latest version and click Install.
- Go back to Tools>Board and select Arduino Gemma.
2. Connect the LEDs
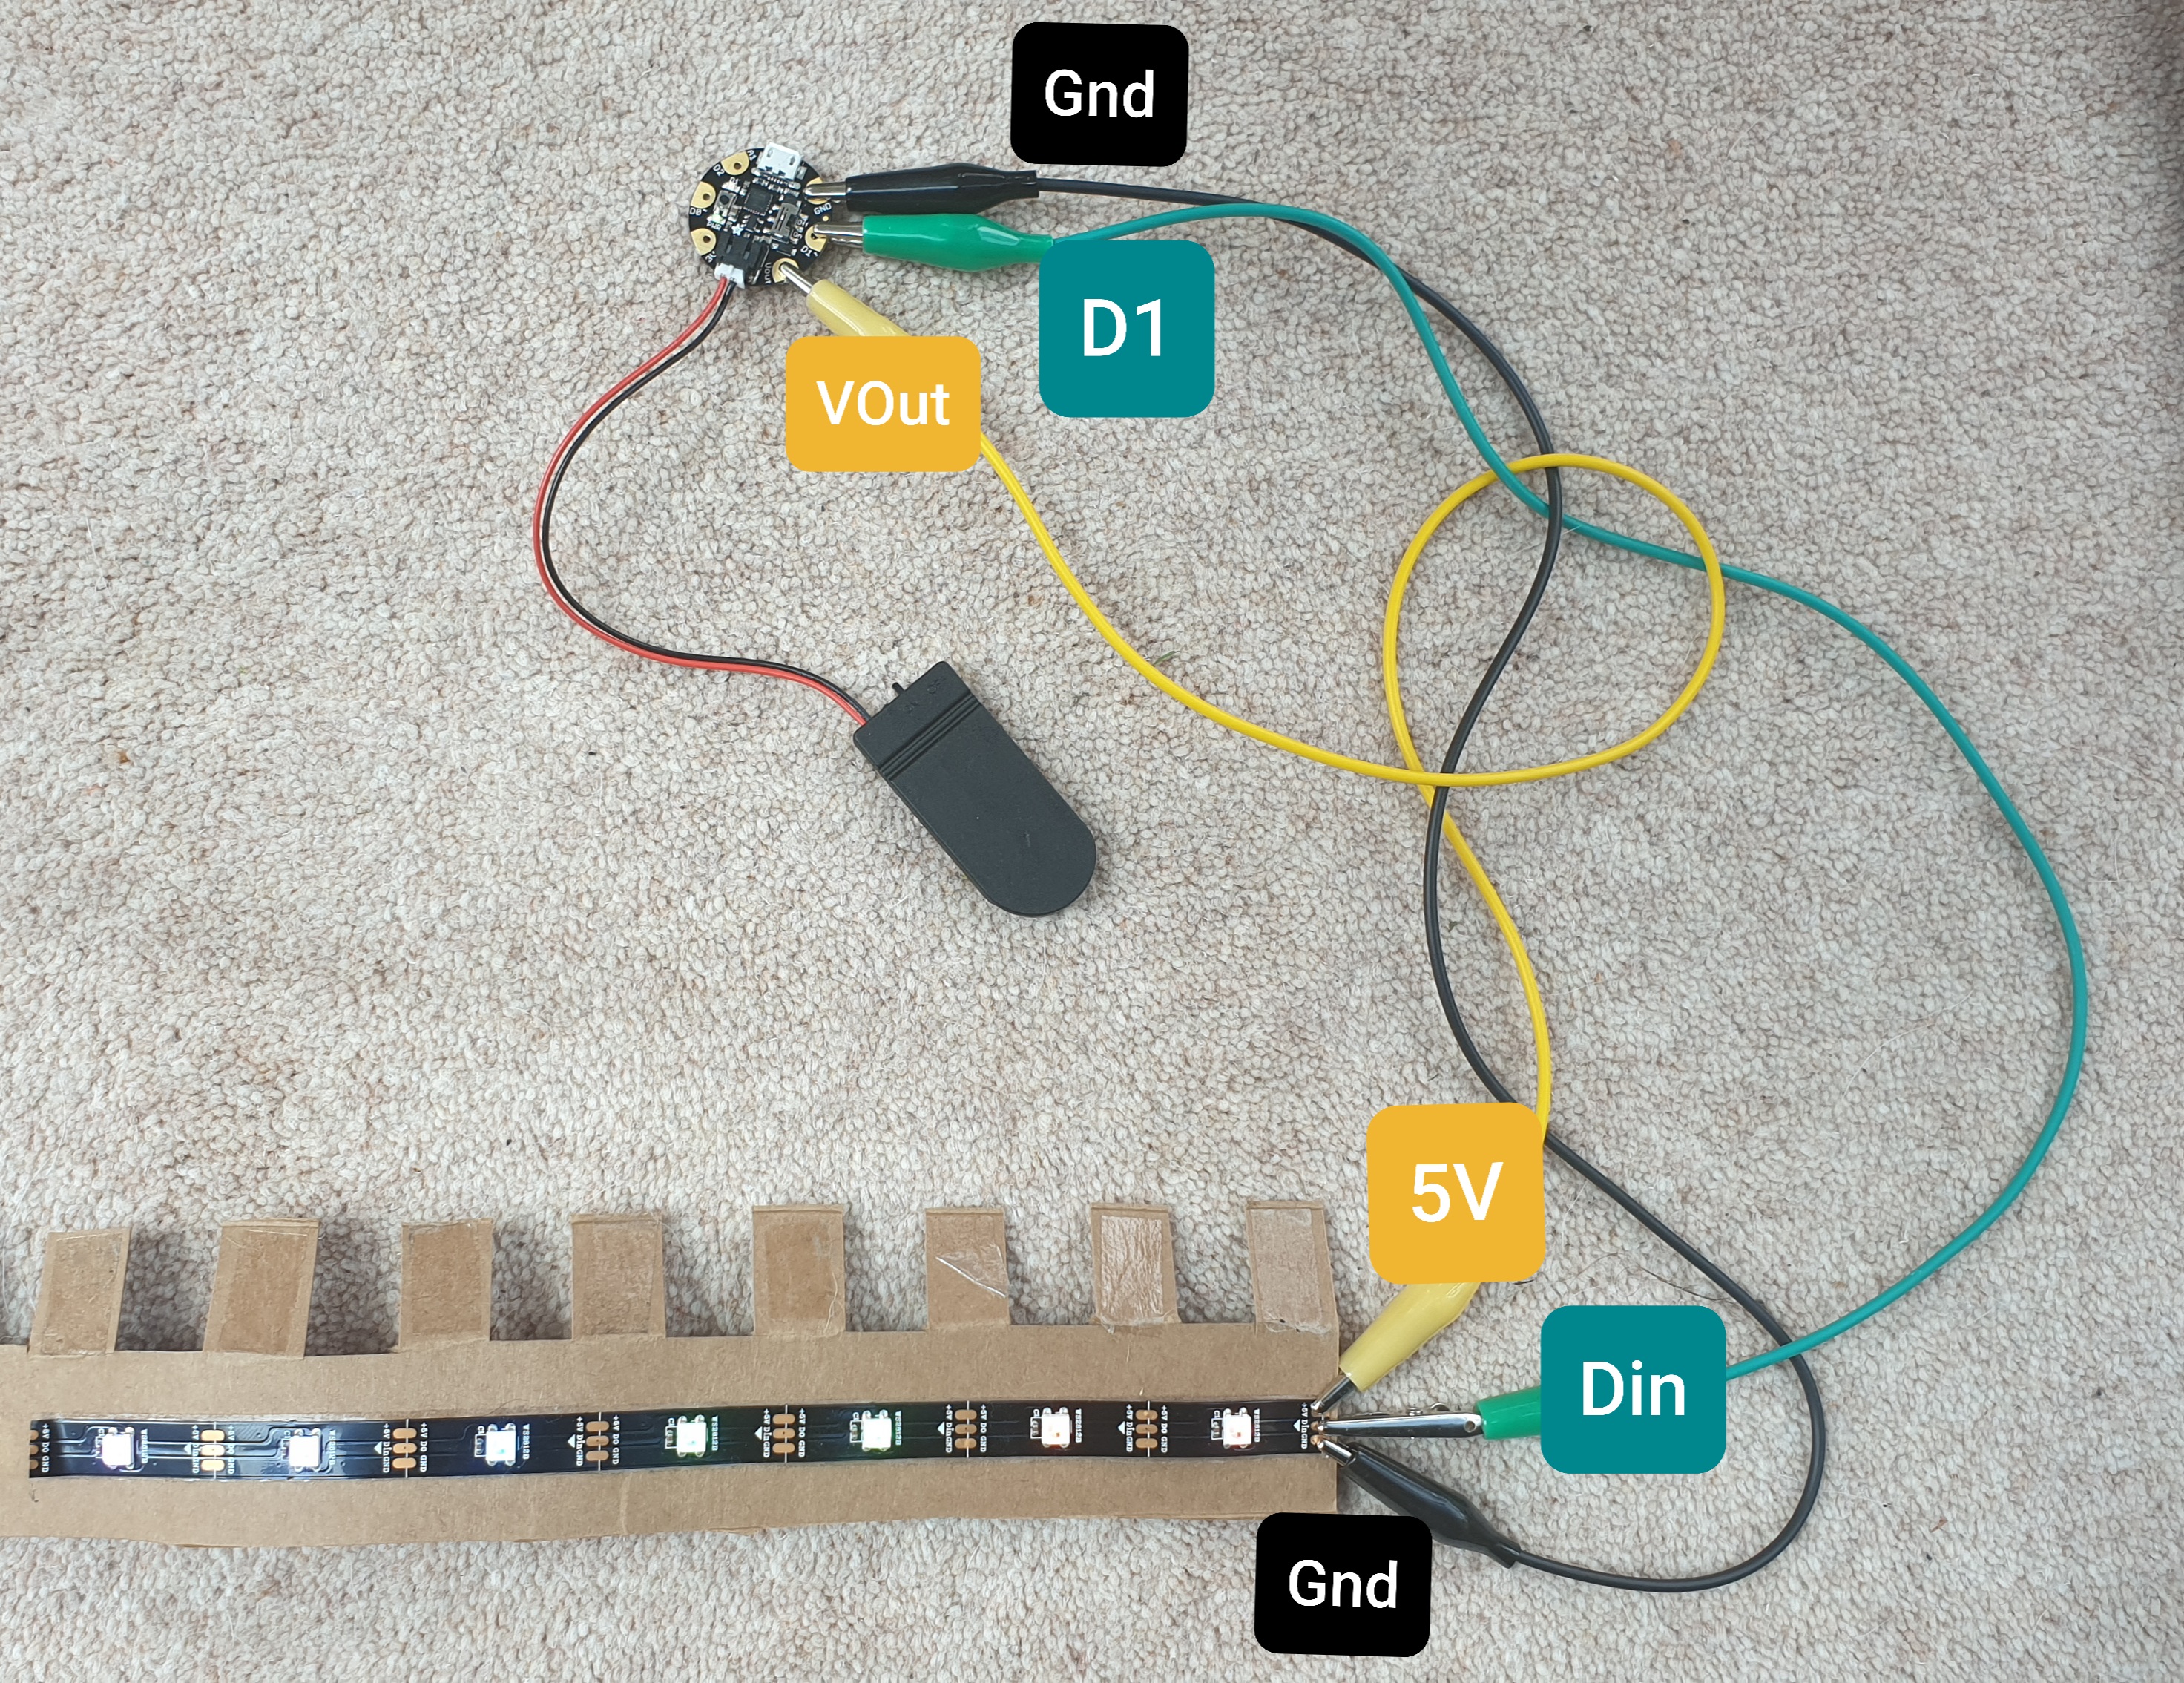
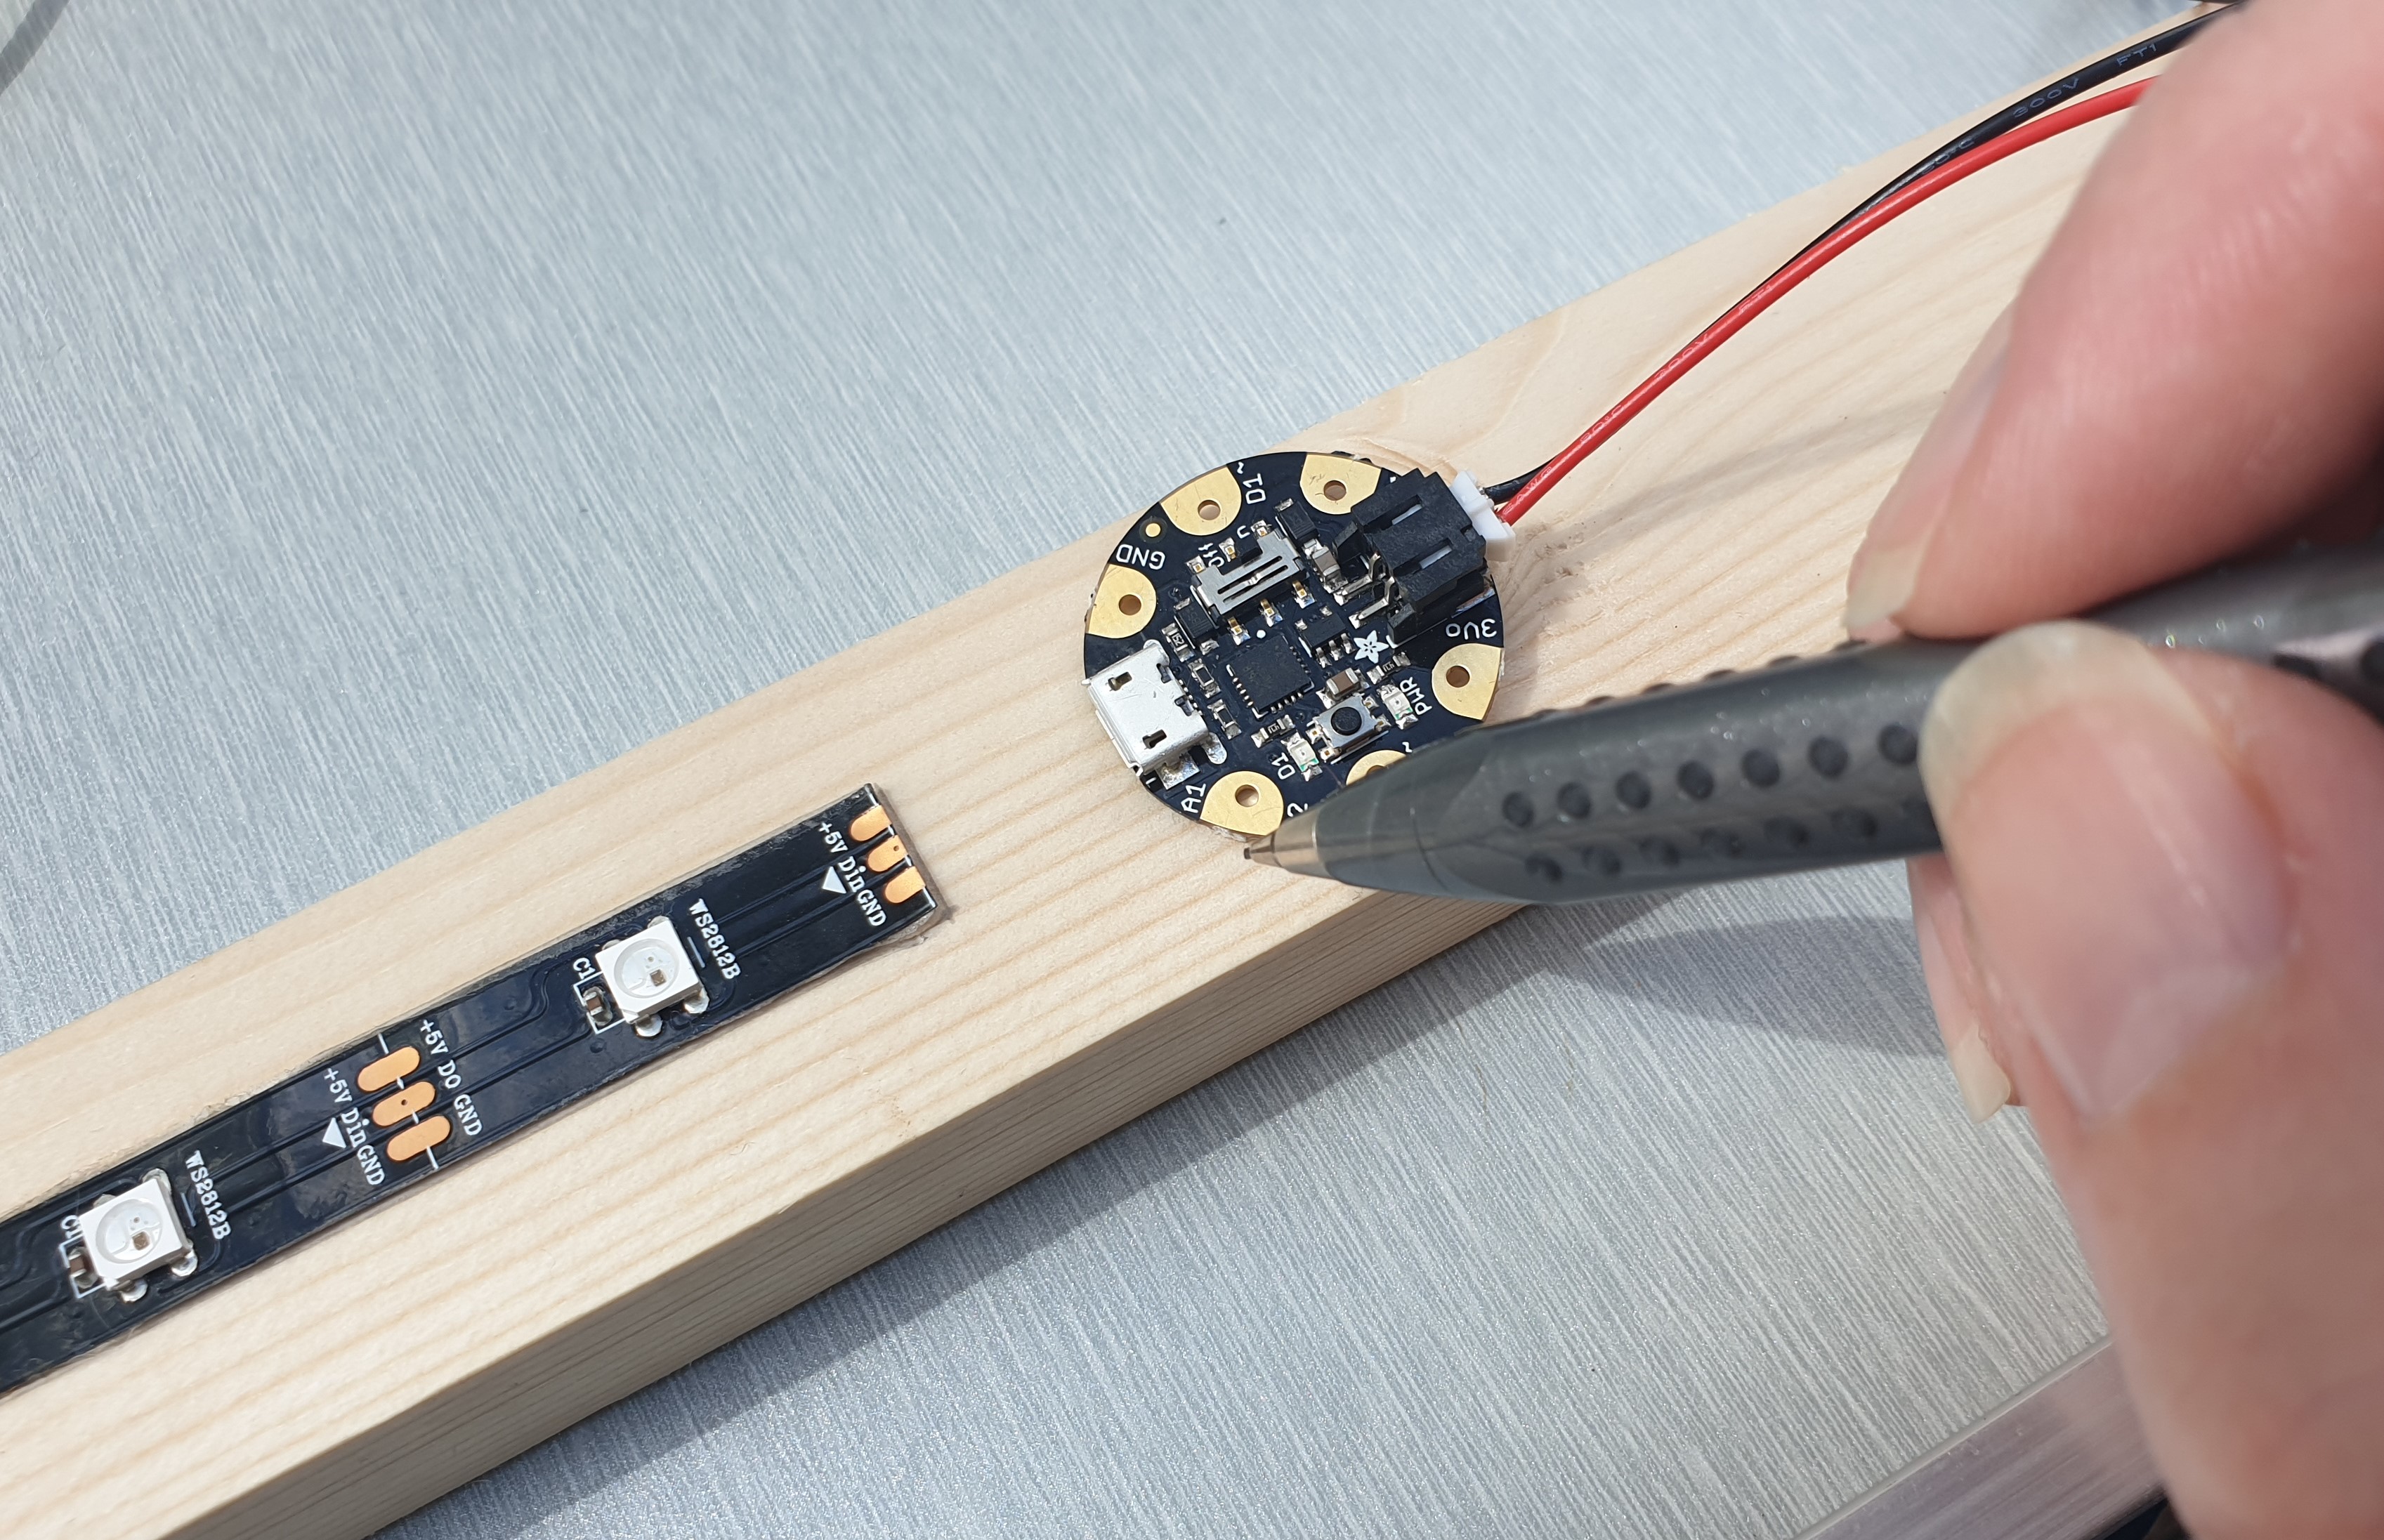
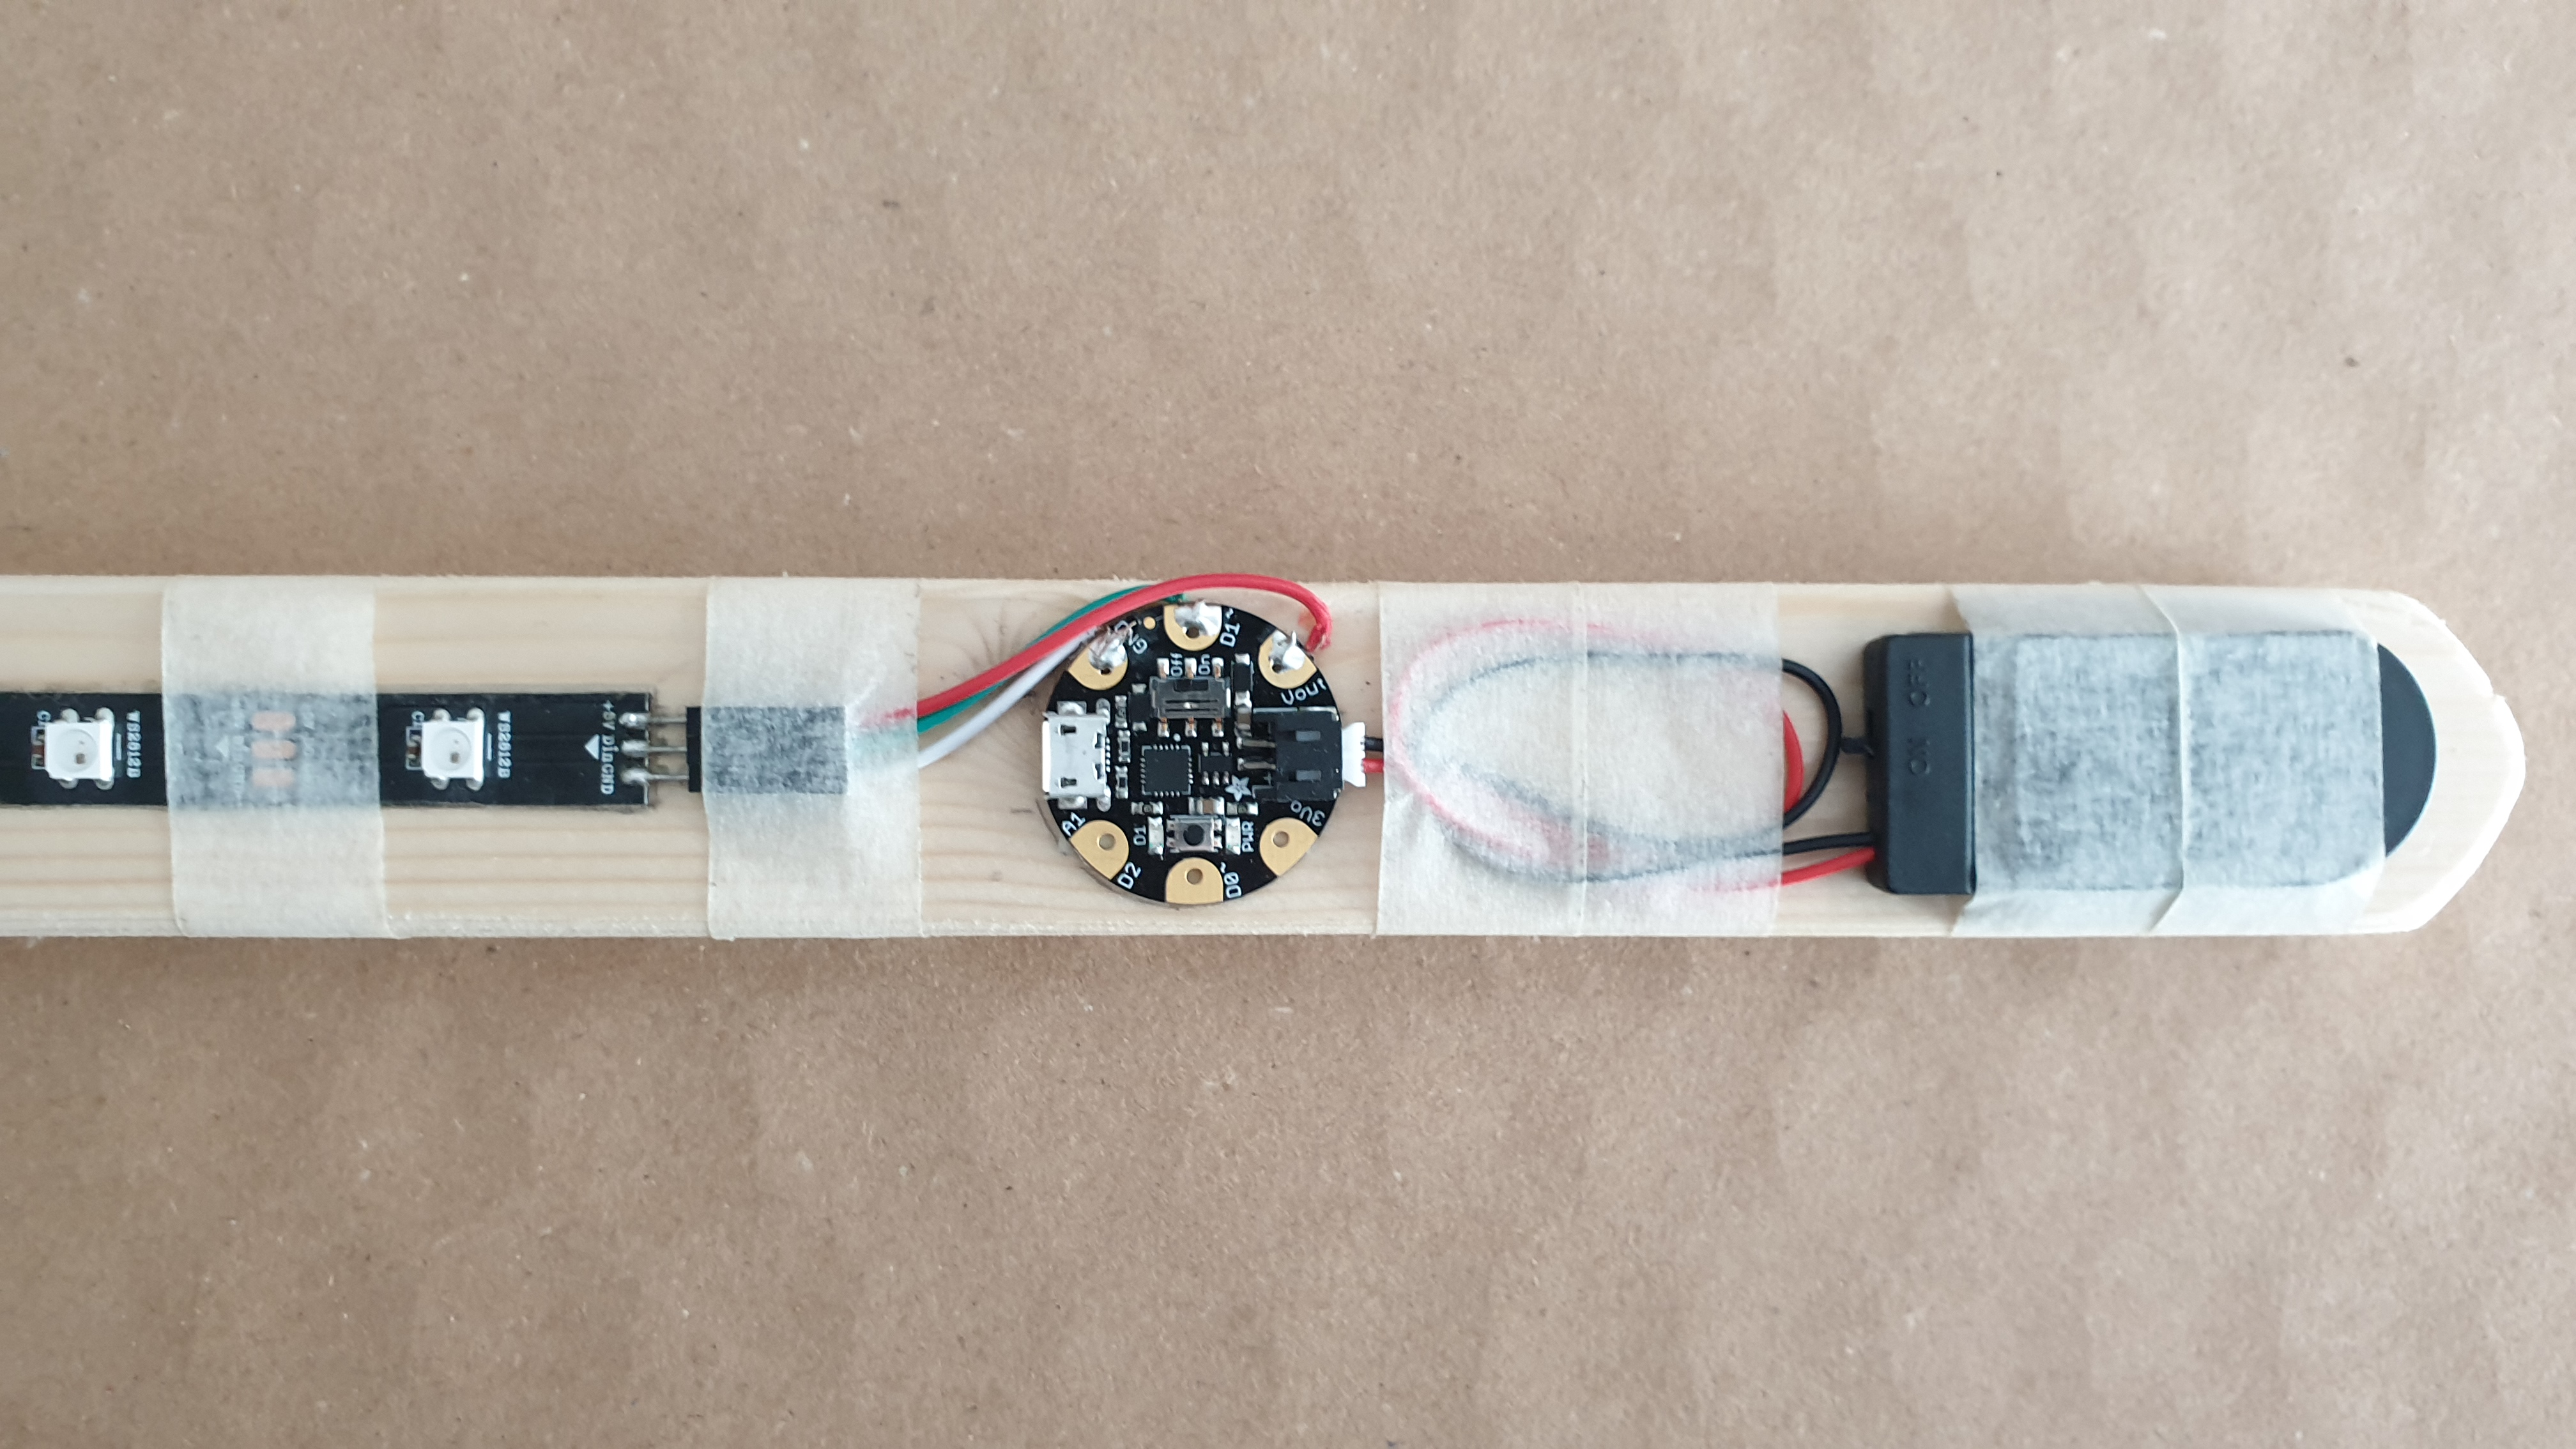
The next step is to connect our pixels to the Gemma, being careful not to touch the crocodile clips together. You can ignore the cardboard on the photo.
- Cut 7 pixels out of your LED strip.
- Connect the Ground pin on your LED strip to the Ground pin on the Gemma.
- Connect the 5V pin on the LED strip to the V out pin on the Gemma
- Connect the centre data pin on your LED strip to pin 1 on the Gemma.
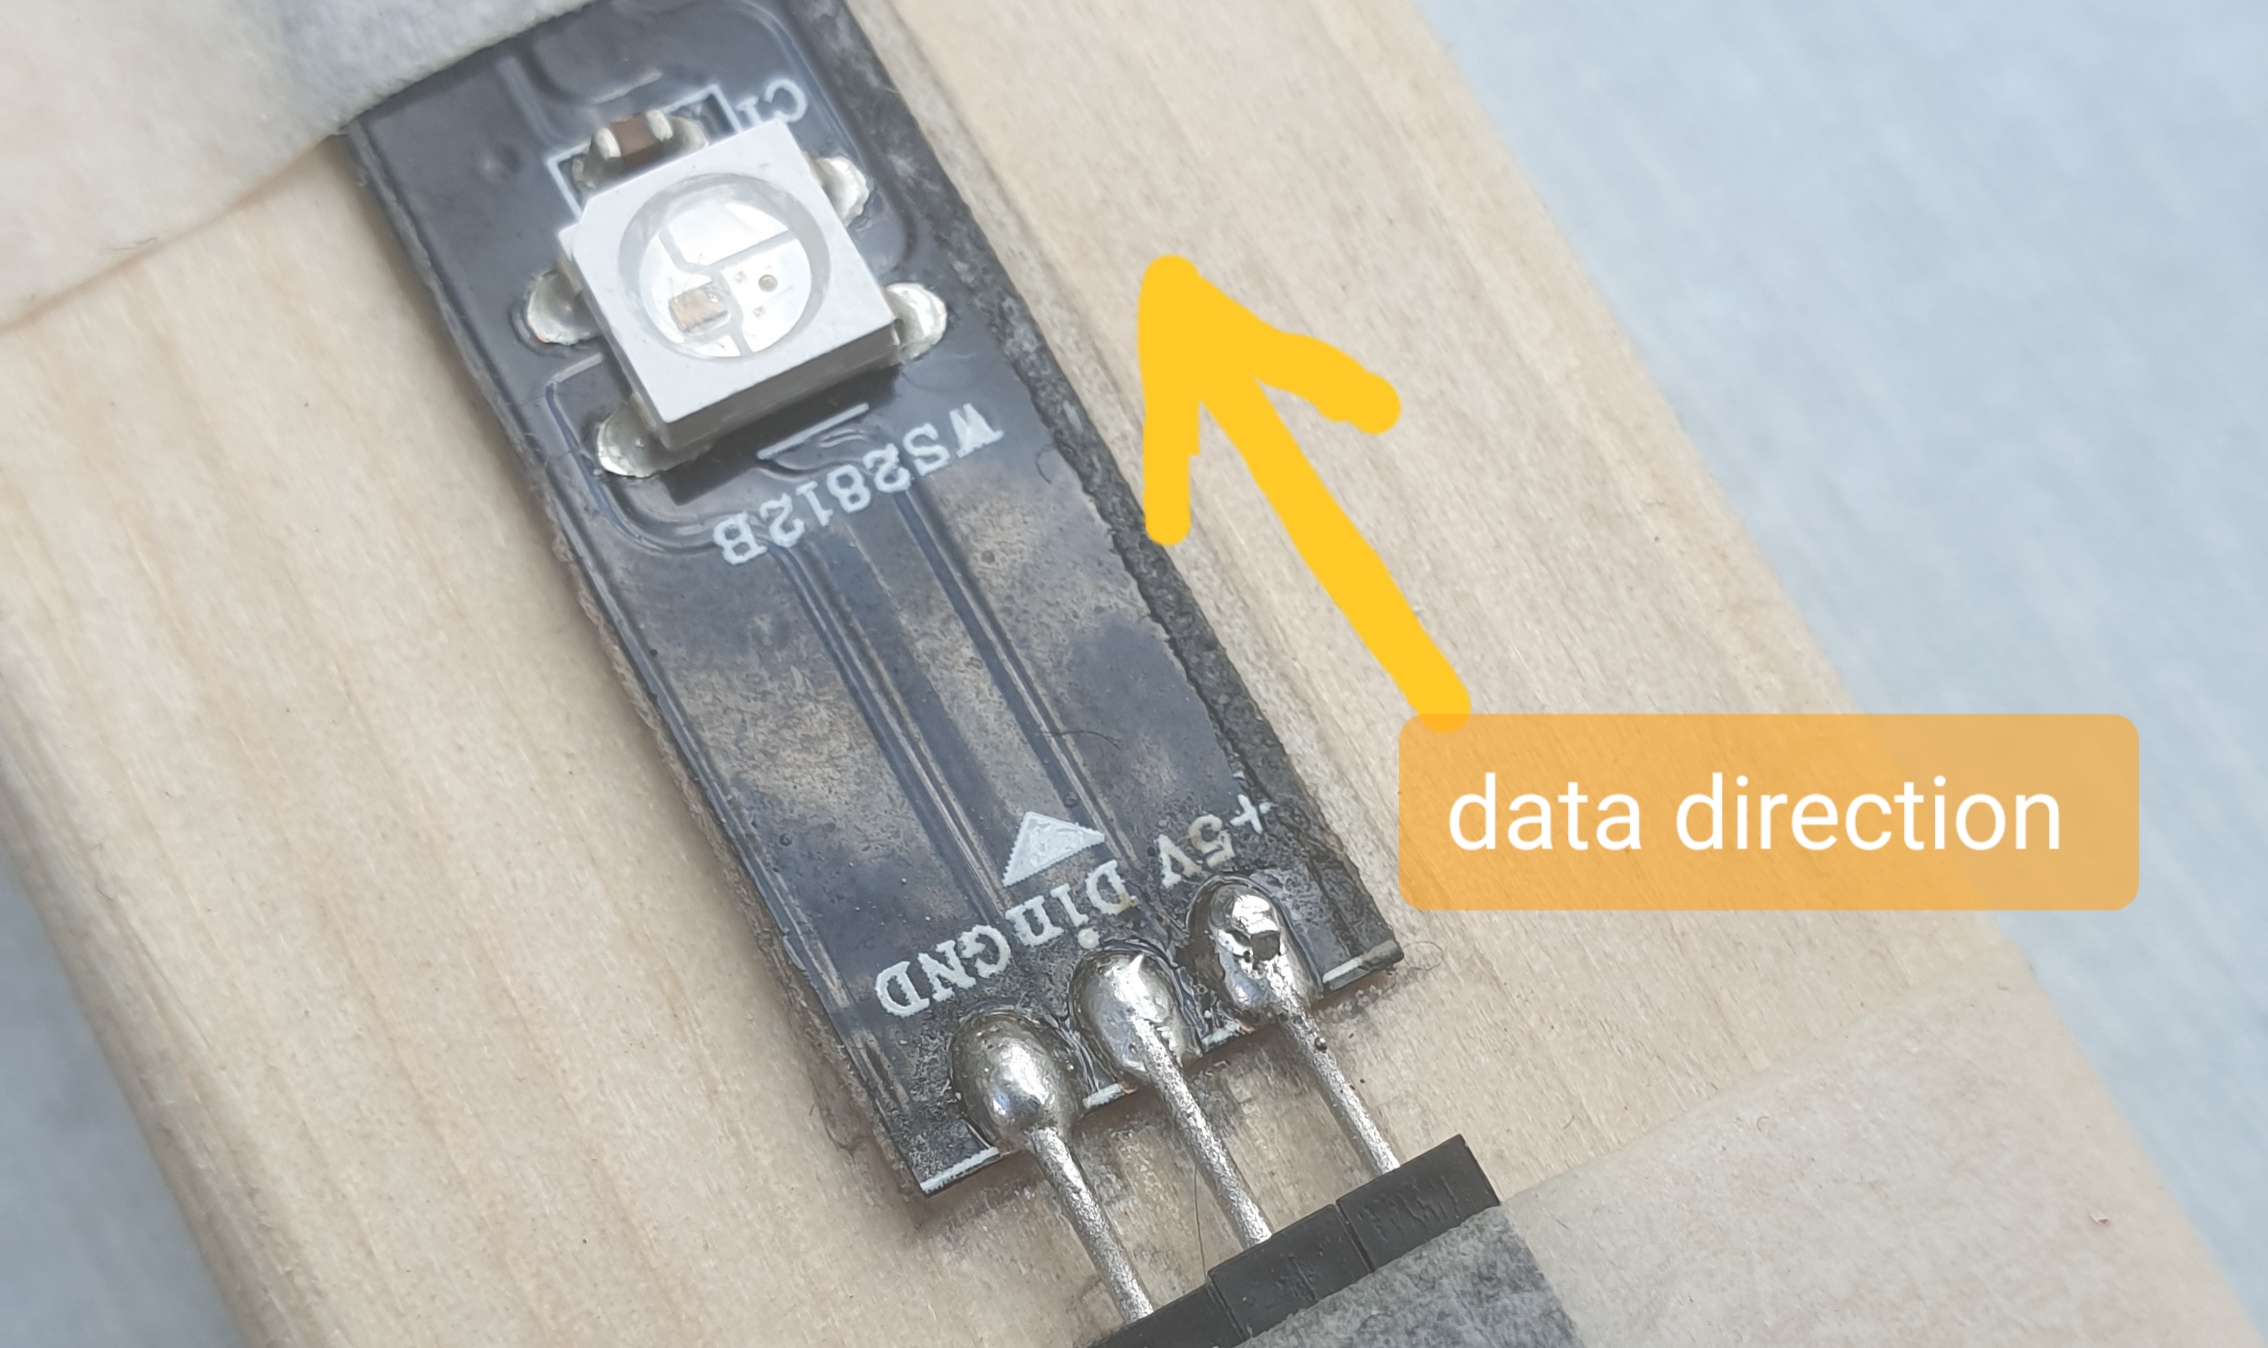
A common mistake people make is to connect from the wrong end of the strip. Check that the arrows on it point away from where you have just connected the crocodile clips.
3. Run a test
When you installed the libraries for the Gemma on the Arduino IDE, several sample programs were installed too. You can use one of these to test your strip.
- Go to File>Examples>Adafruit NeoPixel and select strandtest.
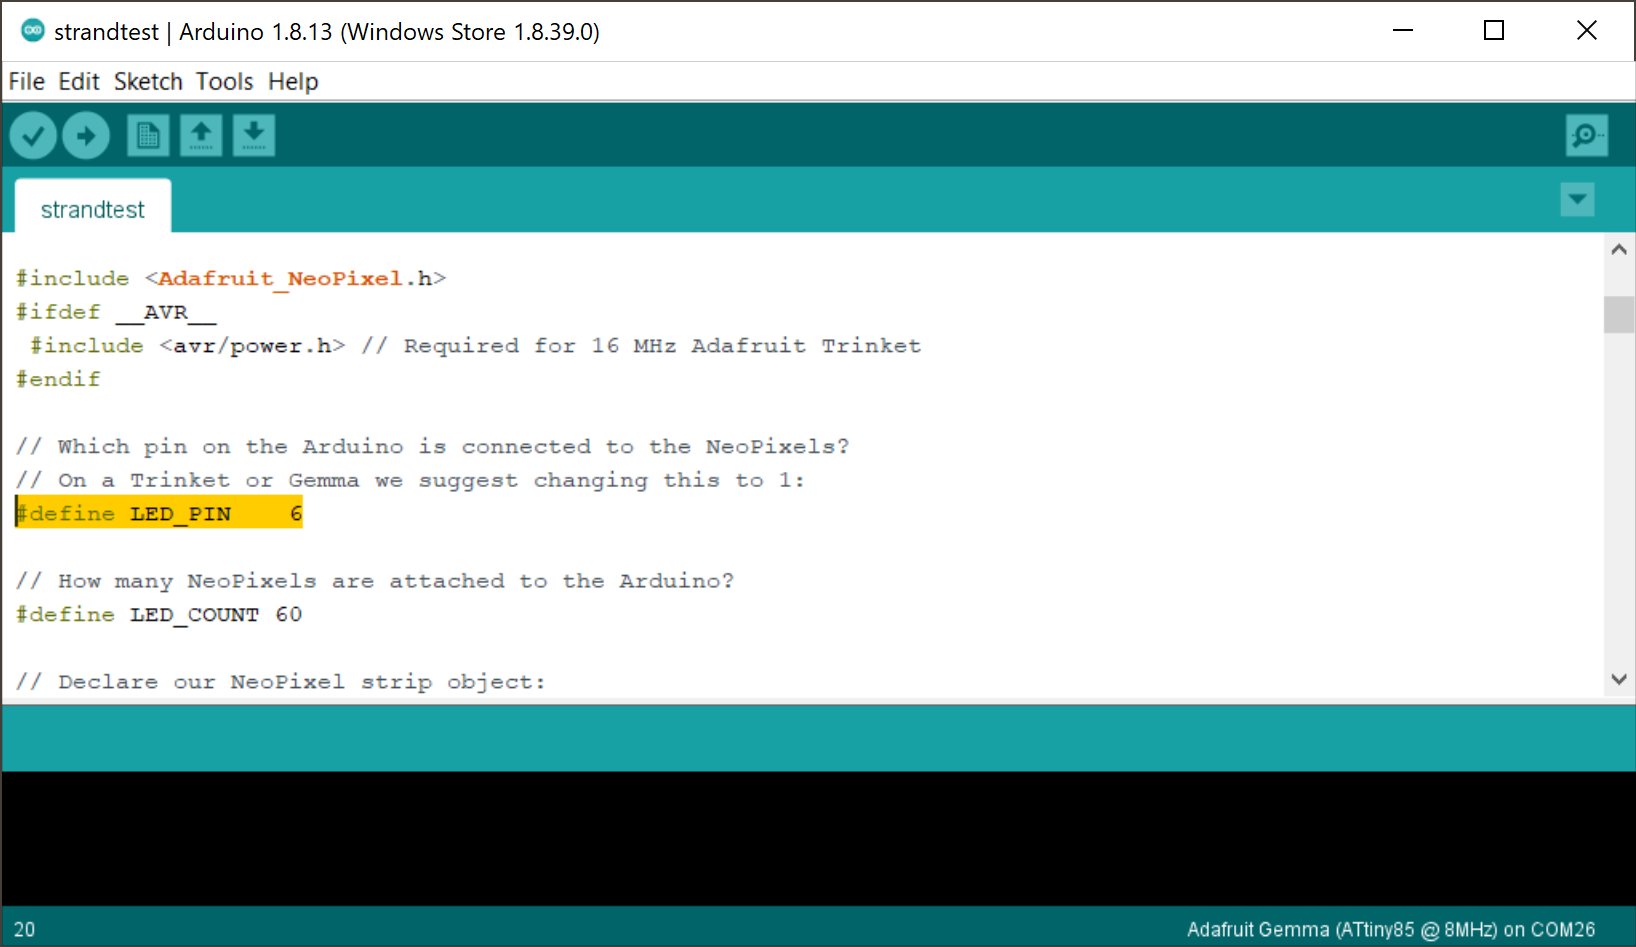
You will need to change two numbers in the programme.
-
Change LED_PIN 6 to LED_PIN 1. This defines which pin on the Gemma will connect to the LEDs.
-
Change LED_COUNT 60 to LED_COUNT 7. This defines how many LEDs we’re using.
-
Once the changes have been made, save it as a copy renaming it to whatever you want.
-
Connect the Gemma to your computer using the micro USB cable. Make sure the Gemma’s switched on.
-
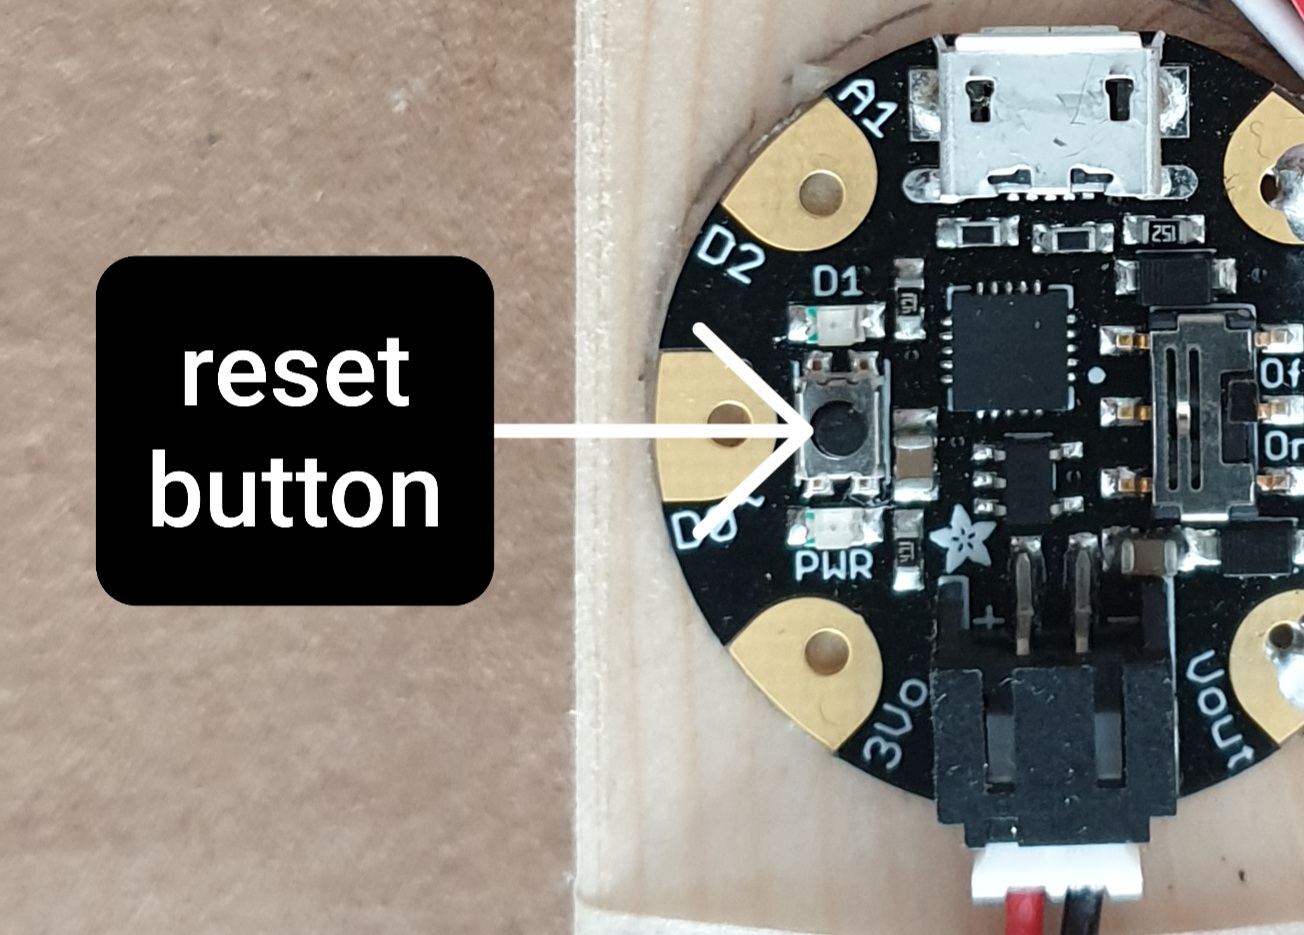
Load the code to the Gemma by pressing the reset button and then pressing the upload button in the Arduino IDE, this is the right-pointing arrow.
- Test once with the USB still connected for power, then re-test by disconnecting the USB cable and plugging the battery pack in (there is an on/off switch on both the Gemma and the battery pack, make sure both are on).
If you get an error while uploading, check that you have the correct board selected, the correct programmer for your particular board, and that the board is connected via USB to your computer.
4. Make the wand
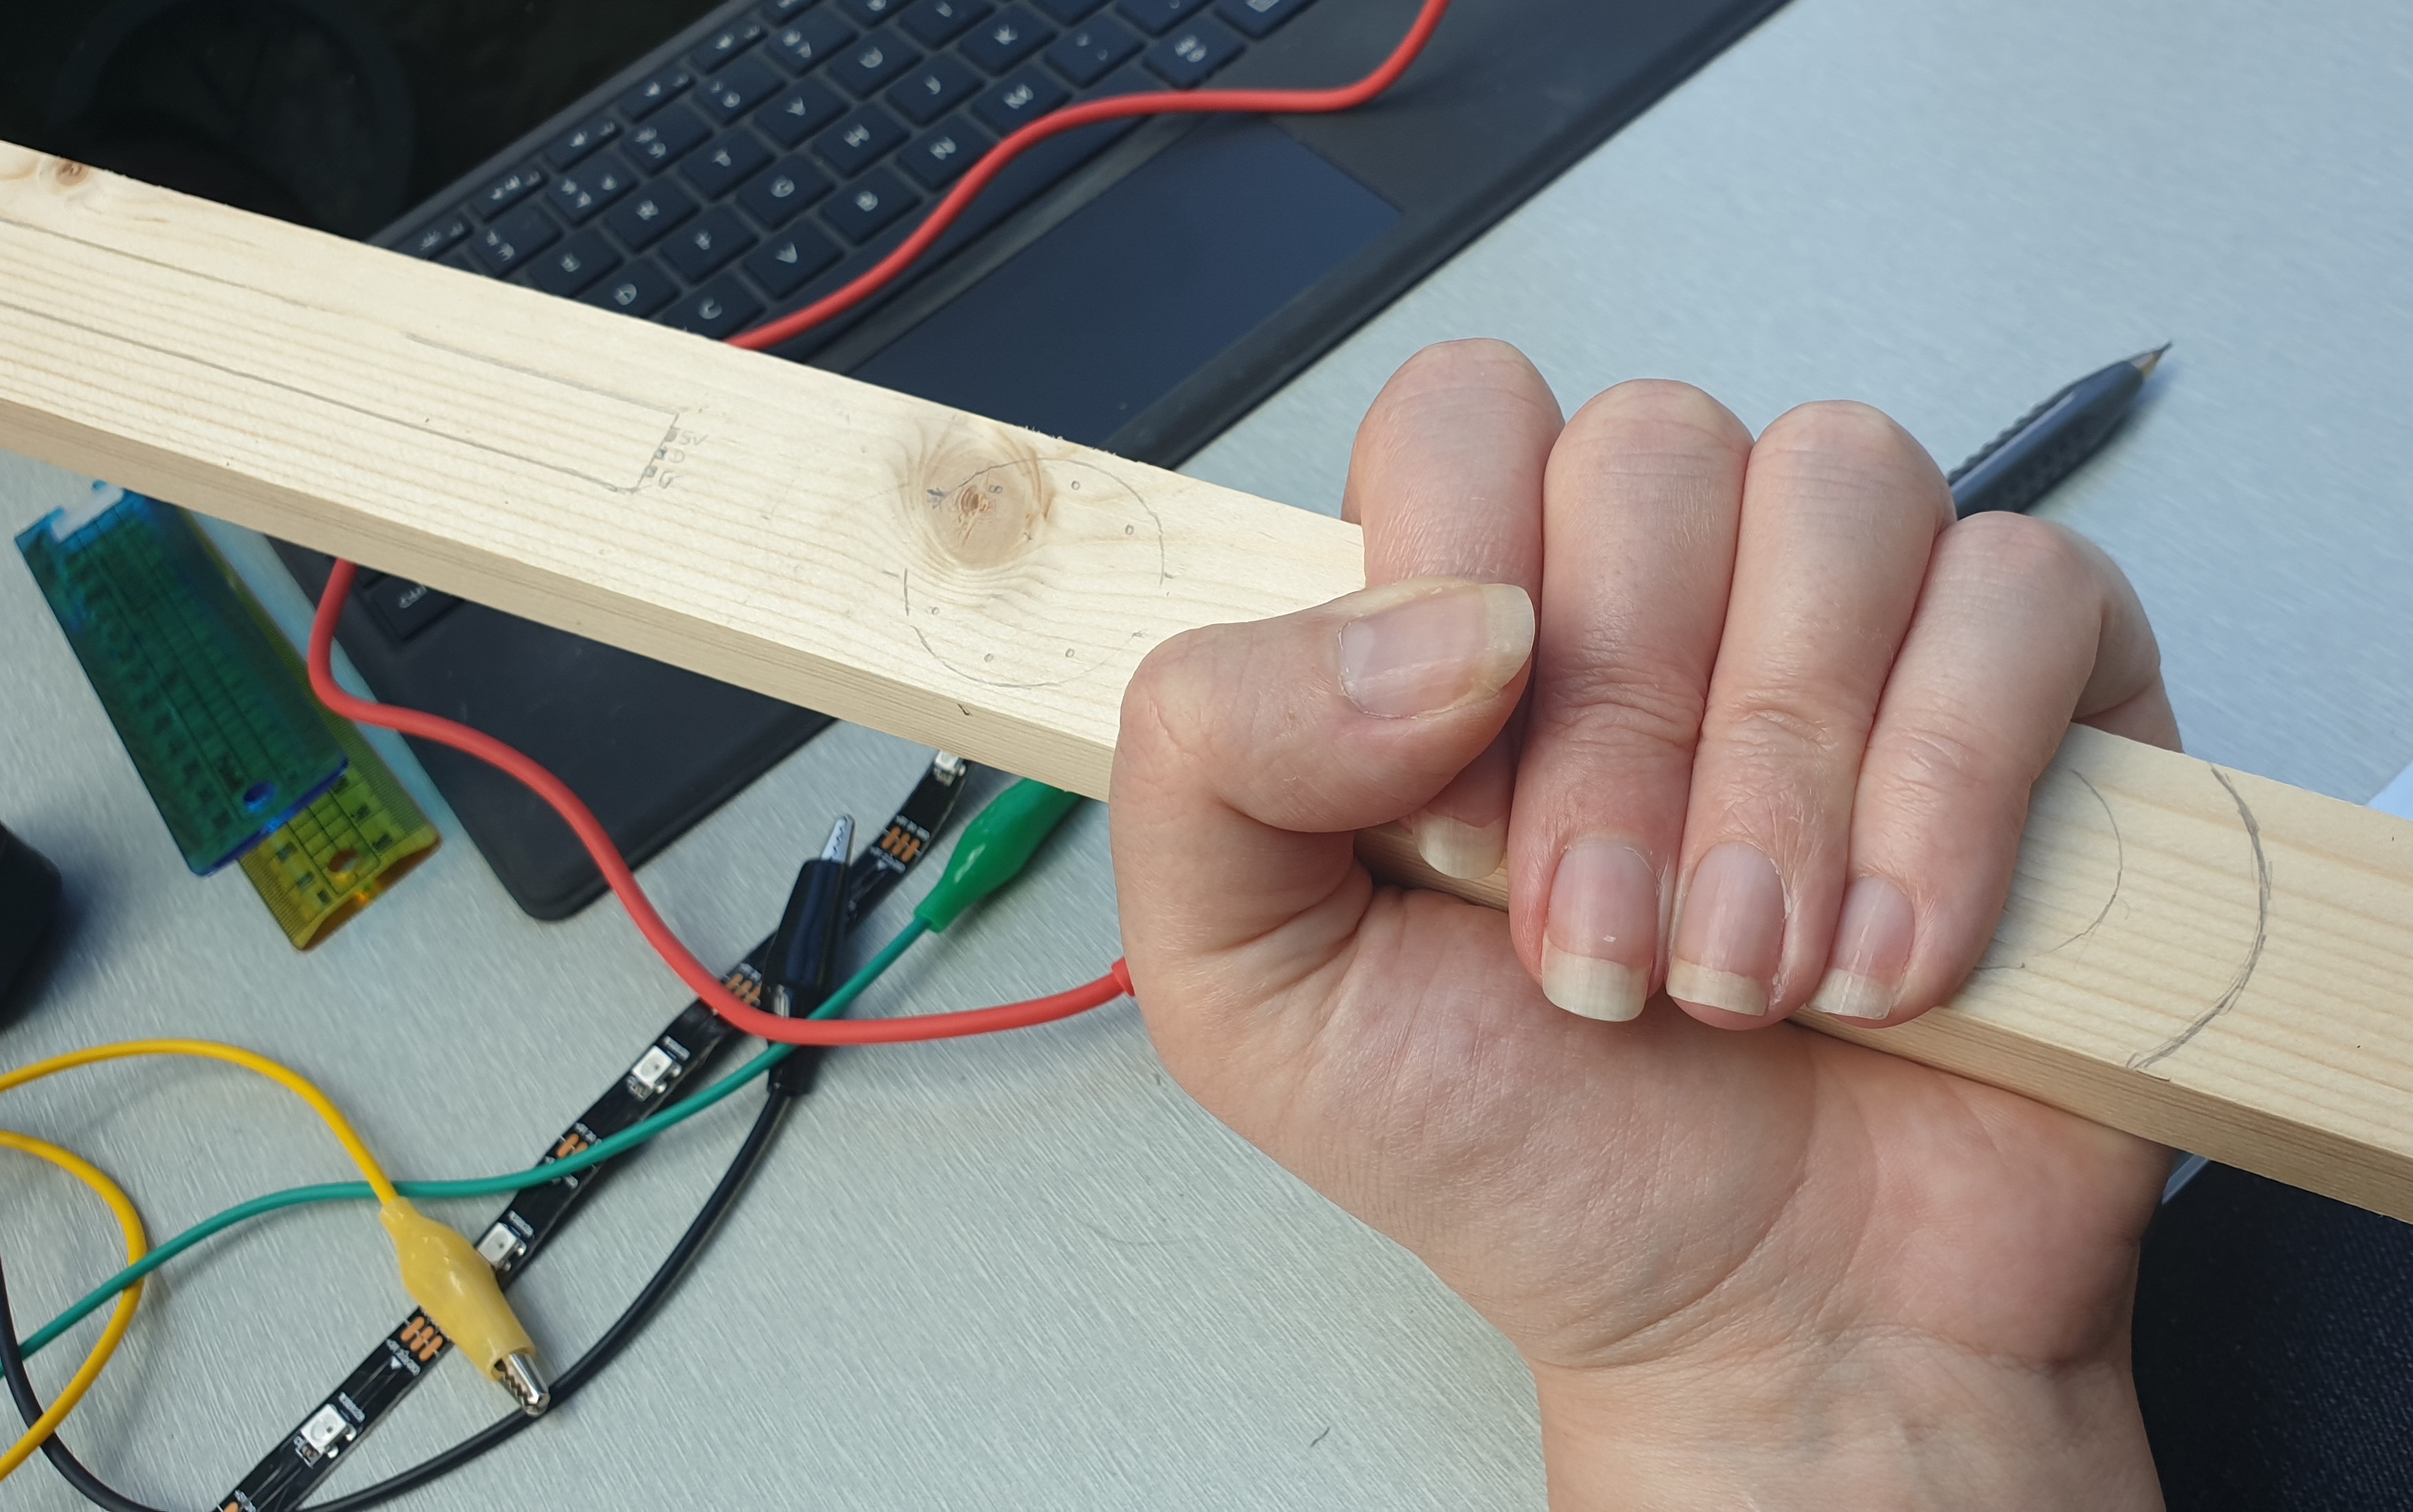
- Layout the electronics on your wooden baton.
- Draw around where they will go with a pencil. Make sure you leave enough space to connect the USB cable so you can reprogram the lights when you want to.
- Hold the stick with a comfortable grip, and mark where to cut any excess off the end of the stick. Sand any rough edges.
- Use double-sided tape to hold down the parts to the stick. You may wish to tape around the battery pack and parts of the LED tape for security.
- Solder some wires to make permanent connections where we used crocodile clips before. The connections are the same as before, 5V on the LEDs to V Out on the Gemma, DIn on the LEDs to D1 on the Gemma, and Gnd to Gnd.
- Place a small piece of tape over the indicator lights on the Gemma if you don’t want these to show in your photos.
5. Test again
You should still have the program that you loaded onto the device and tested earlier. If you turn on the Gemma (also making sure that the battery pack is turned on) everything should light up as before. If it doesn’t:
- Check your connections are correct.
- Check the LED strip is the right way round (arrows pointing away from the Gemma).
- Check that the soldering hasn’t disconnected.
- Check the batteries are in the right way around.
If it works, you can go ahead with trying out your camera settings using the sample program.
6. Create the rainbow programme
![]()
With the wand we made, there are 7 pixels, and they are lit from the bottom up, so the pixel nearest the Gemma is pixel 0, the next one pixel 1, and so on until the one at the top of the stick, which is pixel 6. If we want a rainbow from the top-down, pixel 6 needs to be red, pixel 5 needs to be orange, pixel 4 yellow, and so on.
- Paste the following code into the Arduino IDE and save it as a new programme.
- Upload it to the Gemma using the same process as before.
// Modified from:
// NeoPixel Ring simple sketch (c) 2013 Shae Erisson
// Released under the GPLv3 license to match the rest of the
// Adafruit NeoPixel library

#include <Adafruit_NeoPixel.h>
#ifdef __AVR__
 #include <avr/power.h> // Required for 16 MHz Adafruit Trinket
#endif

// Which pin on the Arduino is connected to the NeoPixels?
#define PIN        1 // On Trinket or Gemma, suggest setting this to 1

// How many NeoPixels are attached to the Arduino?
#define NUMPIXELS 7 // Set to rainbow painter stick

// When setting up the NeoPixel library, we tell it how many pixels,
// and which pin to use to send signals. Note that for older NeoPixel
// strips you might need to change the third parameter -- see the
// strandtest example for more information on possible values.
Adafruit_NeoPixel pixels(NUMPIXELS, PIN, NEO_GRB + NEO_KHZ800);

void setup() {
  // These lines are specifically to support the Adafruit Trinket 5V 16 MHz.
  // Any other board, you can remove this part (but no harm leaving it):
#if defined(__AVR_ATtiny85__) && (F_CPU == 16000000)
  clock_prescale_set(clock_div_1);
#endif
  // END of Trinket-specific code.

  pixels.begin(); // INITIALIZE NeoPixel strip object (REQUIRED)
}

void loop() {
  pixels.clear(); // Set all pixel colors to 'off'

  // The first NeoPixel in a strand is #0, second is 1, all the way up
  // to the count of pixels minus one.
 { // For each pixel...

    // pixels.Color() takes RGB values, from 0,0,0 up to 255,255,255
    // The one closest to the Gemma is pixel 0
    // The one furthest away is pixel 6
    // These are set up as a rainbow, but you can choose your own colours.
    pixels.setPixelColor(6, pixels.Color(100, 0, 0)); // red
    pixels.setPixelColor(5, pixels.Color(130, 40, 20)); // orange
    pixels.setPixelColor(4, pixels.Color(100, 100, 0)); // yellow
    pixels.setPixelColor(3, pixels.Color(0, 100, 0)); // green
    pixels.setPixelColor(2, pixels.Color(0, 0, 100)); // blue
    pixels.setPixelColor(1, pixels.Color(100, 0, 230)); // indigo
    pixels.setPixelColor(0, pixels.Color(200, 0, 230)); // violet
    pixels.show();   // Send the updated pixel colors to the hardware.

  }
}
7. Taking light photos
On our phone, we used “pro” mode on the camera to capture these images. Pro mode lets you choose how long the shutter is open for, and the “speed” of the film. We used the following settings:
ISO = 64
Shutter = 10 seconds F1.5
To get good low light photos you will have to fiddle with the settings until you get them just right. These were taken in a field away from any street lighting, but for you, you may have to increase the ISO or decrease the time the shutter is open for.
If you have an iPhone, you will need a separate app, as the settings on the camera aren’t as accessible. Recommended apps are SlowShutter Cam, and Moment, but other apps are available.
You will also need to put your camera somewhere steady – if you have a professional tripod, great, but if not, propping it up on a garden chair also works!
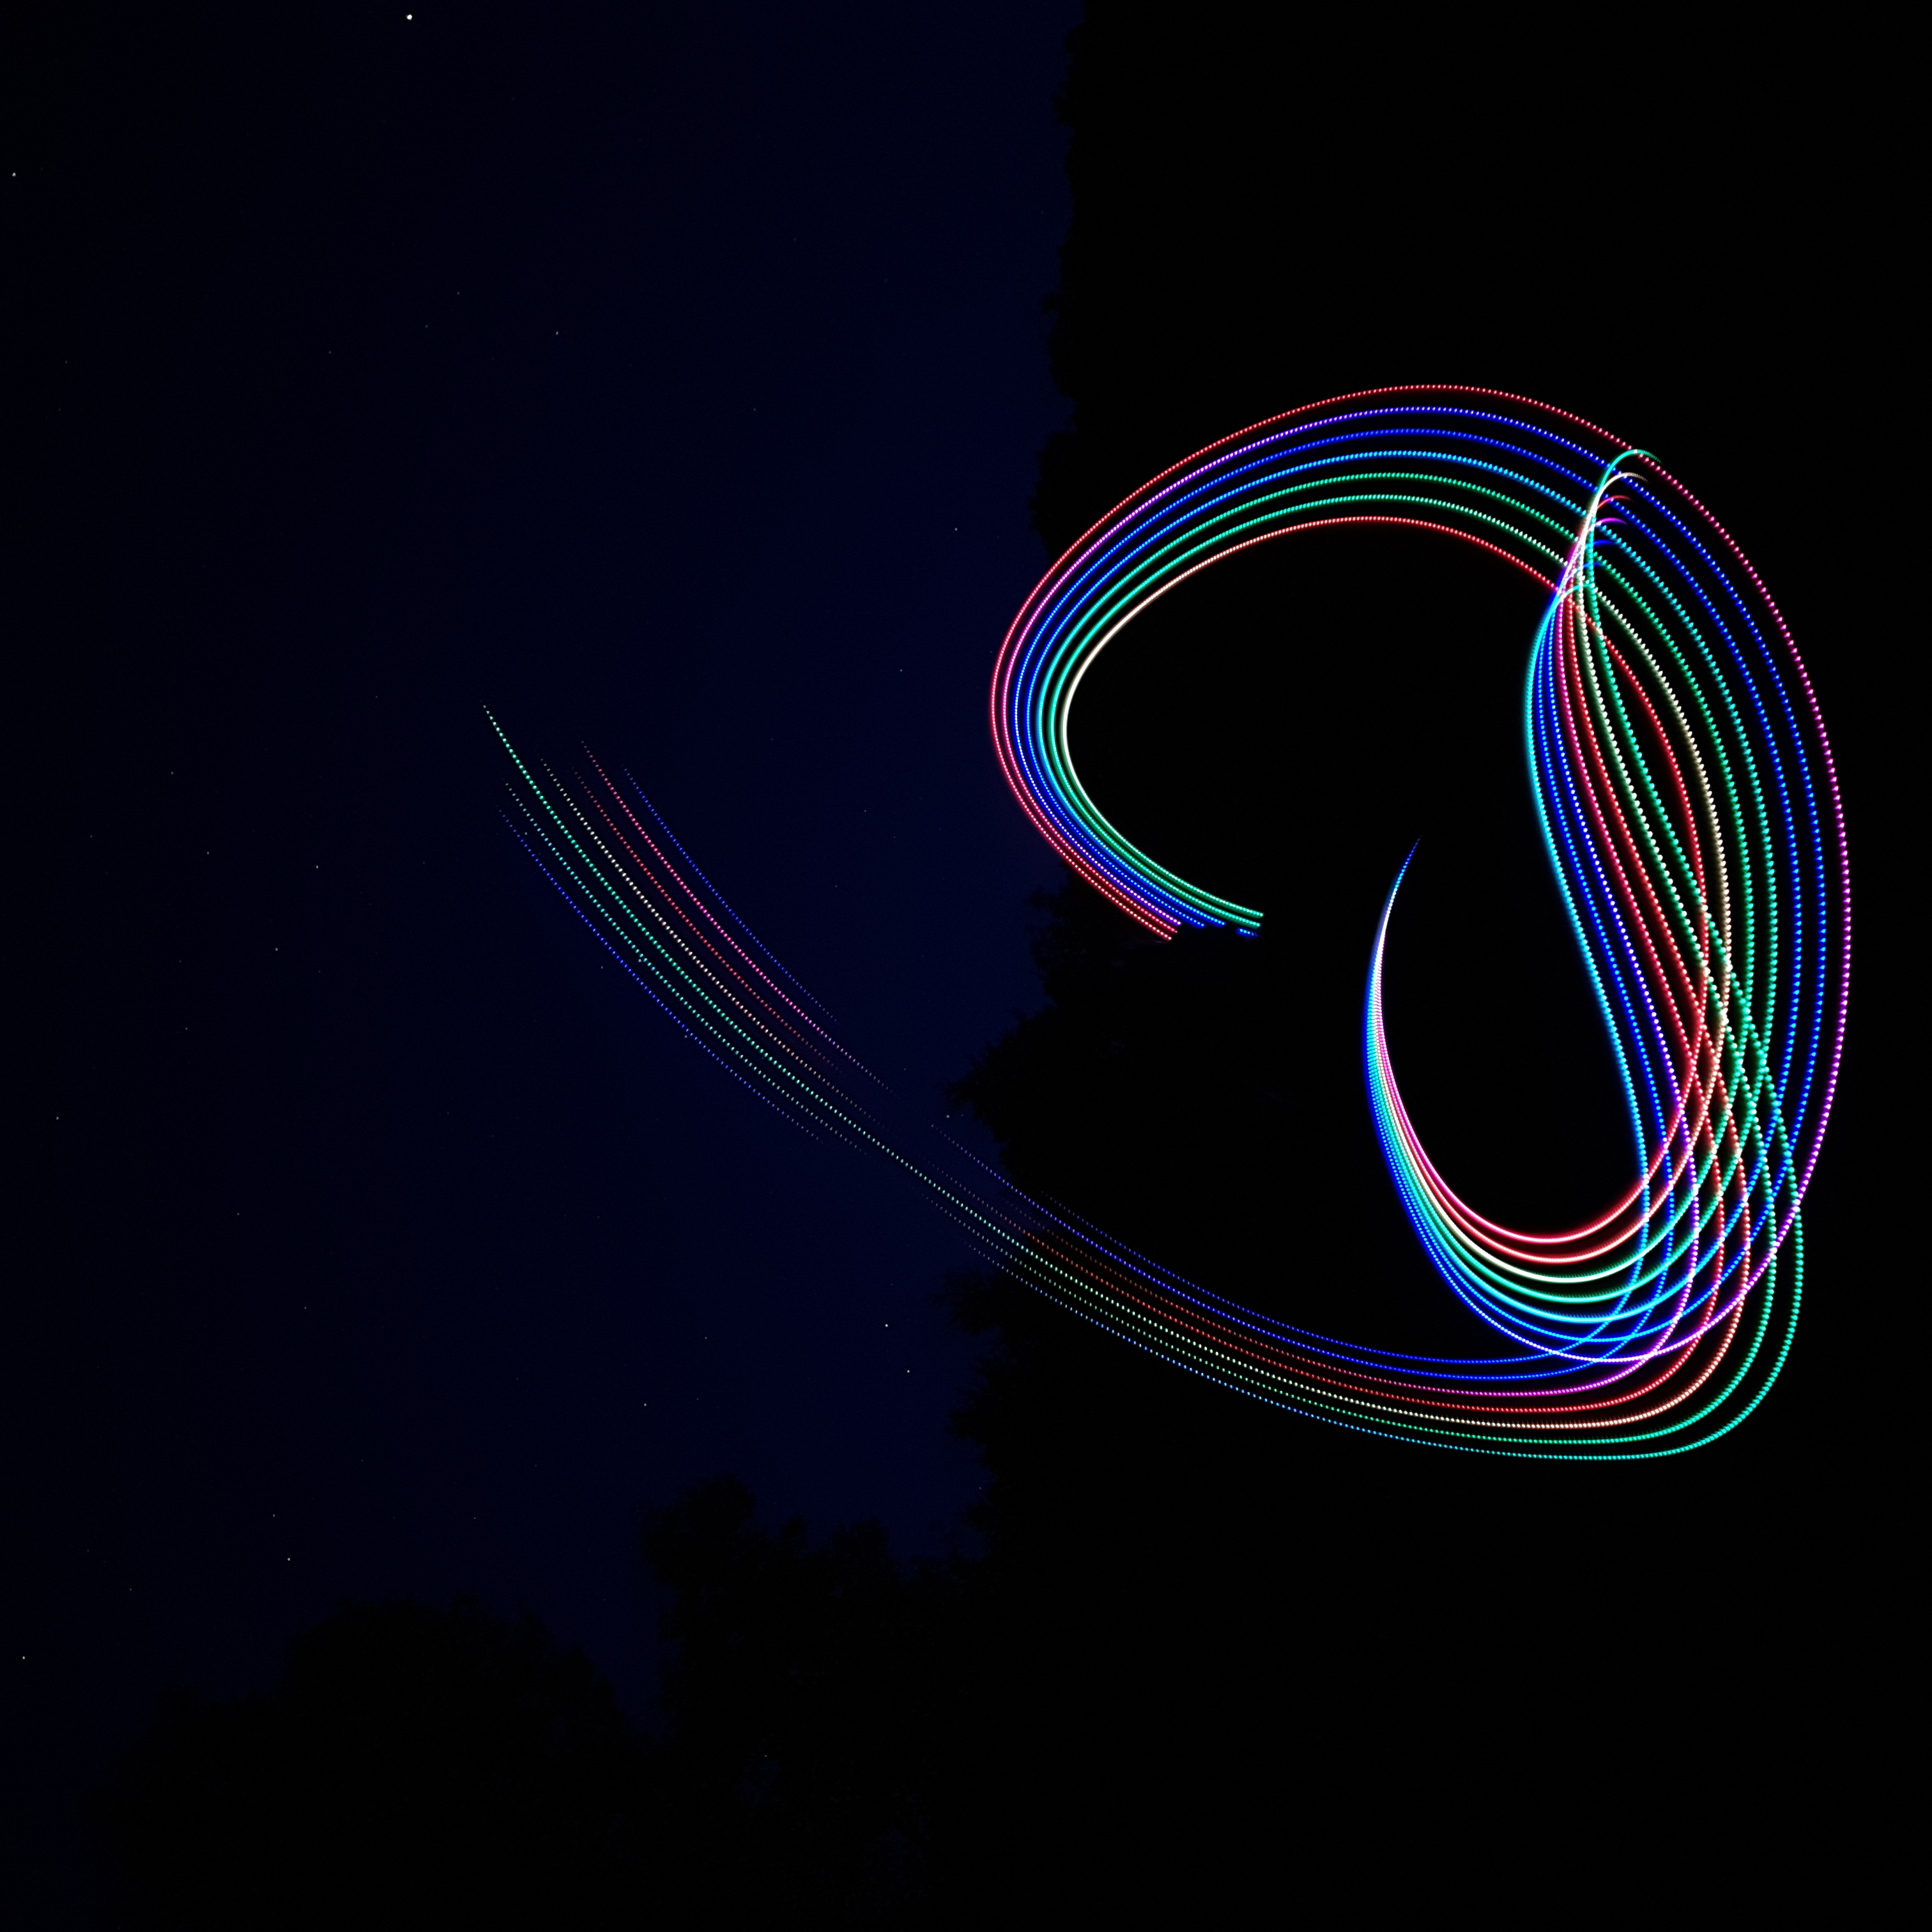
Camera Settings: ISO 64, 10 second exposure
8. Further ideas
You may want to alter the program to be the colours that you prefer, to a single pixel, or to various patterns. In the examples in the Adafruit Neopixel library, you will find a variety of programs to experiment with. You could add a mode button to your wand, by connecting it to pin D2 and ground, and use the example titled buttoncycler to switch between patterns.
Like what you read? Why not show your appreciation by giving some love.
From a quick tap to smashing that love button and show how much you enjoyed this project.

