This project will teach you how to make a wireless MIDI controller that will send control change (CC) messages based on the pitch and rotation of the controller. This is great to control audio effects in any DAW whether in the studio or for live performance. You can strap it to your shoe and use it as a wah-wah pedal or you can control a custom instrument by moving your hand around. You could also use it to control visuals in any software that takes MIDI signals.
We use 2 micro:bits for this project. One acts as the wireless controller which will be battery powered. The other one is the receiver which will be connected to your computer and communicate with your DAW or MIDI-enabled software of choice.
1. Programme the controller micro:bit
- Connect the micro:bit that came with the battery pack to your host computer using a micro USB cable.
- Go to https://makecode.microbit.org/v3.1 We will use Makecode, a graphic programming environment.
- Click on New Project.
- Name your project, we called it MIDI controller.
- Assemble the following:
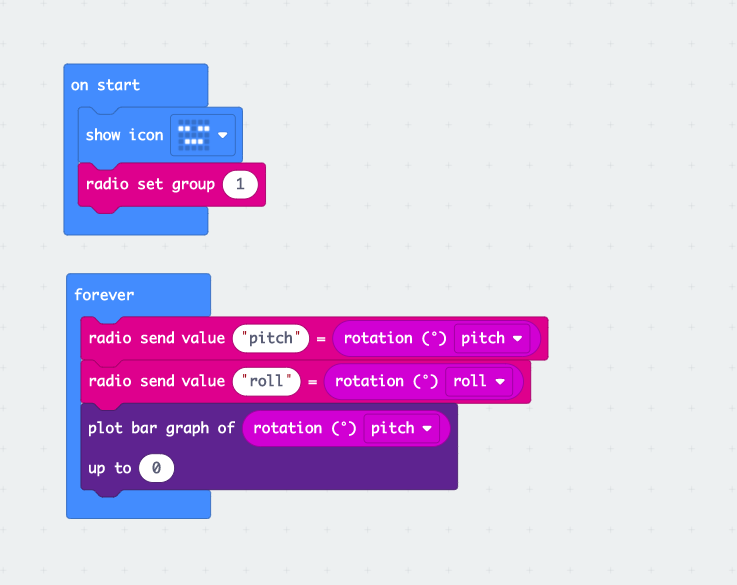
- You can select any icon you like with the show icon block. Although it is not necessary, it helps you identify which code is in which Micro:bit when you switch them on.
- Pair the micro:bit to your computer by clicking on the 3 dots to the right of the Download button.
- Click on Pair device, a pop-up will open.
- Click on Pair device again.
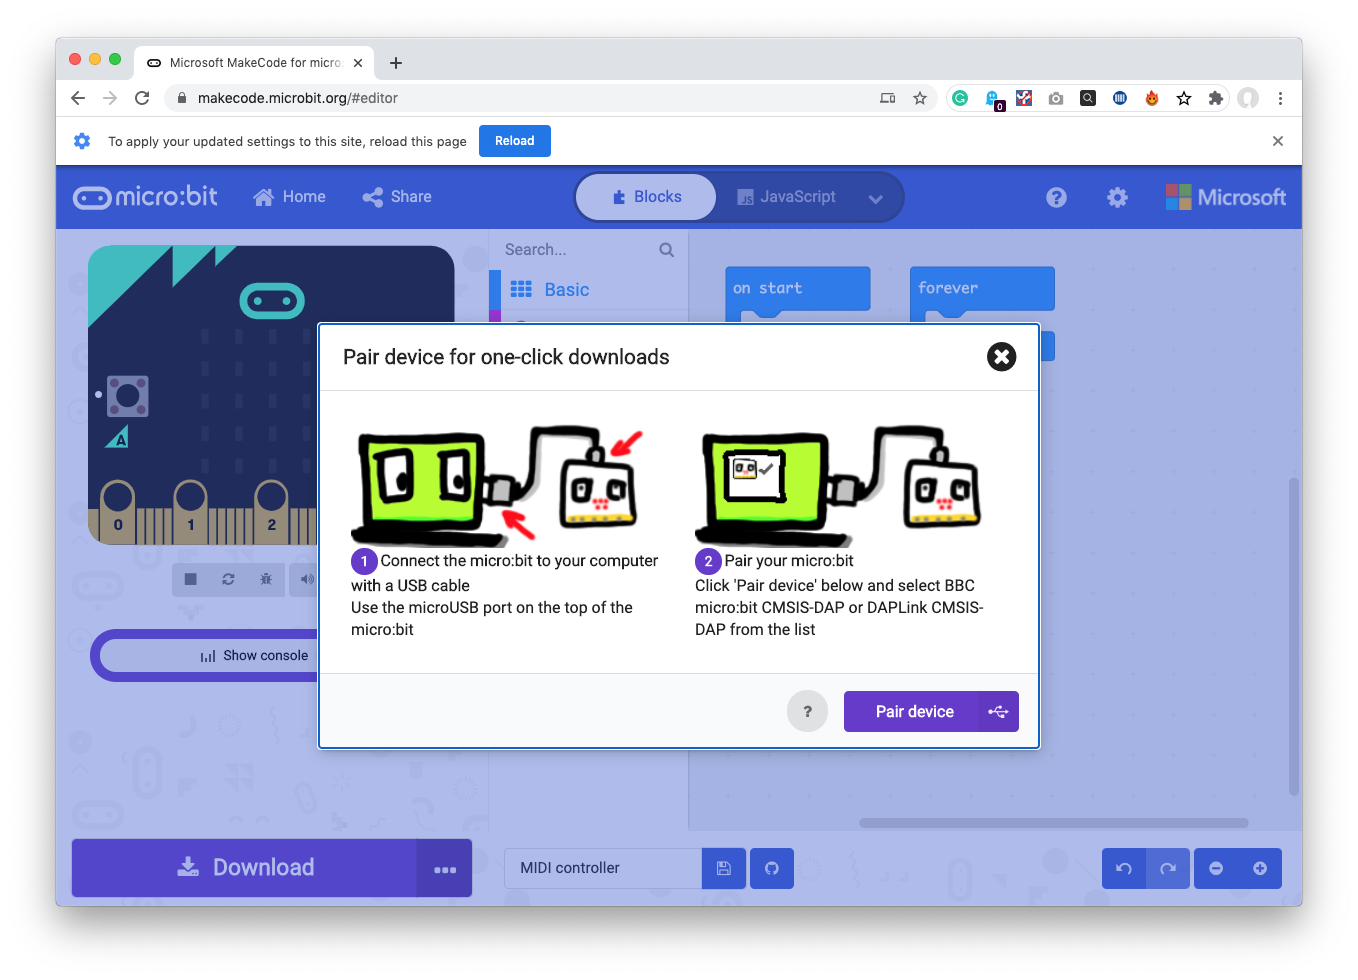

- Select “BBC micro:bit CMSIS-DAP” and click Connect.
- Click on the Download button.
- Eject the micro:bit from the computer using the usual procedure to eject a USB device.
- Power up the micro:bit using the battery pack.
You should now have the controller micro:bit ready. Tilting it should affect the display on the LED matrix.
2. Programme the receiver Micro:bit
- Connect the other Micro:bit to your host computer using a micro USB cable.
- Create a new document using the procedure described earlier and name it. We called ours Receiver.
Install the MIDI extension on Makecode by:
- Clicking on gear icon > Extensions.
- Enter midi into the search field and click on the midi tile.
This will enable all the MIDI blocks.
- Enter the following code:
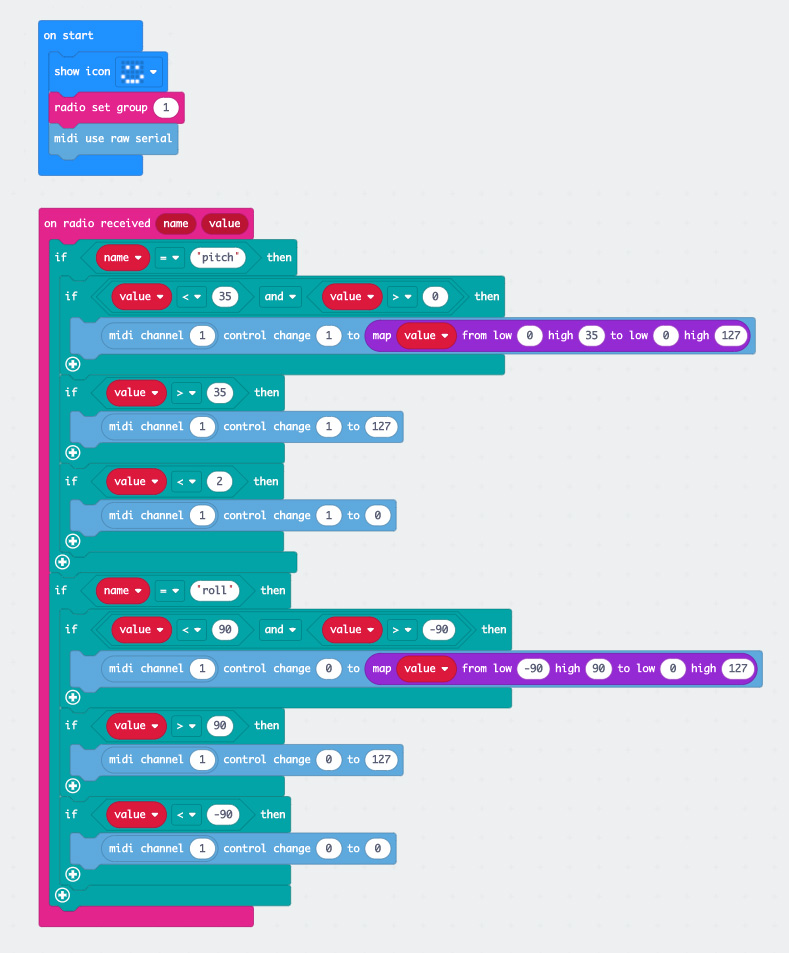
You can use any MIDI channel and MIDI cc’s of your choice. If you do, make sure they are consistent throughout each of the two main “if-then” blocks.
- Follow the same process as before to download the code on to your Micro:bit.
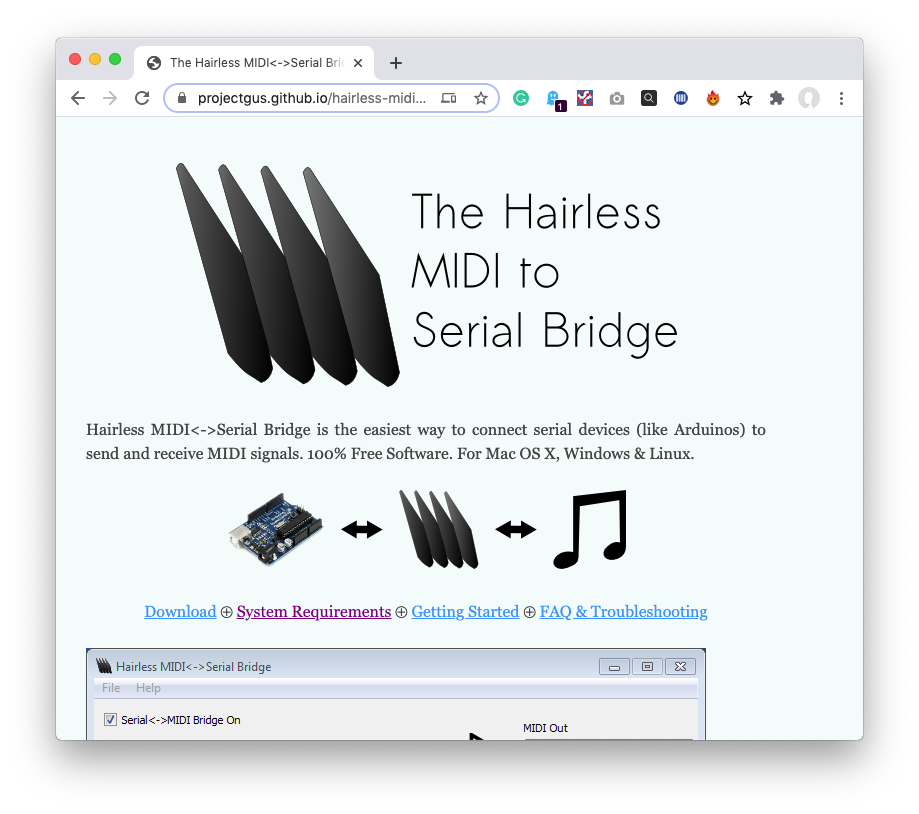
3. Install Hairless MIDI to Serial Bridge
You will need Hairless MIDI to Serial Bridge to allow your Micro:bit to send MIDI to your DAW.
- Go to https://projectgus.github.io/hairless-midiserial/and download and install the correct version for your computer’s operating system.
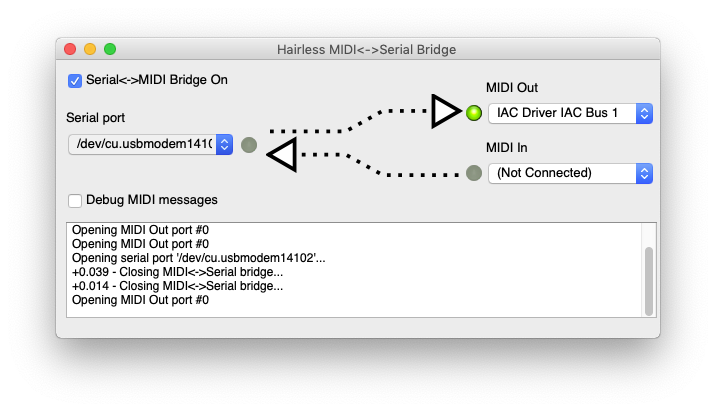
- Open Hairless MIDI to Serial Bridge.
- Select your Micro:bit from the Serial port dropdown. Exactly how it is identified will depend on your OS. On a Mac it appeared as usbmodem 14102.
- Ensure that Serial<->MIDI Bridge ON is selected.
- If you’re on a Mac select IAC Driver for your MIDI out.
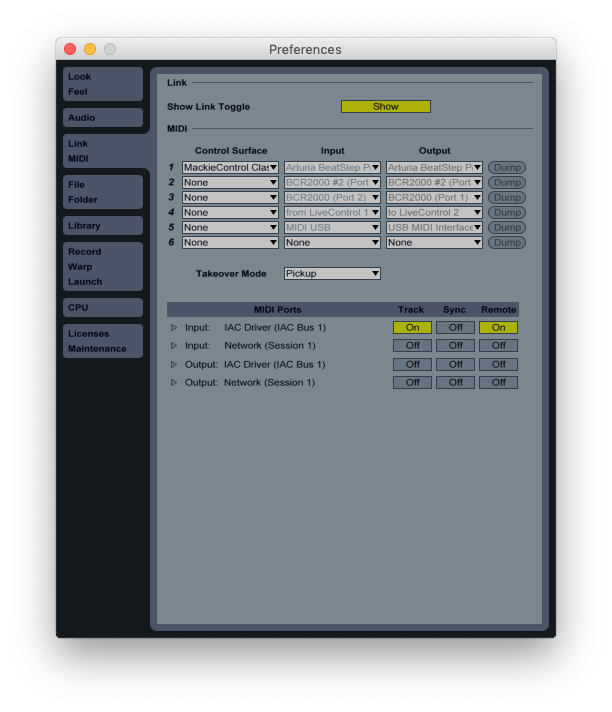
4 Prepare your DAW
- In your DAW; Ableton Live in our case, select the MIDI input coming from Hairpin MIDI. In our case, we checked Track and Remote for the IAC Driver input.
Now you’re ready to MIDI map your controller to the functions of your choice. This can be tricky as the controller will be sending 2 CC’s simultaneously. If your DAW allows to manually input your MIDI mappings, great. In Ableton this is not possible so you can use this workaround:
- In Ableton, select the control you want, it will receive the 2 different CC’s from the Micro:bit controller in succession.
- Click away from the selected control.
- Look at the CC assigned to the control. If it is the one you wanted great. If it is not, undo in Ableton. This should present the other CC as they both came in quickly in succession.
We mapped our controller to a MAX for Live instrument but the possibilities are endless!
5. Do more
This is only the beginning to see you started with your very own personalised MIDI controller. You could:
- Add more sensing and CC’s. The Micro:bit has a host of other possibilities. Temperature-controlled synth anyone?
- Tweak the existing sensing. As it stands the pitch range is limited between 0-35 degrees as this works well for a foot controller but you might want to expand it.
- Attach the controller to the bow of a violin or a guitar neck to control effects.
You can find more information and resources for your micro:bit here: https://microbit.org/
Like what you read? Why not show your appreciation by giving some love.
From a quick tap to smashing that love button and show how much you enjoyed this project.

