This project will show you how to make a musical cracker that plays music when pulled. Not only that, but it also contains possibly the greatest gift that you can fit in a cracker, a micro:bit!
1. Programme the micro:bit
We’ll be using Makecode to programme the micro:bit.
- Go to https://makecode.microbit.org/stable#editor
- Assemble the following code:
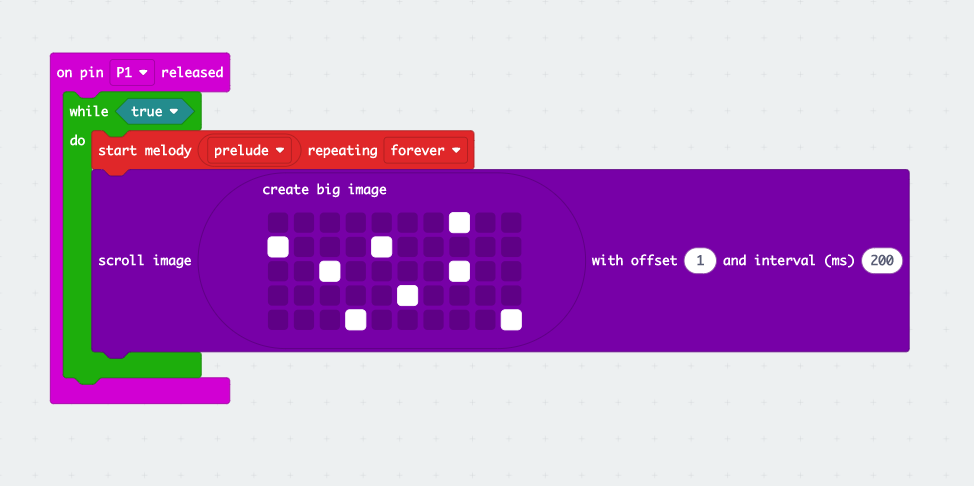
You can pick any melody you like from the start melody dropdown menu.
- Connect the micro:bit to your computer using the micro USB cable.
- Upload the code to the micro:bit.
2. Prepare the micro:bit.
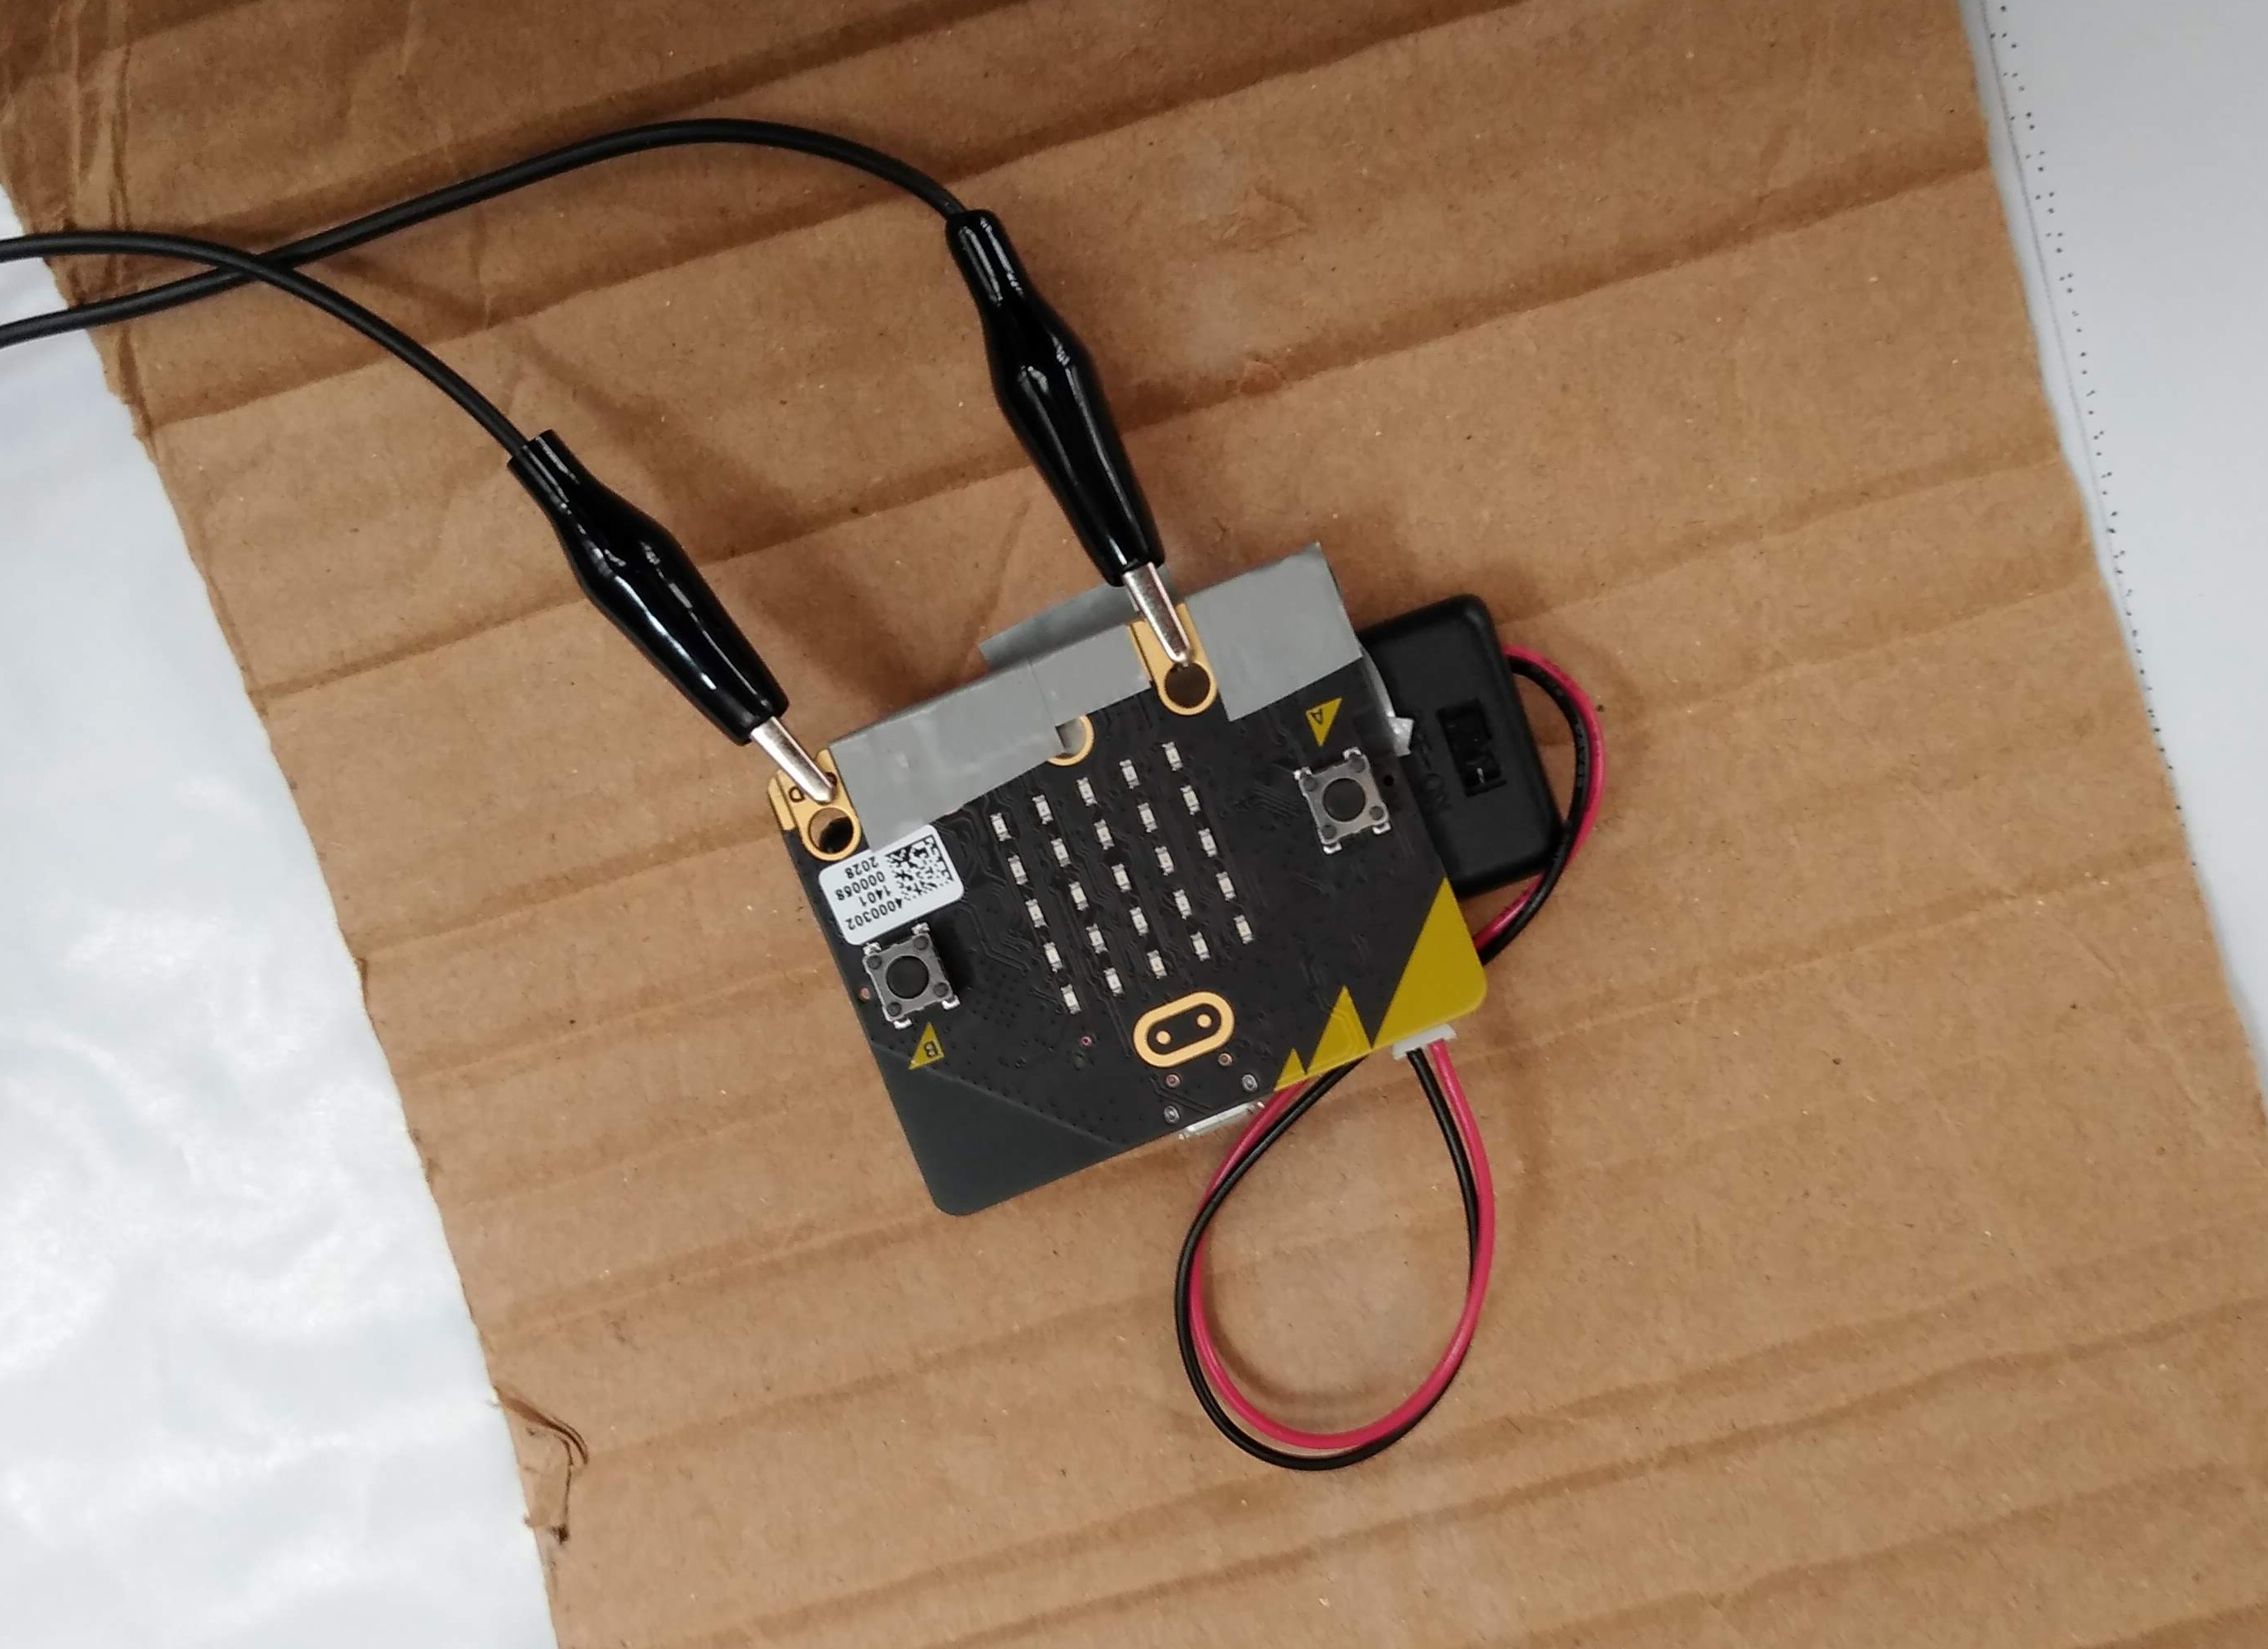
- Using some electrical tape, cover all the micro:bit’s contacts except 1 and GND. This is to stop the crocodile clips from making contact with the wrong contacts.
- Connect the battery pack to the micto:bit.
- Connect a crocodile lead from 1 to GND. Don’t push the clips all the way so that they grip on the contact’s hole. The idea is to keep the slightly loose so that they come off easily enough when the cracker is pulled.
At this point, you can test your progress. Ensuring that the battery pack is switched on, pull the crocodile lead off from the micro:bit’s contacts. This should start playing the melody and animation.
3. Assemble the cracker
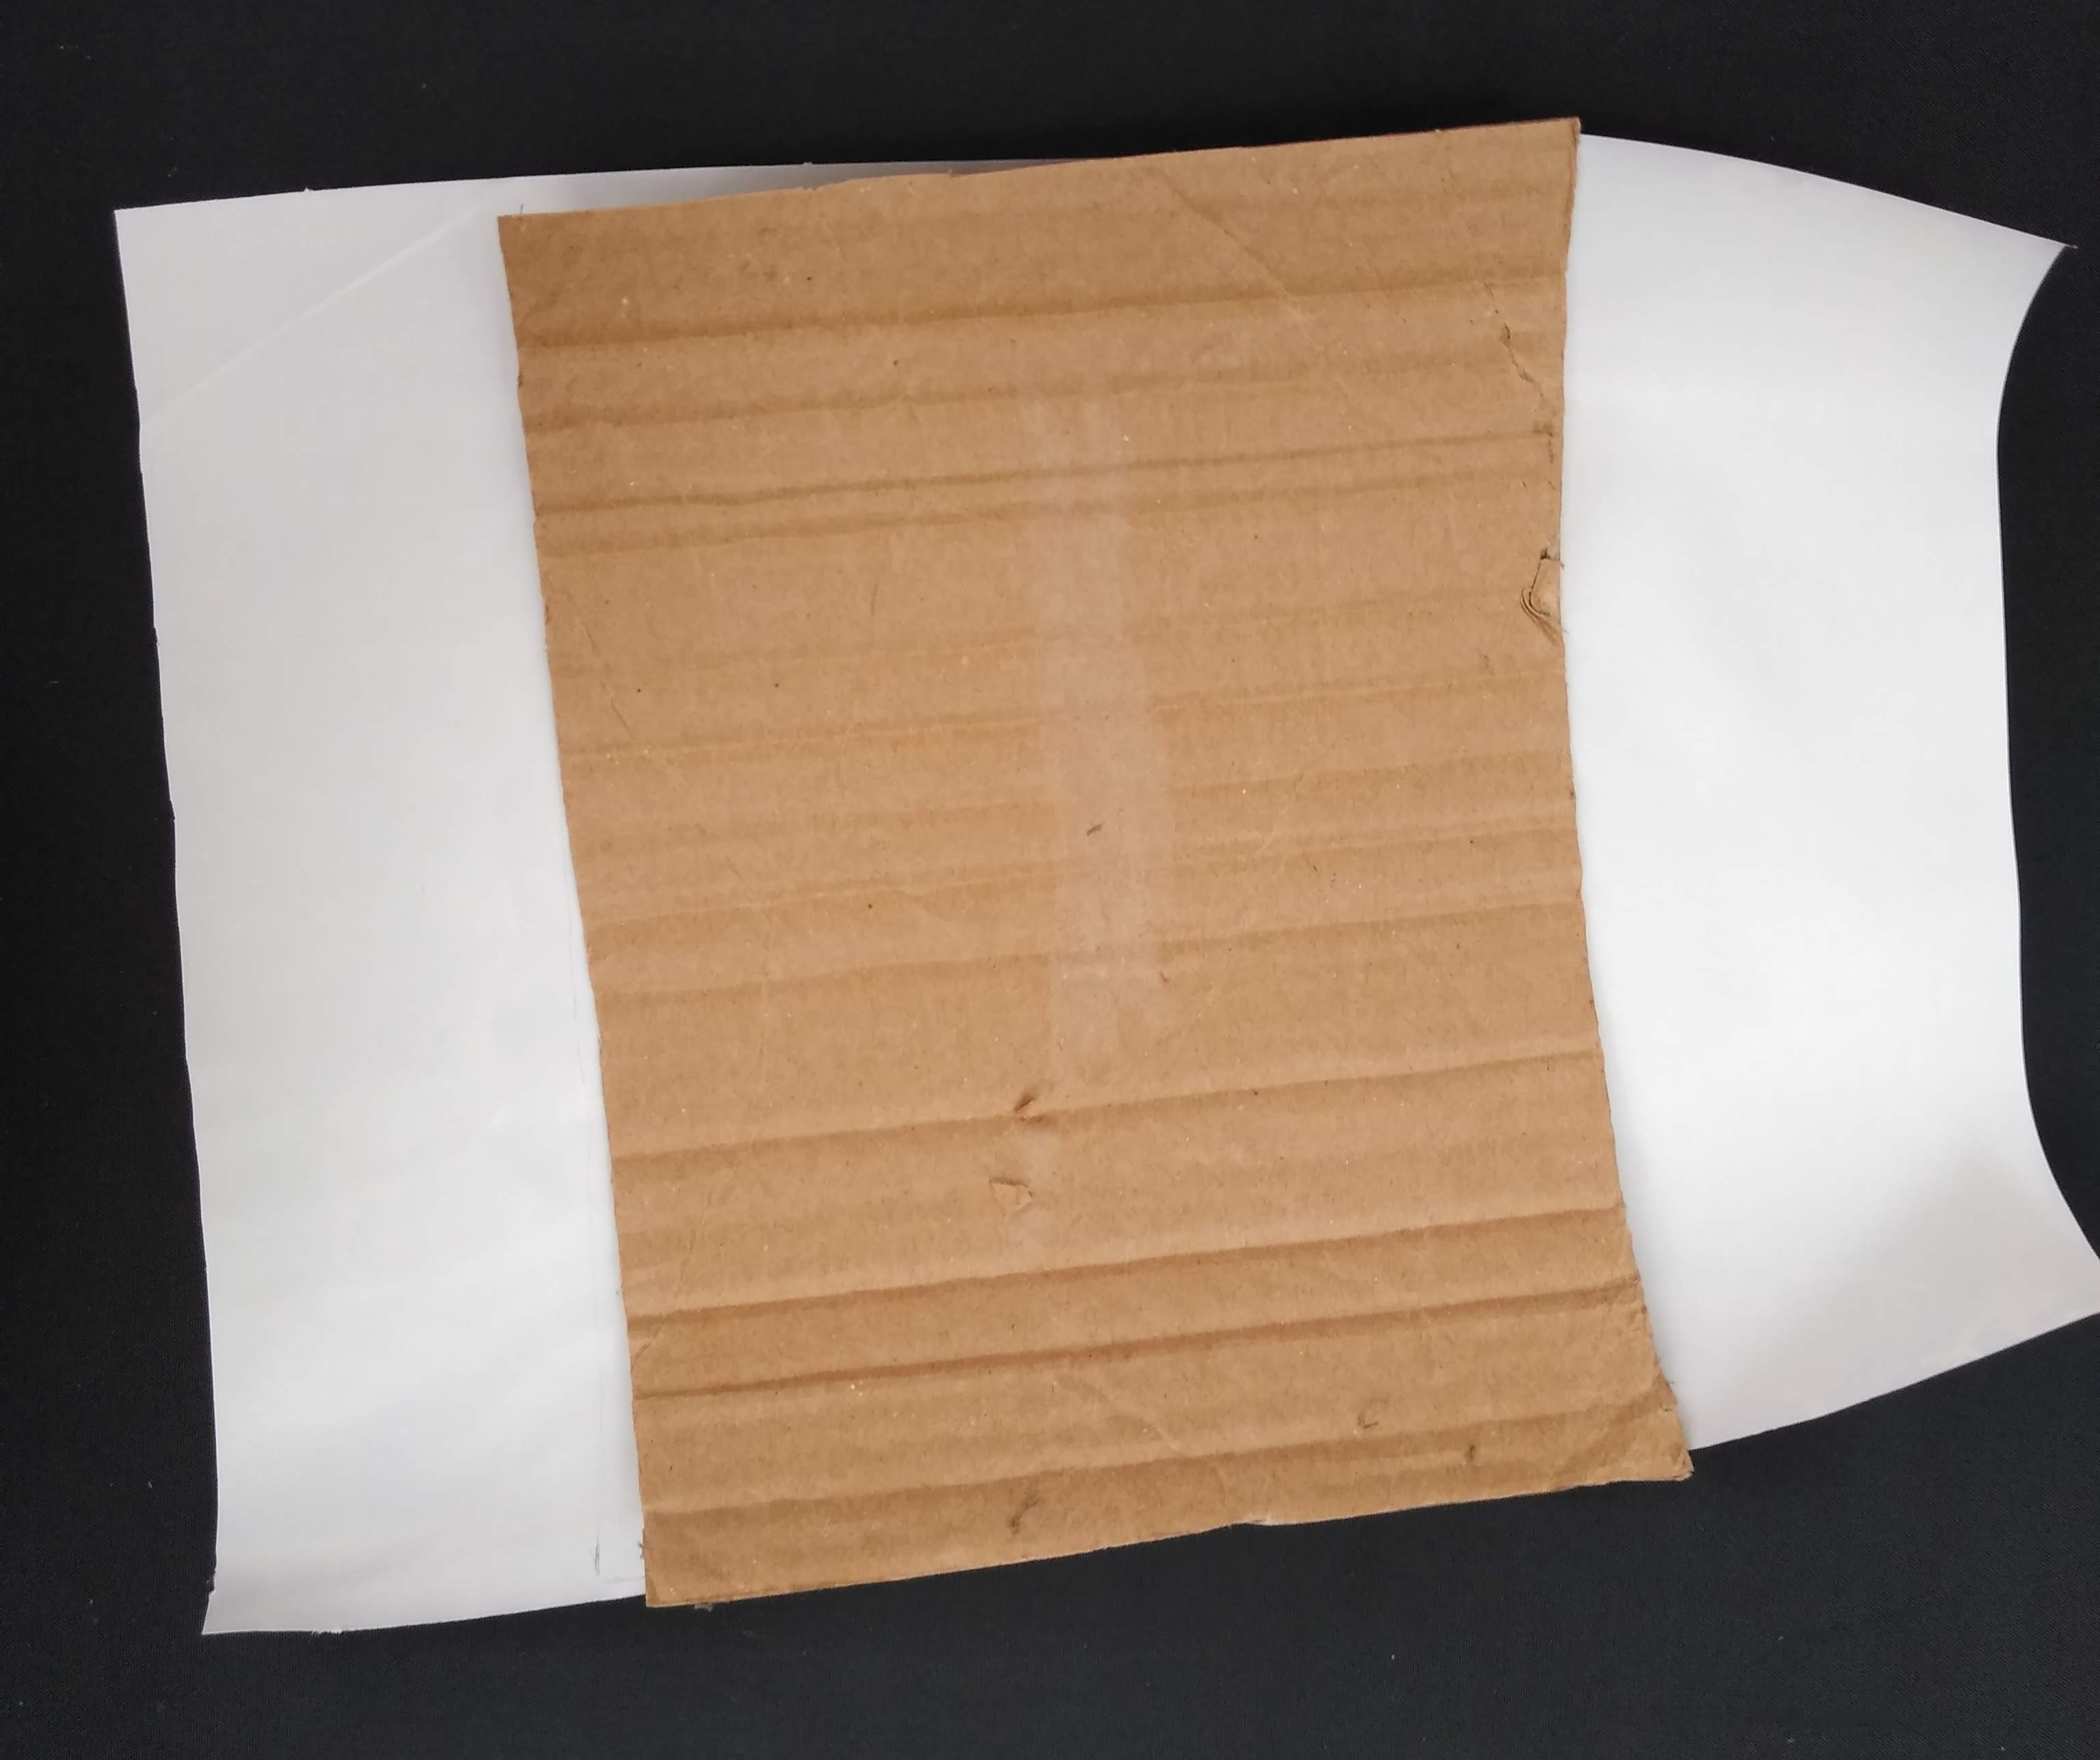
- Cut a piece of cardboard that’s big enough to make the body of the cracker. It should be able to fit the micro:bit and battery pack inside it.
- Cut a piece of wrapping paper that is the same height as the piece of cardboard and wide enough to cater for the pulling ends of the cracker.
- Centre the cardboard on top of the wrapping paper and with a pencil, mark its position.
- Use a needle, compass pin etc.. to score small holes all over the lines that you just marked. These will be necessary for the cracker to rip open when pulled.

- Attach the battery pack and micro:bit to the card using electrical tape. Ensure it is secured enough to hold it in place when the cracker is pulled.
- Attach the crocodile lead to one of the pulling ends of the cracker using electrical tape.
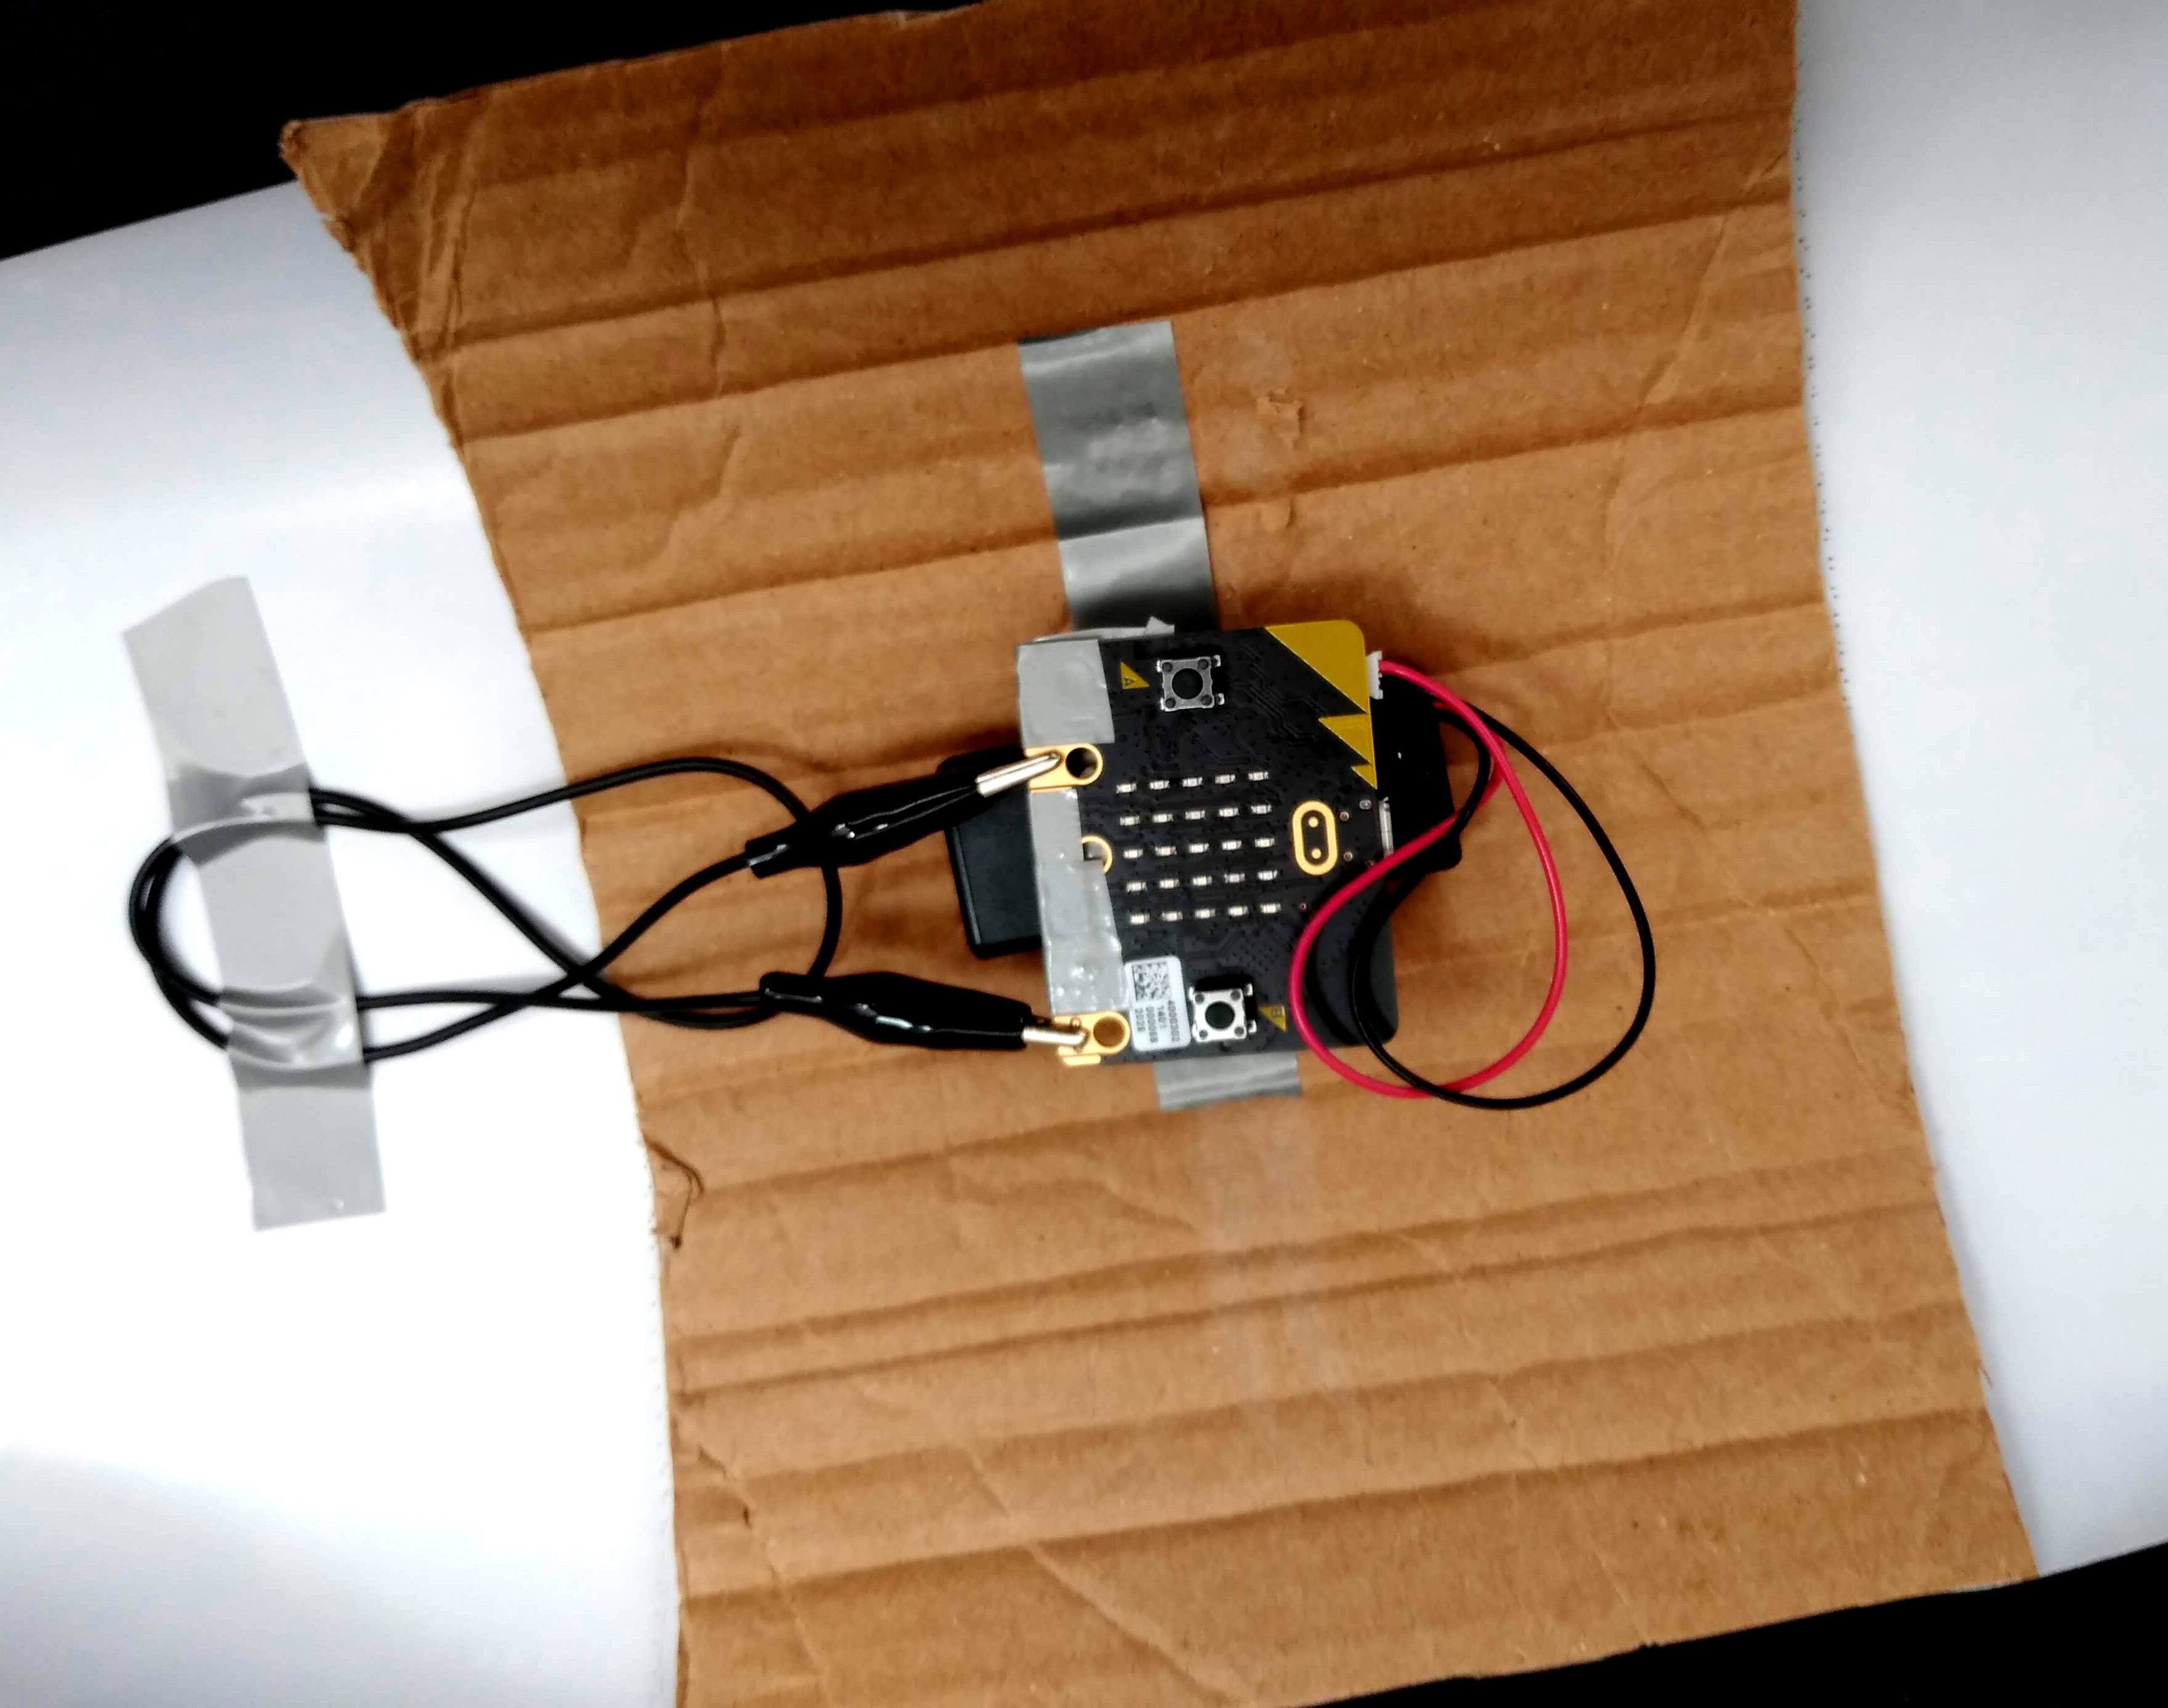
- Ensure the battery pack is switched on!
- Roll the cracker and secure it with sticky tape.
- Bunch up the ends of the cracker and tie them with string. You should do this carefully to avoid ripping the wrapping paper as you tighten.

That’s it! Now you’re ready to start cooking lunch.
You can find more information and resources for your micro:bit here: https://microbit.org/
Like what you read? Why not show your appreciation by giving some love.
From a quick tap to smashing that love button and show how much you enjoyed this project.

