In this project you will turn your Pi into a print server that can add Wifi capability to a USB printer so that other computers whether Windows, Mac or Linux, can print from it wirelessly.
1. Get your Pi ready
- You should start with a switched-on Raspberry Pi connected to mouse, keyboard and monitor, you can learn here how to do it using an Okdo Pi kit
- Ensure that you have the latest version of Raspbian installed on your Pi. You can learn here how to do it using a micro SD card.
2. Network settings
- In the Main menu select Preferences > Raspberry Pi Configuration, in the System Tab change the Hostname. This project used “pi-printer” but you can choose your own name. Reboot when requested.
3. Install CUPS
- CUPS is the application that controls network printing in Linux. Install it by opening Terminal from the top menu on the PI and typing the command shown below after the $ and pressing Return
sudo apt install cups- Terminal will run its process, when it finishes, it will ask your permission to continue. When prompted type Y and press Return
4. Install Samba
- Samba is a file sharing service that makes printers available to Windows PC’s. Install it by typing the following command in the Terminal window and pressing Return
sudo apt install samba- Terminal will run its process, when it finishes, it will ask your permission to continue. When prompted type Y and press Return
5. Add user
- Add pi user to printer admin group by typing the following command in the Terminal window and pressing Return
sudo usermod -aG lpadmin pi- Terminal will run its process, when it finishes, it will ask your permission to modify smb.conf, select Yes by using the keyboard’s cursor arrows and press Return.
6. Connect printer
- Connect your Pi to the printer with a USB cable and switch it on
- Type the following command in the Terminal window
lsusb- Terminal will run its process. The printer manufacturer should be visible in the listing displayed in Terminal
7. Configure CUPS
- Open Chromium on your Pi and enter 127.0.0.1:631 in the search box. This will open the CUPS configuration pages for setting up your printer.

- Click on the Administration tab
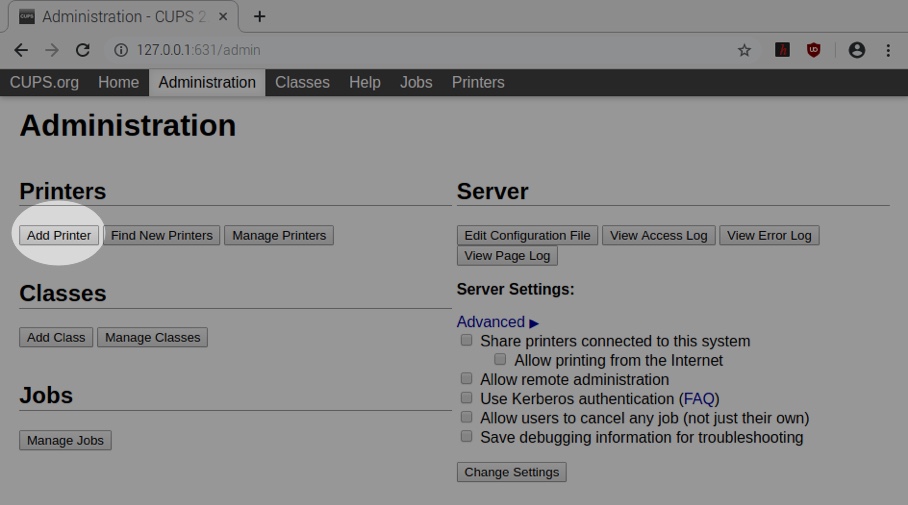
- Click on Add Printer, you’ll be prompted with a login window.
- Enter your user name and password. If you haven’t changed the user name in your Pi’s configuration, it will be pi
- The available printers will be displayed
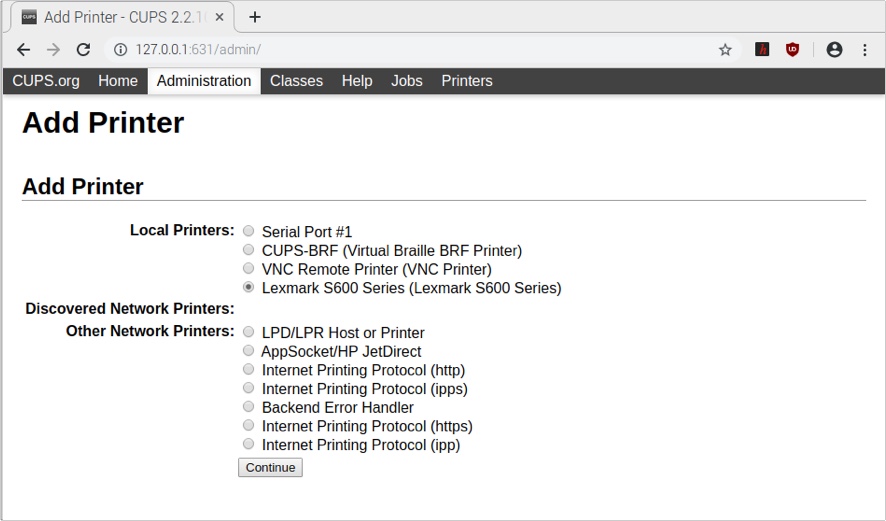
- Select your printer from the options, and press Continue
- Optionally rename your printer and give it a description and location
Use a printer name that is easy to remember, is short and does not contain any spaces or special characters. It will be case sensitive.
- Tick Share this printer and click continue
- On the following page select your printer model and click Add Printer
Most common printers are listed but if yours is not, the manufacturer may supply an open source driver or a PPD file, or try searching on-line for information about your particular model
- Set up your default options, these will vary between different printer models
- Click Set Default Options, this will take you to the printer’s page
- From the Maintenance dropdown menu select Print Test Page
You should now be able to print documents on your Pi 4 to the attached printer
8. Share the printer
- Click on the Administration tab and click the Share printers connected to this system checkbox in the Advanced section.
- Click Change Settings, the cups server will restart with the printer being shared with other computers
At this stage, you’re ready to print from a Mac connected to the same network. Simply select your printer from the Printer dropdown in the print menu.
9. Windows 10 set up
- Type Printers into the Windows Search Box to open the Add Printers & Scanners screen.
- Click on Add a printer or scanner and allow the system to search for new printers. After a few seconds the message The printer that I want isn’t listed will be shown
If your printer does appear during the search please ignore it.
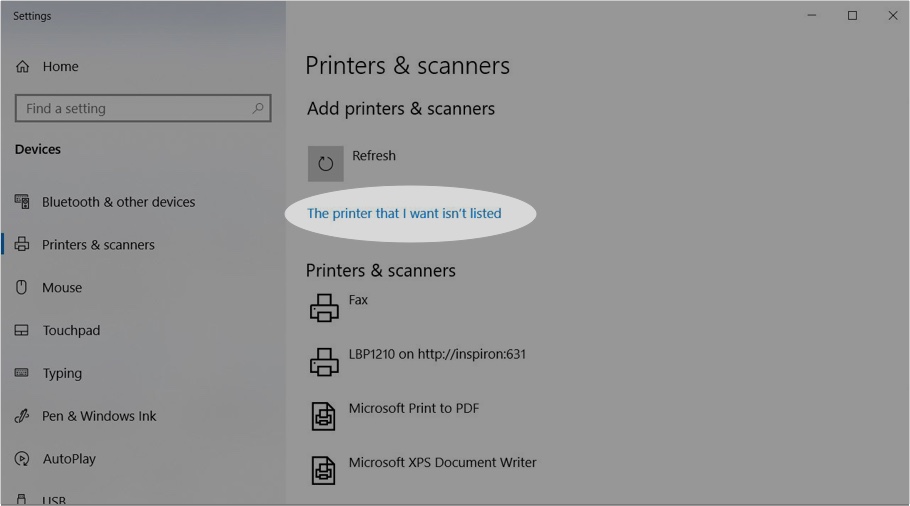
- Click on the message and a dialogue box will open. Click Select a shared printer by name option and enter the URL for your shared printer. The first part is the hostname of your Pi 4 (pi-printer in this example) and the CUPS port (the default is 631) followed by “printers”, followed by the name of the printer (LEXMARK in the example below)
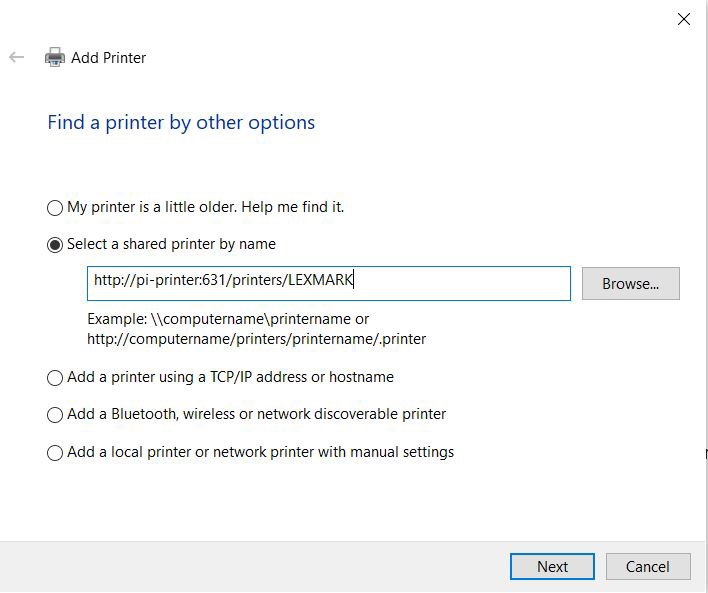
- Click Next, Windows will connect to the printer and open the Add Printer Wizard.
Select the Generic / Text Only printer to start with. This will be changed later on.

- Click OK and Next which will open another dialogue showing that the printer has been setup.
- Select Finish
Don’t try to do a test print at this stage – you need to update the driver
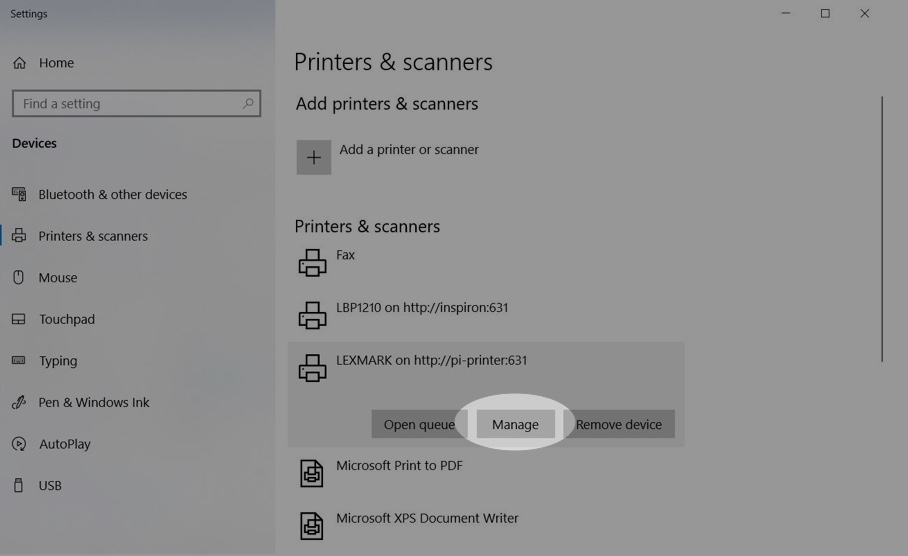
- You should now see the printer listed in your Printers & Scanners configuration.
- Select your printer from the list and select Manage
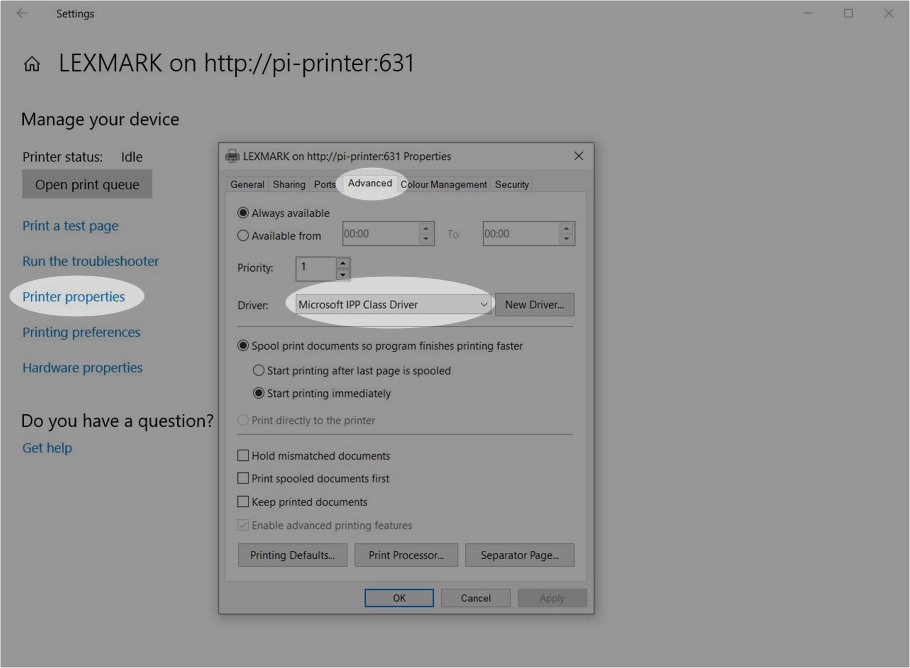
- Click on Printer properties and the Advanced tab
- Change the driver to Microsoft IPP Class Driver in the drop down menu
- Click Apply
- Select the General tab and click Preferences / Advanced
- Set the default paper size for your printer, then press OK
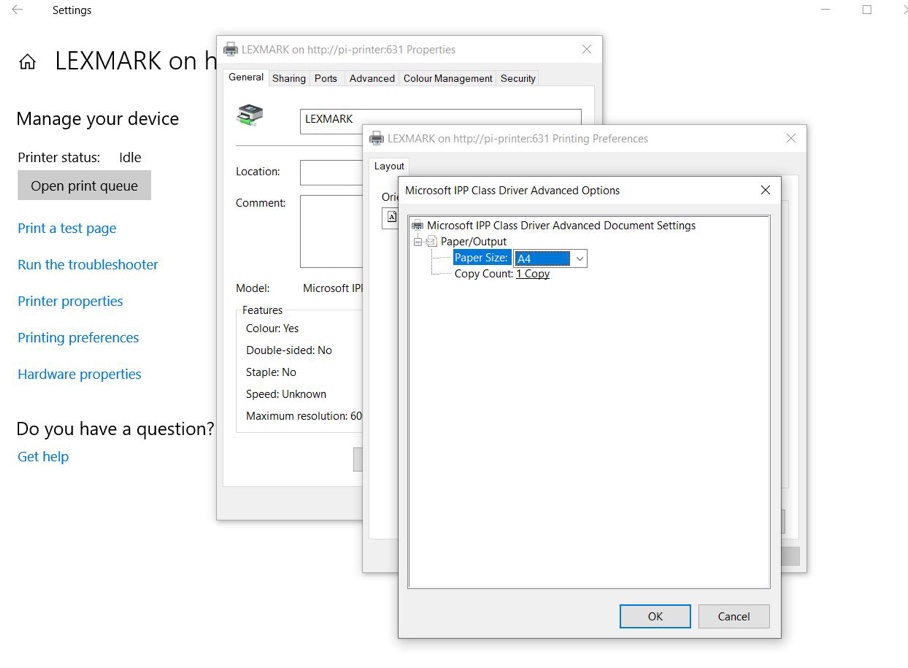
You should now be able to print a test page from the remote printer attached to the Pi
10. Make your Pi headless (optional)
Now that everything is setup for remote printing you can remove the keyboard and monitor to turn your Pi 4 into a “Headless” print server and locate it somewhere convenient.
- On the Pi select Preferences > Raspberry Pi Configuration and in the Interfaces tab select Enable SSH. Now you will be able to safely shutdown your print server from the command line of your Windows PC.
- On the Windows PC, open a command window by typing command in the search box and login to the Pi 4 using ssh with the following command:
ssh pi@pi-printer- Enter the password for your Pi when prompted
- Execute the power off with the following command:
sudo poweroff- When the yellow network LED on the Pi has finished flashing it is safe to power it off
You should now have a networked printer connected to your Pi that can be accessed by any computer connected to your network. The Monitor and Keyboard can be disconnected and the printer located in a convenient position as it now uses wifi to connect to the network.
Like what you read? Why not show your appreciation by giving some love.
From a quick tap to smashing that love button and show how much you enjoyed this project.

