Cycle happily into the night with this micro:bit cycle lights T-shirt that will switch itself on when ambient light levels decrease.
This project is meant as a complement to traditional cycle lights. Always ensure that you use proper bicycle lights when cycling in the dark.
1. Prepare the T-shirt
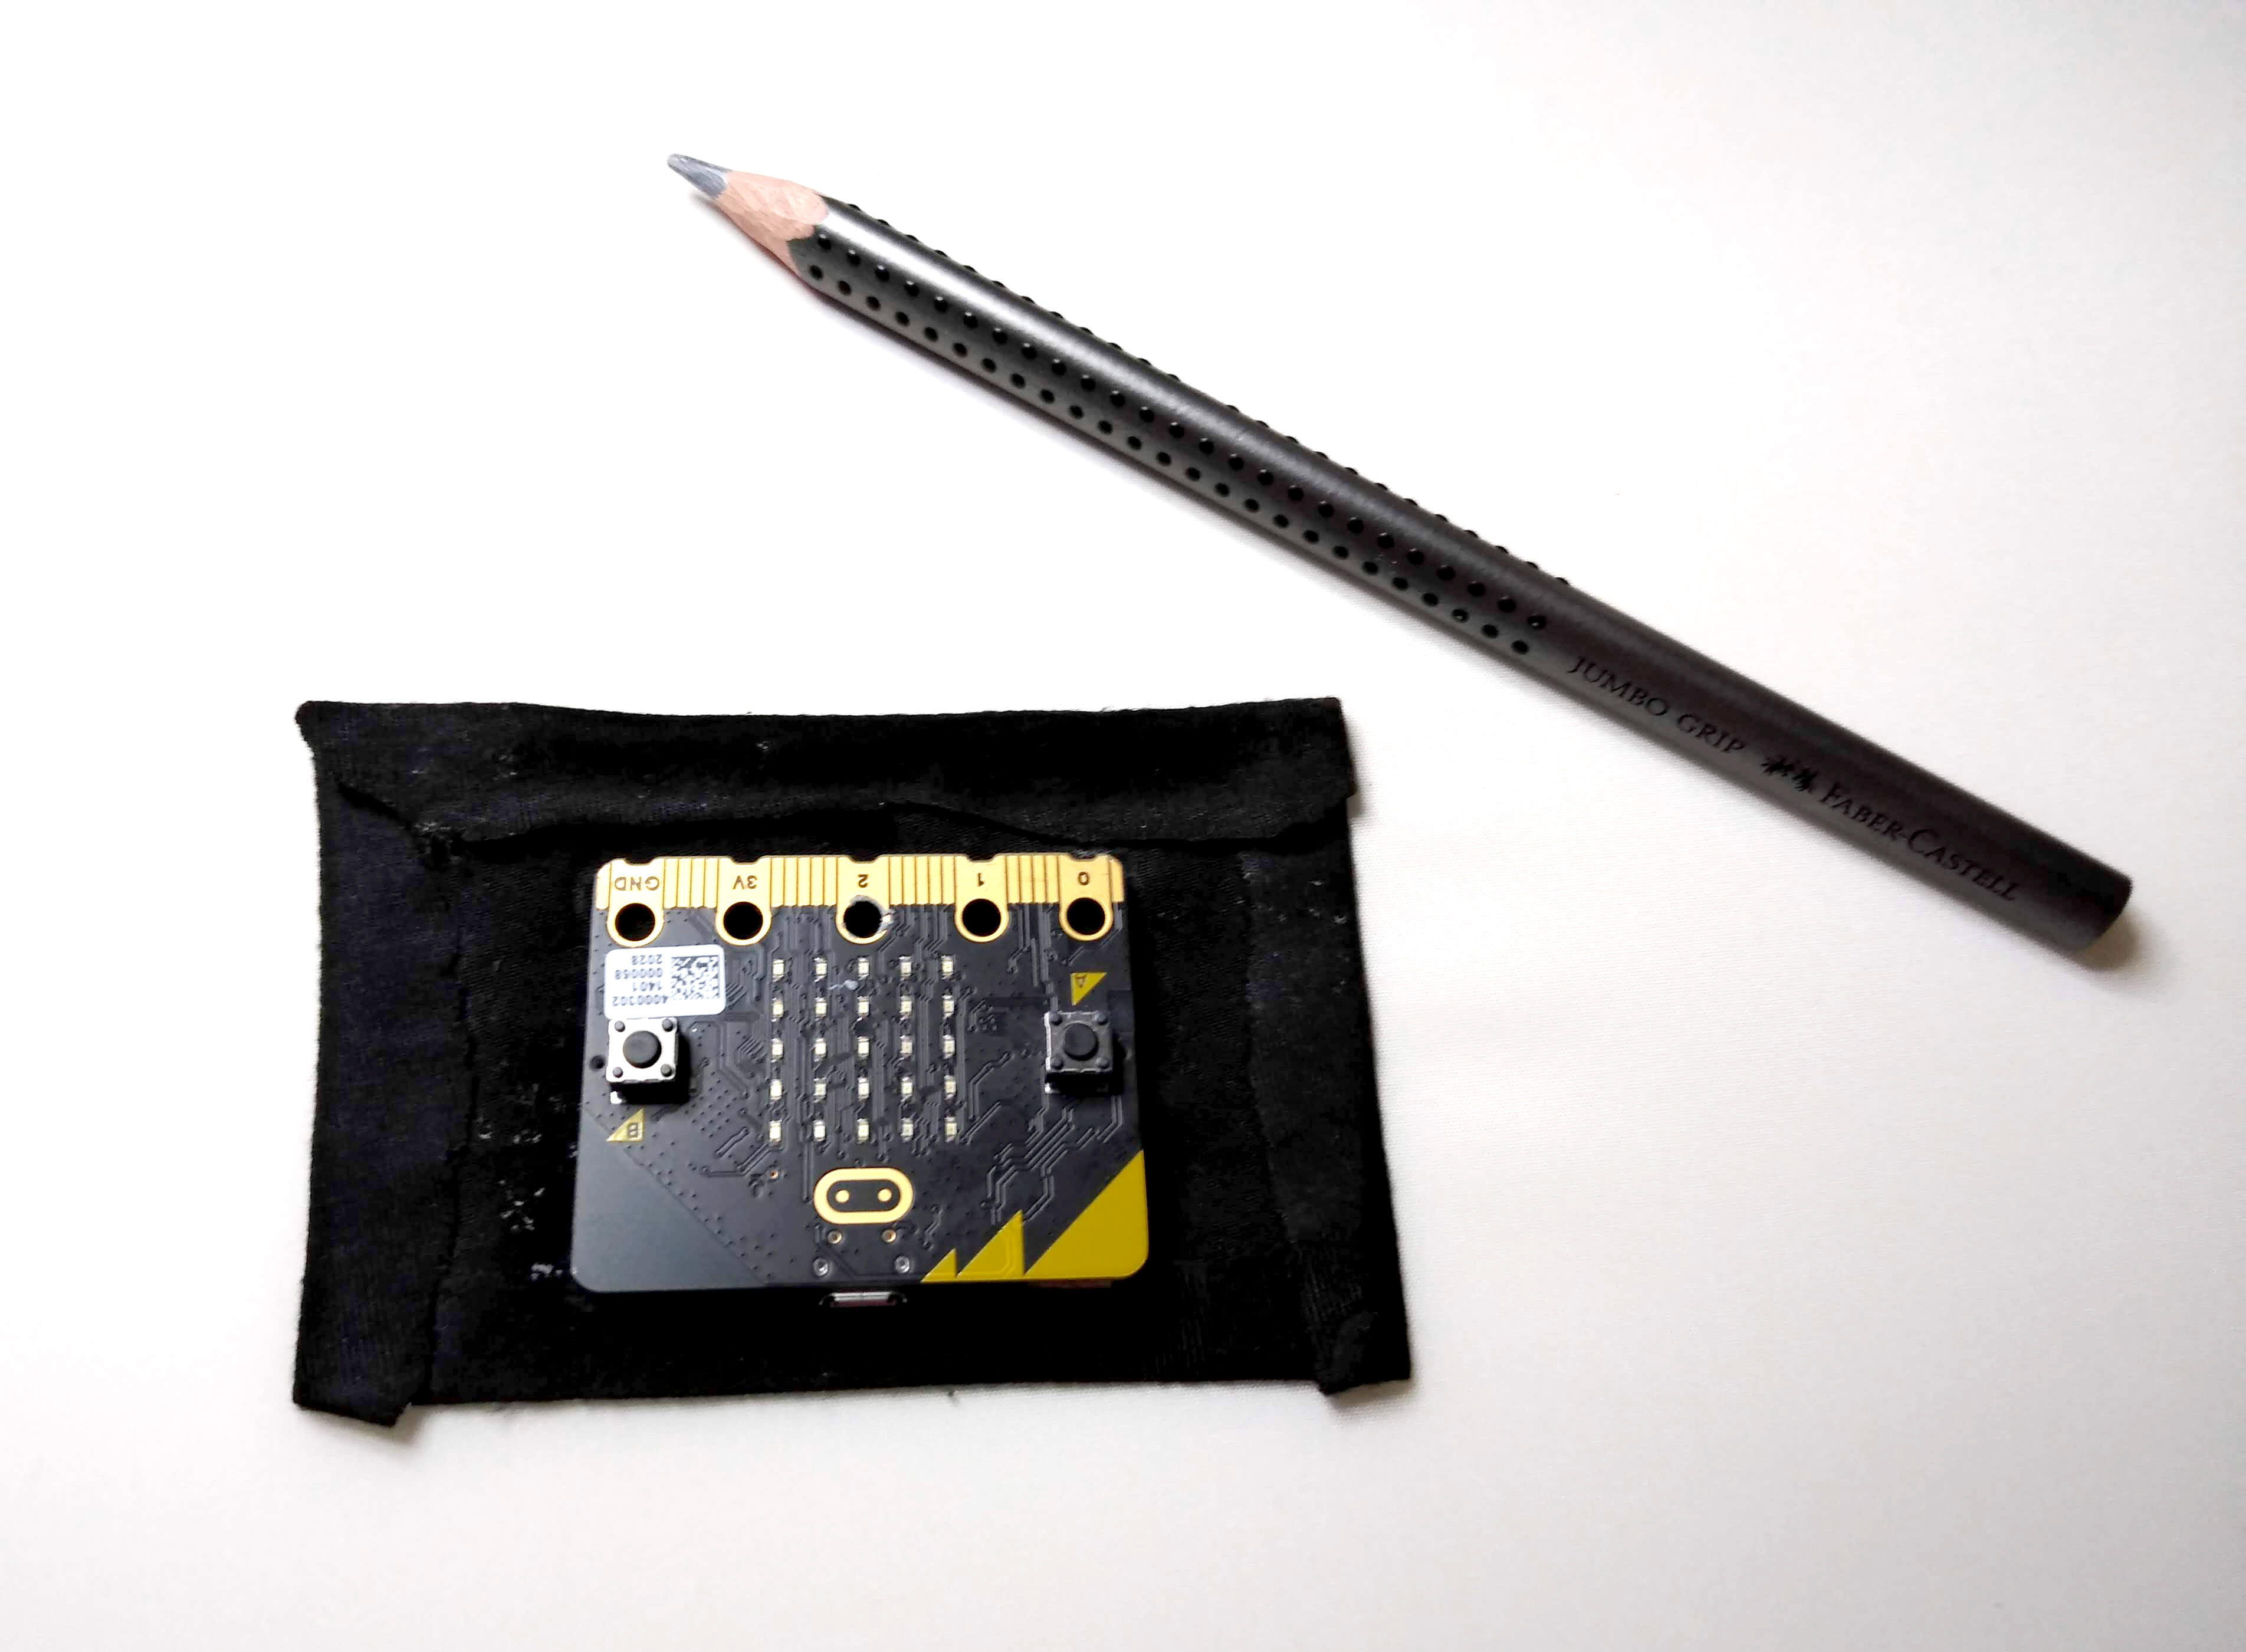
Prepare the T-shirt by fitting it with a small pocket that will house the micro:bit and battery pack. It’s best to use a piece of fabric with some elasticity so that the pocket’s contents are held securely in place. We used a piece from an old t-shirt.
- Cut out a piece of fabric large enough to make a pocket that will hold the micro:bit and battery pack tightly. The exact dimensions will depend on the elasticity of the material you use. We used an 11x10cm piece of t-shirt fabric. Ensure that you allow enough extra material around the edges to fold and sew securely to the T-shirt. If in doubt make the piece larger than you’ll need as you can always trim it later.
- Fold approximately 1cm from the bottom edge of the fabric to create a straight line and iron it to retain the fold.
- Repeat the process with the 3 remaining sides so that you end up with a rectangular shape.
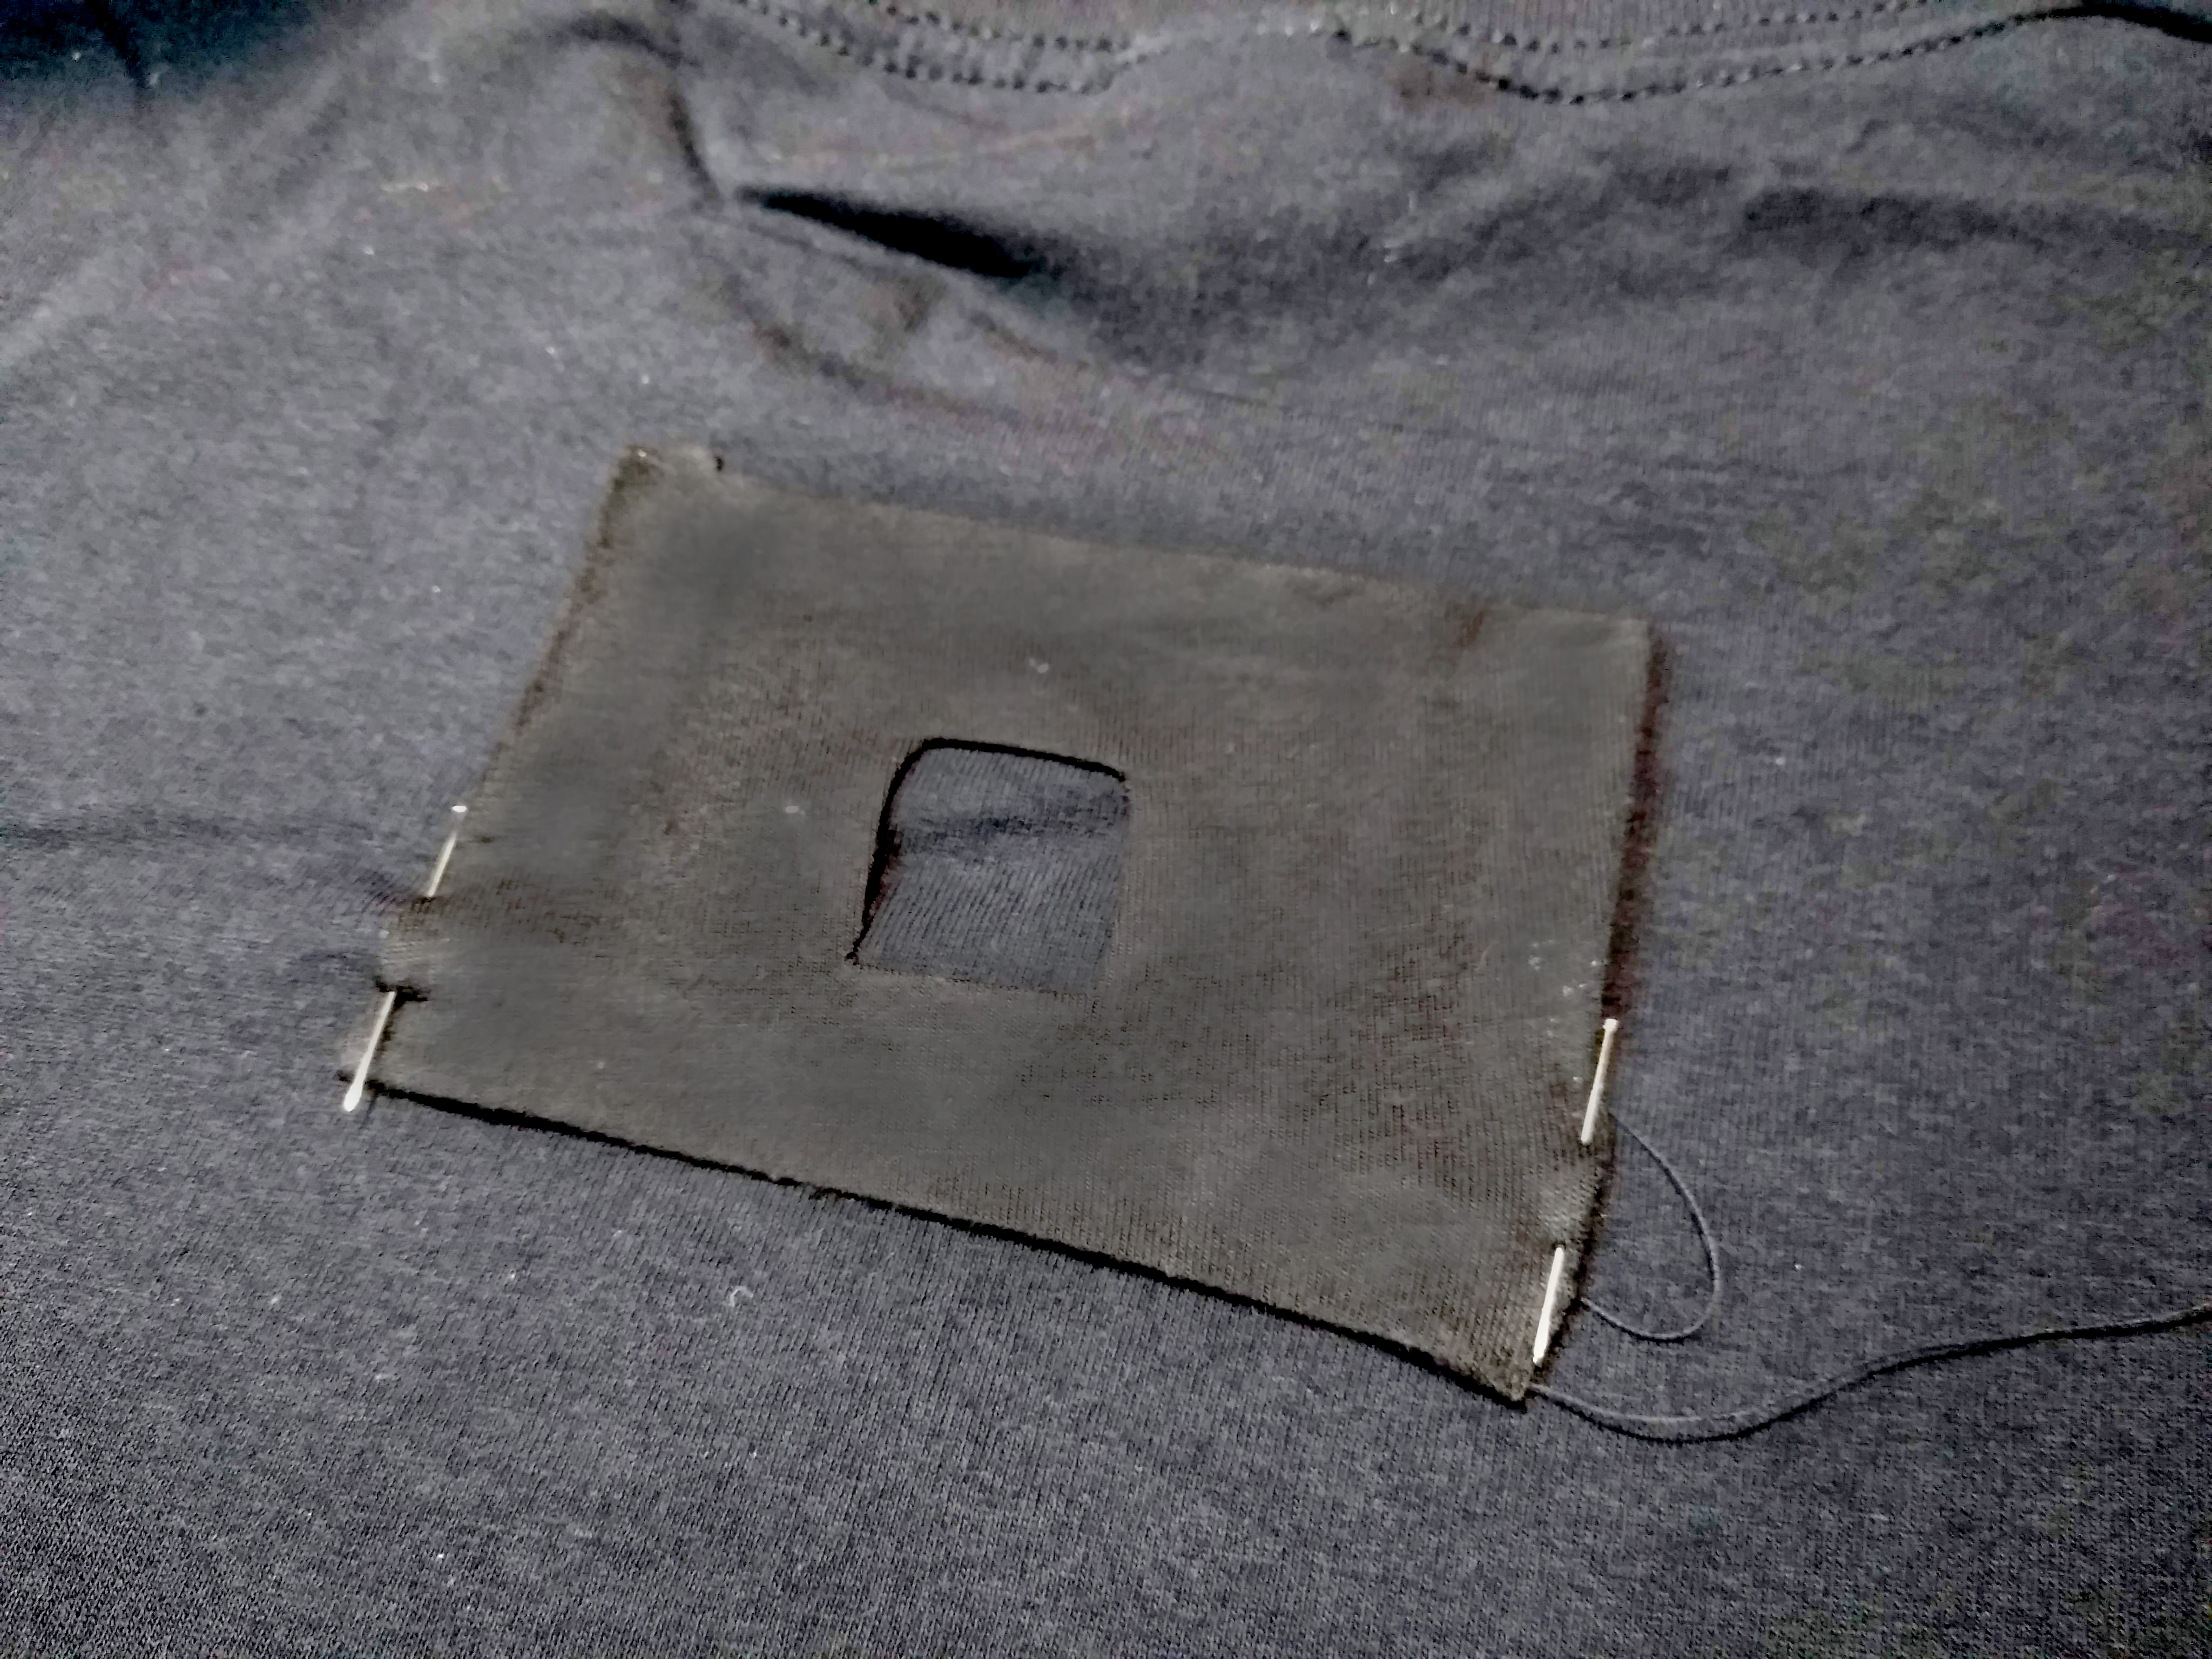
- Place the micro:bit centring it on top of the fabric and mark its position using a soft pencil.
- Mark a 2x2cm square in the position where the micro:bit’s LED matrix will sit.
- Mark the diagonals of the square and cut through them.
- Fold the triangular flaps to form a square window and iron them down to fix them into place.
- Stitch the triangular flaps into position to keep the window open.
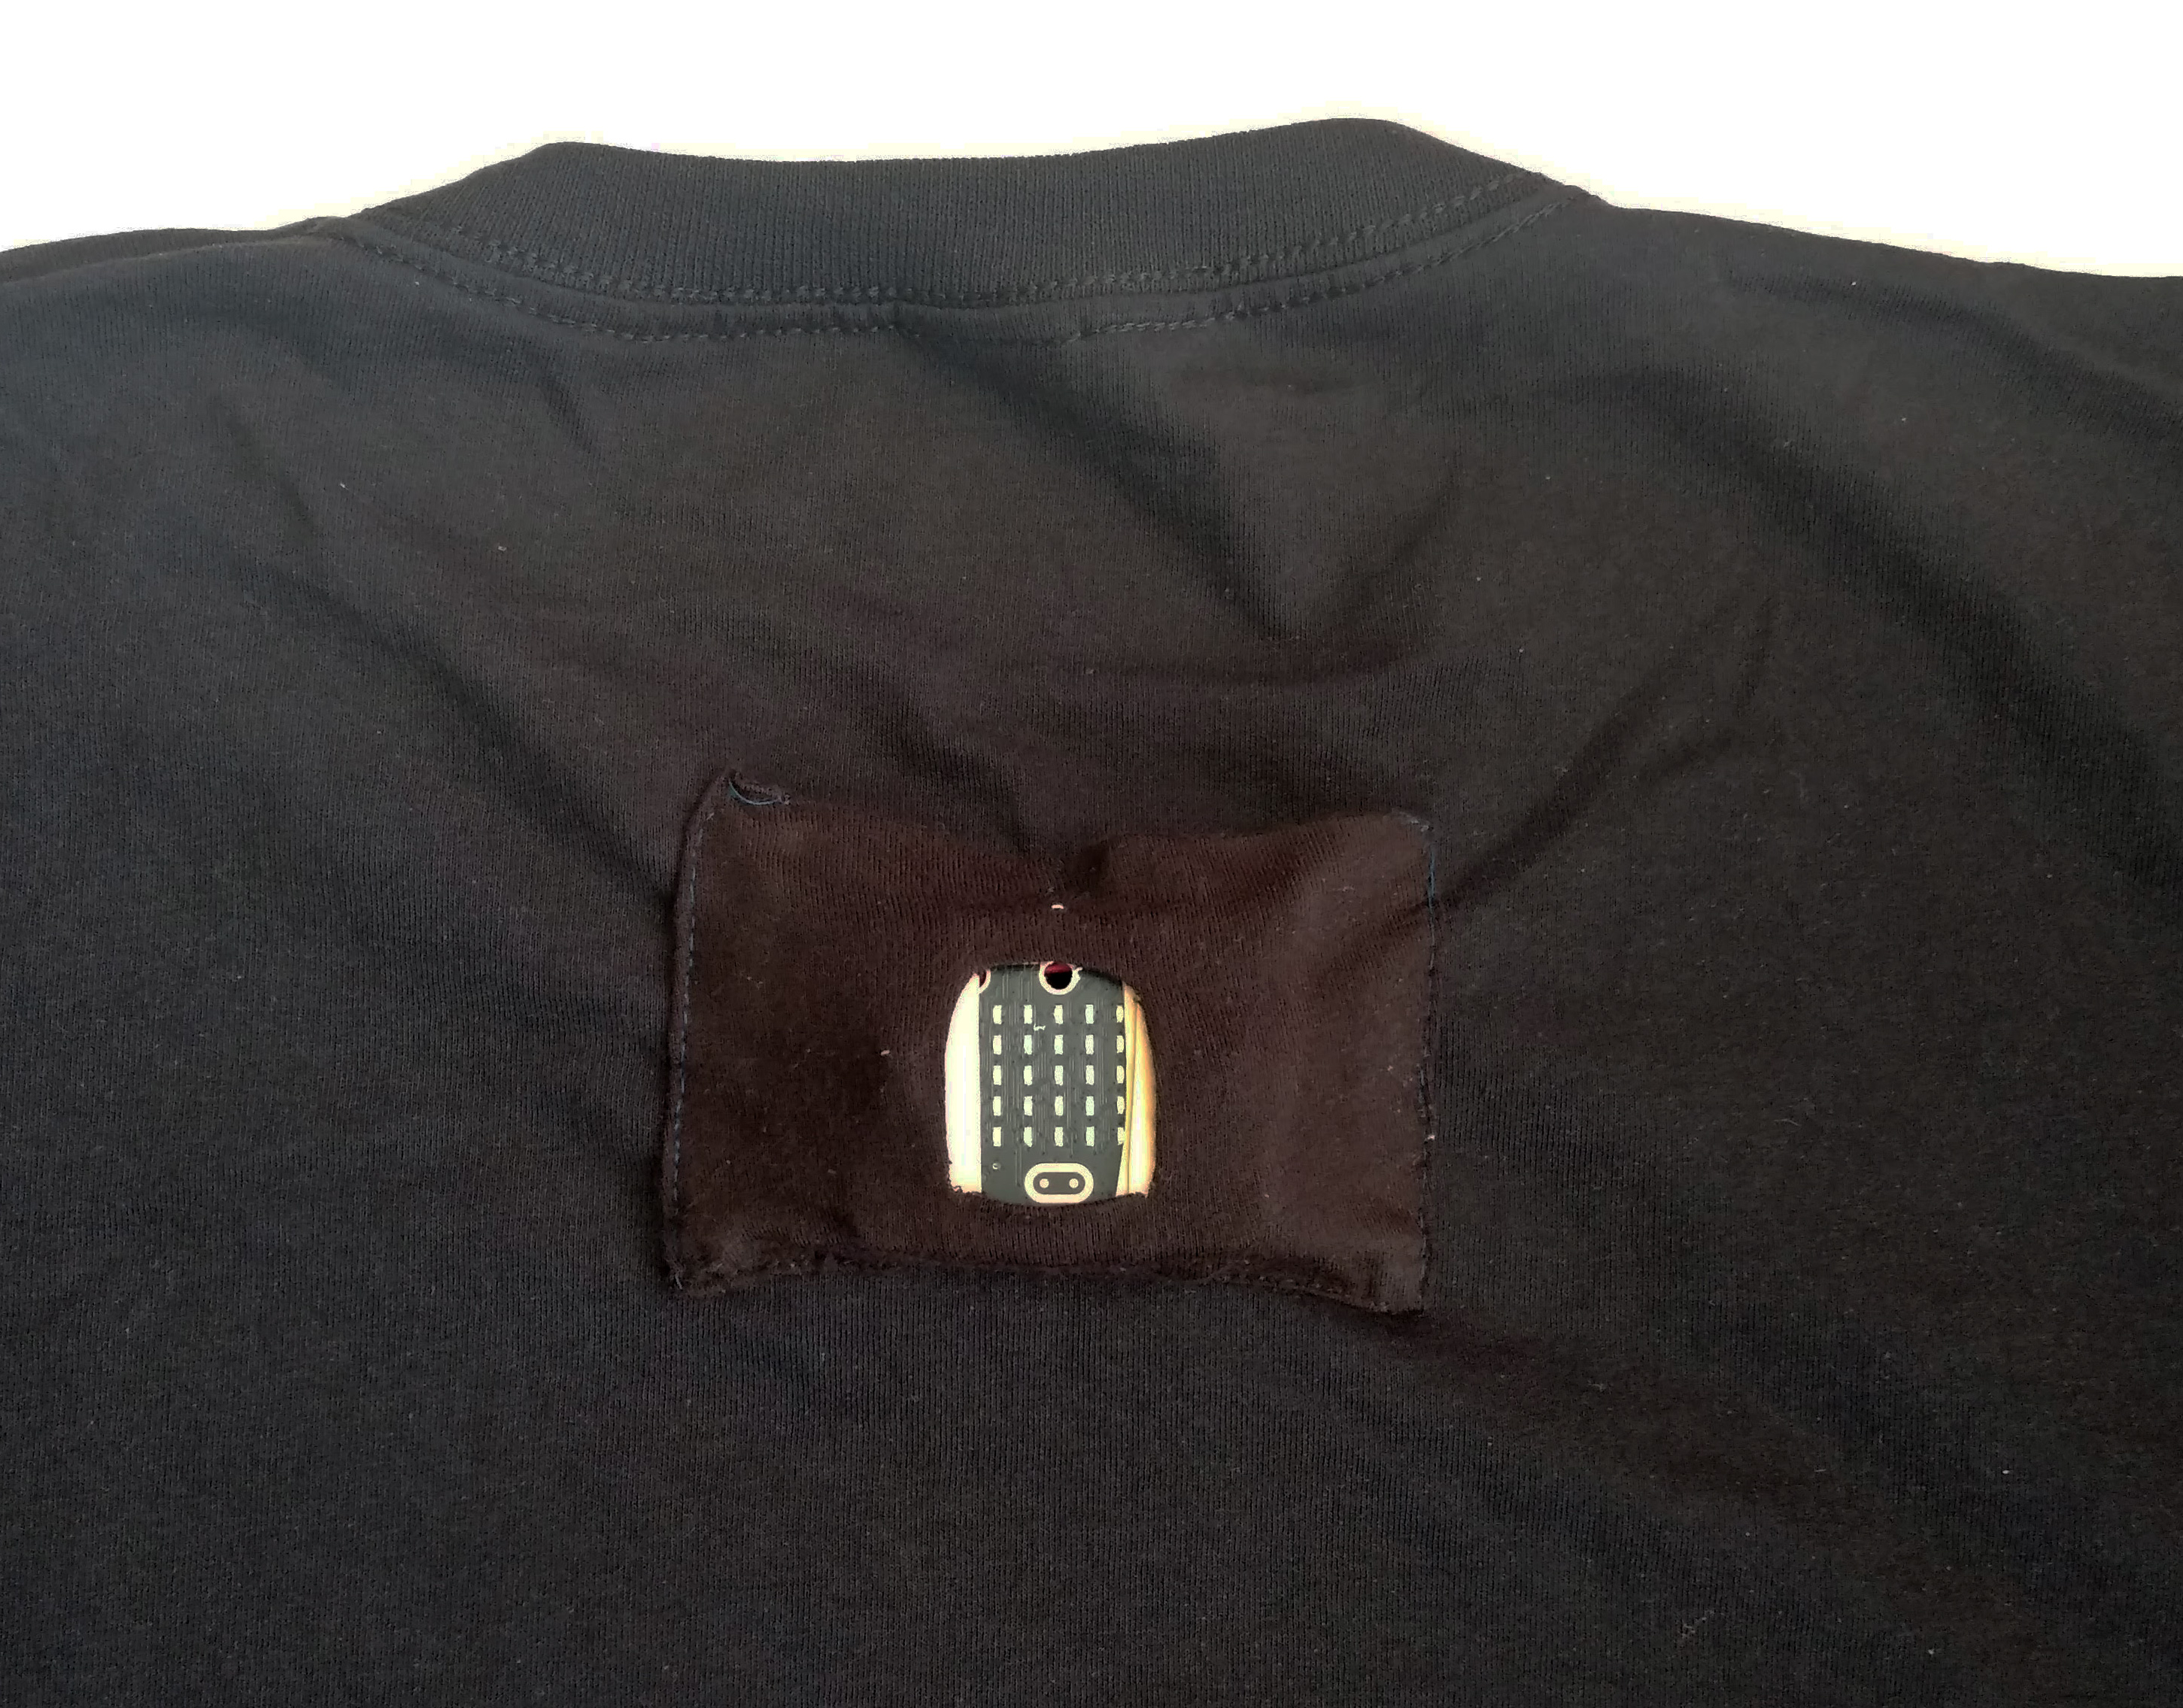
- Place the fabric with the folded parts against the T-shirt on the back of the T-shirt. Position it horizontally centred between the shoulder blades and secure it with pins.
- Stitch the bottom edge to the T-shirt.
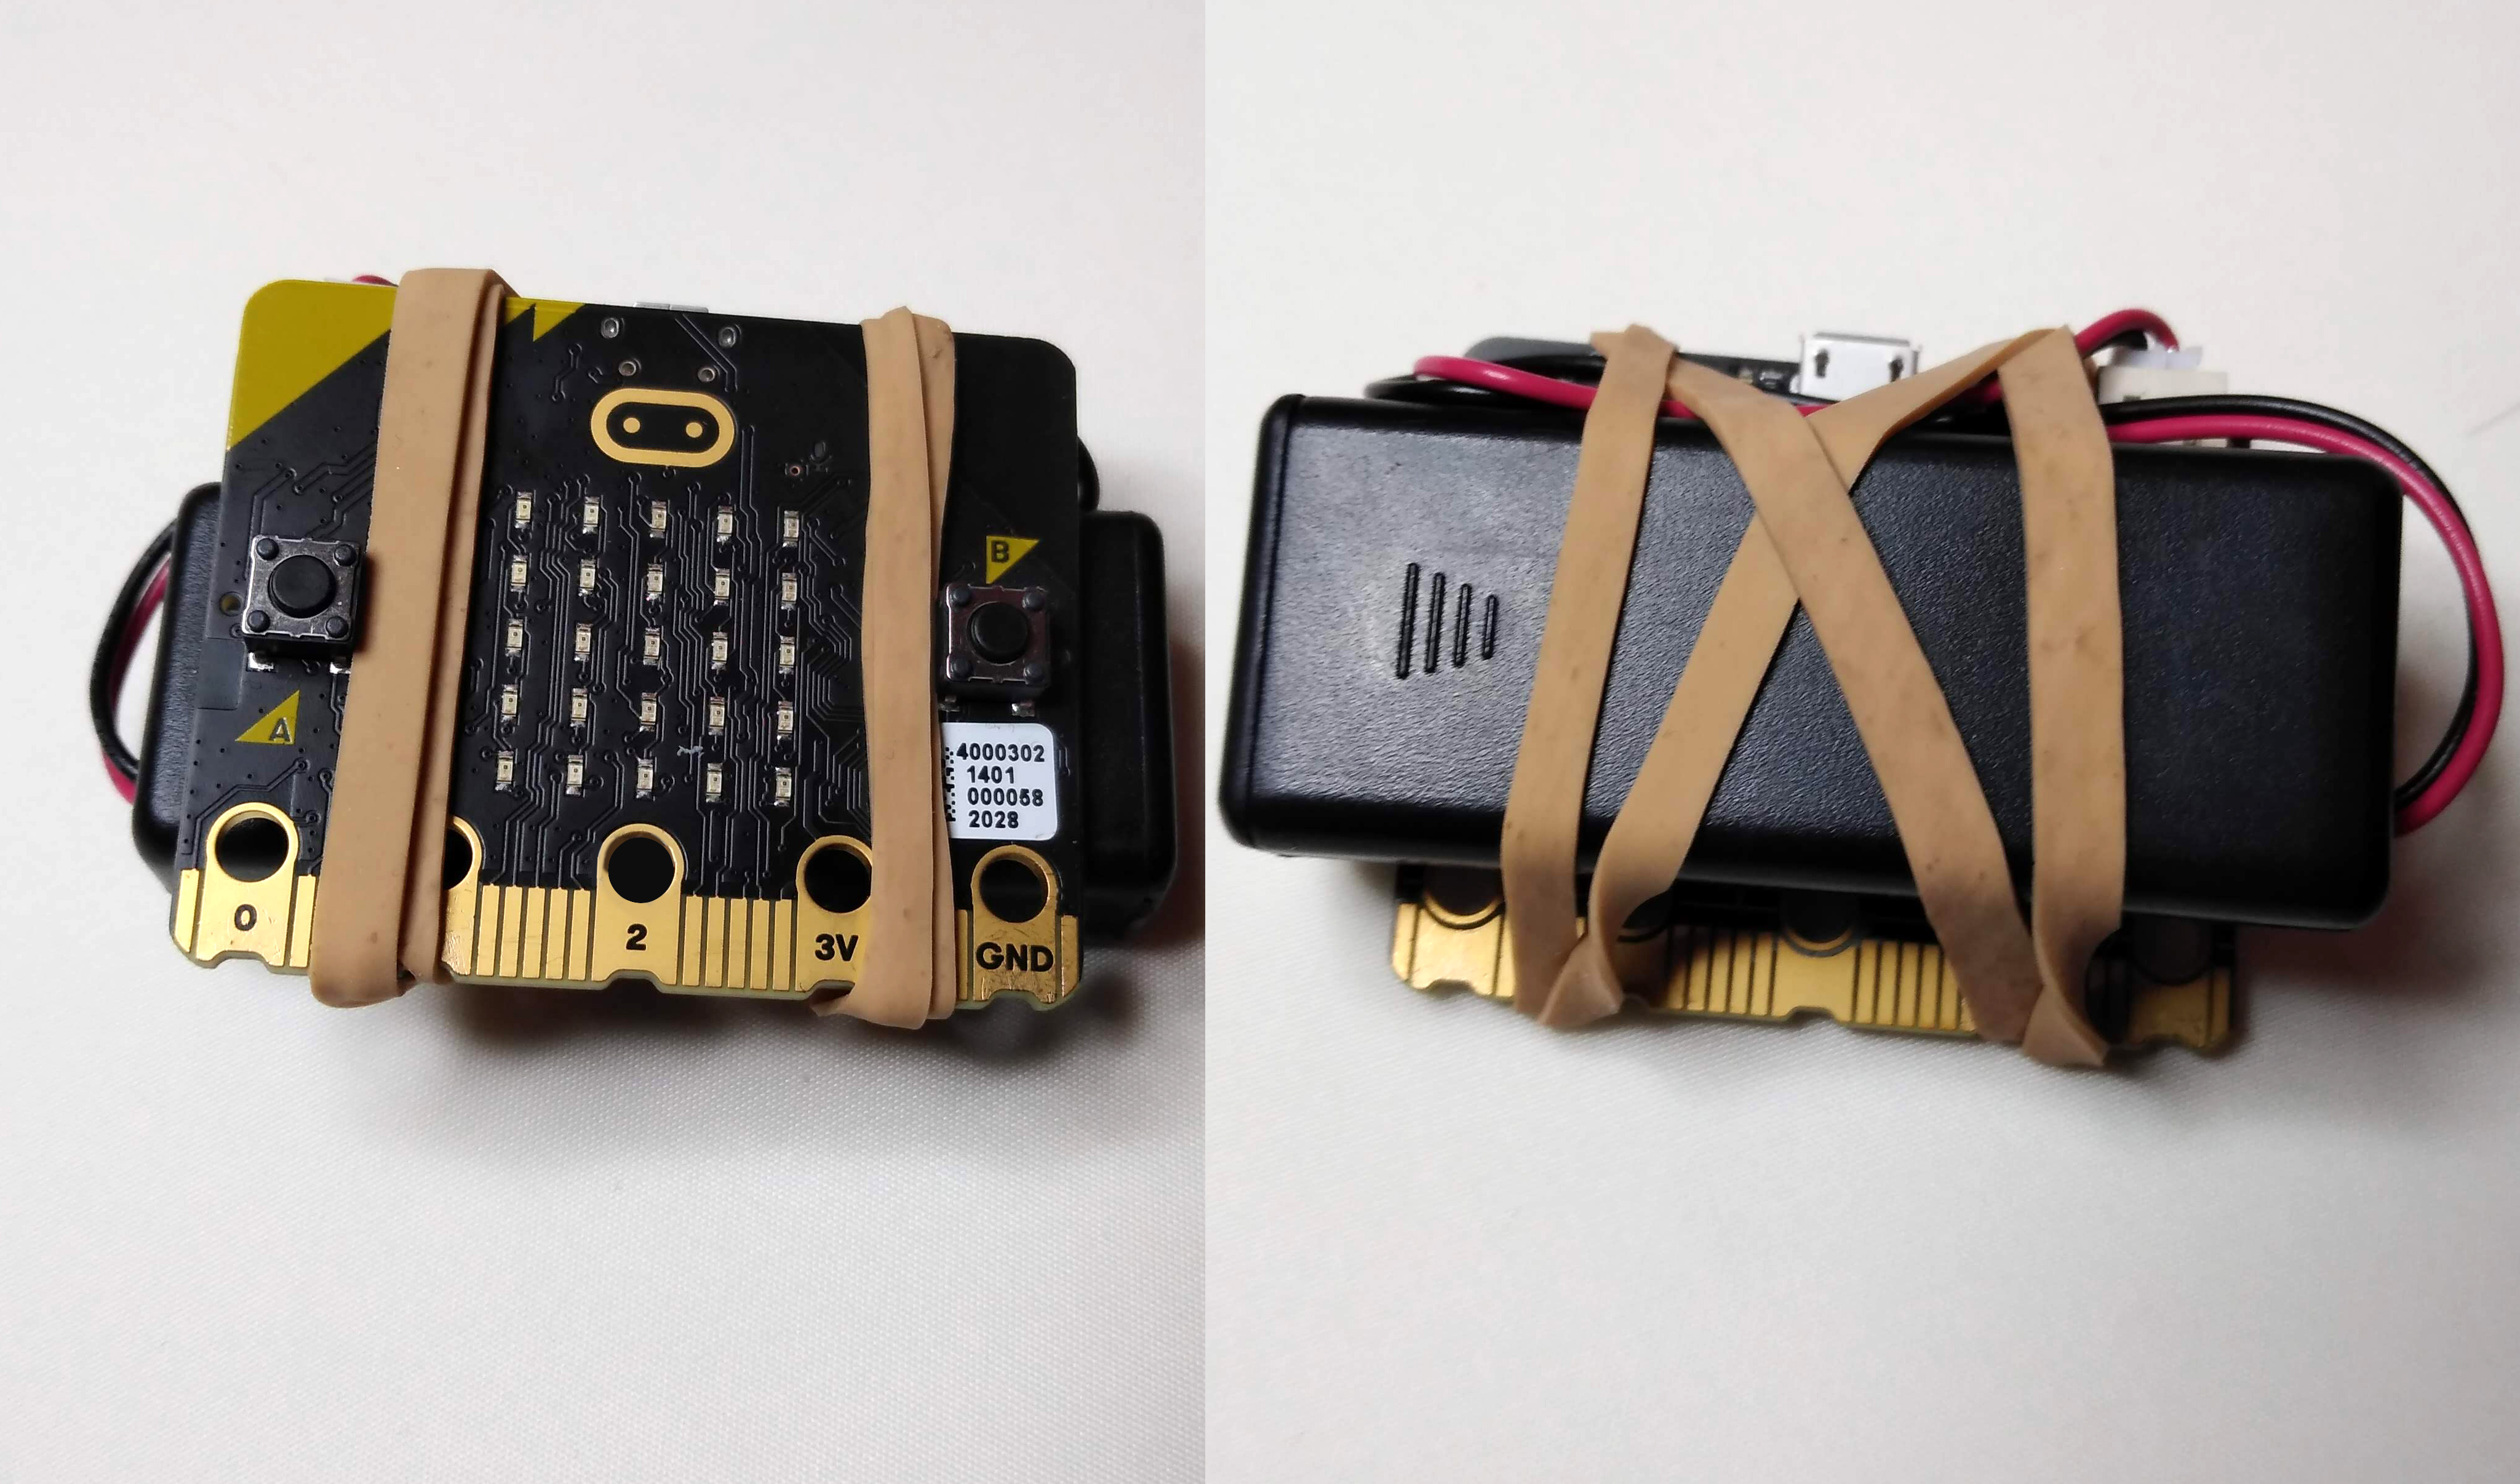
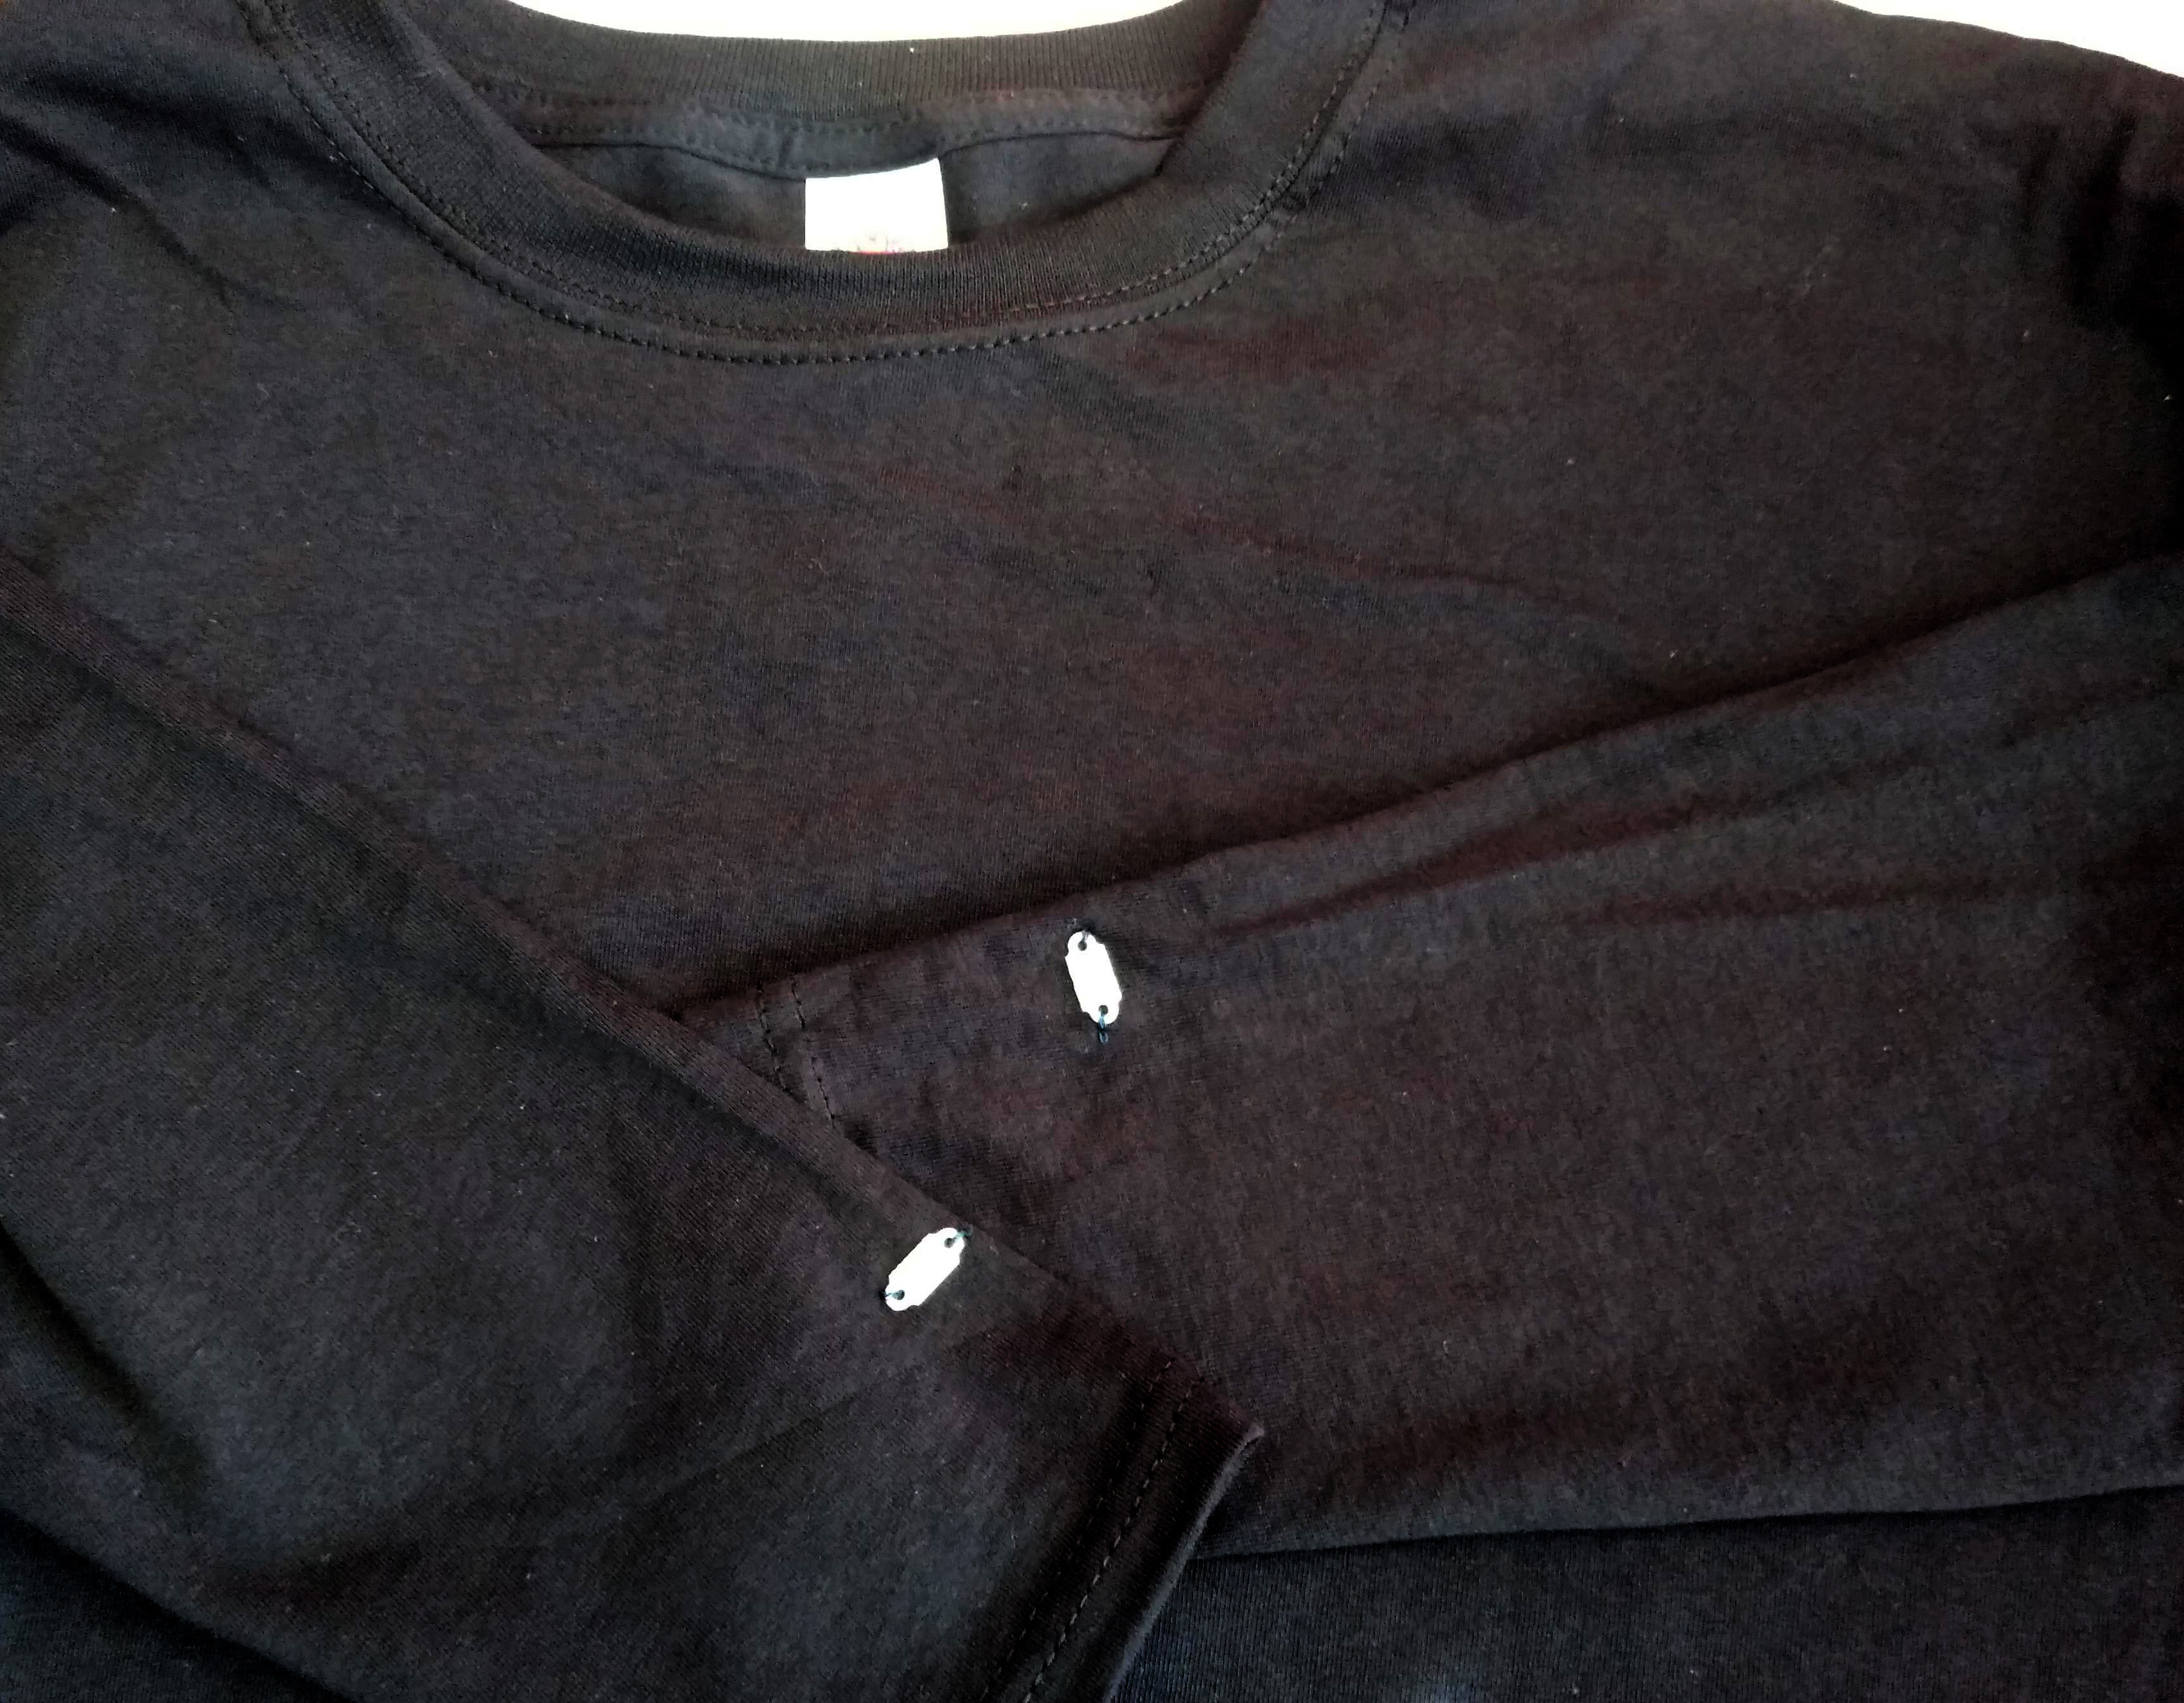
- Connect the micro:bit to the battery pack.
- Hold the micro:bit to the battery pack using a rubber band as shown below.
- Place the micro:bit and battery pack under the flap that you sewed on the T-shirt.
- Secure the left and right sides of the flap to the T-shirt with pins so that the micro:bit and battery pack are held tightly in place.
- Remove the micro:bit and battery pack and sew the left and right sides of the flap to the T-shirt creating a pocket.
- Sew a snap-on fastener to the top of the pocket ensuring that the micro:bit and battery pack will tightly fit in the pocket when fastened.
2. Create the circuit
Next, we’ll be sowing the circuit as shown on the diagram below.
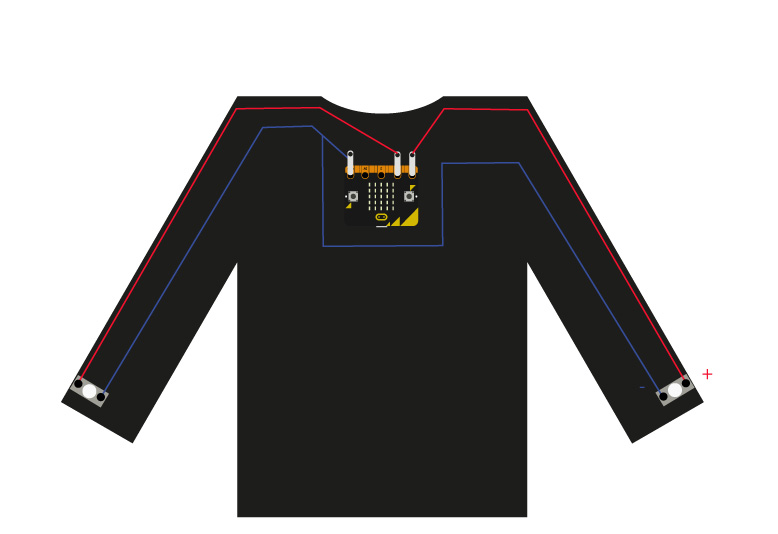
- Start by sowing a PCB LED to each sleeve using a bit of normal thread. You might want to put the T-shirt on to mark the exact location so that they are located on the front-facing part of the sleeve.
- Using conductive thread, sow the connections as illustrated above. Note the polarity of the LEDs, marked with – and + signs. Leave enough thread at the end of each connection to be able to tie a crocodile clip ensuring that you can clip it comfortably to the micro:bit once inside the pocket.
Avoid crossing the positive and negative sides of the circuit when sewing with the conductive thread as this will cause a short circuit.
3. Programme the micro:bit
- Go to https://makecode.microbit.org/
- Click on New Project and give it a name.
- Using the Blocks programming environment create the following:
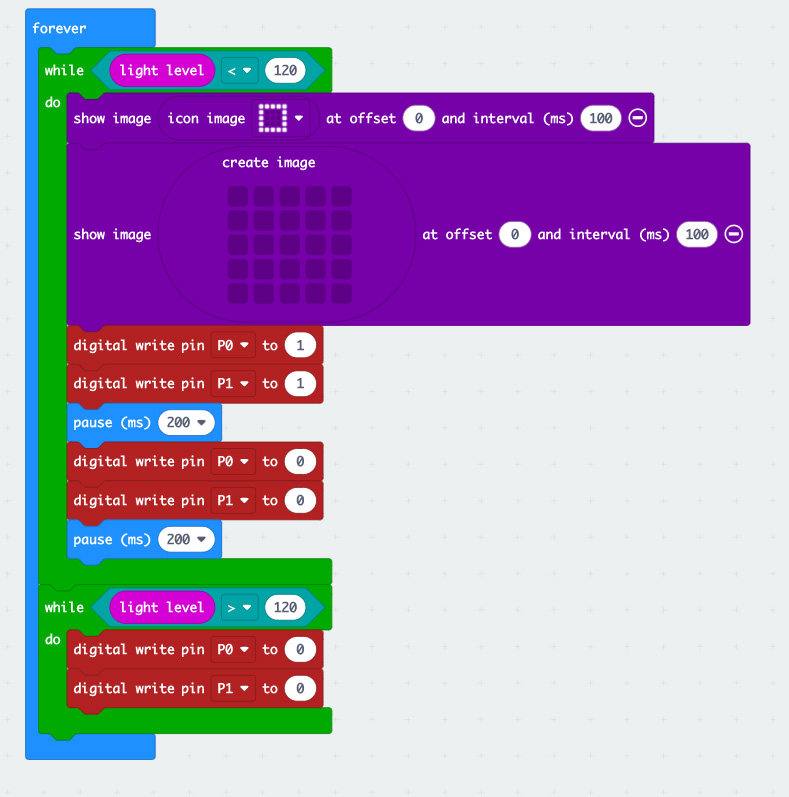
- Alternatively, using the Python environment, paste the following code:
def on_forever():
    while input.light_level() < 120:
        images.icon_image(IconNames.SQUARE).show_image(0, 100)
        images.create_image("""
            . . . . .
            . . . . .
            . . . . .
            . . . . .
            . . . . .
            """).show_image(0, 100)
        pins.digital_write_pin(DigitalPin.P0, 1)
        pins.digital_write_pin(DigitalPin.P1, 1)
        basic.pause(200)
        pins.digital_write_pin(DigitalPin.P0, 0)
        pins.digital_write_pin(DigitalPin.P1, 0)
        basic.pause(200)
    while input.light_level() > 120:
        pins.digital_write_pin(DigitalPin.P0, 0)
        pins.digital_write_pin(DigitalPin.P1, 0)
basic.forever(on_forever)- Connect the micro:bit to your computer using a micro USB cable.
- Click on the 3 dots on the Download button and select Pair device.
- Once paired click Download.
- Disconnect the micro:bit from your computer.
- Put some batteries in the battery pack if you haven’t already done so and switch it on.
If all is well, the LED matrix should be lighting up in low light conditions.
4. Assemble the T-shirt
- Using electrical tape, cover all the contacts on the micro:bit except GND, 0 and 1. This is to avoid short circuits with the crocodile clips.
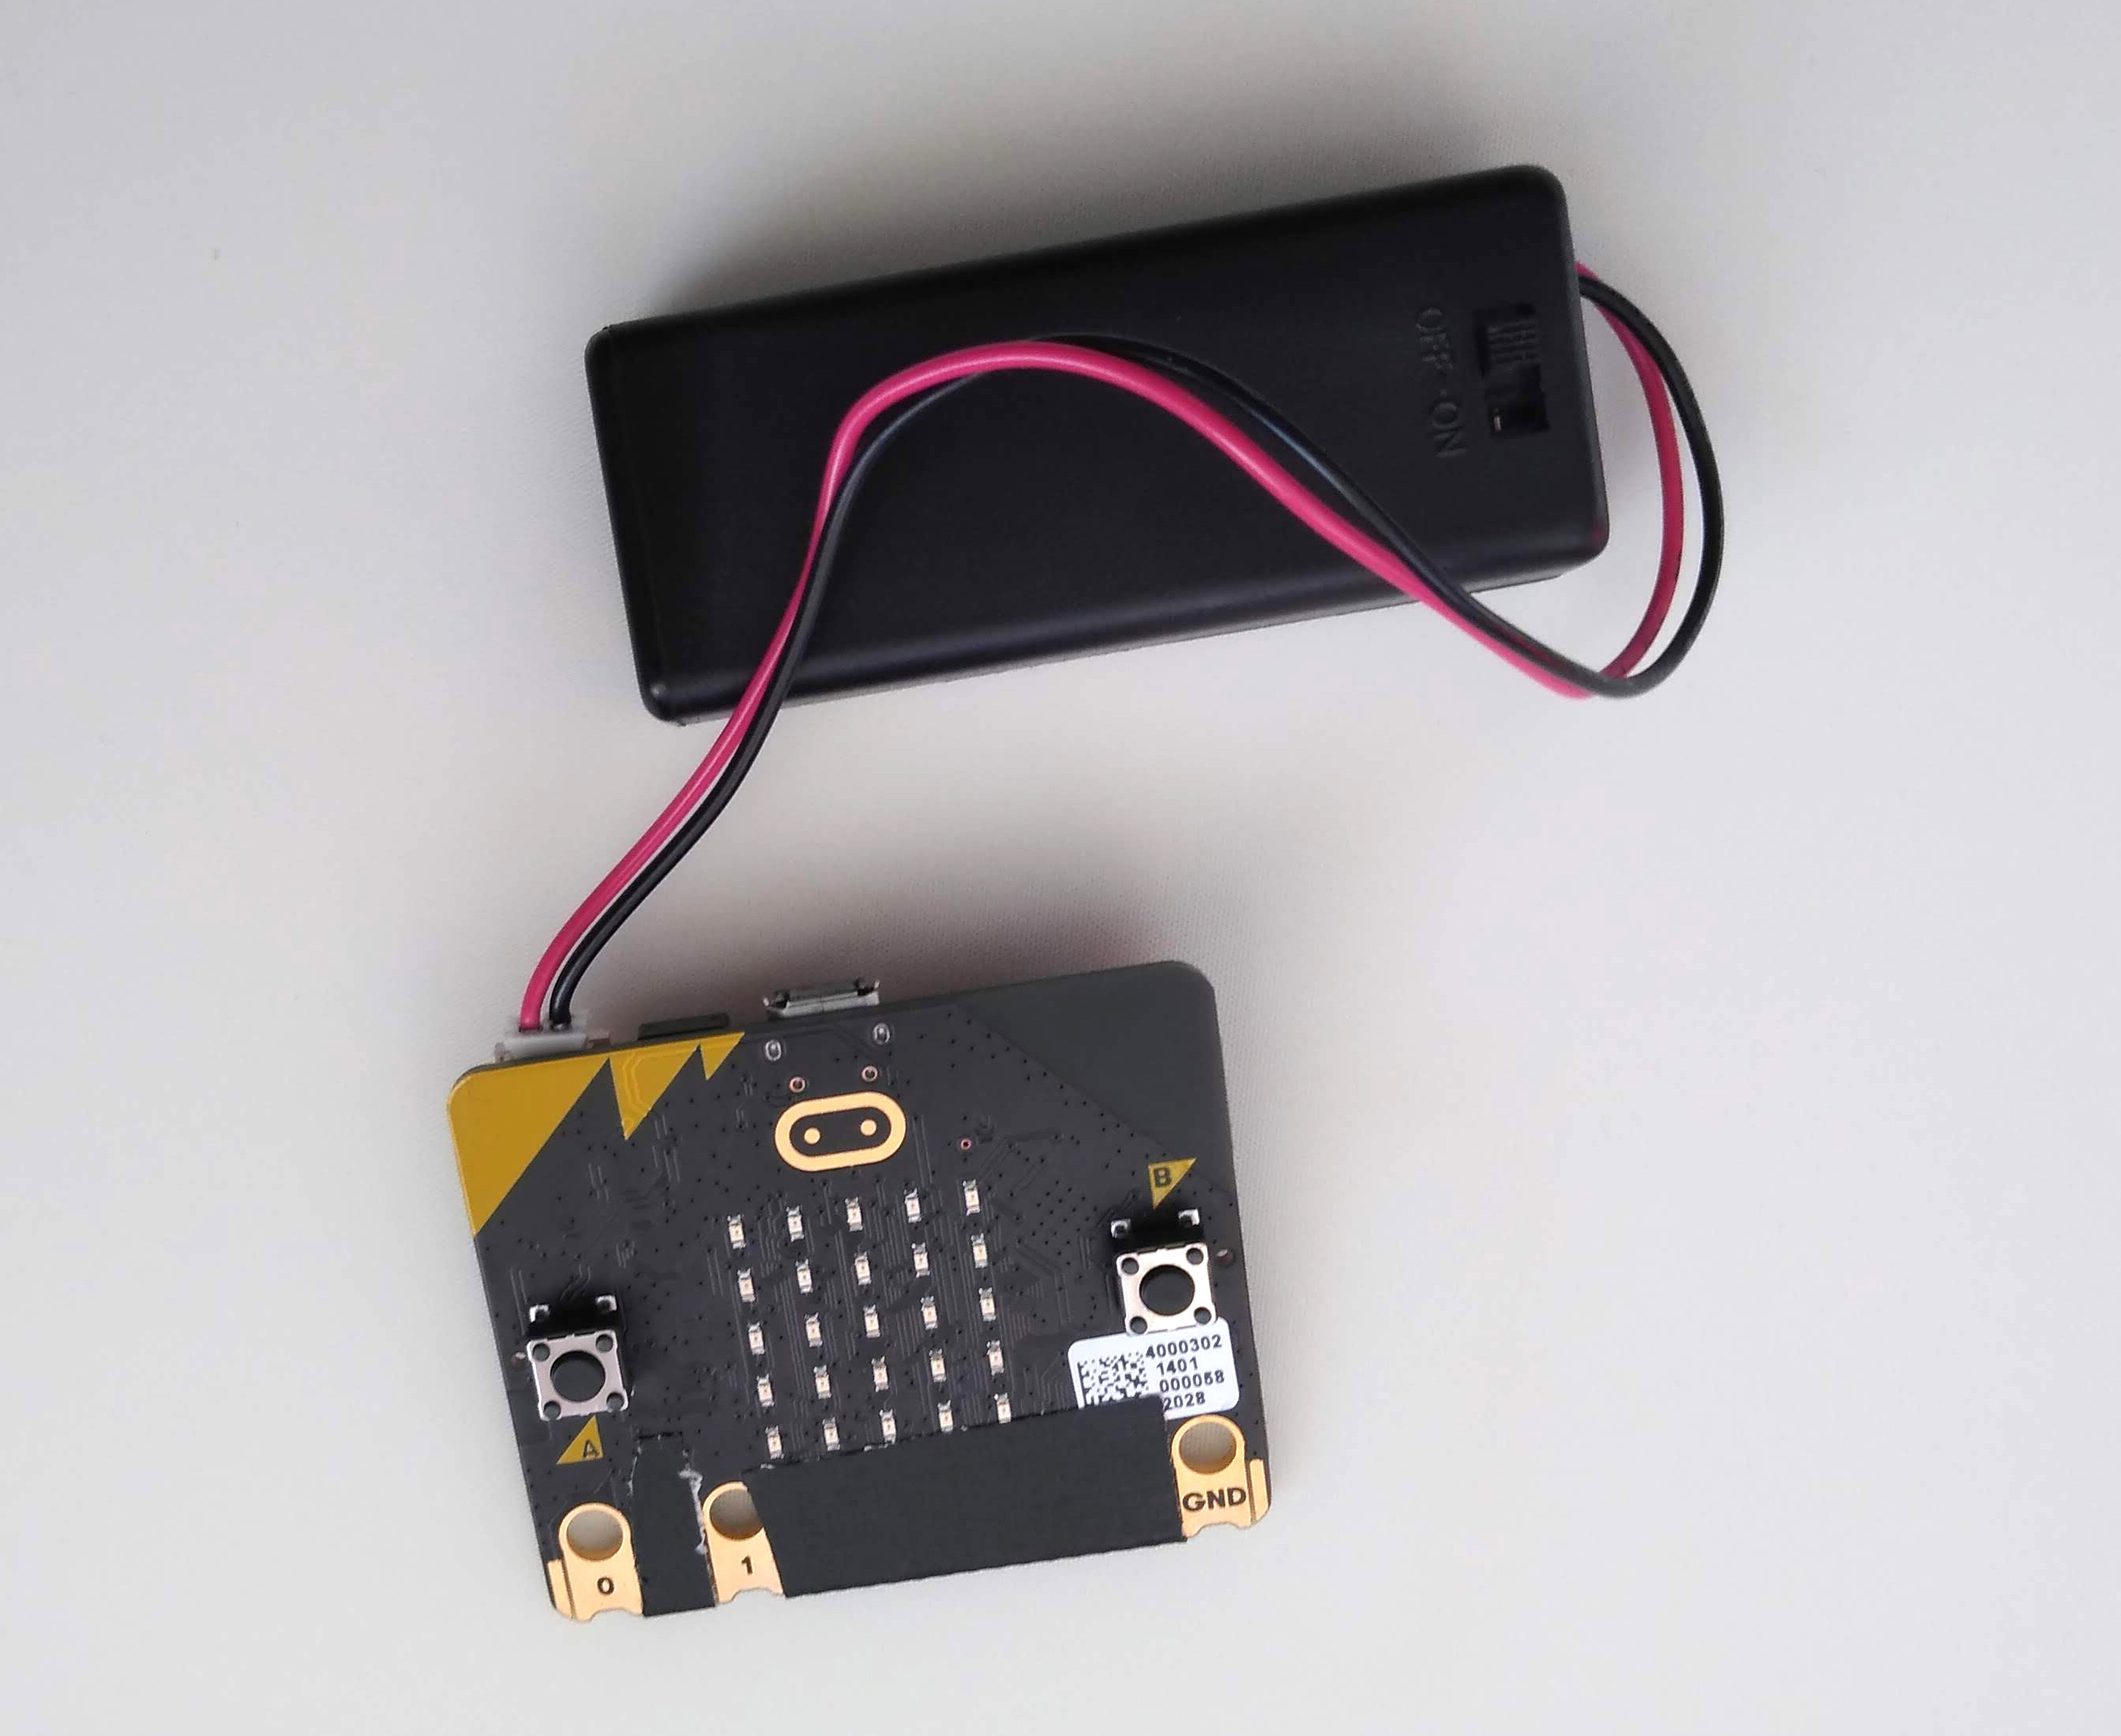
- Using a rubber band, hold the micro:bit and battery pack together like you did earlier.
- Place the micro:bit and battery pack in the T-shirt’s pocket.
- Connect the crocodile clip from the – contact of the LEDs to the GND contact on the micro:bit.
- Connect the other 2 crocodile clips to the 0 and 1 contacts on the micro:bit.
- Switch on the battery pack.
You should now have the micro:bit’s LED matrix and the sleeve LEDs flashing under low light conditions.
If things are not working as expected, the most likely cause is a short circuit. Double-check that neither the crocodile clips or the conductive thread are causing this.
5. Do more
Once you have it all working, you can tweak the code to adjust the level at which the lights turn on. To do this adjust the number associated to the light level (120). This can be anything from 1 to 255.
When washing the T-shirt ensure that you remove the micro:bit first. The LEDs, conductive thread and crocodile clips should be ok. To avoid damage it is best to hand-wash the T-shirt.
You can find more information and resources for your micro:bit here: https://microbit.org/
Like what you read? Why not show your appreciation by giving some love.
From a quick tap to smashing that love button and show how much you enjoyed this project.

