This project will show you how to make a light-controlled sound machine, running you through some of the capabilities of the new micro:bit to create a standalone experimental, electronic instrument with LED visualisation. Although it can run from the micro:bit’s built-in speaker, it’s sonic power becomes apparent when connected to an amplifier and speaker.
1. Programme the micro:bit
- Assemble the micro:bit and the battery pack, don’t power the micro:bit yet.
- Connect the micro:bit to your host computer using the micro USB cable.
- Go to https://makecode.microbit.org/ We will use Makecode, a graphic programming environment.
- Click on New Project.
- Name your project, we called it Light instrument.
Here is an overview of what you’ll be assembling. Below you’ll see a broken-down guide.
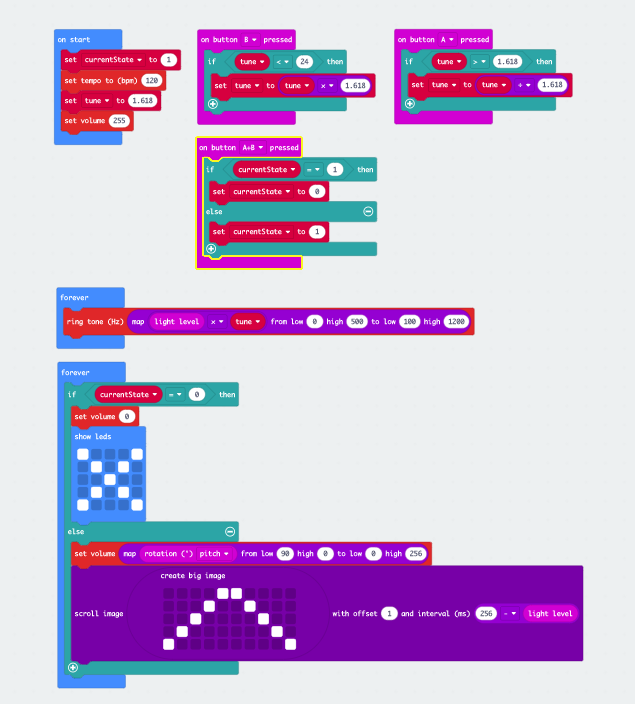
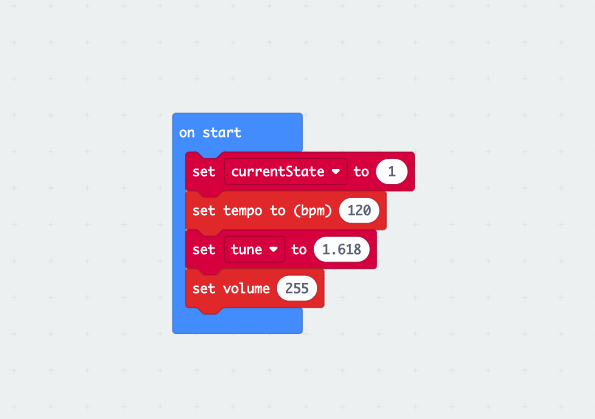
- Assemble On start:
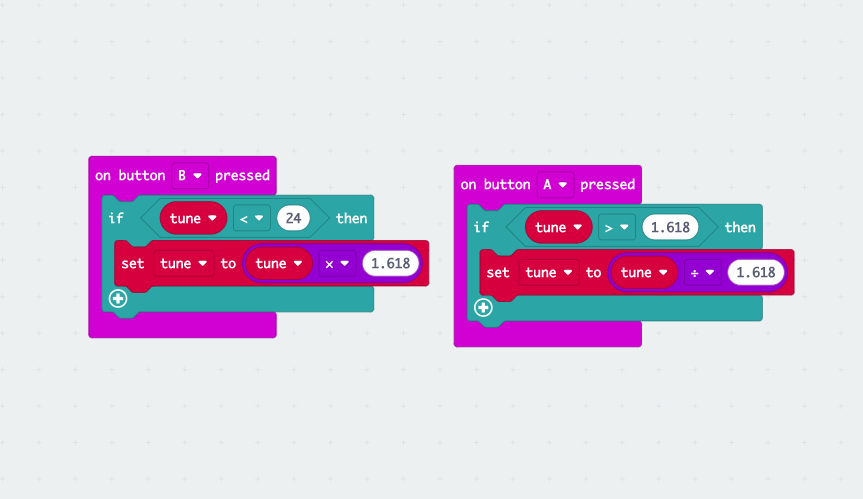
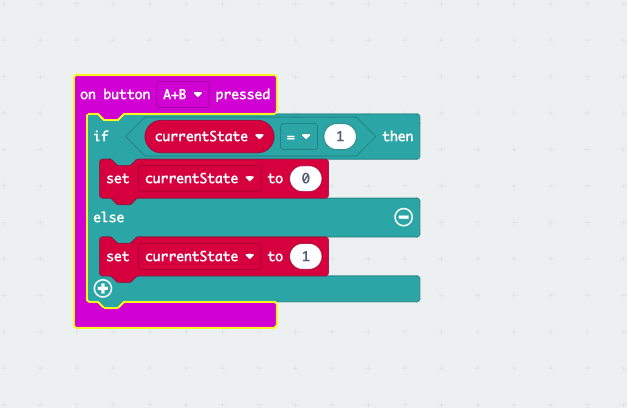
- Assemble Button A and Button B presses.
- Assemble Button A + Button B press.
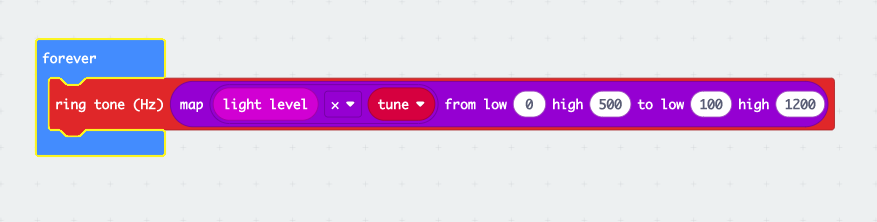
- Assemble the forever loop that runs the sound.
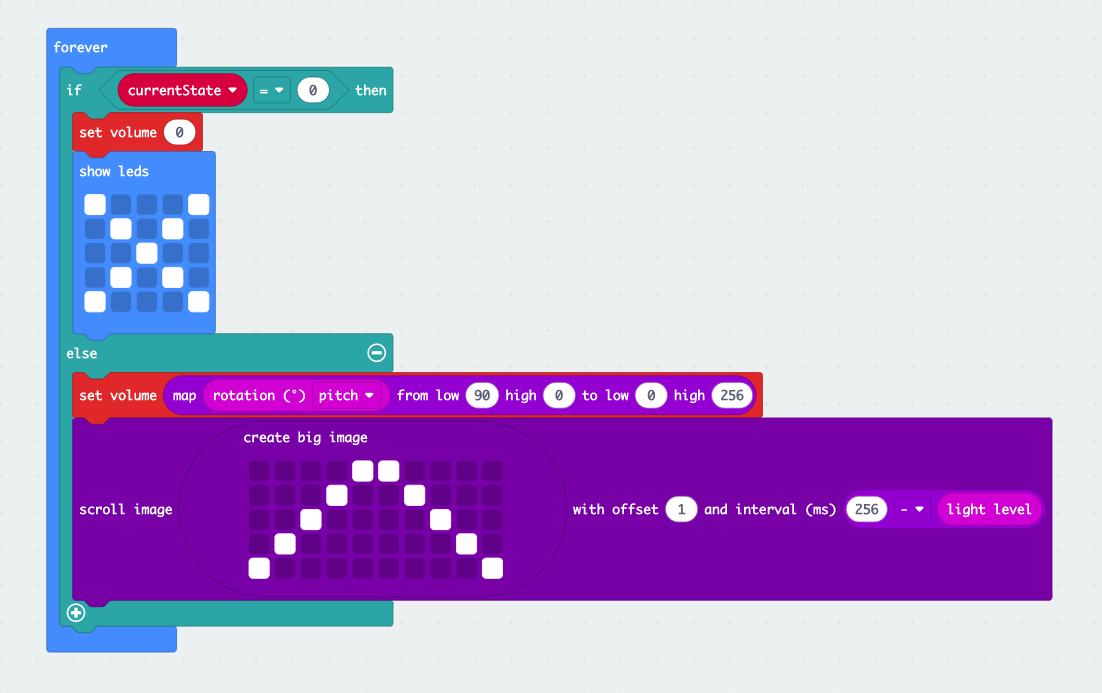
- Assemble the forever loop that runs the graphics
 .
.
2. Upload the programme to the micro:bit
- Pair the micro:bit to your computer by clicking on the 3 dots to the right of the Download button.
- Click on Pair device, a pop-up will open.
- Click on Pair device again.
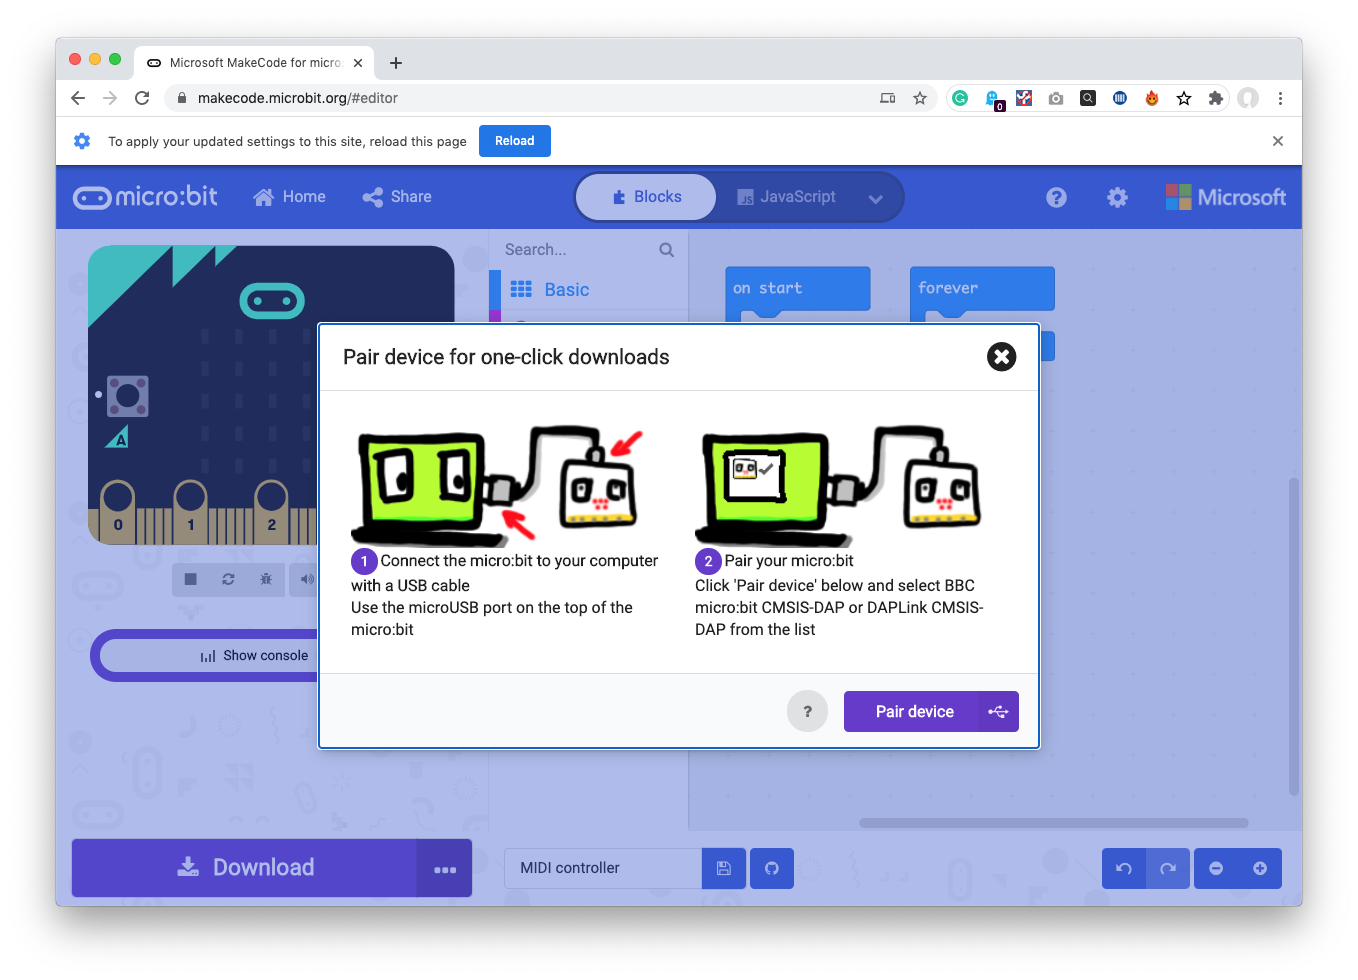

- Select “BBC micro:bit CMSIS-DAP” and click Connect.
- Click on the Download button.
- Eject the micro:bit from the computer using the usual procedure to eject a USB device.
- Power up the mIcro:bit using the battery pack.
You should now have the instrument ready.
3. Play your instrument
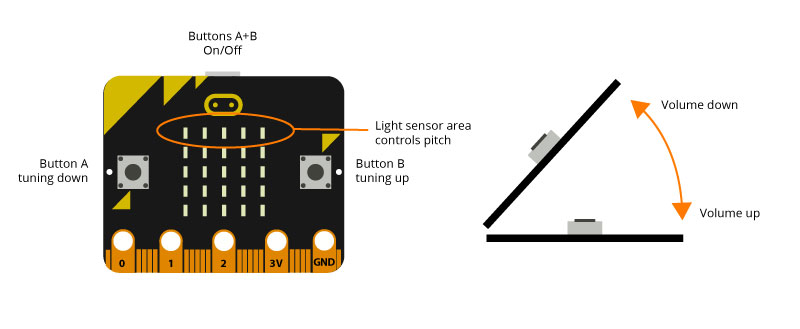
Above you can see the controls for your light instrument. Using a combination of button presses, tilting and light exposure you can change and modulate the sound to your liking. The LED matrix will graphically reflect what the sound is doing.
4. Do more
The first thing you might want to do is play your instrument through a HiFi or speakers to appreciate its sound range.
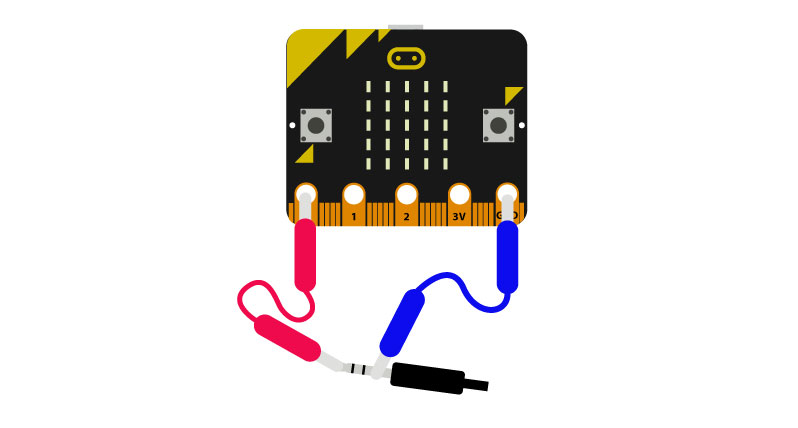
- Use a crocodile clip to connect electrode 0 to the live connection of a jack which will be connected to your headphones, HiFi etc.
- Connect GND to the Ground connection of the jack.
Ensure to have the volume on your speakers set to low. The micro:bit IS LOUD!
You can find more information and resources for your micro:bit here: https://microbit.org/
Like what you read? Why not show your appreciation by giving some love.
From a quick tap to smashing that love button and show how much you enjoyed this project.

