How-to: Set Up a Zigbee Home Automation System with BeaglePlay and HomeAssistant
BeaglePlay has unlocked a remarkable new ability – it can now serve as a Zigbee Coordinator for Home Assistant! This incredible and affordable board comes packed with all the necessary features and performance to act as your very own HomeAssistant setup, and in this project created by Andrei Aldea from Texas Instruments, you’ll find out how you can set one up yourself in a few simple steps.
Let us introduce this open-source SBC from BeagleBoard.org. BeaglePlay features a highly reliable eMMC memory, enabling smooth performance, and is equipped with the Zigbee capable CC1352P7 2.4Ghz and Sub-Ghz radio, ensuring seamless connectivity while remaining cool and energy-efficient.
But, what is ZigBee, and how it works?
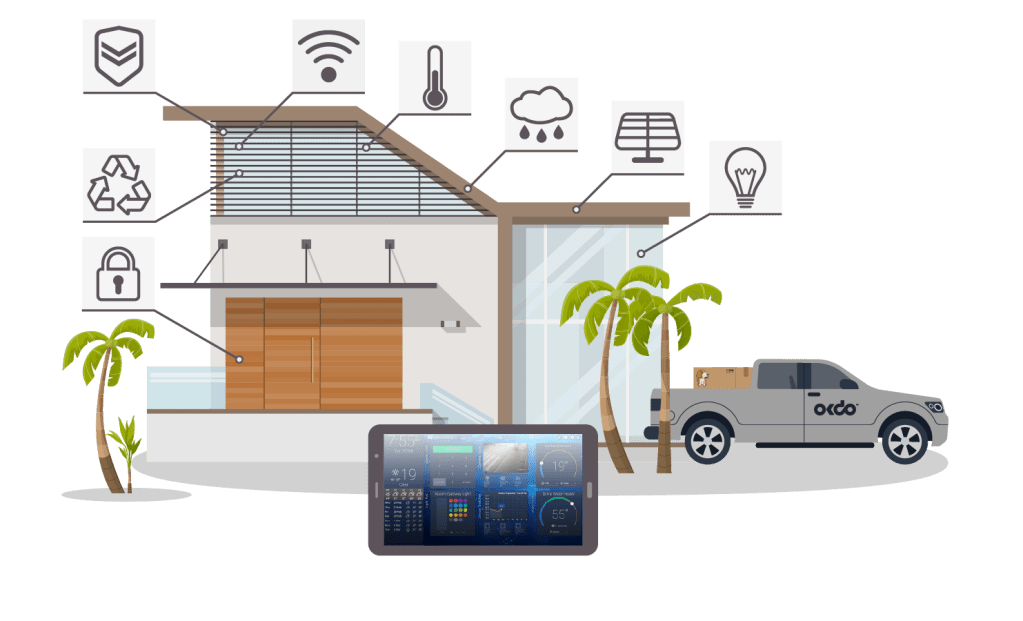
Zigbee is a wireless mesh technology specifically designed for connecting smart devices, operating independently from Wi-Fi. This technology is widely adopted by various devices, including popular ones like Phillips Hue, Ikea Tradfri, Aquara, and many more.
With this innovative BeaglePlay + HomeAssistant implementation, you can now bypass the usual manufacturer bridge needed to get your Zigbee devices connected to the internet while allowing you to stay in control of your data.
Now, let’s crack on with the project!
Parts needed:
| 1. BeaglePlay single board computer |
||
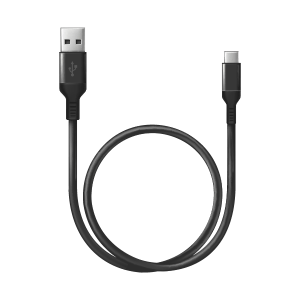
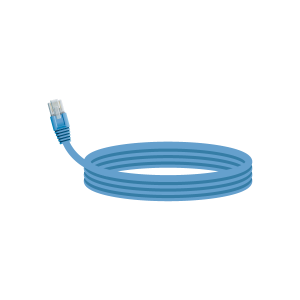
| 2. Micro-SD Card + USB Reader (Only need this once to flash HomeAssistant) | 3. USB-C Cable for Power & Data | 4. Ethernet Cable (Optional) |
 |
 |
 |
Author: Andrei Aldea, “an Electronics, EV and 3D Printing enthusiast by night and a Marketing Engineer at Texas Instruments by day.”
Originally published on: Hackster.io
Step 1: Get the HomeAssistant BeaglePlay Image
Download the HomeAssistant Flasher Image. In the future, images will be available directly from Beagleboard.org.
Step 2: Flash the Image to an SD Card
Use Balena Etcher to flash the image to your SD Card. Download Balena Etcher from here.
Step 3: Flash the Board
Without applying power, insert your SD card and hold down the “USR” button, then Apply power.
Keep holding the USR button until the LEDs start cycling, as shown below:

When the LEDs are done flashing, first remove power to the board, then remove the SD card and re-apply power to boot from the onboard eMMC memory.
- Once booted, the Beagle shows up as a USB-Serial Adapter!
- Find its IP address on your router and use an “SSH” client to connect.
- Connect a monitor, keyboard and mouse.
Step 4: Change your password
The defaults are:
- Username: debian
- Password: temppwd
You will want to change this immediately, as keeping a device with its default password on the network is dangerous.
Run the following command once logged in to change your password:
passwdStep 5: Let’s Setup Zigbee
- First, we need to disable bfserial:
This is documented in the BeagleDocs here.
echo "    fdtoverlays /overlays/k3-am625-beagleplay-bcfserial-no-firmware.dtbo" | sudo tee -a /boot/firmware/extlinux/extlinux.conf
sudo reboot now
The board will now reboot. Once booted, re-connect.
- Grab the CC1352 Python Flasher Script:
wget https://git.beagleboard.org/beagleconnect/cc1352-firmware/-/raw/main/0.2.2/play/cc1352-flasher.py- Get the Zigbee Coordinator Firmware:
wget https://github.com/Koenkk/Z-Stack-firmware/raw/3096170e03f36a90e91648a7e703379ca386d6c6/coordinator/Z-Stack_3.x.0/bin/CC1352P7_coordinator_20230507.zip- Unzip the Firmware
unzip CC1352P7_coordinator_20230507.zip- Get the IntelHex Python Extension
sudo pip install IntelHex- Finally, flash the CC1352
sudo python cc1352-flasher.py CC1352P7_coordinator_20230507.hexStep 6: Let’s find our IP Address
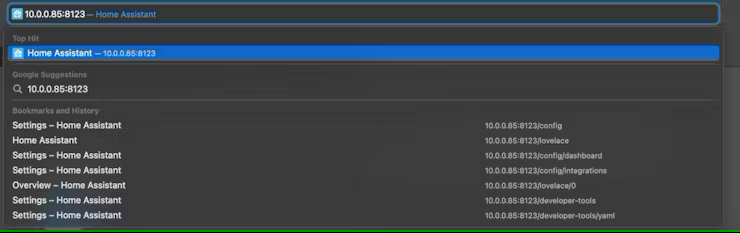
ifconfig eth0Step 7: Now, let’s login to HomeAssistant
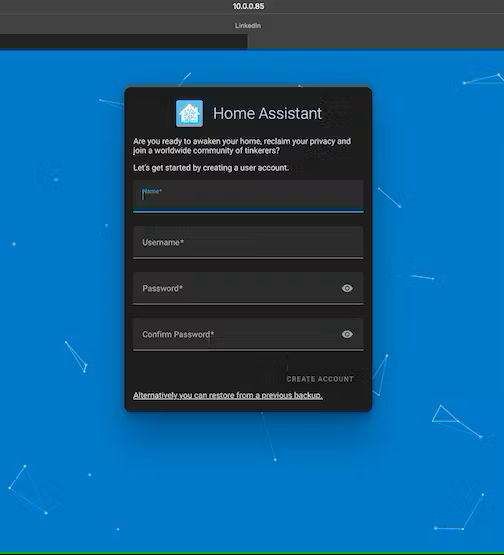
On your computer, navigate to your IP address and add “:8123” at the end of your URL to indicate the HomeAssistant port number.
Example: http://10.0.0.85:8123 or http://192.168.1.12:8123
You will be presented with the HomeAssistant setup screen.
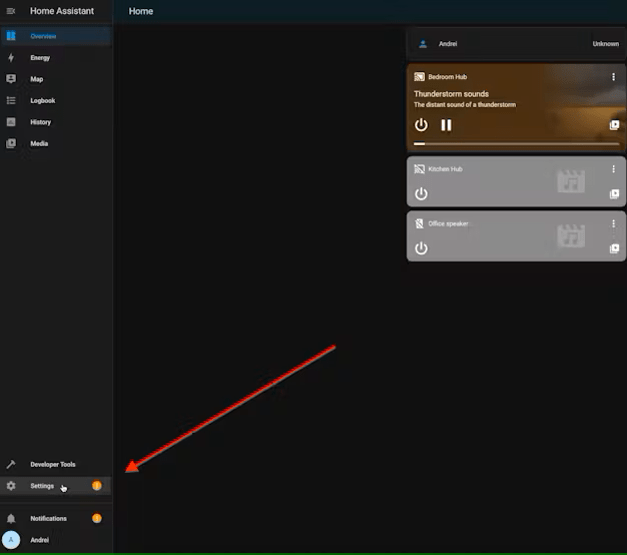
Step 8. Add the Zigbee Integration to HomeAssistant
On the bottom left, select Settings.
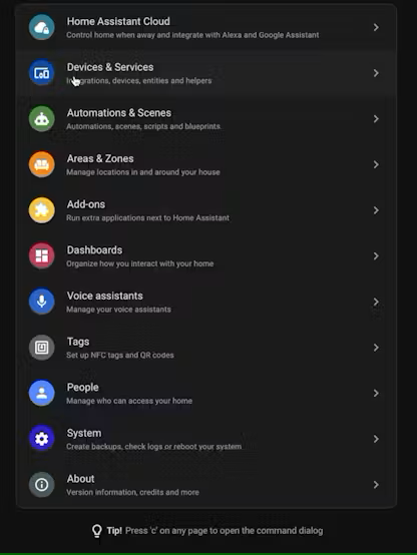
Then, select Devices & Services.
And finally, “Add Service” at the bottom right and select Zigbee Home Automation from the list.
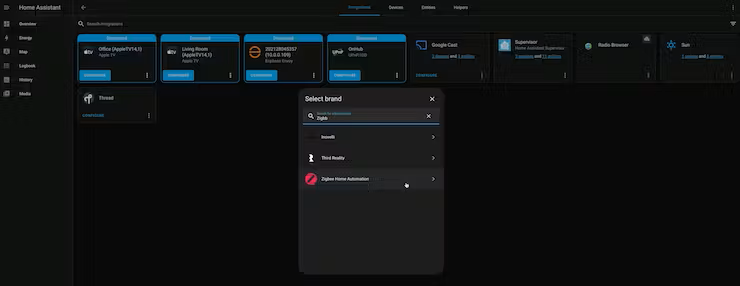
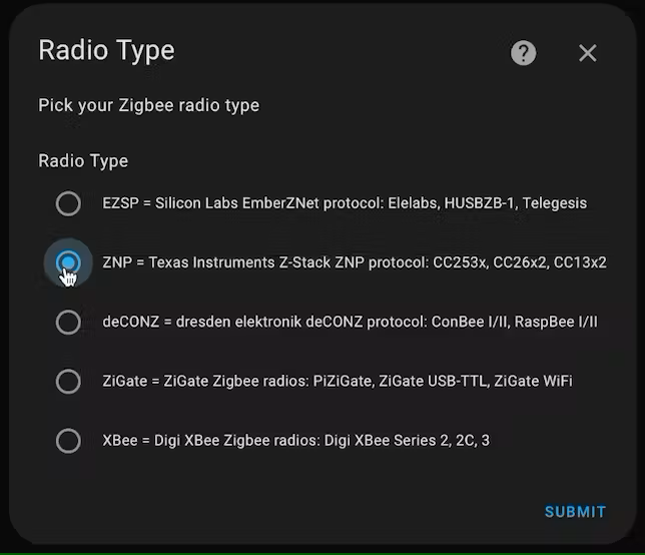
For Radio Type, select ZNP.
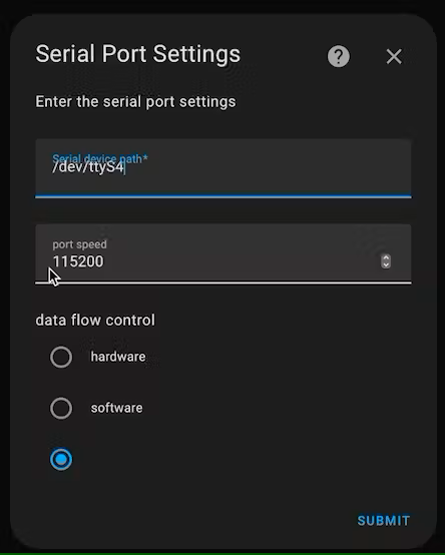
Note: Make sure to set the Serial device path to /dev/ttyS4
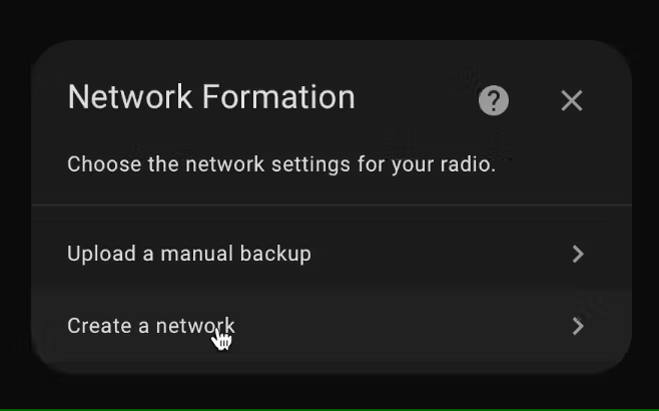
And now you can create a new Zigbee network.
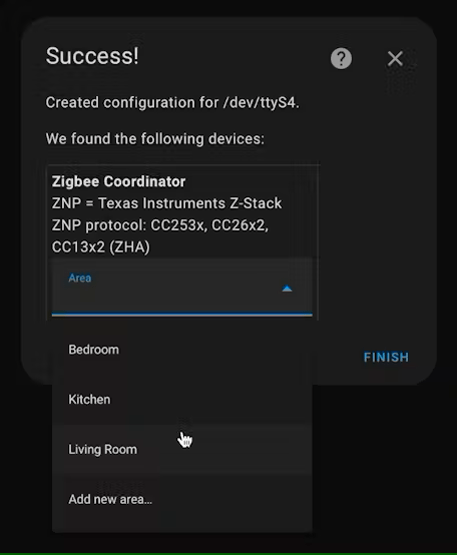
If all goes to plan, it should show up successfully, and you can assign the coordinator to a room.
Now, simply click “add devices” under the Zigbee integration!
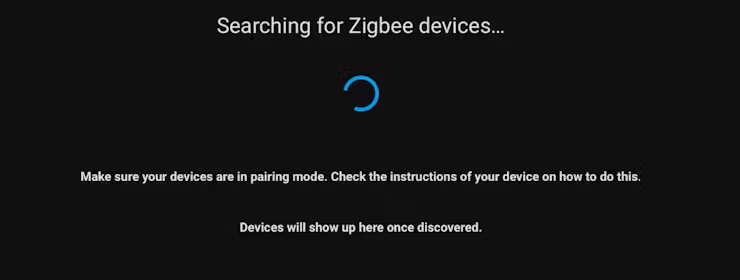
Different Zigbee devices enter pairing mode in different ways.
Most have a “Sync” button that you need to hold for a few seconds. Others, like my Ikea FYRTUR blinds, have you hold the two buttons to pair. Lights will usually have you cycle them on-off several times (5 in the case of my Ikea ones). But once in pairing mode, you will see devices start to populate the list.
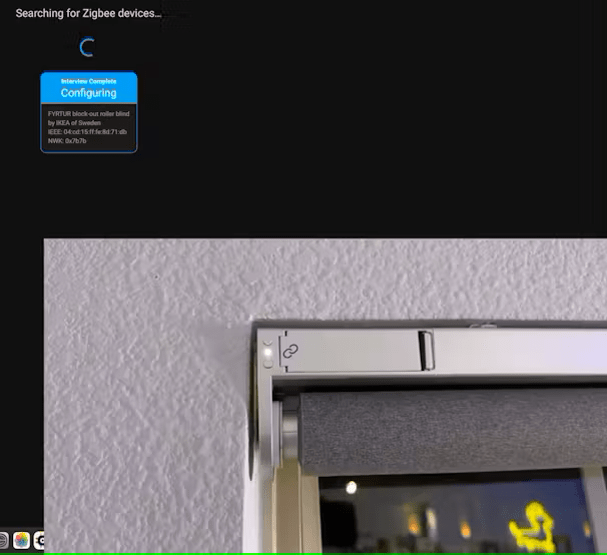
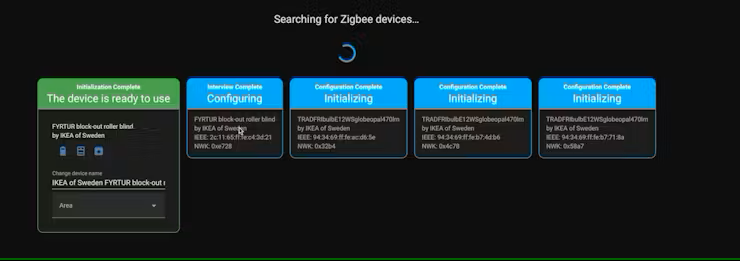
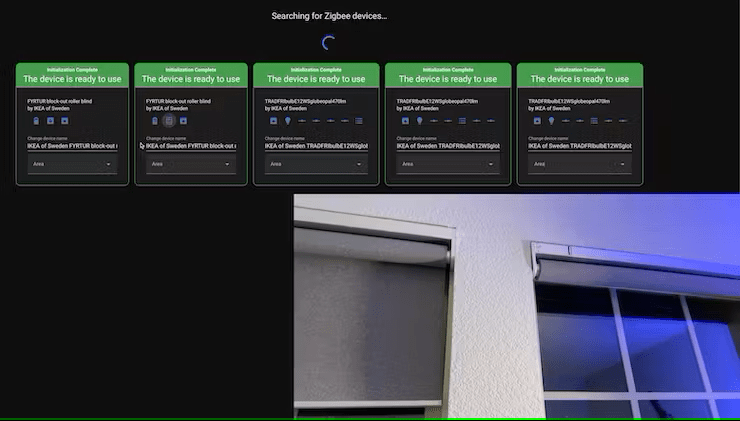
You can even configure multiple devices at once! Here we have 2 blinds and 3 lights, all configuring and initializing at once! How neat!
After a little bit, you should see that all your devices are ready to use and reporting various data to HomeAssistant. You are now in full control!
Summary
Well done! Thanks to your ingeniosity and a little help from BeaglePlay, this powerful little board with remarkable capabilities, you’ve now successfully set up your own Zigbee home automation system.
But hold on, what you’ve experienced so far is just a glimpse of what’s out there. This has just been a small subset of devices, ranging from remotes, MMWave presence detection, infrared sensors, cameras, lights, garage door openers and beyond.
There is a whole world of IoT and smart devices ahead of you. Perhaps you’ll want to add more Zigbee devices or Wi-Fi-enabled ones, or you may want to integrate HomeAssistant into Alexa or Apple HomeKit and create routines and automations. All of these things are just a few clicks away, and the Beagle is ready to remain by your side as your trusty Home Automation hub. We’re excited to see what you’re up to! Don’t forget to share your projects with us.
#letsokdo
Image credits: Andrei Aldea
![]()

Let’s invent the future together
What’s your challenge? From augmented reality to machine learning and automation, send us your questions, problems or ideas… We have the solution to help you design the world. Get in touch today.
Like what you read? Why not show your appreciation by giving some love.
From a quick tap to smashing that love button and show how much you enjoyed this project.
