How to add NVMe SSD storage to ROCK Single Board Computers
Author: Peter Milne, engineer and Linux advocate with probably more SBCs than a Chandrayaan-3 moon lander.
In this project we show you how your ROCK board can support NVMe SSDs through M.2 adapters, providing dedicated, high-capacity storage (up to 2TB) with PCIe interface for speeds over 10 times faster than SD!
One of the big advantages of the ROCK range is the ability to attach NVMe solid state drives (SSD) using the M.2 adapter fitted to most boards. This provides dedicated and durable large capacity storage (upto 2TB) with high speed capability, using the PCIe interface. Read / write speeds can be greater than 10x faster than SD or eMMC storage with a lifespan of several years, depending on usage.
If you are using your ROCK as a power efficient desktop system, or for image editing, program compilation or database storage, then an NVMe SSD storage solution will give improved performance and data security.
The root filesystem (rootfs) can easily and safely be mounted on the SSD using standard Linux tools whilst the system still boots from the SD card or eMMC storage. This avoids having to solder NAND chips or configure those where present, which requires specialist software and can stop your board from booting if used incorrectly.
Below is a summary of the M.2 support for NVMe SSDs on the current ROCK range:
| ROCK | PCIe Gen | Lanes | M.2 Key | SSD Form Factor |
| ROCK 3A | PCIe 3.0 | x2 | M Key | M.2 Extension Board 2230 / 2242 / 2260 / 2280 |
| ROCK 3C | PCIe 2.0 | x1 | M Key | 2230 |
| ROCK 4SE | PCIe 2.1 | x4 | M Key | M.2 Extension Board 2230 / 2242 / 2260 / 2280 |
| ROCK 4C+ | Not Fitted | |||
| ROCK 5A | PCIe 2.0 | x2 | E Key | M.2 E Key-to-SATA |
| ROCK 5B | PCIe 3.0 | x4 | M Key | 2280 |
We tested using the latest Debian Bullseye CLI distribution with a Transcend MTE352T 128GB, M.2 2230 PCIe Gen3 x2 SSD on the ROCK 3A and ROCK 4SE.
For the ROCK 5B we used the latest Debian Bullseye KDE distribution and a Transcend MTE670T M.2 2280 128 GB PCIe Gen3 x4 SSD.
SSD performance depends on several factors including the capability of the ROCK board, the specification of the SSD and the OS, application software, and device drivers.
Step 1: Hardware
All of the ROCK boards support NVMe SSD storage using M.2 connectors, with the exception of the ROCK 4C+ which doesn’t have one fitted. Depending on the board you are using there are various options for fitting an NVMe SSD drive and the form factors which are supported.
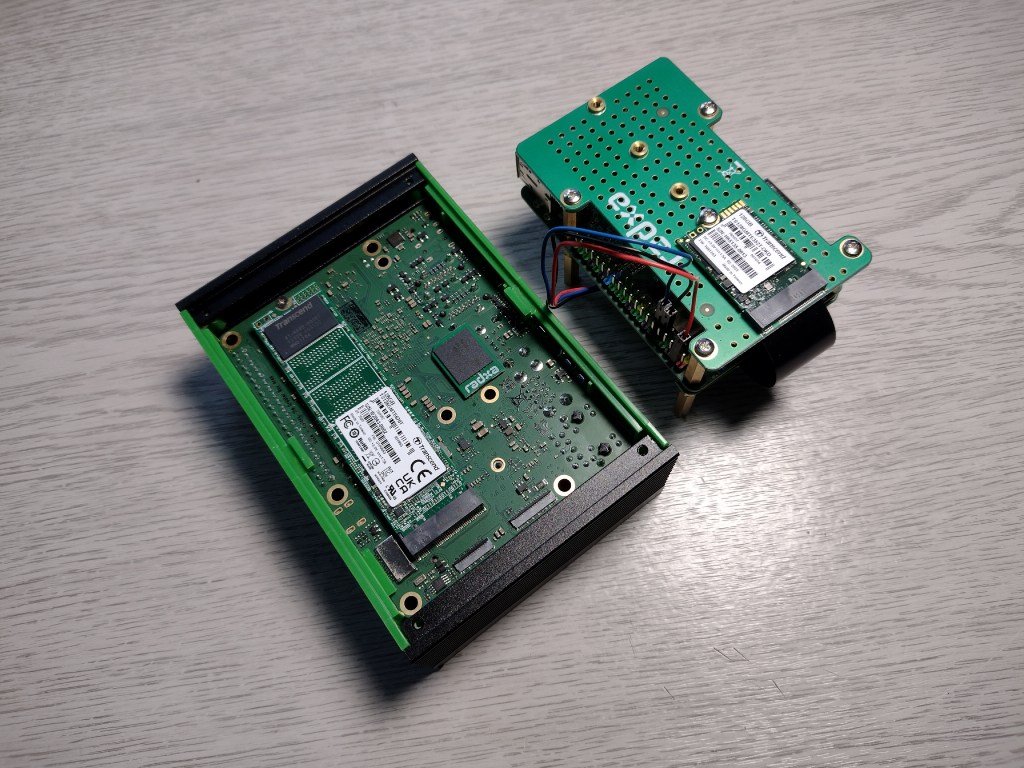
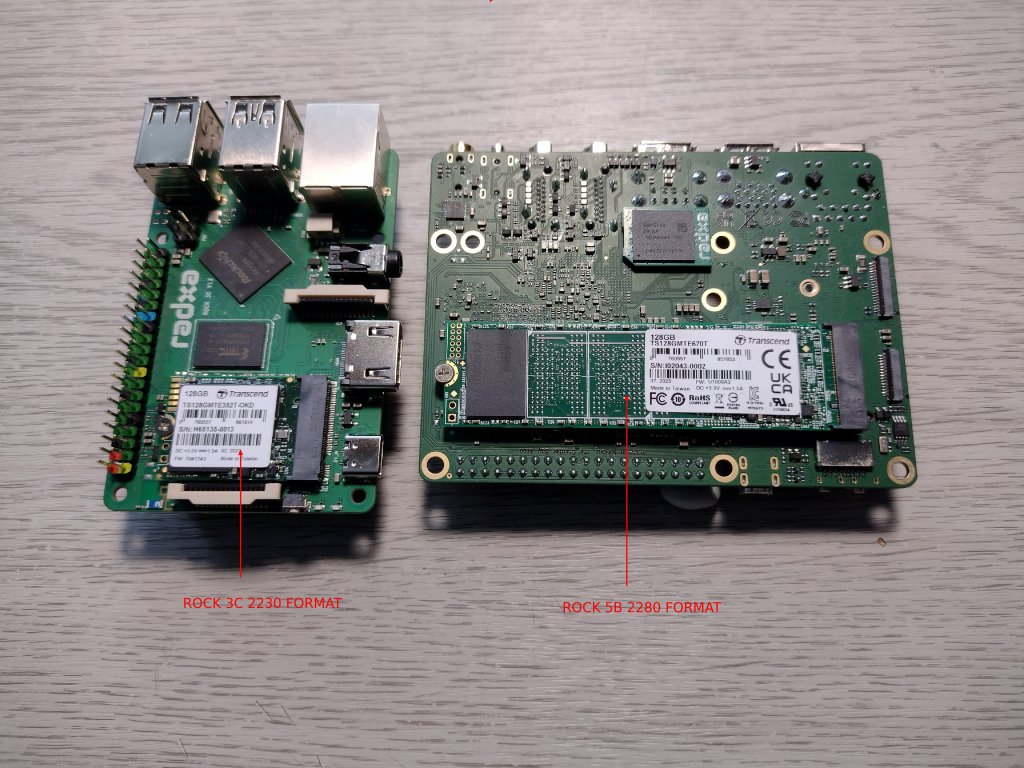
ROCK 3C and ROCK 5B
Both boards have M.2 M-key connectors and mounting bosses on the PCB. The ROCK 3C supports 2230 format drives on the top side and the ROCK 5B 2280 format drives on the bottom side.
2230 format SSDs are 22mm in width and 30mm in length. 2280 format drives are 22mm wide and 80mm long.
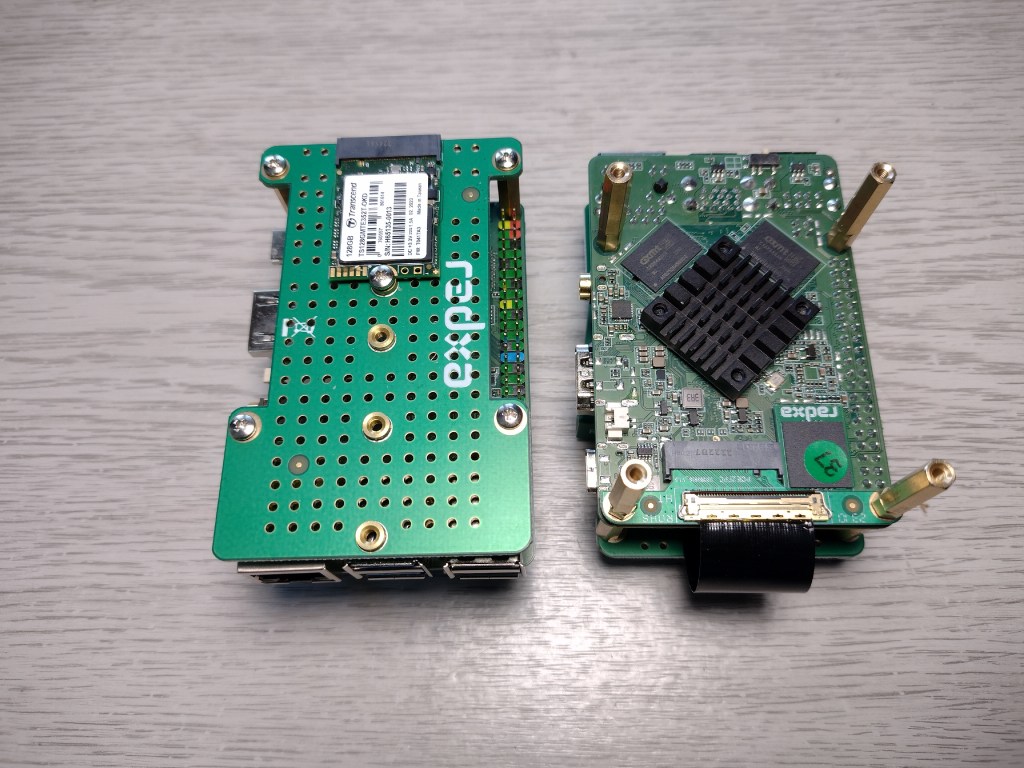
ROCK 3A and ROCK 4SE
Both boards have M.2 M-key connectors on the bottom side so they require the M.2 Extension Board which mounts the SSD above the ROCK.
The Extension Board supports the following SSD formats 2230 / 2242 / 2260 / 2280 and all the parts required to install the kit are included.
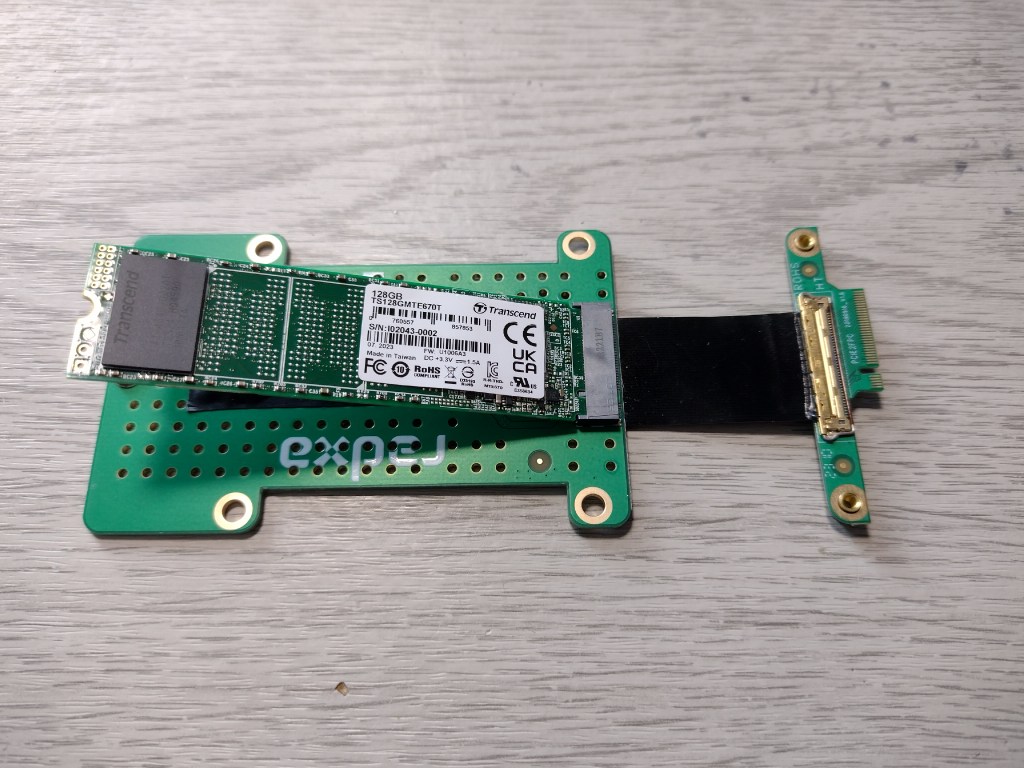
The image below shows the ROCK 3A we are testing, along with the extension kit, SD card, 2280 SSD and USB-to-serial adaptor.
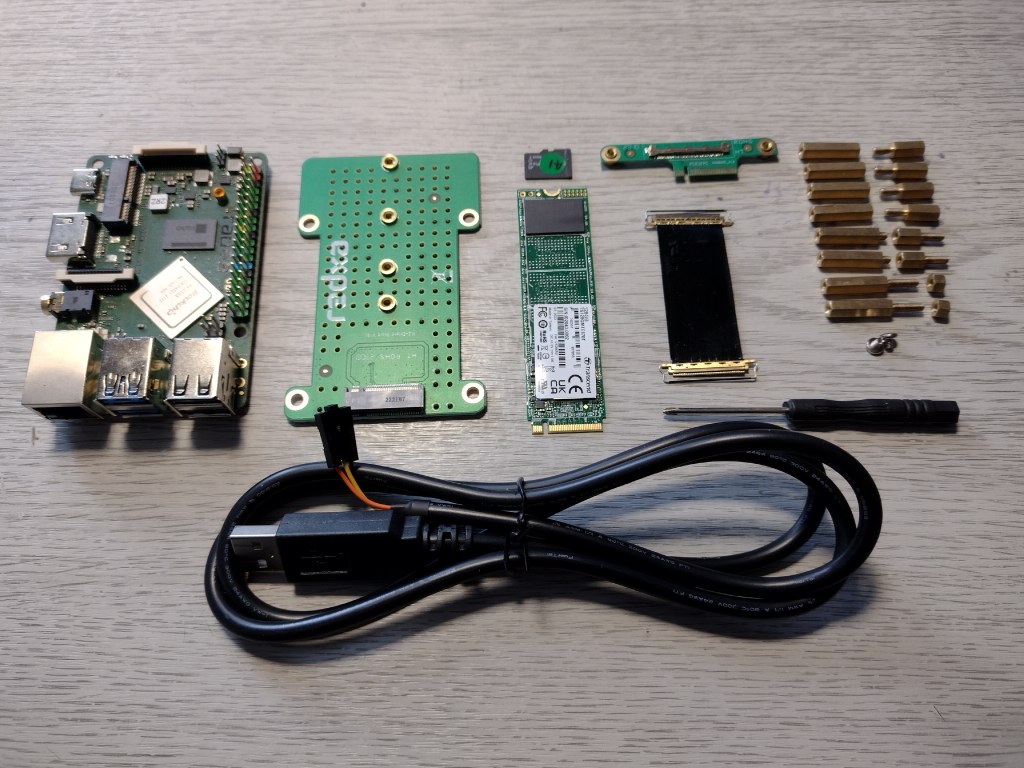
To assemble the kit, first of all connect the IPEX cable to the SSD adapter board and the IPEX to M.2 adapter.
For long format SSDs as a precaution put a strip of insulation tape over the unused screw holes on the adapter board to prevent any possible short circuits.
Insert the SSD into the M.2 M key slot on the adapter board. This fits in at an angle and is held down in place by the screw provided.
Warning: If you are attaching an SSD directly to the ROCK 3C / ROCK 5B DO NOT overtighten the retaining screw or you will shear off the boss.
Step 2: Flash SD Card
Before configuring the SSD an up-to-date operating system that boots from SD /eMMC storage is required. You can use the Getting Started guides for your ROCK board. Here’s the link for the ROCK 3A that we are using in this demo: Get Started with the ROCK 3A Single Board Computer & Debian ┃OKdo
Step 3: Serial Console (Optional)
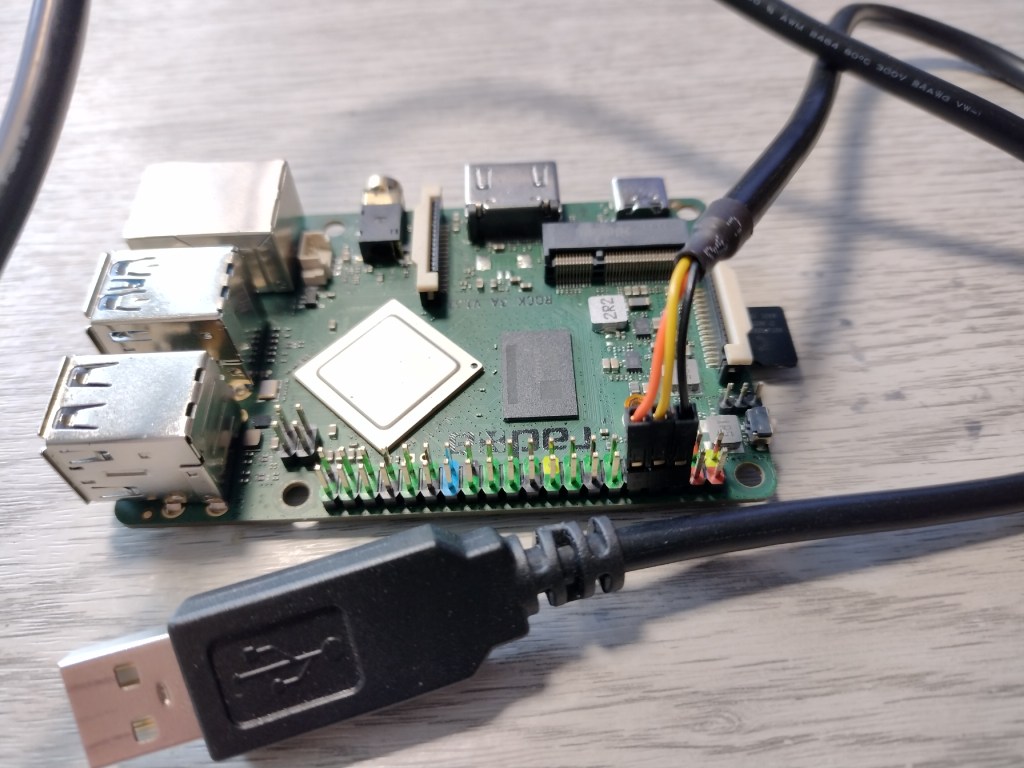
Although this is optional, we recommend attaching a USB-to-serial cable to the GPIO header so that you will be able to view the serial console output as the system boots. It is also possible to login via the console if anything is not working as expected.
Connect the cable to the ROCK board as follows:
- Black -> Pin 6, Yellow -> Pin 8, Orange -> Pin 10
- Connect the USB-A connector to your PC.
- Open a serial terminal application on the host PC. We use minicom on Linux or Putty on Windows.
$ minicom -D /dev/ttyUSB0 -b 1500000Note: the default baud rate for ROCK boards is 1500000 baud
Step 4: Partition Table
Warning: All the following commands are executed as root so be careful to refer to the correct device when running them.
It is important to correctly identify the storage devices attached to the system. lsblk is the Linux utility that lists all the block devices (disks) and partitions (part) recognised by the system. Each disk can contain none or several partitions.
Login to your ROCK via the desktop or SSH in and in a Terminal session list the devices attached:
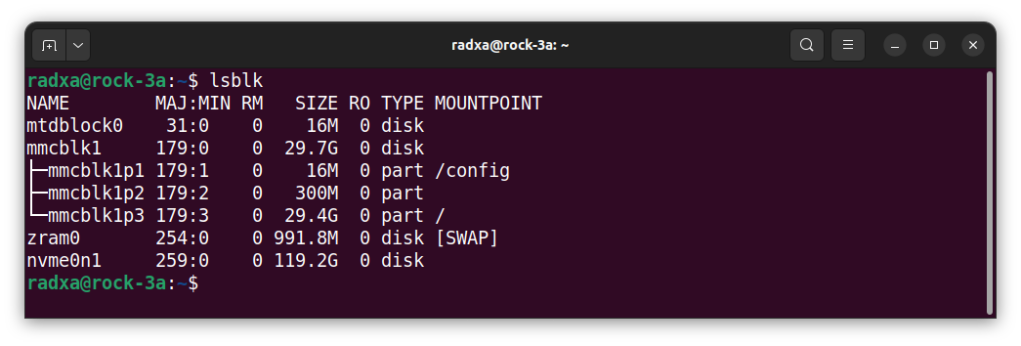
$ lsblkThe screenshot below shows all the devices on the ROCK 3A with NVMe SSD attached:
- SPI Flash chip mtdblock0 (16MB)
- SD card – disk mmcblk1 (29.7GB) with 3 partitions:
- mmcblk1p1 (16MB) is mounted on /config containing configuration used as part of the boot stage.
- mmcblk1p2 (300MB) is unmounted
- mmcblk1p3 (29.4MB) mounted on / containing the root filesystem
- zram0 (991.8MB) is a swap disk
- nvme0n1 (119.2GB) is unmounted – this is the SSD that we will be configuring
Note: Not all ROCK boards will have the same block devices
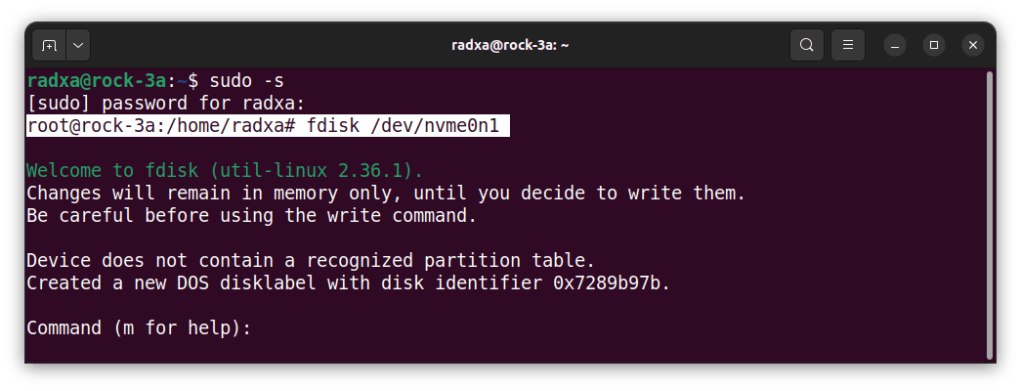
Now change to root to gain sufficient privileges to be able to setup the disk. This is indicated by the prompt changing to the #.
The current state of the disk can be shown with fdisk, the Linux disk formatting utility.
$ sudo -s
# fdisk /dev/nvme0n1
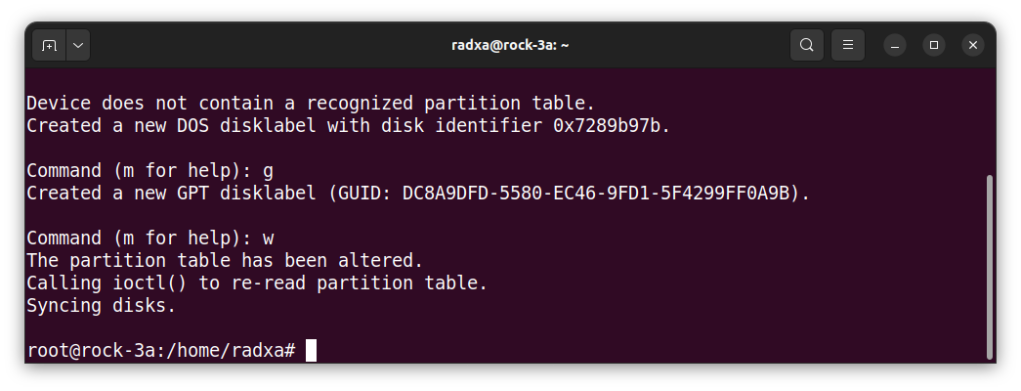
This shows that the drive needs a partition table creating before we can proceed:
Note: Use m to see all the commands available in fdisk
Create a GPT partition table:
Enter option g to create a GPT partition then w to write the partition table to the device.
Step 5: Partitioning
Now that there is a partition table, a new Linux partition can be created on the disk.
Use fdisk again but this time with the n option for a new partition and press Enter to accept the defaults, then w to write them to the disk:
# fdisk /dev/nvme0n1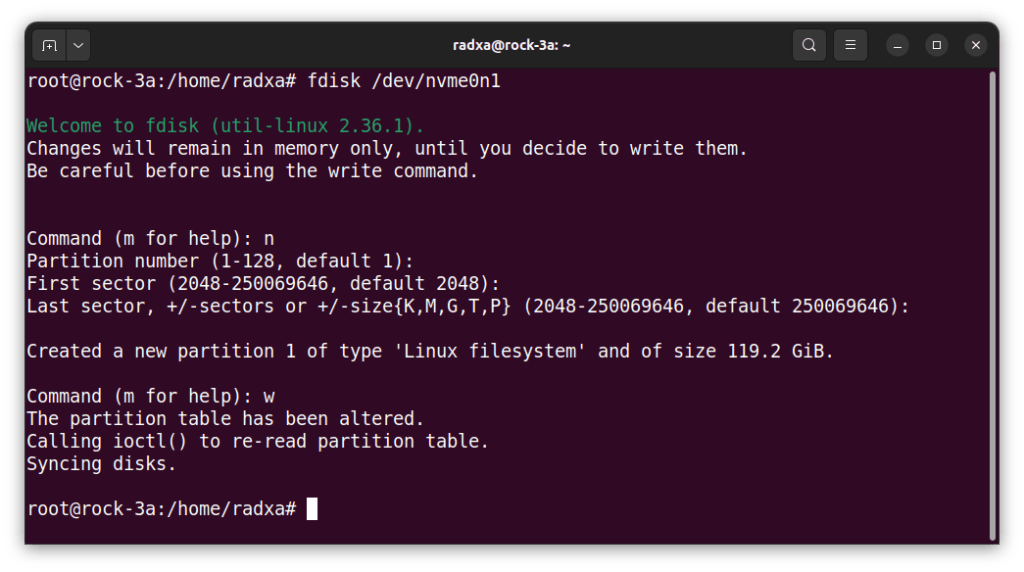
Now if you run lsblk again you can see the new partition nvme0np1:
# lsblk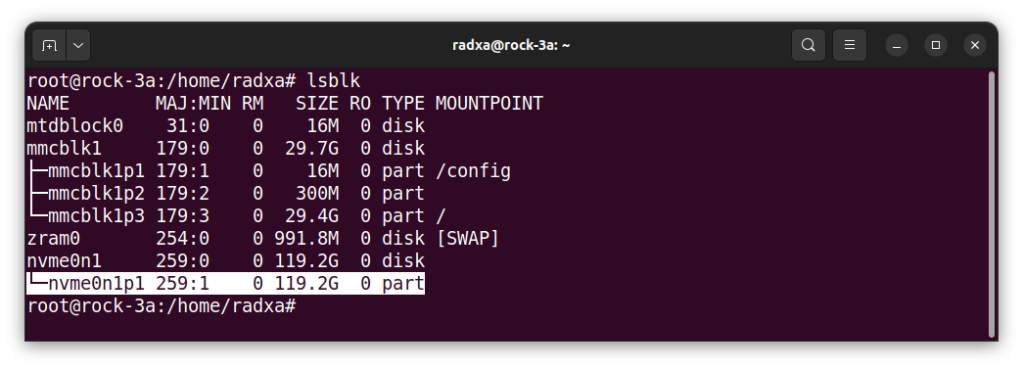
Step 6: Copying
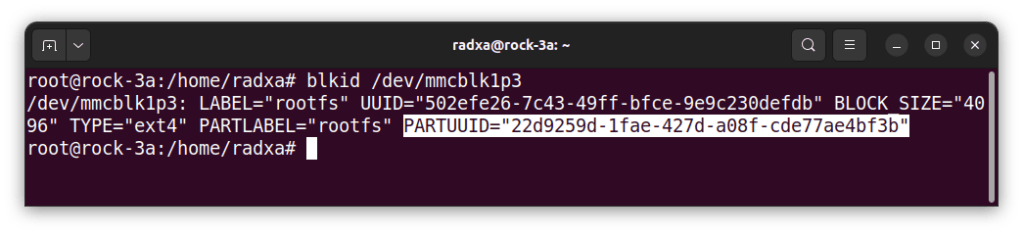
To copy the rootf filesystem from the SD / eMMC media to the SSD we need to discover the partition UUID for the rootfs on the SD / eMMC storage. This is mounted on the SD card device mmcblk1p3 in this example.
blkid is the Linux utility that displays partition UUID information for block devices:
# blkid /dev/mmcblk1p3The rootfs PARTUUID for this example is “22d9259d-1fae-427d-a08f-cde77ae4bf3b”. Your ID may be different!
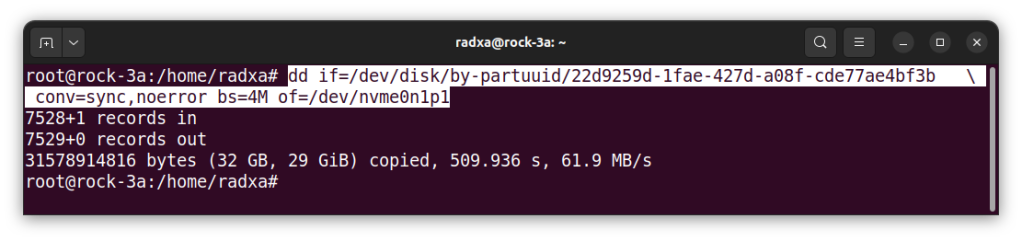
dd is the Linux utility for copying raw bytes.
Use dd to copy the rootfs – this will take a few minutes (10 mins for this SSD) with just a blinking cursor, so be patient and wait until the command prompt returns:
# dd if=/dev/disk/by-partuuid/22d9259d-1fae-427d-a08f-cde77ae4bf3b
 conv=sync,noerror bs=4M of=/dev/nvme0n1p1
Warning: dd will override the data on your drive so be careful to write to the correct disk / partition – you can read about all the options with: $ man dd
Step 7: Resize
After copying the partition the SSD partition must be resized to use the full storage.
Resize the partition, fixing any issues with the following command:
# resize2fs /dev/nvme0n1p1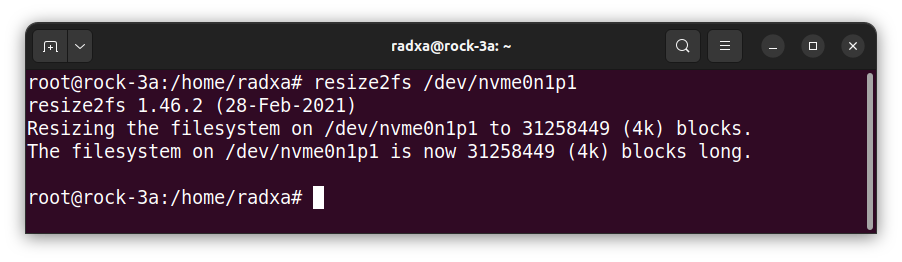
Step 8: Mount NVMe
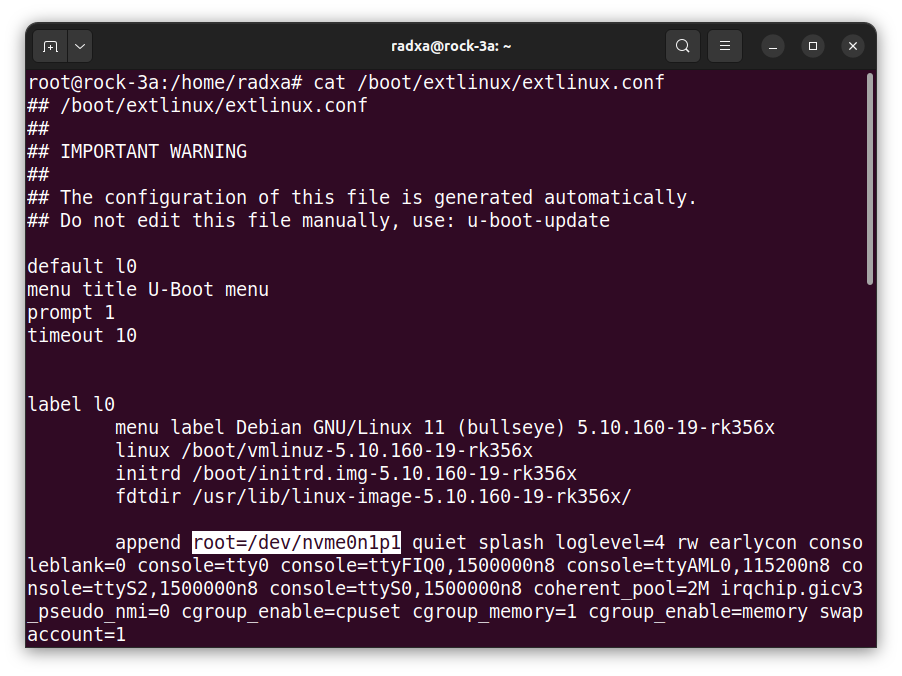
The penultimate step is to configure the boot process to mount the rootfs from the NVMe disk rather than the SD / eMMC storage.
Make a copy of extlinux.conf in case you want to revert:
# cp /boot/extlinux/extlinux.conf /boot/extlinux/extlinux.conf.origEdit /boot/extlinux/extlinux.conf using vi or nano:
# vi /boot/extlinux/extlinux.confChange the first entry for the rootfs which will be something like this:
root=UUID=22d9259d-1fae-427d-a08f-cde77ae4bf3bto the NVMe partition
root=/dev/nvme0n1p1Now reboot and the rootfs (/) should now be mounted on nvme0n1p1:
# rebootThe board still uses the first partition on the SD card to start the boot process but now the rootfs is mounted on the NVMe drive.
Step 9: Speed Test
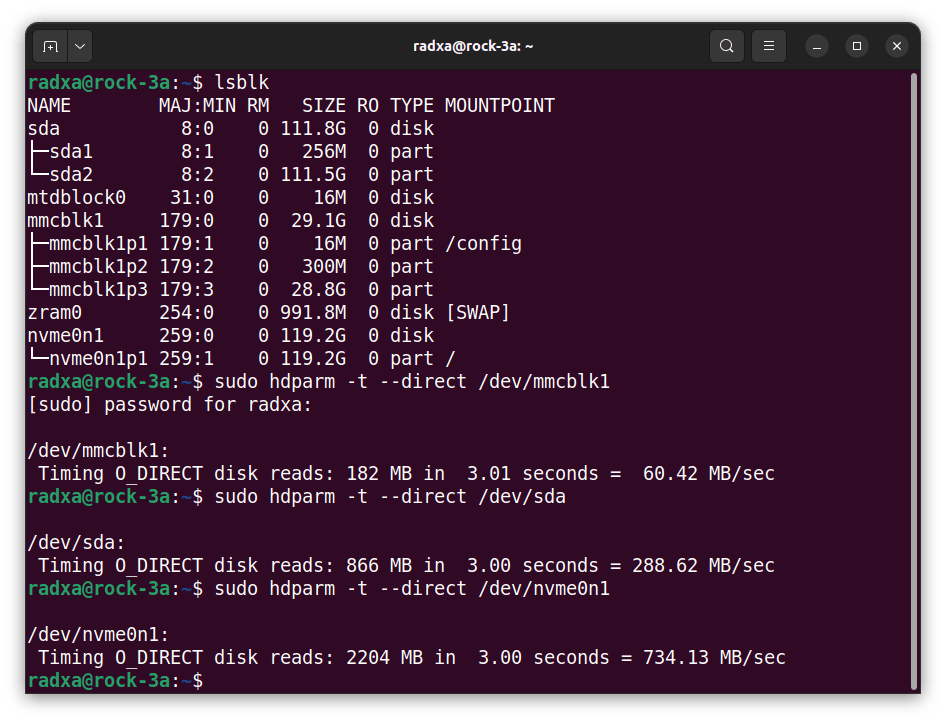
Now you can run a speed test on your SD card and the NVMe SSD and see the difference:
$ lsblk

$ sudo hdparm -t --direct /dev/mmcblk1

$ sudo hdparm -t --direct /dev/nvme0n1
You should now have a really fast NVMe SSD setup (10x faster than SD)!
Troubleshooting
If things don’t go to plan and you need to revert the changes to the SD / eMMC so the system boots again, you can remove the SD / eMMC storage and attach it to a USB reader on a Linux host.
If you saved the extlinux.conf file, mount the drive and then copy the original back:
$ mkdir -p /mnt/sd

$ sudo mount /dev/sda /mnt/sd

$ sudo cp /mnt/sd/boot/extlinux/extlinux.conf.orig /mnt/sd/boot/extlinux/extlinux.conf

$ sudo umount /mnt/sd
Then put the media back in the ROCK and it should boot and run from the SD / eMMC storage again.
You can check that the filesystem is expanded using df:
$ df -h /dev/nvme0n1p1If the full capacity of the drive is not reported, run the resize command again.
Summary
In this project we have shown you how you can take advantage of NVMe SSDs through M.2 adapters on most ROCK boards, providing dedicated, high-capacity storage (up to 2TB) with PCIe interface for speeds over 10 times faster than SD or eMMC storage, and a durable lifespan of several years based on usage.
![]()


Let’s invent the future together
What’s your challenge? From augmented reality to machine learning and automation, send us your questions, problems or ideas… We have the solution to help you design the world. Get in touch today.
Looking for something else? Discover our Blogs, Getting Started Guides and Projects for more inspiration!
Like what you read? Why not show your appreciation by giving some love.
From a quick tap to smashing that love button and show how much you enjoyed this project.

