This step by step guide will show you how to make a GPS tracking and data logging device using the BBC micro:bit and the Seluxit wappsto:bit. It’s a great device that can track locations and log coordinates of the places you’ve been to.
This device is perfect as a family GPS tracker to monitor the location of your children to ensure their safety, a pet tracker or just for tracking your running or walking routes for fun, to collect all the beautiful places you’ve visited.
Springtime is “equal” to spending time outside – and that’s great! But couldn’t it be funny to see how far you have been around? Let’s try this project to create a GPS tracking data logging device, step by step. But, most of all, have fun!
![]()
Step 1: Planning process
To ensure that the project you’re planning will turn out successful, it’s always wise to make a “master plan”.
The “Master plan” for this project needs to cover our main requirements for the project, and specifically, we want it to:
- Capture GPS coordinates.
- Be based on the micro:bit platform.
- Be wearable.
If you work on a bigger project, then do a Flow Chart to create a plan before you start to code anything.
So, to get started, you first need to create:
- A setup routine
- A loop that gathers the position data
- A loop that stores the collected data
- Some button functions
- & Learn how to use the data.
Step 2: Gather all parts needed for the project
This project is based on two main components, the BBC micro:bit V2.2 board and the Seluxit Wappsto:bit NB IoT+. Some additional parts required for the project are listed at the top of this project page.
Step 3: Assembly
First, attach the micro:bit to the wappsto:bit.
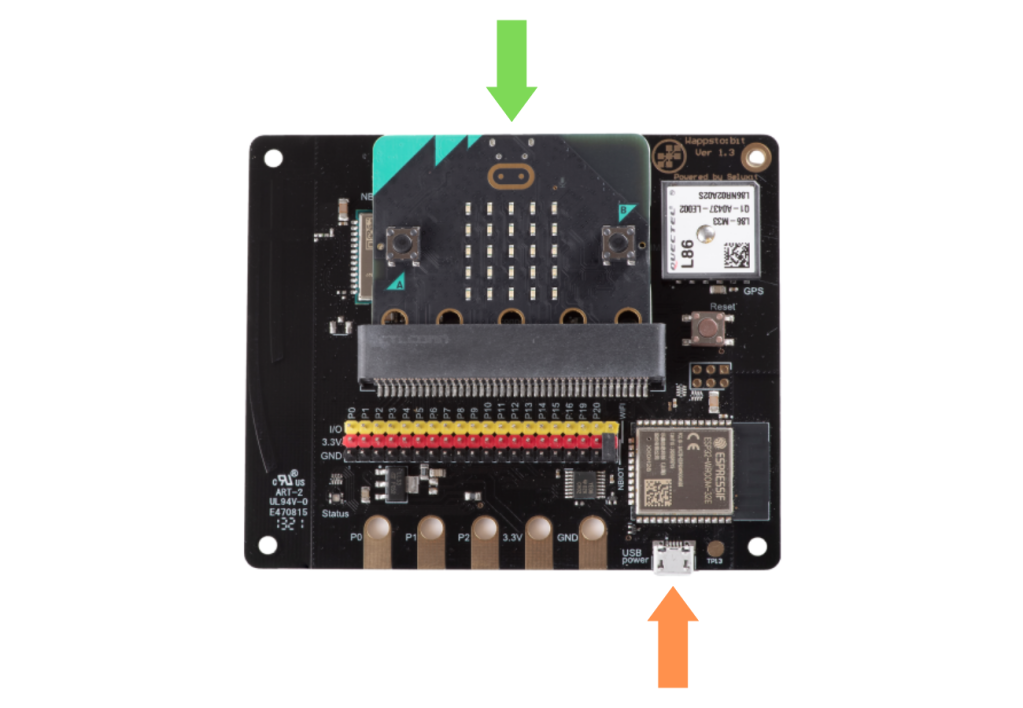
It’s important to note that the micro:bit does not power the wappsto:bit. When programming and using the stored data, you need to have a USB cable connected to the micro:bit (green arrow). When running the code and using the functionality of wappsto:bit, you need to power both through the wappsto:bit (orange arrow).
Step 4: Proof of concept
Before we put the whole program together, let’s first see if the plan holds tight. We can do this by a simple “proof of concept” program.
First, create a new project. Let’s call it “GPSDatalogger”.
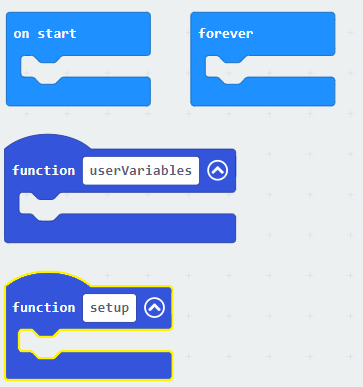
Personally, I like to use functions, so let’s create those needed:
setup
userVariables
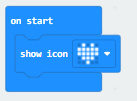
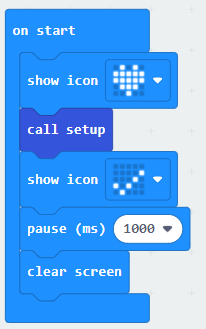
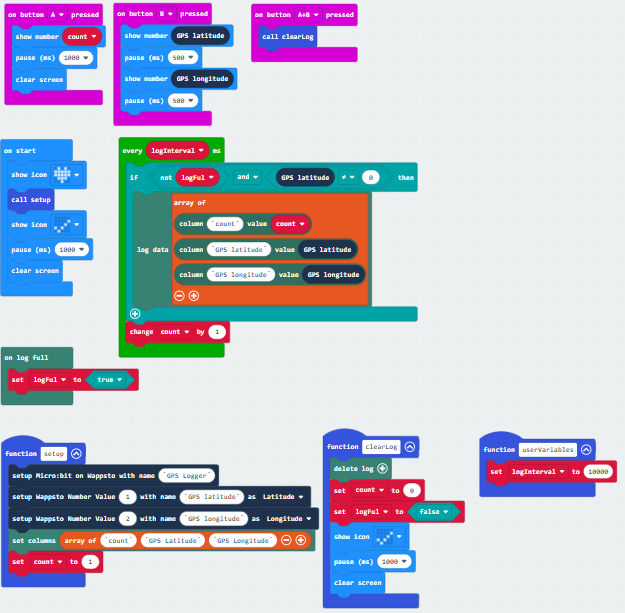
I always add an icon or similar to the on start block – that way I am sure that the micro:bit is working (remember to use the Green arrow USB). To add a simple icon to the “on start” block:
Then, we need to add the extension (library) for the wappsto:bit. Click on extensions; in the new window, write “Wappsto” and click search:
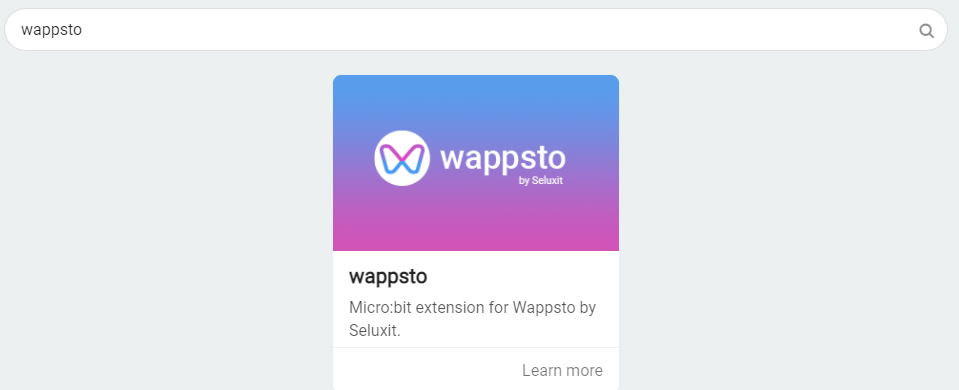
Click on the extension shown – it’s now added to the environment.
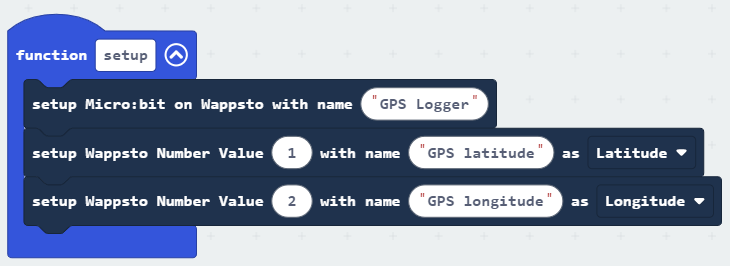
To configure the wappsto:bit, we first need to set it up; we do this in the setup function:
- From the wappsto extension library drag, “setup Micro:bit on Wappsto with name “name” and change the name to “GPS Logger”.
- Drag in “setup Wappsto Number Value 1 with name “myValue” as Number”, change “MyValue” to “GPS latitude” and Number to Latitude.
- Drag in “setup Wappsto Number Value 1 with name “myValue” as Number”, change “1” to “2” and “MyValue” to “GPS longitude” and Number to Longitude.
In the “on start” block, we will add the just created setup function and some basic things (just to have some visual of the things happening):
Add “call setup” from the Functions library.
Now let’s add some more functionality.
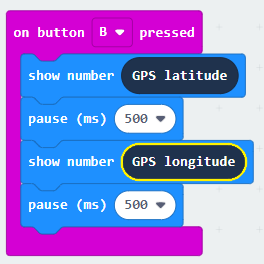
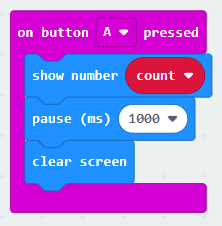
Add a button to display some positions:
- from “input” library drag “on button “A” pressed and change “A” to “B”.
Add the following to the “no button “B” pressed block:
- “Show number ‘0’” and change “0” to “GPS latitude” (from the wappsto extension library).
- “pause (ms) ‘100’” and change “100” to “500”.
- “Show number ‘0’” and change “0” to “GPS longitude” (from the wappsto extension library).
- “pause (ms) ‘100’” and change “100” to “500”.
Now try downloading the program to the micro:bit. You will see that the micro:bit is “stock” at the heart icon; this is because the micro:bit is not supplying power to the wappsto:bit. So, try moving the USB cable (remember the green/Orange arrows) to the wappsto, and you should now see the “Check sign” appear.
If you click the button “B” and it shows “NaN NaN”, it means the GPS module does not yet have a fix. If you are indoors, try putting the board close to a window and wait for a little before trying again.
Step 5: Add the data logging functionality
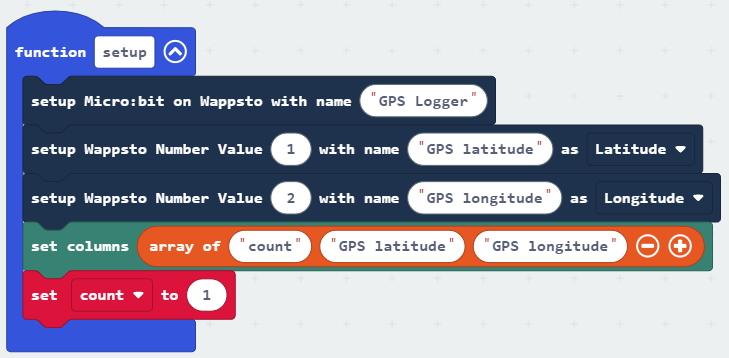
First, we need a “count” variable. So, from the Variables library, click on “Make a Variable” and name it “count”.
Next, we need to add the datalogger extension similar to when we added the wappsto:bit extension. We also need to set it up – we will do this in the setup function, so add:
“set columns array of “a” “b” “c” ” change “a” to “count”, “b” to “GPS latitude” and “C” to “GPS longitude”.
In the setup function, we also define the count variable:
From the Variables library, drag “set count to ‘0’” and change “0” to “1”.
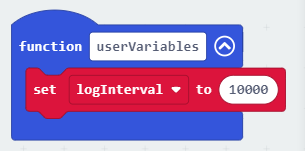
Now create the Variable called “logInterval”.
Add “set logInterval to ‘0’” from Variables library to block “function “userVariables” and change the “0” to “10000”.
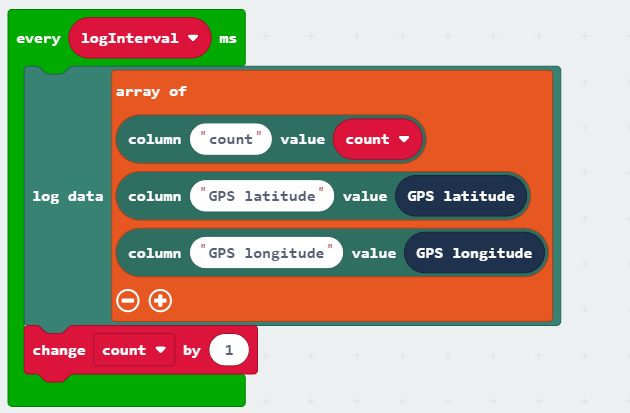
Now for the logger loop:
- From the Loops library, drag “every ‘500’ms” and change ‘500’ to the variable “logInterval”
- From the Datalogger extension library, drag “log data array of column ” ” value 0 column ” ” value 0″ and click on the + to add one more entry.
- Then, change the first set ” ” to “Count” and 0 to variable count and the second set from ” ” to “GPS Latitude” and 0 to “GPS latitude”.
- Finally, change the last set from ” ” to “GPS Longitude” and 0 to “GPS longitude”.
- Add from the Variables library “change count by 1”.

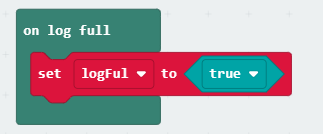
Let’s add functionality to clear the log. Here we use the “on log full” event to set a flag:
From the Data Logger library, drag the “on log full” block out.
Now create a variable named “logFul”, add “set logFul to 0” to the above block and change “0” to the logic component “true”.
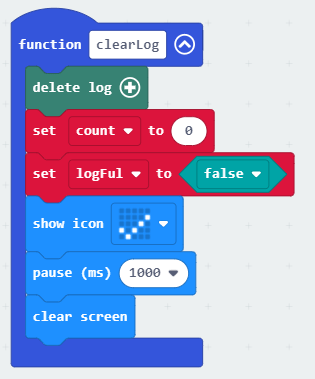
Create the function “clearLog” and populate it, so it’s like this:
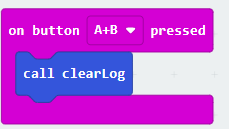
Call the function from a button (here A+B):
Now, I would like to add a way to see how much we have logged:
Step 6: Add a little more logic
Now everything works fine! But, let’s add extra functionality so that we only log data when the log is not full and we have a fix/position.
So, we can add some logic to the “every “logInterval” ms” block by adding this:
Your program should now look like this:
And here is a link to the finished code.
Step 7: Learn how to use the logged data
Now that we have logged data, how to get it?
When you plug the USB cable between the micro:bit and your computer, you will get the log a window looking like this:

Try clicking on the “micro_bit data log”; it will look similar to this:
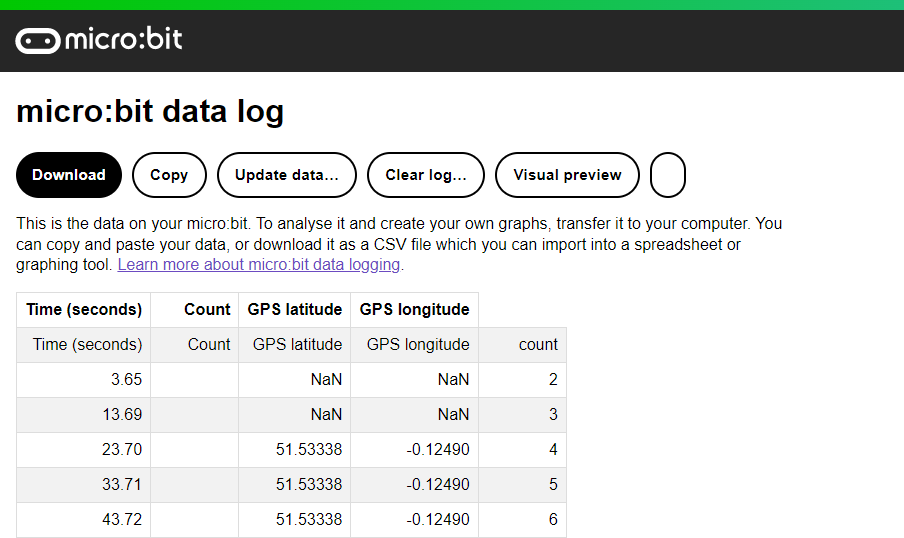
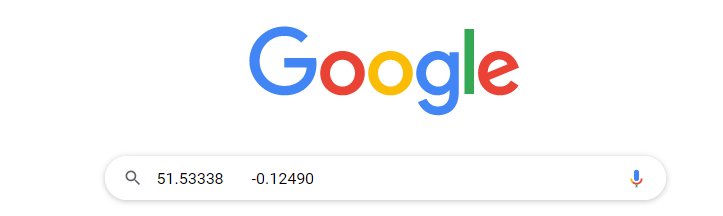
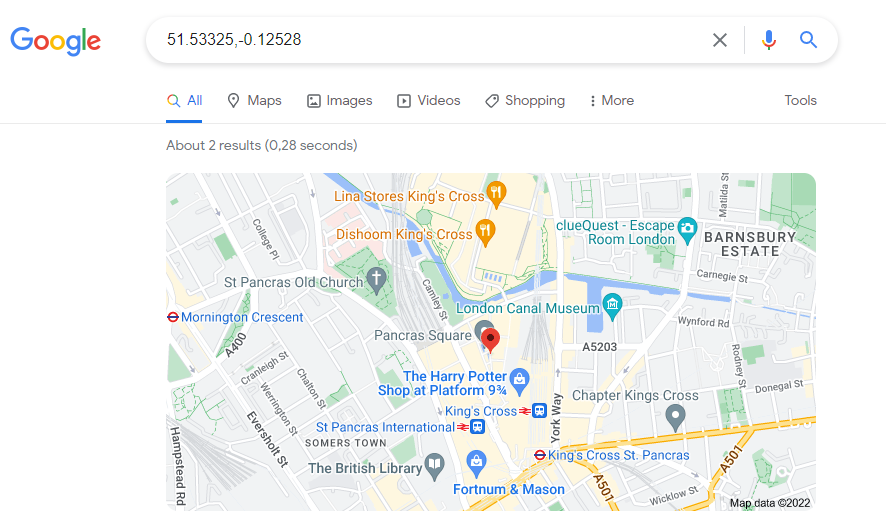
If you then mark one log entry with data (here the last one) – just the GPS latitude and GPS longitude and copy & paste it to the Google search console, you’ll be able to see where you’ve been:
Summary
This project is easy, fun, and highly customizable to best suit your intended use for this GPS tracking device. It can be adapted for multiple applications where location tracking is required.
Using the BBC micro:bit, the Seluxit wappsto:bit boards and a bit of programming, you can now keep records of all the fantastic locations you, our family or friends have been to. Whether you’re walking, running or hiking, imagine how cool it would be to view the path you’ve made on a map!
![]()
BBC micro:bit shop on OKdo
Visit our BBC micro:bit shop for more exciting products for your next projects!
Projects Hub
Visit our Projects Hub for more inspiring projects to try out next!

Appendix
Useful links:
Link to the code as shown in step 6.
Variables:
logInterval – Number, used to set the interval between Data Logger entries.
Count – number, used to count nr of data entries.
logInterval – number, used to set the time between log entries.
Functions:
clearLog – empty the data storage.
userVariables – keeps the settings that the user can play with.
setup – keeps the things that need to be set up before running the program.
Like what you read? Why not show your appreciation by giving some love.
From a quick tap to smashing that love button and show how much you enjoyed this project.

