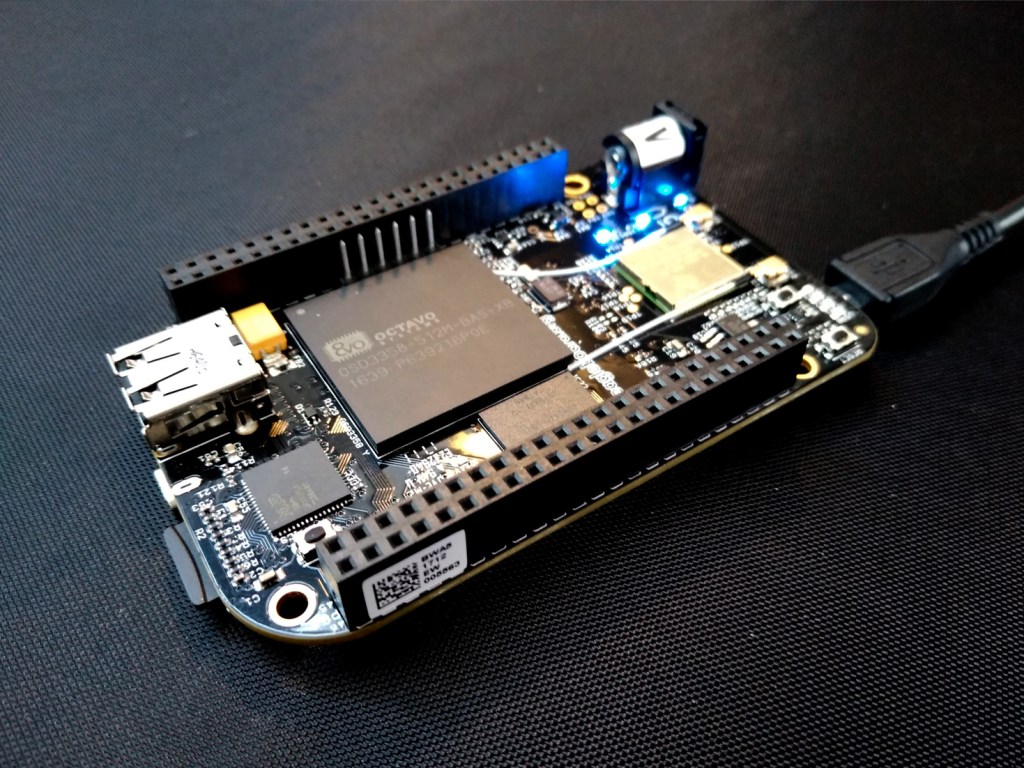
BeagleBone Black is a tiny computer ideal for learning and prototyping with electronics. With this getting started tutorial you will be up and running with your BeagleBone in minutes. This get started with Beaglebone Black (headless) guide is suitable for BeagleBone Black and BeagleBone Black Wireless.
Download latest Debian
It is good practice to always start with the latest software installed on your Beaglebone. There are 2 main variants depending on your intended use. LXQT includes a graphic desktop while the lightweight IoT doesn’t. Ensure that whichever one you choose is the correct version for BeagleBone Black.
- Download the appropriate Debian image
Flash Debian
- Download and install balena Etcher from here if you don’t already have it
- Insert an SD card into your computer
- Open balena Etcher
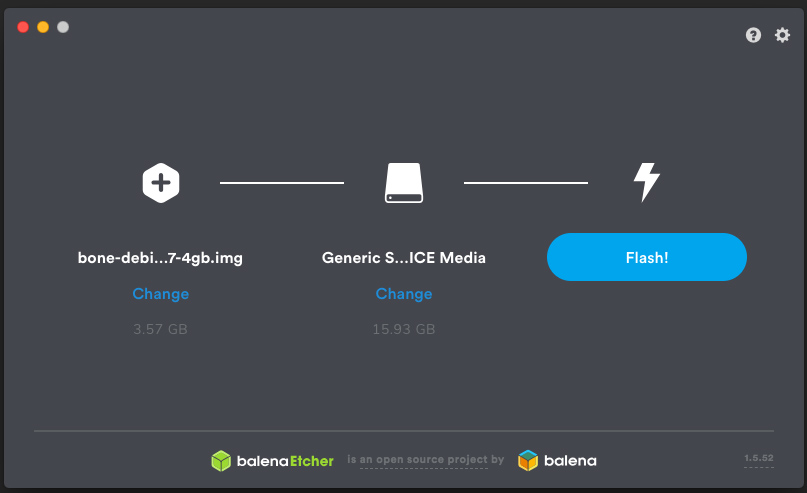
- Select your downloaded Debian image and your SD card, click Flash!
- Eject your SD card
Start your BeagleBone
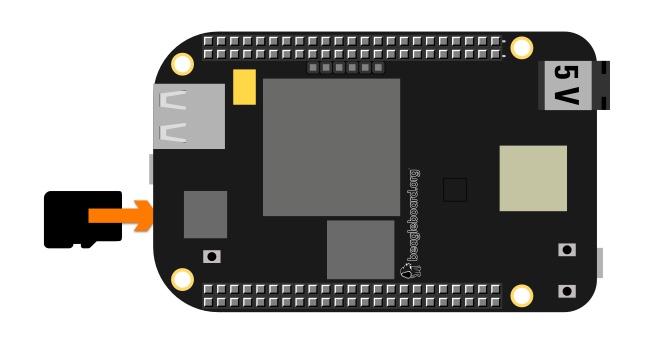
- With your BeagleBone Black powered down, insert your newly flashed SD card. It will click when fully inserted.
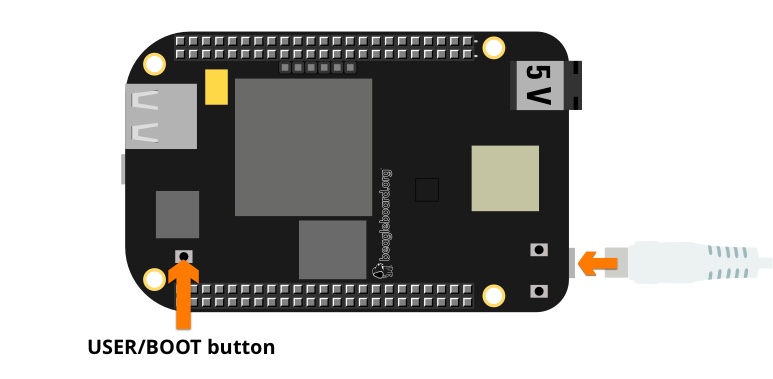
- Hold down the USER/BOOT button and power up your BeagleBone using either the micro-USB cable or 5V adapter.
Your BeagleBone should now be on and running the latest Debian. If you want to write the image to your onboard eMMC, follow the instructions on http://elinux.org/Beagleboard:BeagleBoneBlack_Debian#Flashing_eMMC.
Enable network connection
If your BeagleBone includes WiFi, you should be able to see it in the available WiFI networks from your computer. It will appear as BeagleBone-XXXX, where XXXX is a number that varies between boards.
- Connect to BeagleBone-XXXX WiFI network from your computer, the default password is BeagleBone.
- Using Chrome or Firefox, enter the BeagleBone’s IP address: 192.168.8.1 into the address field of your browser window. You will briefly see the following Cloud 9 screen:
You will then be greeted with the BeagleBone’s Terminal interface showing a message about upgrading your software.
First, you’ll need to connect your BeagleBone to the internet through your WiFi.
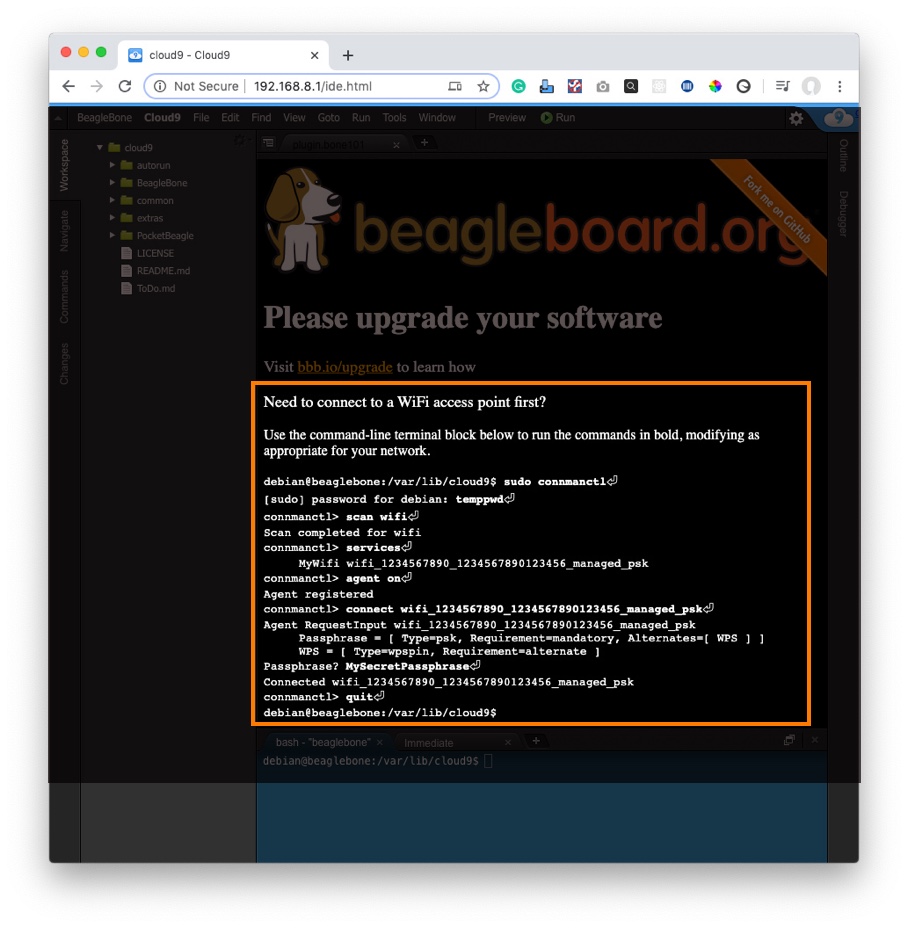
- Enter the commands listed in bold into the bash-“beaglebone” tab pressing return after each one. Ensure to replace the line starting MyWifi with your WiFi’s id which will appear in the Terminal window as you go through the process.
- Enter your WiFi’s password when prompted with Passphrase?
You should now have your BeagleBoard connected to your WiFi network.
Upgrade your software
- Click on bbb.io/upgrade
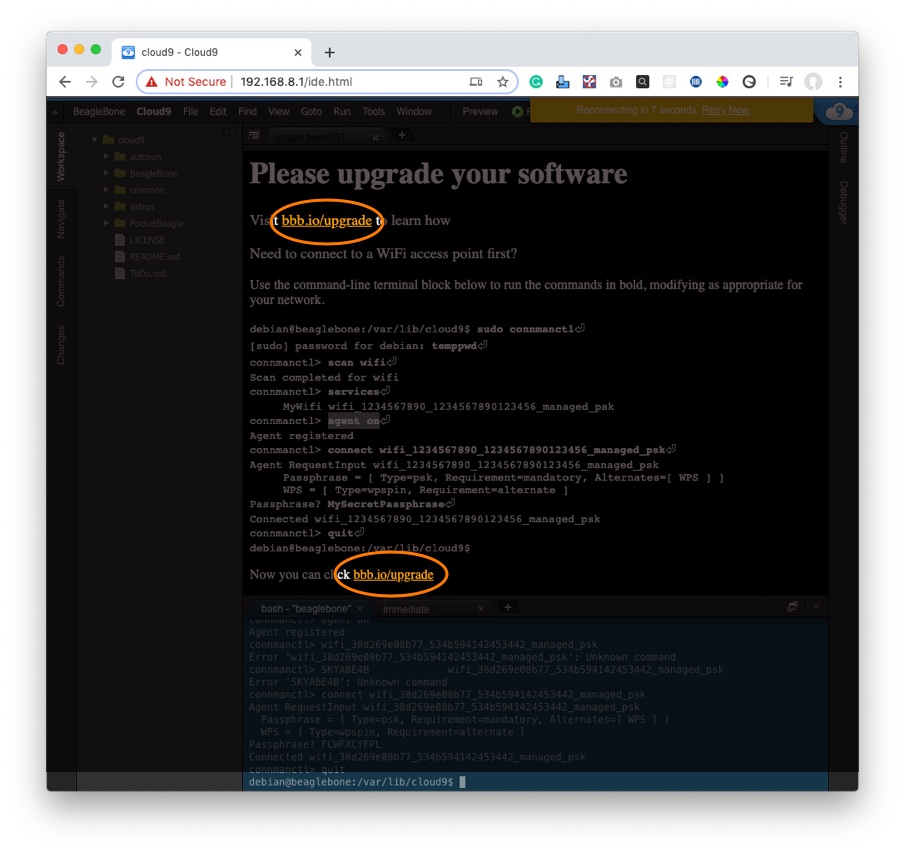
You will be presented with instructions on how to upgrade your software. You can skip the part about connecting to the internet as you should already be connected.
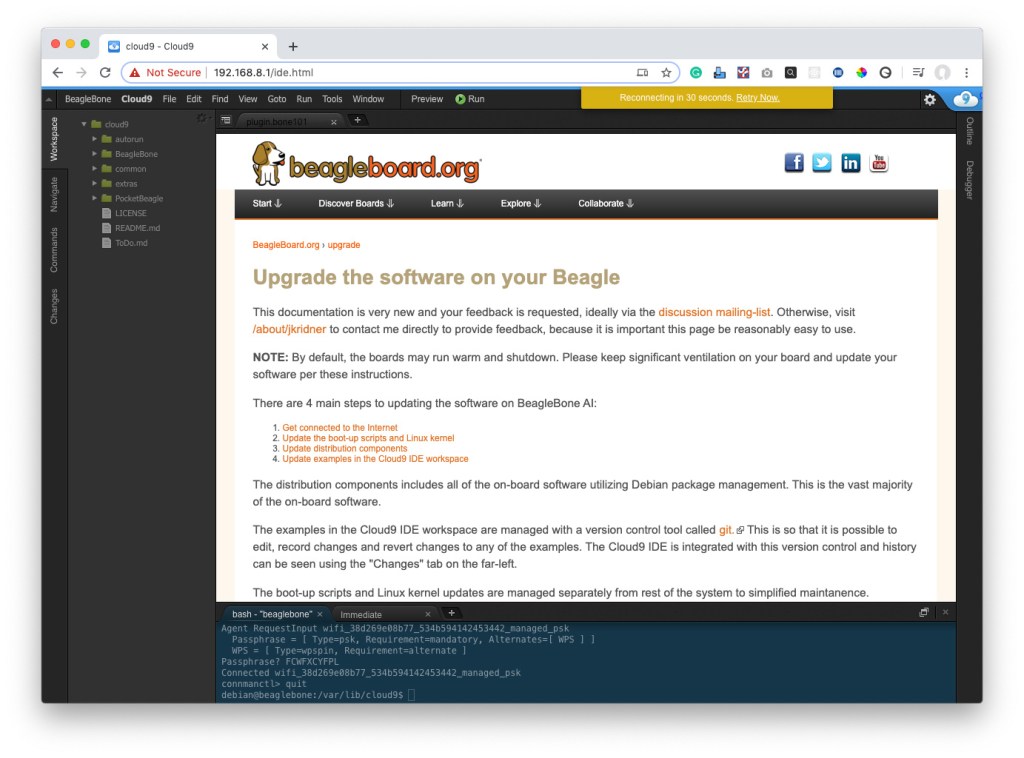
- Click on Update the boot-up scripts and Linux Kernel.
- Follow the on-screen instructions. Some processes might take a little while as you download and install the necessary updates.
- Follow the on-screen instructions for Update distribution components.
- Follow the on-screen instructions for Update examples in the Cloud9 IDE workspace.
- Follow the on-screen instructions for Test installed versions.
Your BeagleBone Black is now ready!
