Building a Spaceship Interface with the Arduino Starter Kit
Author and image credits: Arduino.cc
The Arduino Starter Kit is an innovative educational tool meticulously crafted to empower young minds with essential coding skills. Specifically designed to foster an early interest in programming and electronics, this kit serves as a gateway for students to delve into the exciting world of technology. In this project we show you how you can use the Arduino Starter Kit to build a control panel complete with switches and lights, simulating the interface of a spaceship. Through this hands-on experience, students will valuable insights into digital inputs and outputs, grasp fundamental programming structures, and deepen their understanding of resistors.
Prefer to watch a video of the project? It’s available on the Arduino YouTube account.
Step 1 - Arduino IDE
Let’s get started! Firstly, you’ll need to open Arduino Integrated Development Environment (IDE). Arduino IDE connects to your Arduino board to upload programs, communicate with it, and makes it easy to write code and upload it to the board offline. You can read more about the Arduino IDE on the Arduino Docs hub. For this project, you can use either the desktop version or the web editor version of Arduino IDE.
Step 2 - The Board's Pins
Now, let’s take a look at the Arduino UNO Board included in the Arduino Starter Kit. For this project we’ll be utilising the digital pins on the board, they can either be ON or OFF. However, these pins can act as both inputs and outputs.
An input is when the microcontroller receives information from any external component, meaning the data is flowing towards the microcontroller. An output is when the microcontroller sends information to the components, so the data flows out from the microcontroller.
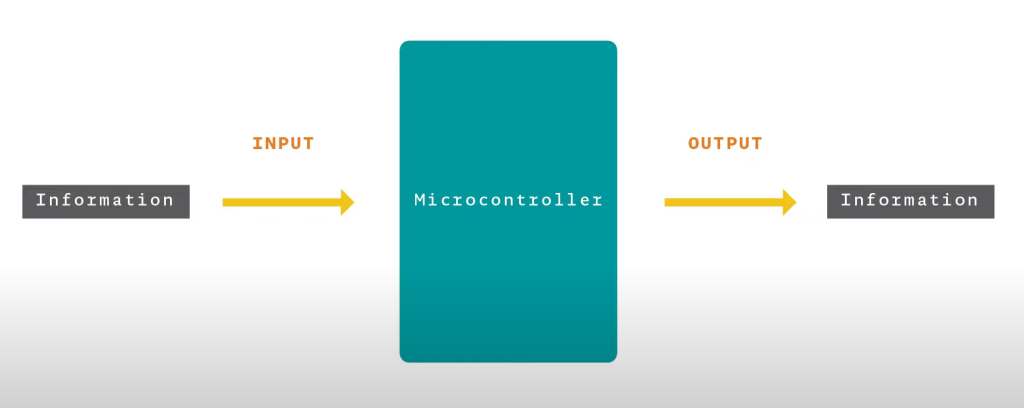
For example, a switch is an input that can tell us if it is being pressed or not, and based on that information we can turn on and off an LED, which is an output.
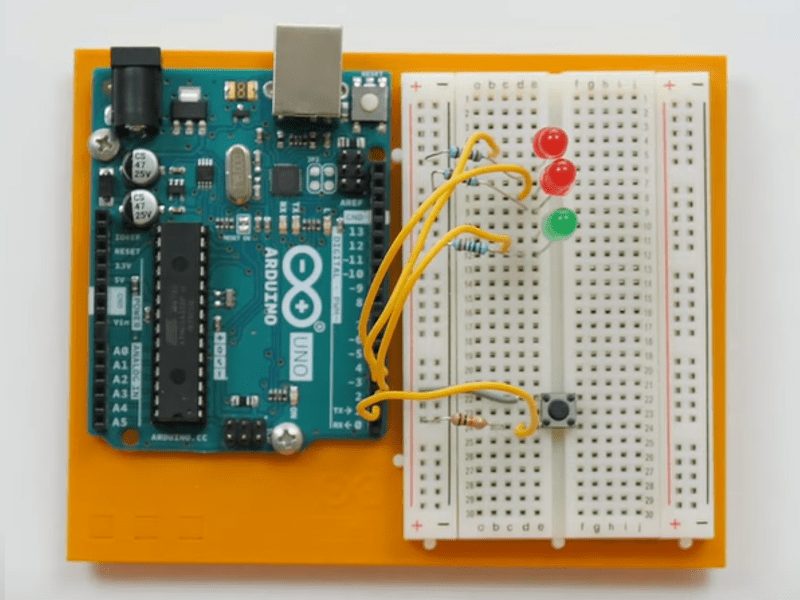
Step 3 - Connecting your LEDs
Firstly, make sure your UNO board is not connected to a computer. You can start connecting your 3 LEDs. Because the LED is a polarised component it’s important that you connect it the right way. The longer leg of the LED connects to the digital pin (row 5), and the shorter leg to ground (row 6).
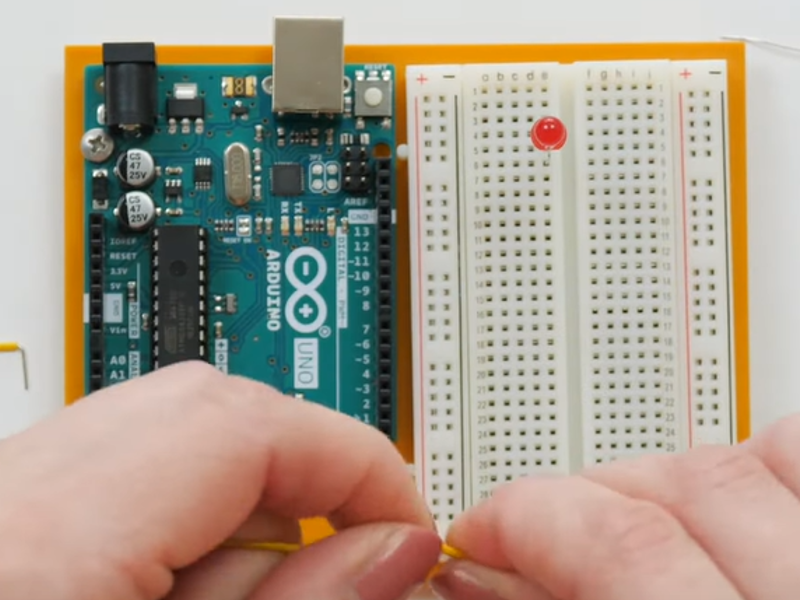
Now connect a jumper wire to the same row as the long leg of the LED, and the other end to digital pin 5 on your UNO board.
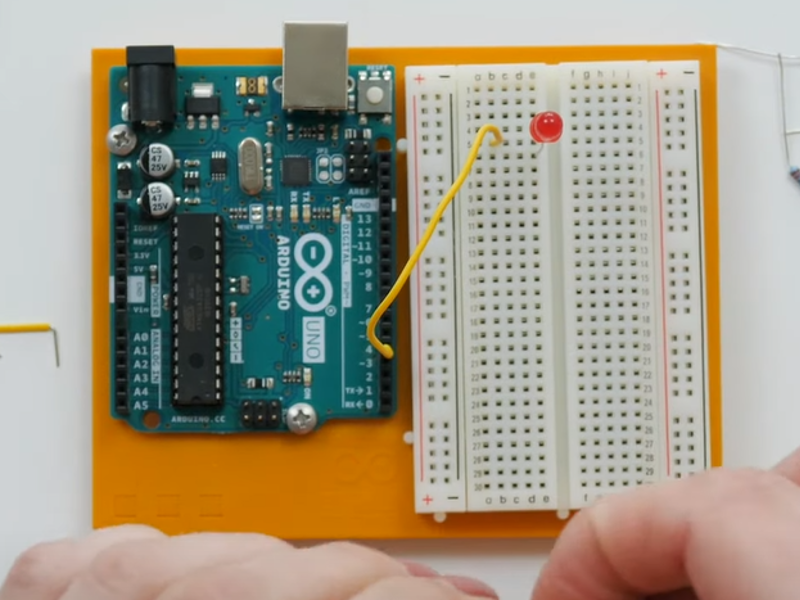
Finally, connect your resistor to the same row as the short leg of the LED, and the other end to ground.
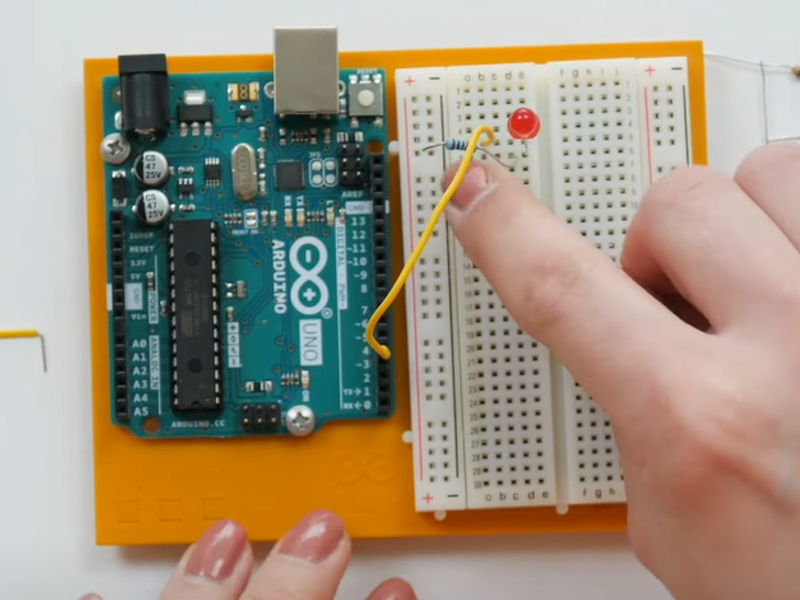
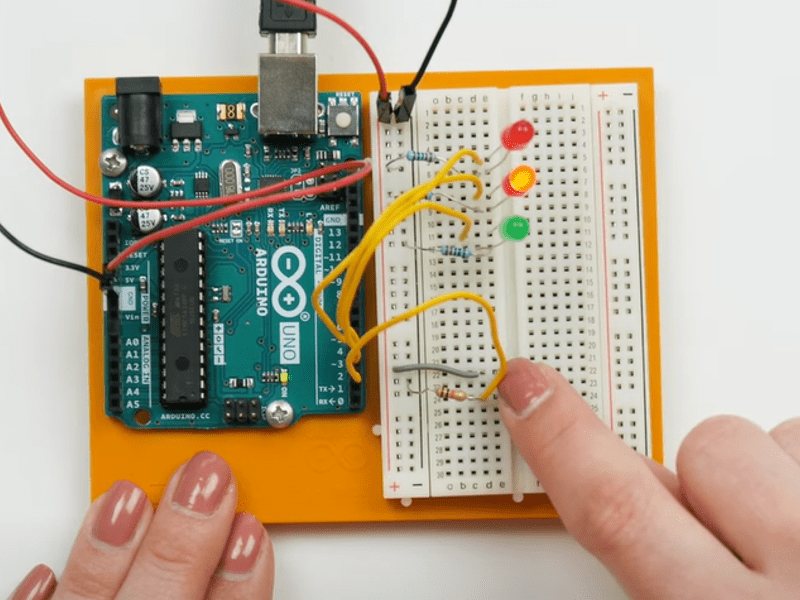
Repeat this process for all 3 LEDs and connect to digital pins 5, 4, and 3 on your UNO board. Your circuit should look something like this:
It’s important that you know which LED is connected to which digital pin on your UNO board as we will use this later when coding.
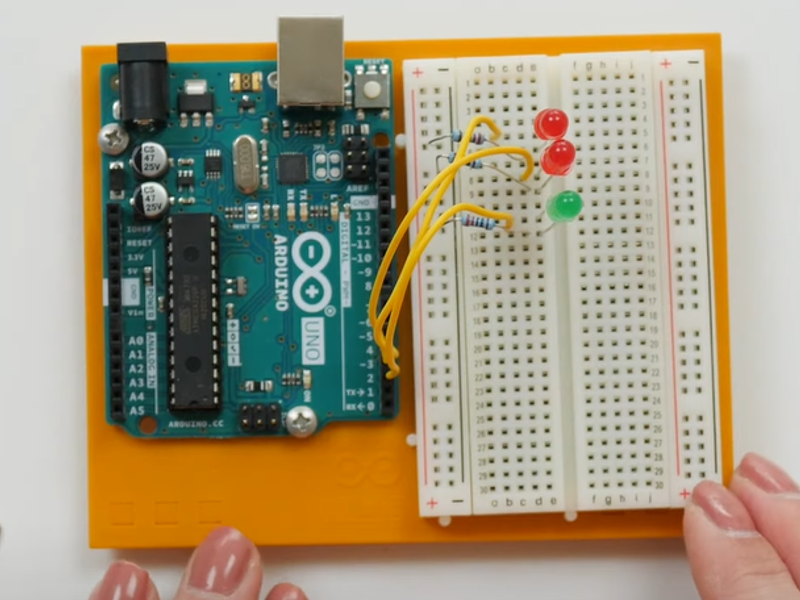
Step 4 - Connecting your Switch
Time to connect your switch, jumper wire, and resistor to ground as shown below:
Now connect the resistor using the same pin to digital pin 2 on the UNO board using a cable as shown below:
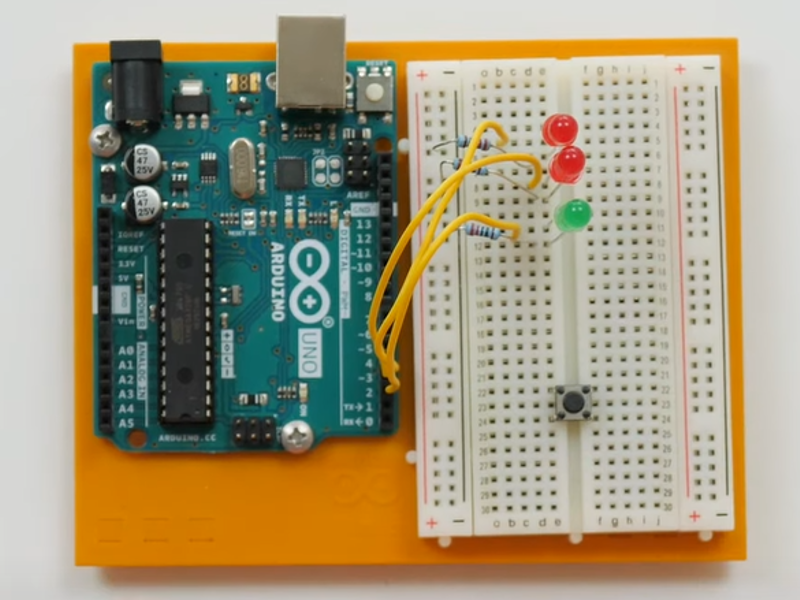
Finally, connect ground and power to the UNO board as shown below:
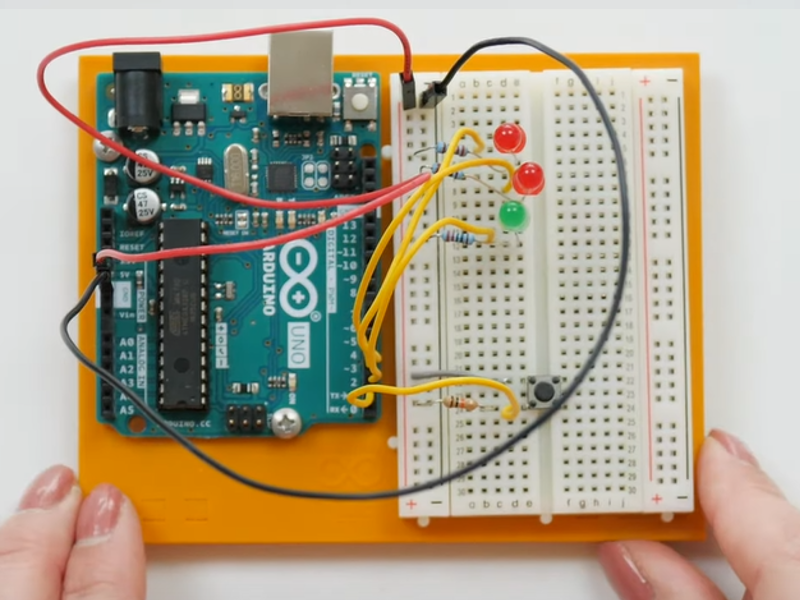
Your circuit is now ready, just connect your board to your computer and get ready to code!
Step 5: Coding
Once your board is connected to your computer, open Arduino IDE, you can use the desktop version or the web editor. The interface should look something like this:
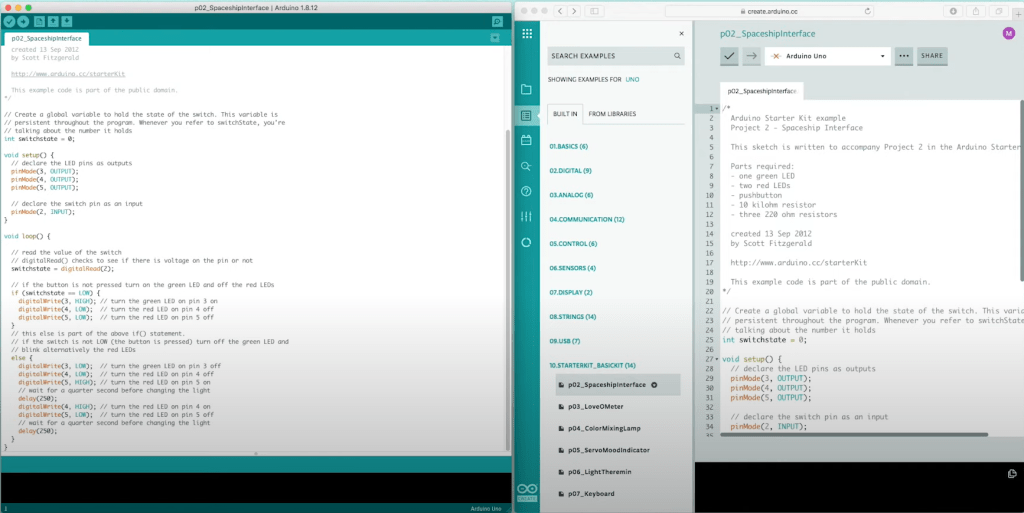
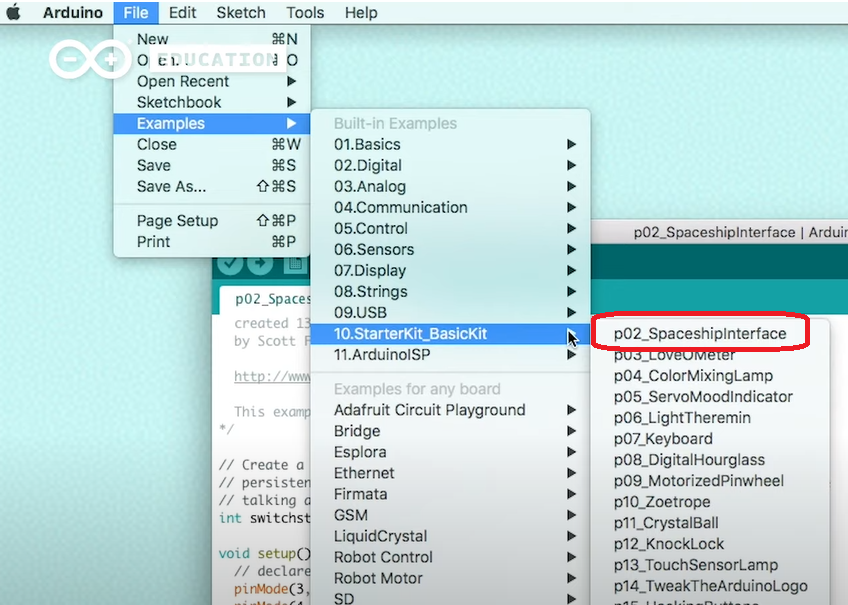
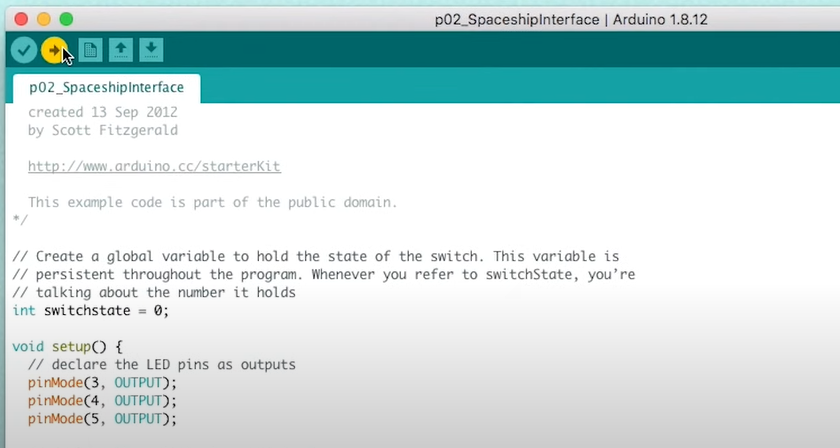
Open the example code, you can find this under File, Examples, Built-In Examples, StarterKit_BasicKit, then p02SpaceshipInterface:
You can now upload the code to your board:
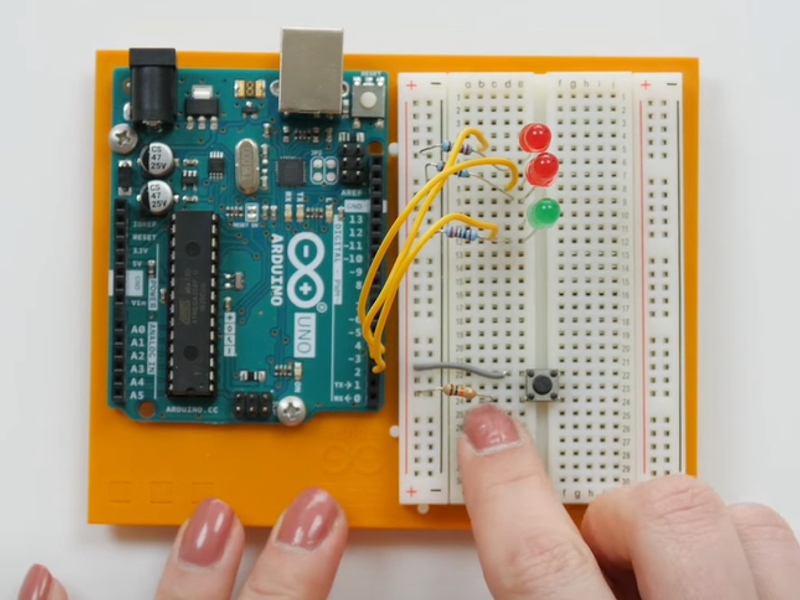
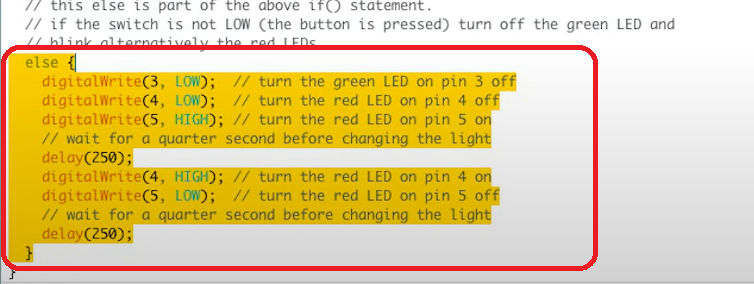
Once it has successfully uploaded, when you click the button on your circuit your LEDs will blink and one will remain on when the button is not pressed.
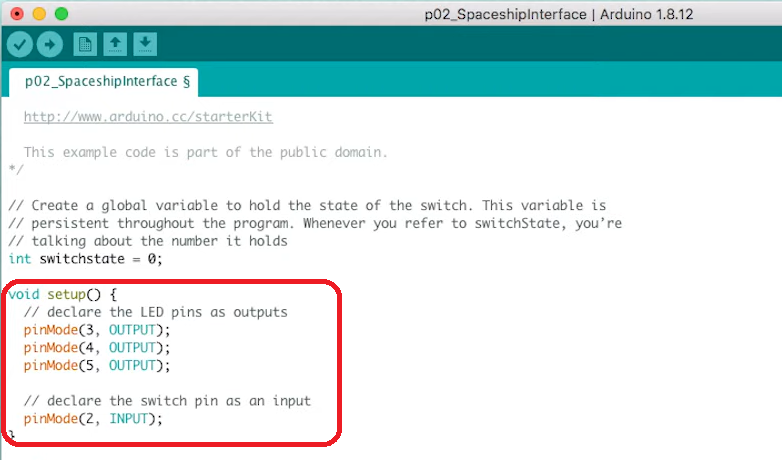
Step 6: Understanding the Example Code
In the Arduino IDE, examine the example code, and you’ll notice the additional comments providing helpful notes.
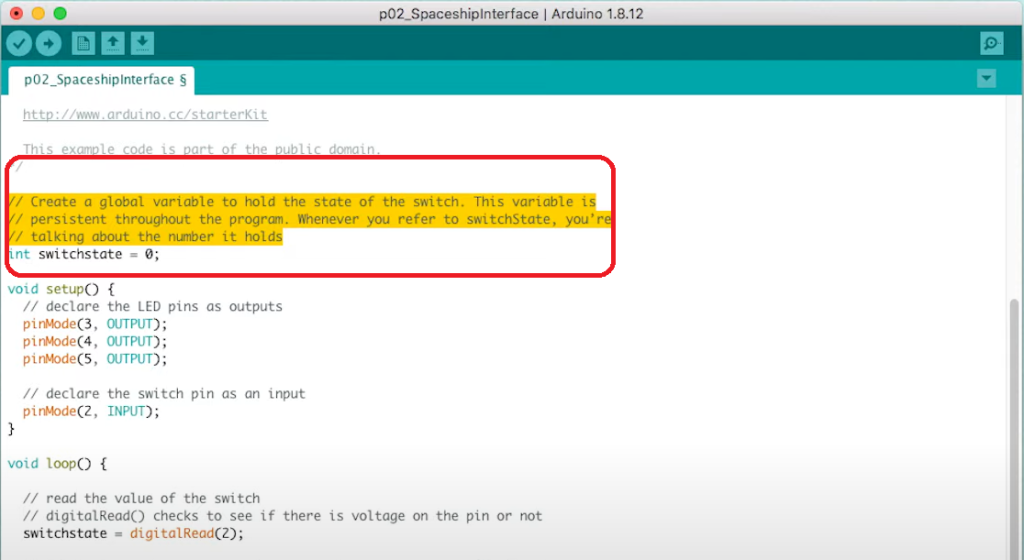
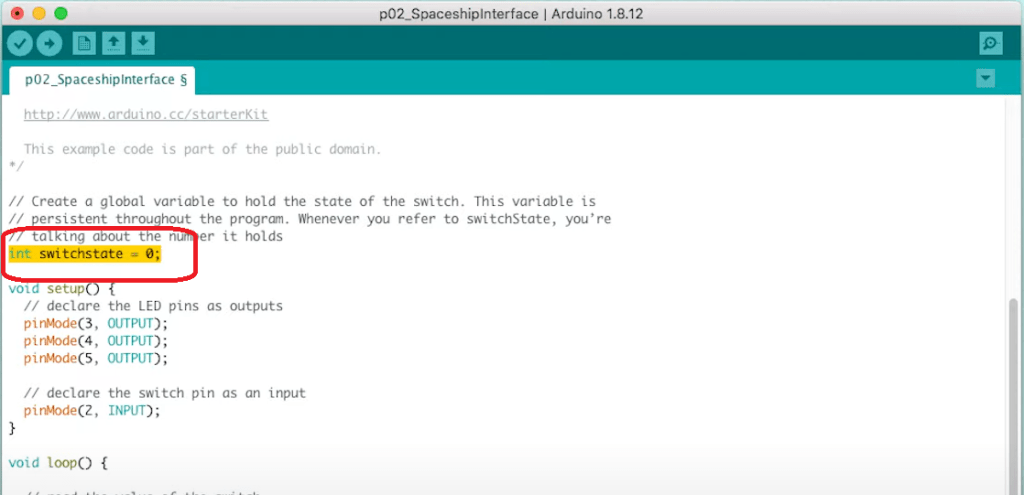
Identify the variable “switchstate” at the beginning of the code, please be aware of case sensitivity if you are editing the “switchstate”.
In the setup section, you can configure the digital pins of the UNO board, just ensure the pin numbers match your physical components on the board.
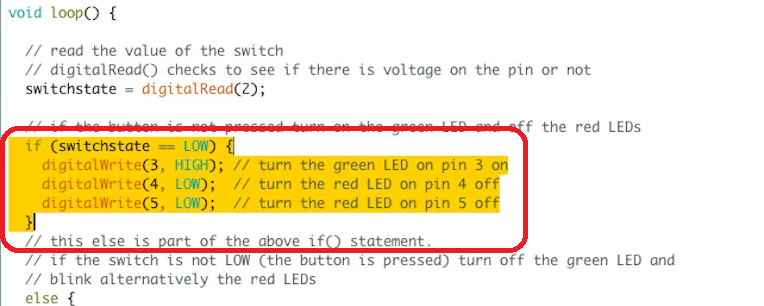
In the loop section, you’ll find most of the code. Here you can utilise the digitalRead() function to check the state of pin 2, whether it is HIGH or LOW, and store it in the “switchstate” variable.

Use an if statement to execute code when the button is not pressed (switchstate is LOW), ensuring proper syntax with double equal signs for value comparison.
You can modify the example sketch by adding an extra LED to the circuit and adjusting the code to make one LED blink when the switch is not pressed.
Before making modifications, simply create a copy of the example sketch and save it with a different name, such as “project02_challenge.”
Summary
If you’ve followed every step in the project you will have just built a cool control panel with switches and lights, mimicking a spaceship interface. Along the way, you’ll have demonstrated some key skills in understanding digital inputs and outputs, getting the hang of basic programming structures, and wrapping your head around resistors.
Don’t forget to check out the Arduino YouTube account for a full video on this project.
![]()

Let’s invent the future together
What’s your challenge? From augmented reality to machine learning and automation, send us your questions, problems or ideas… We have the solution to help you design the world. Get in touch today.
![]()
Looking for something else? Discover our Blogs, Getting Started Guides and Projects for more inspiration!
Like what you read? Why not show your appreciation by giving some love.
From a quick tap to smashing that love button and show how much you enjoyed this project.

