So you’ve followed our Raspberry Pi Pico getting started guide and got the onboard LED flashing, so what’s next?
The Raspberry Pi Foundation has made it easy to install Visual Studio Code and the SDK needed to compile, build and debug the Pico using a Raspberry Pi 4B or Pi 400. It is the officially supported C/C++ programming environment, maintained and tested by the Foundation. They also provide extensive example code covering most aspects of the Pico’s RP2040 chip for you to study and learn from.
This guide will take you through the steps to connect the Pico and Raspberry Pi using the SWD interface and set up a Visual Studio Code development environment so you can explore the sample code to kick-start your C/C++ Pico programming.
What you'll need
Connect the Pico
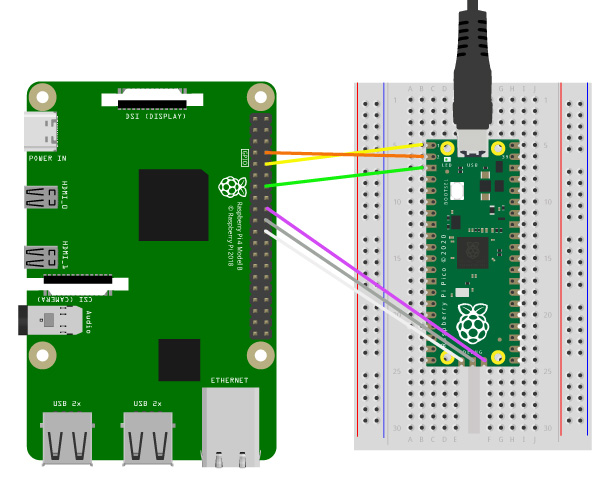
Prepare your Pico by soldering male header pins to both sides of the board so it can be placed in a breadboard. Also solder three headers to the SWD (serial wire debug) pins at the end of the board with the pins facing upwards.
The Pico will be connected to the Raspberry Pi using the SWD pins allowing it to be flashing without having to put the board into Mass Storage mode by re-connecting each time. It will also allow use of the debugger.
Make sure the Raspberry Pi is powered down and the power supply removed before making any connections, then check them carefully before powering on.
For the SWD port connect three female / female jumper cables from the Raspberry Pi to the Pico:
| Raspberry Pi | Pico | Colour |
| GPIO24 (Pin 18) | SWDIO | Purple |
| GND (Pin 20) | GND | Grey |
| GPIO25 (Pin 22) | SWCLK | White |
To view output from the Pico also connect the serial UART with three more jumper wires:
| Raspberry Pi | Pico | Colour |
| GPIO14 (UART0_TX, Pin 8) | UART0_RX (Pin 2) | Orange |
| GPIO15 (UART0_RX, Pin 10) | UART0_TX (Pin 1) | Yellow |
| GND (Pin 14) | GND (Pin 3) | Green |
Power the Pico by connecting a microUSB cable to the Pico from the Raspberry Pi.
Toolchain installation
The Raspberry Pi Foundation provides a script which downloads and installs the SDK and Visual Studio Code when using a Raspberry Pi or Pi 400. The complete installation consumes about 2.5GB of storage.
- Open Terminal by the clicking prompt icon in the top border of the desktop.
- Check your SD card has enough space available.
df-h - Update the Raspberry Pi OS.
 sudo apt update
sudo apt upgrade - Download the Pico SDK and Visual Studio Code installation script.
wget https://raw.githubusercontent.com/raspberrypi/pico-setup/master/pico_setup.sh - Make the script executable.
chmod +x pico_setup.sh - Run the script.
./pico_setup.sh - After about 10 minutes, when the script has completed, reboot.
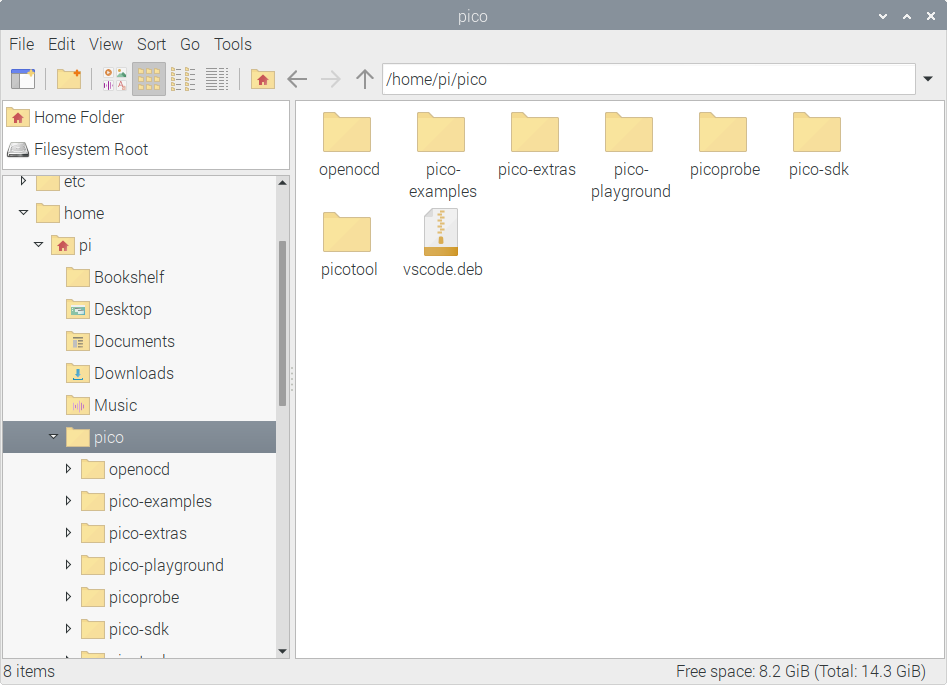
You should have the complete Pico C/C++ SDK, Pico example code, plus the OpenOCD debugger and Visual Studio Code almost ready to run. Everything will be installed in the pico directory:
Update your SDK periodically with the following commands:
cd pico-sdk
git pull
git submodule update
Visual Studio Code:
Before running Visual Studio Code, configure the Pico examples to run under VSCode:
cd ~/pico/pico-examples
mkdir .vscode
cp ide/vscode/launch-raspberrypi-swd.json .vscode/launch.json
cp ide/vscode/settings.json .vscode/settings.json
Now run Visual Studio Code:
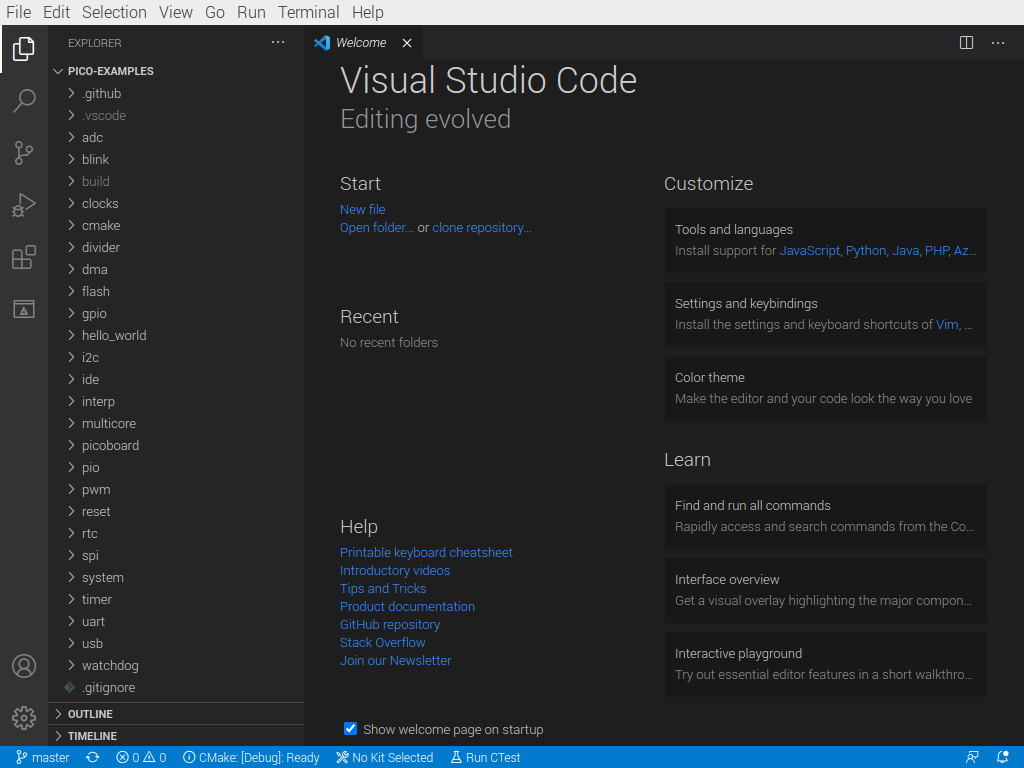
- Open Visual Studio Code from the menu – Programming > Visual Studio Code and let it load the extra components.
- Open the pico-examples directory from the menu – File > Open Folder.
- Messages pop up and disappear after a few seconds.
- A warning will ask you to reload the window, go ahead and accept.
- Another pop-up will ask if you want to configure pico-examples, wait until it disappears.
The example projects will be loaded into the VSCode Explorer pane.
Before projects can be built VSCode needs to be told which compiler to use:
- Click No Kit Selected in the bottom blue status bar.

- Choose GCC x.x.x arm-non-eabi , NOT arm-linux-gnueabihf from the dropdown.
- Open the Debug pane by clicking the Bug icon in the left-hand bar.
- Click the green Pico Debug button at the top of the Debug pane.
- Click the Red Stop Debugging (Shift + F5) icon.

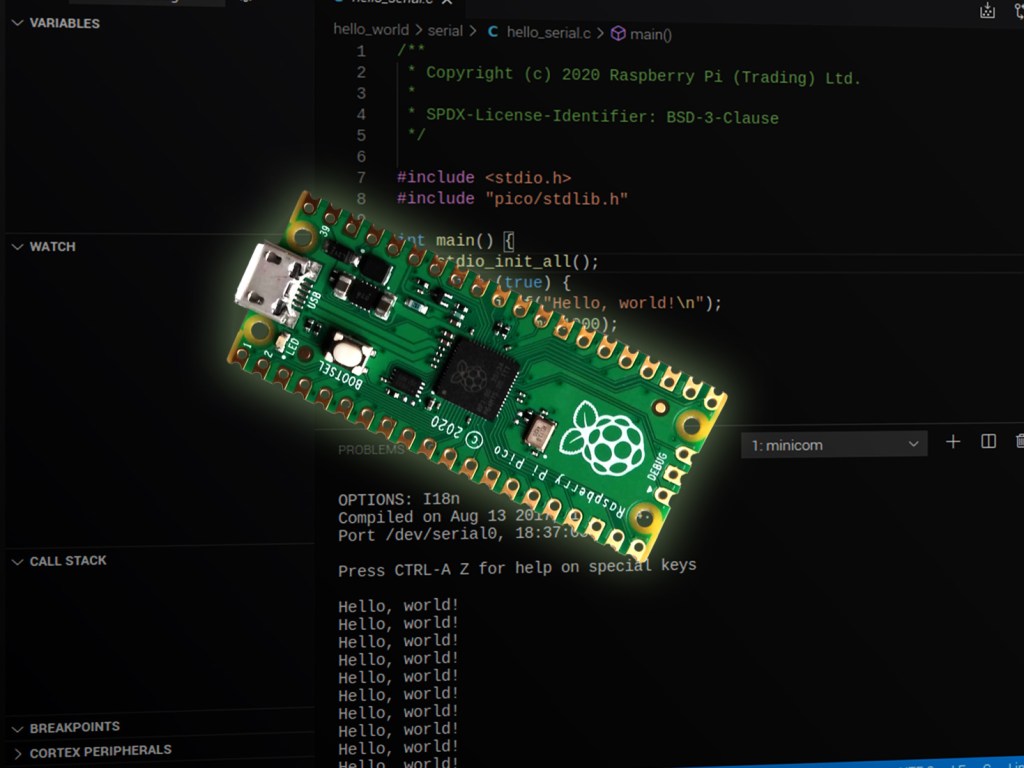
Hello serial
Now one of the example programs can be loaded, built and run.
- Click the green Pico Debug button again, select the hello_serial target from the drop-down.
After a few seconds the hello_serial.c file will open, the project will build and run up until the first line in main() – Note that Debug buttons appear at the top of the Code view and the bottom status bar turns orange.
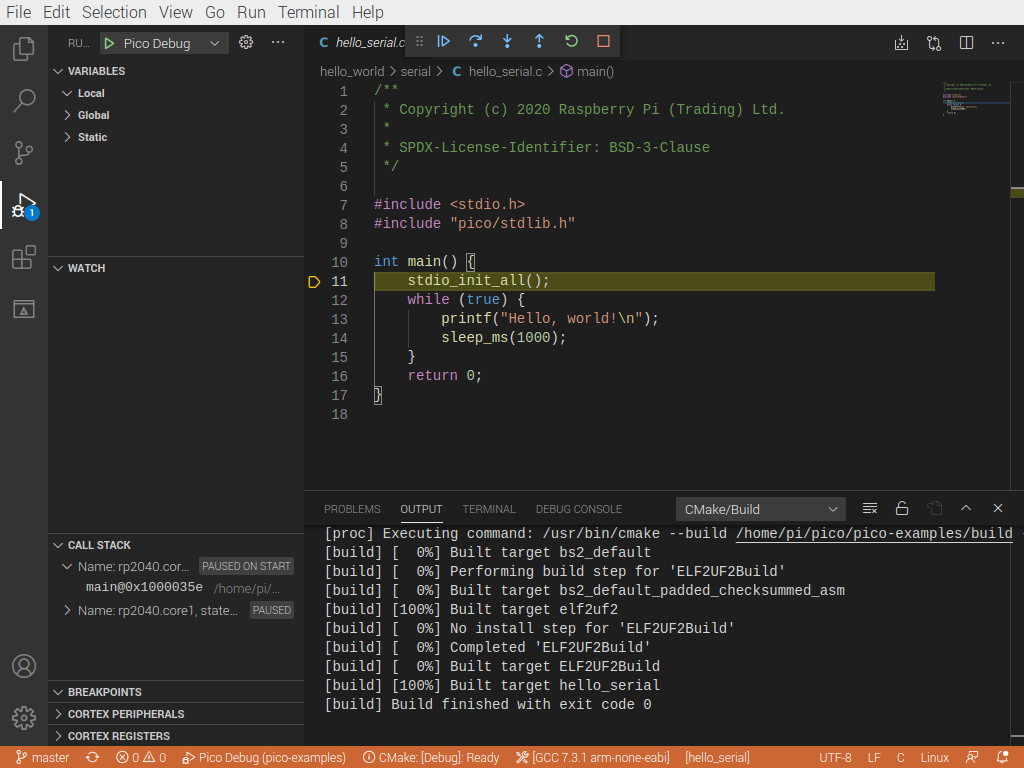
VSCode will have flashed the firmware to the Pico and is now running in Debug mode. The printf output can be viewed in the serial Terminal:
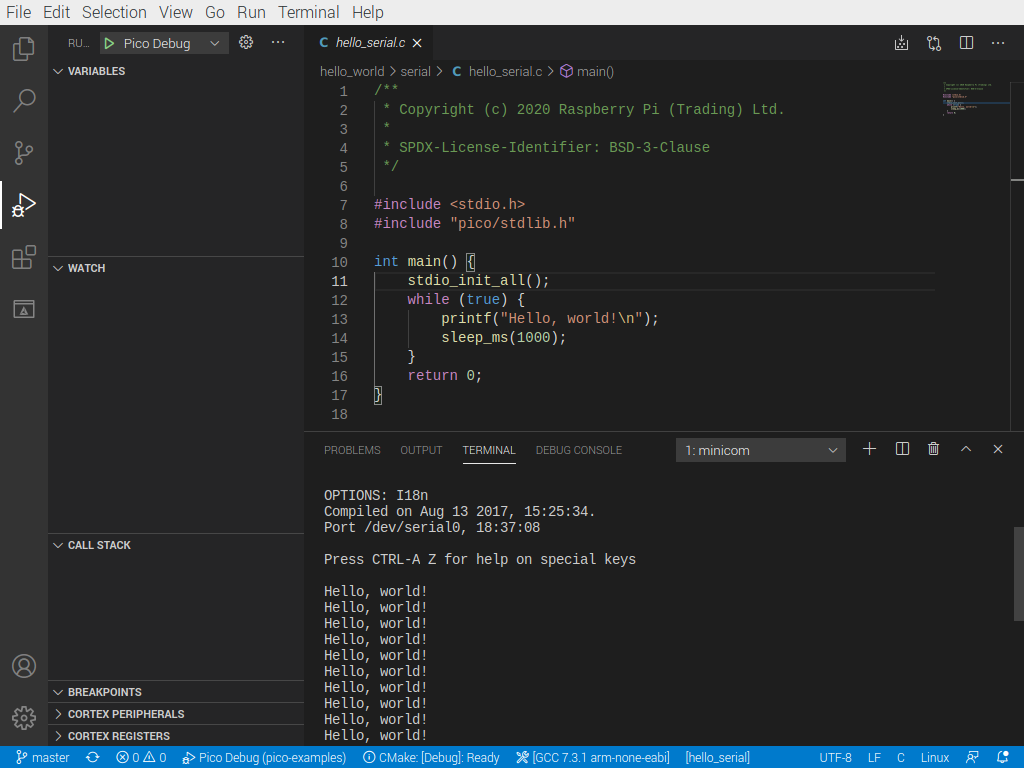
- Click Terminal in the bottom pane.
- Open a minicom session at the Terminal prompt at 115200 baud rate using the serial0 device (UART0)
minicom -b 115200 -D /dev/serial0 - Now press the Continue (F5) debug button in the top pane.
- The “Hello world!” output should be visible in the Terminal.
- Stop debugging by clicking the Red Square (Shift + F5) debug icon in the to pane.
- Press Ctrl + A then X to exit the minicom session.
Summary
This guide has shown how to set up a Visual Studio Code programming environment on a Raspberry Pi 4B or Pi 400 for C/C++ development on the Pico.
The Hello Serial example program was built and run demonstrating use of the SWD interface and serial terminal to view the output.
You should now be all set up to explore over 70 code examples that cover the Pico’s RP2040 chip functions by loading and running them in a similar way. Each program has its own subdirectory and many have a README file with technical details.
For more information on the Raspberry Pi Pico C/C++ SDK visit: https://datasheets.raspberrypi.org/pico/raspberry-pi-pico-c-sdk.pdf