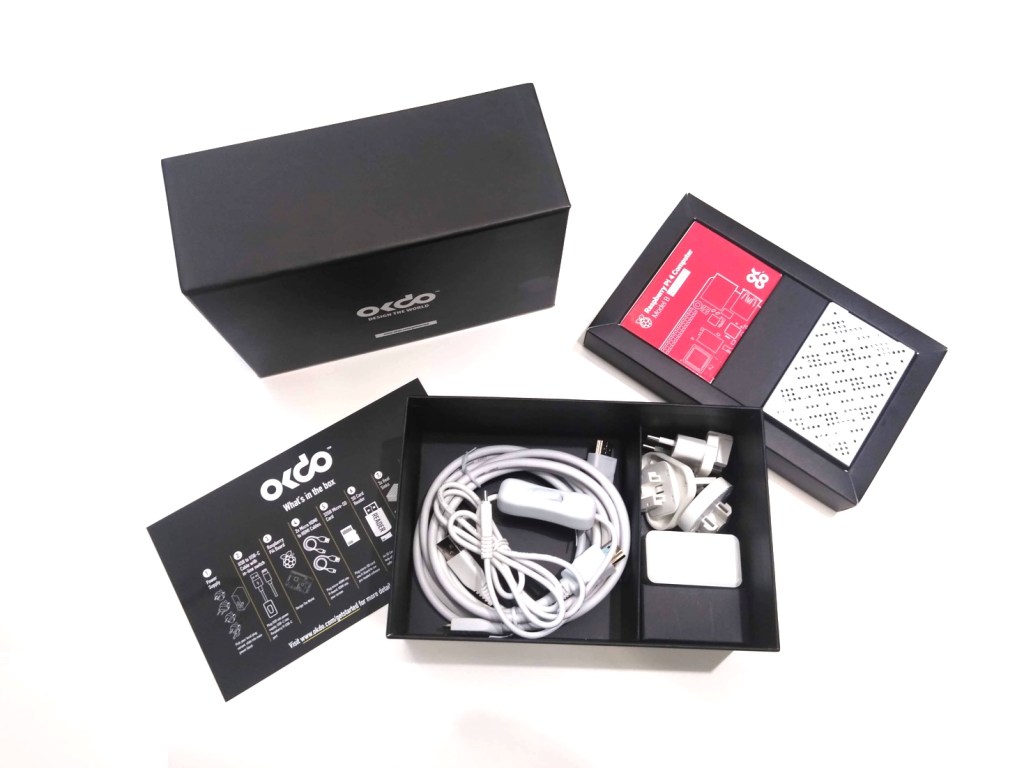

Get up and running with your OKdo Raspberry Pi 4 Kit in no time
What you'll need
1 x OKdo Raspberry Pi 4 4GB Model B Starter Kit
1 x Raspberry Pi Mouse red/White
1 x Raspberry Pi Keyboard UK Layout Red/White
1 x HDMI screen/TV
1 x PH1 Phillips screwdriver
Mount heatsinks
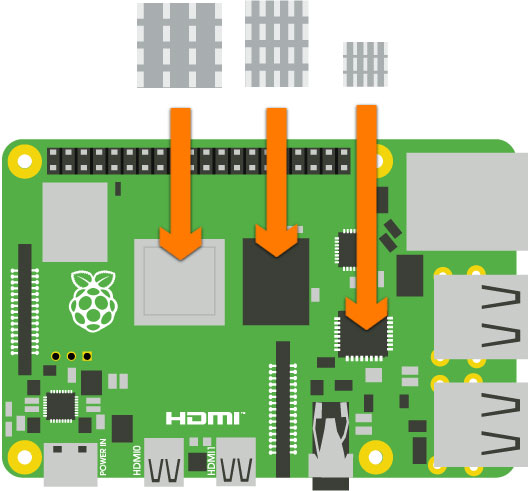
- Peel the protective backing from the heatsinks and stick them to the components shown in the diagram above
Insert Raspberry Pi into case
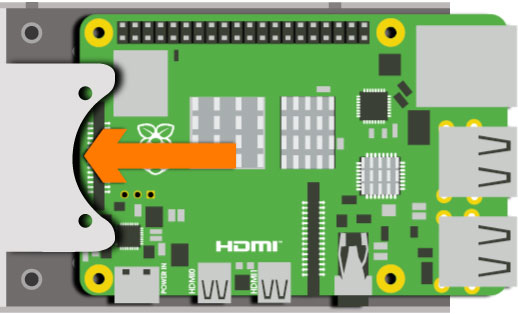
- Insert Raspberry Pi into the case
Secure screws
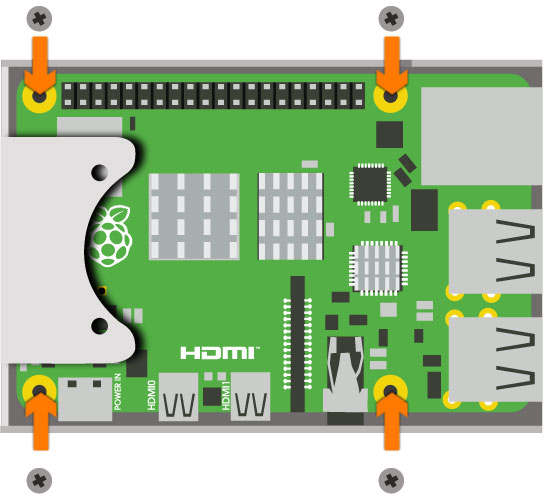
- Secure the 4 screws that hold the Raspberry Pi to the case
Position fan
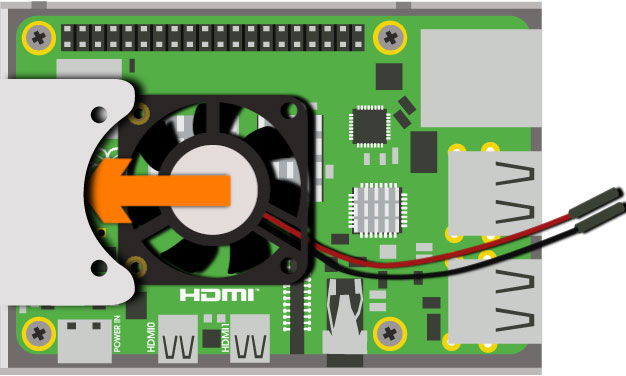
- Slide the fan into position
Secure fan screws
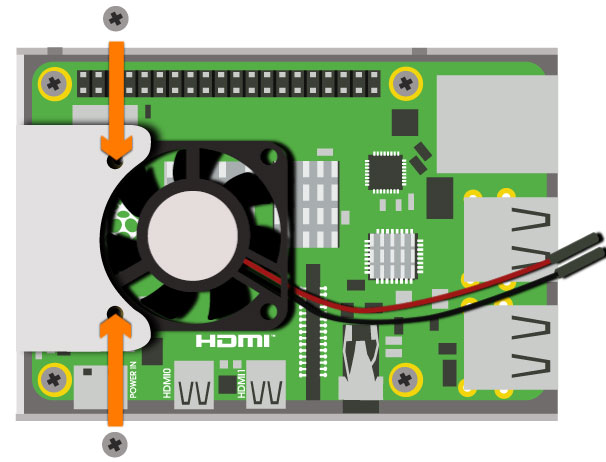
- Secure the 2 screws that hold the fan in place
Connect fan
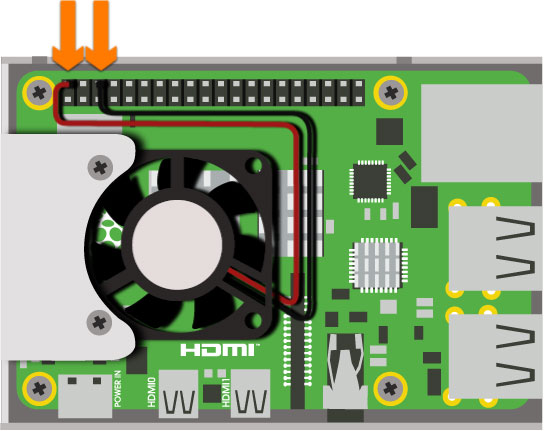
- Connect the positive (red) cable of the fan to the pin shown above
- Connect the negative (black) cable of the fan to the pin shown above
Stick feet
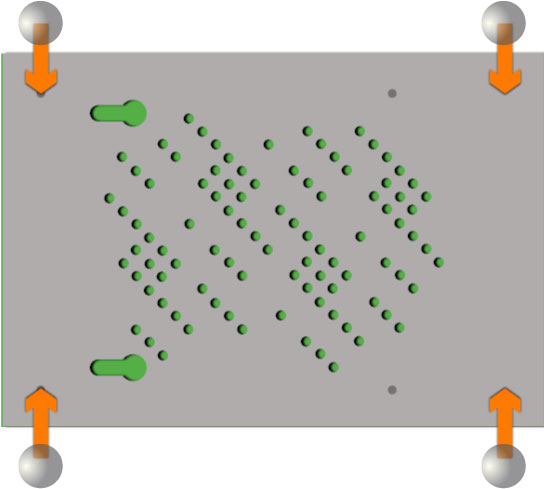
- Turn the Raspberry Pi and case around and stick the self-adhesive feet to the case
Insert micro SD card
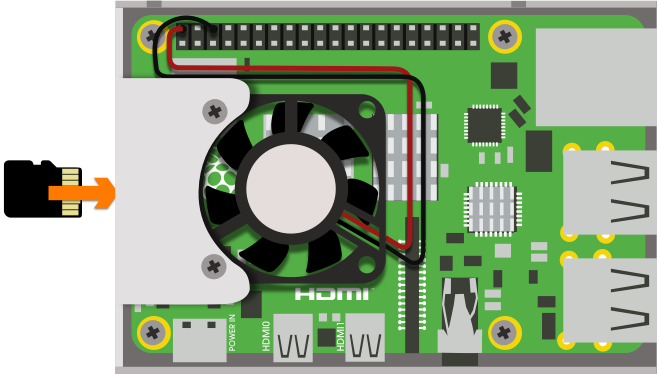
- Insert the micro SD card into the slot of the Raspberry Pi
Connect mouse & keyboard
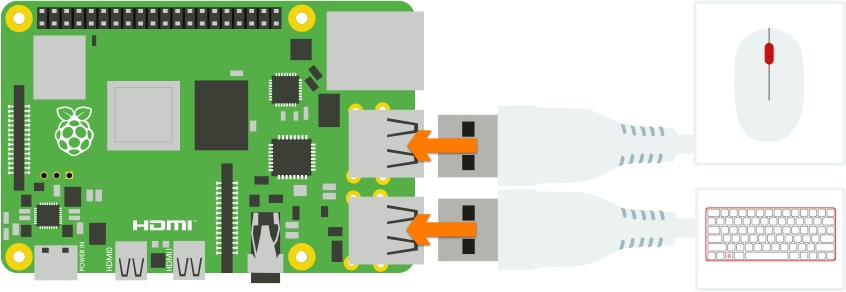
- Connect the mouse and keyboard to any 2 of the USB ports
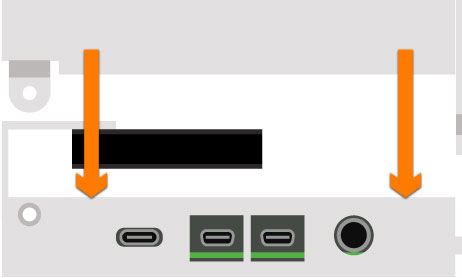
Connect screen
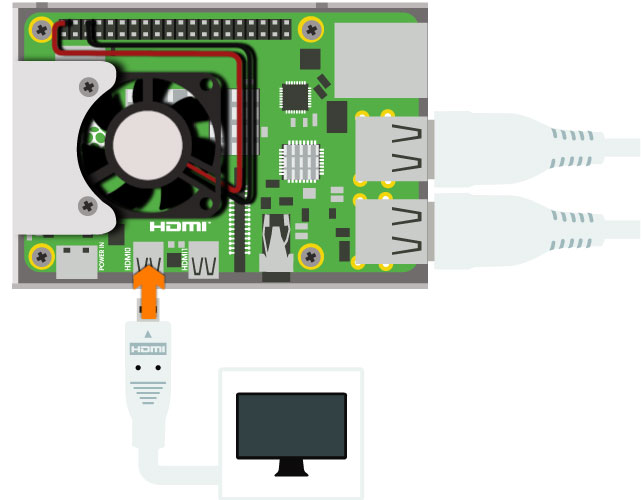
- Connect the screen to the HDMI port labelled “HDMI0”
Connect power
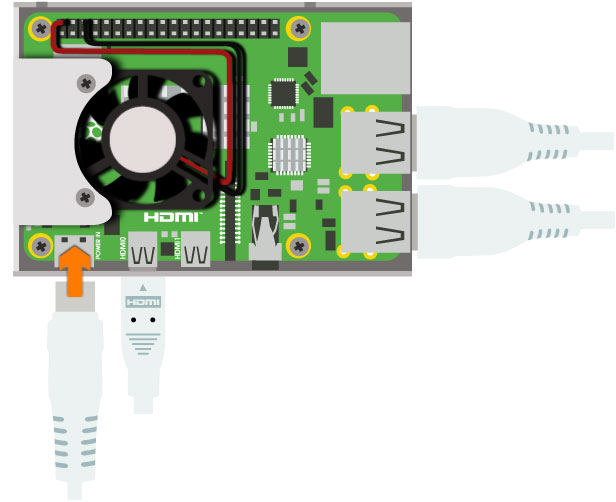
- Connect the power cable to the port labelled “POWER”
- Ensure that the switch on the power cable is turned on
Follow on-screen instructions
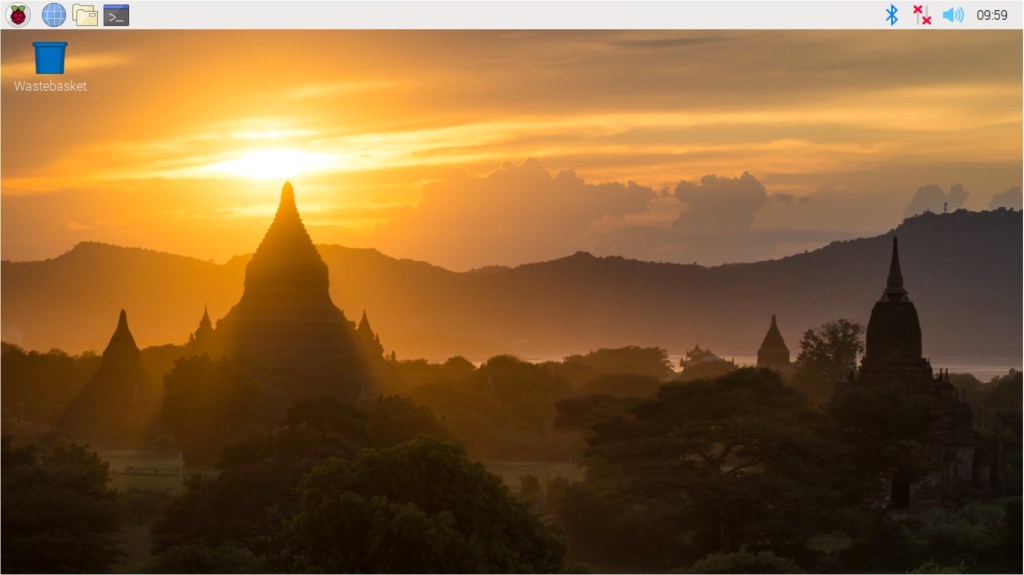
- Your Raspberry Pi will boot and display the desktop
- The first time you start up your Raspberry Pi, the Welcome to Raspberry Pi application will pop-up, guiding you through the initial setup
Close case
The following steps are optional and not needed if you plan to use the GPIO pins in your projects.
- Carefully slide the top of the case into position ensuring that all the small tabs snap into place and the screw holes are aligned
Secure case screw
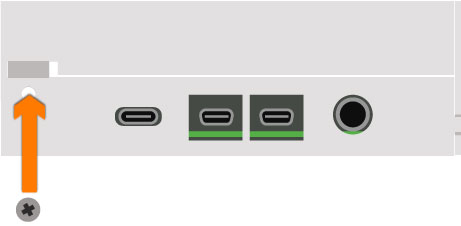
- Use the remaining screw to secure the lid to the base of the case