

This get started with the Lidar hat guide will take you through setting up your Lidar hat and configuring it for use with a Raspberry Pi 4B.
The hat uses a low powered infrared laser beam which is safe and compliant with Class 1 laser certification. It has a serial interface and the lidar scanner can be controlled using a PWM signal.
We will show how to install the Robot Operating System (ROS) which the module relies on, using a shell script to simplify the process. This includes setting up the serial interface on the Raspberry Pi, installing the driver and running a 2D visualization of the Lidar scan.
All the scripts used, including a stable version of the driver, are hosted on the OKdo GitHub for your convenience.
What you'll need
Host computer Windows/Mac/Linux
HDMI monitor
USB keyboard
USB mouse
Ethernet cable
Internet connection and router
Raspberry Pi set up
Before adding the Lidar Module, start by setting up your Raspberry Pi Kit in the usual way. You will need to enable internet connectivity using either ethernet or WiFi. We recommend using the full desktop version of Raspberry Pi OS. We have a guide on how to set up your kit here.
During the Raspberry Pi configuration steps, you can skip the OS updates.
Robot Operating System
The Lidar Module relies on the Robot Operating System (ROS) which must be specially installed and configured to run on the Raspberry Pi.
As this process is complex and involves running multiple bash commands, we have produced two shell scripts to ease the installation. They can be found on the OKdo GitHub repository: https://github.com/LetsOKdo/ld19
The ROS installation and build script lidar_ros_setup.sh takes about 2:15 hrs to complete.
- Open a Terminal and change to the Pi users home dir:
cd- Clone the repo and execute the ROS setup script.
git clone https://github.com/LetsOKdo/sdk_ld06_raspberry_ros.git
cd sdk_ld06_rasberry_ros
./lidar_ros_setup.sh
- When the script has finished, reboot the pi and test with the following command in Terminal.
roscoreThe output should look something like this screenshot and shows that the ROS install was successful:
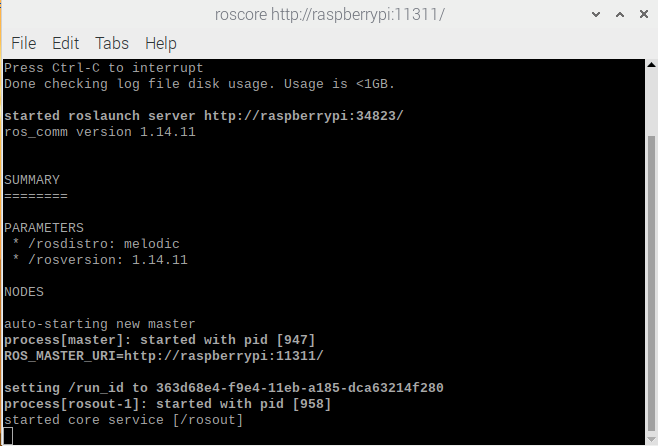
- Use Ctrl + C to exit.
Tip: Monitor the build progress by checking the Terminal title eg [179 of 187]
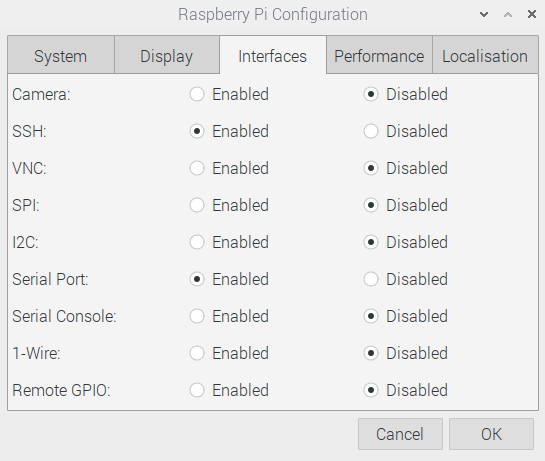
Enable serial
Enable the Raspberry Pi’s serial port and disable serial console:
- From the main menu click Preferences > Raspberry Pi Configuration.
- Select Interfaces tab.
- Click Serial Port Enabled button.
- Click Serial Console Disabled button.
- Select OK and reboot when prompted.
- Select Shutdown > Shutdown to safely shutdown the Raspberry Pi.
- Disconnect the power supply.
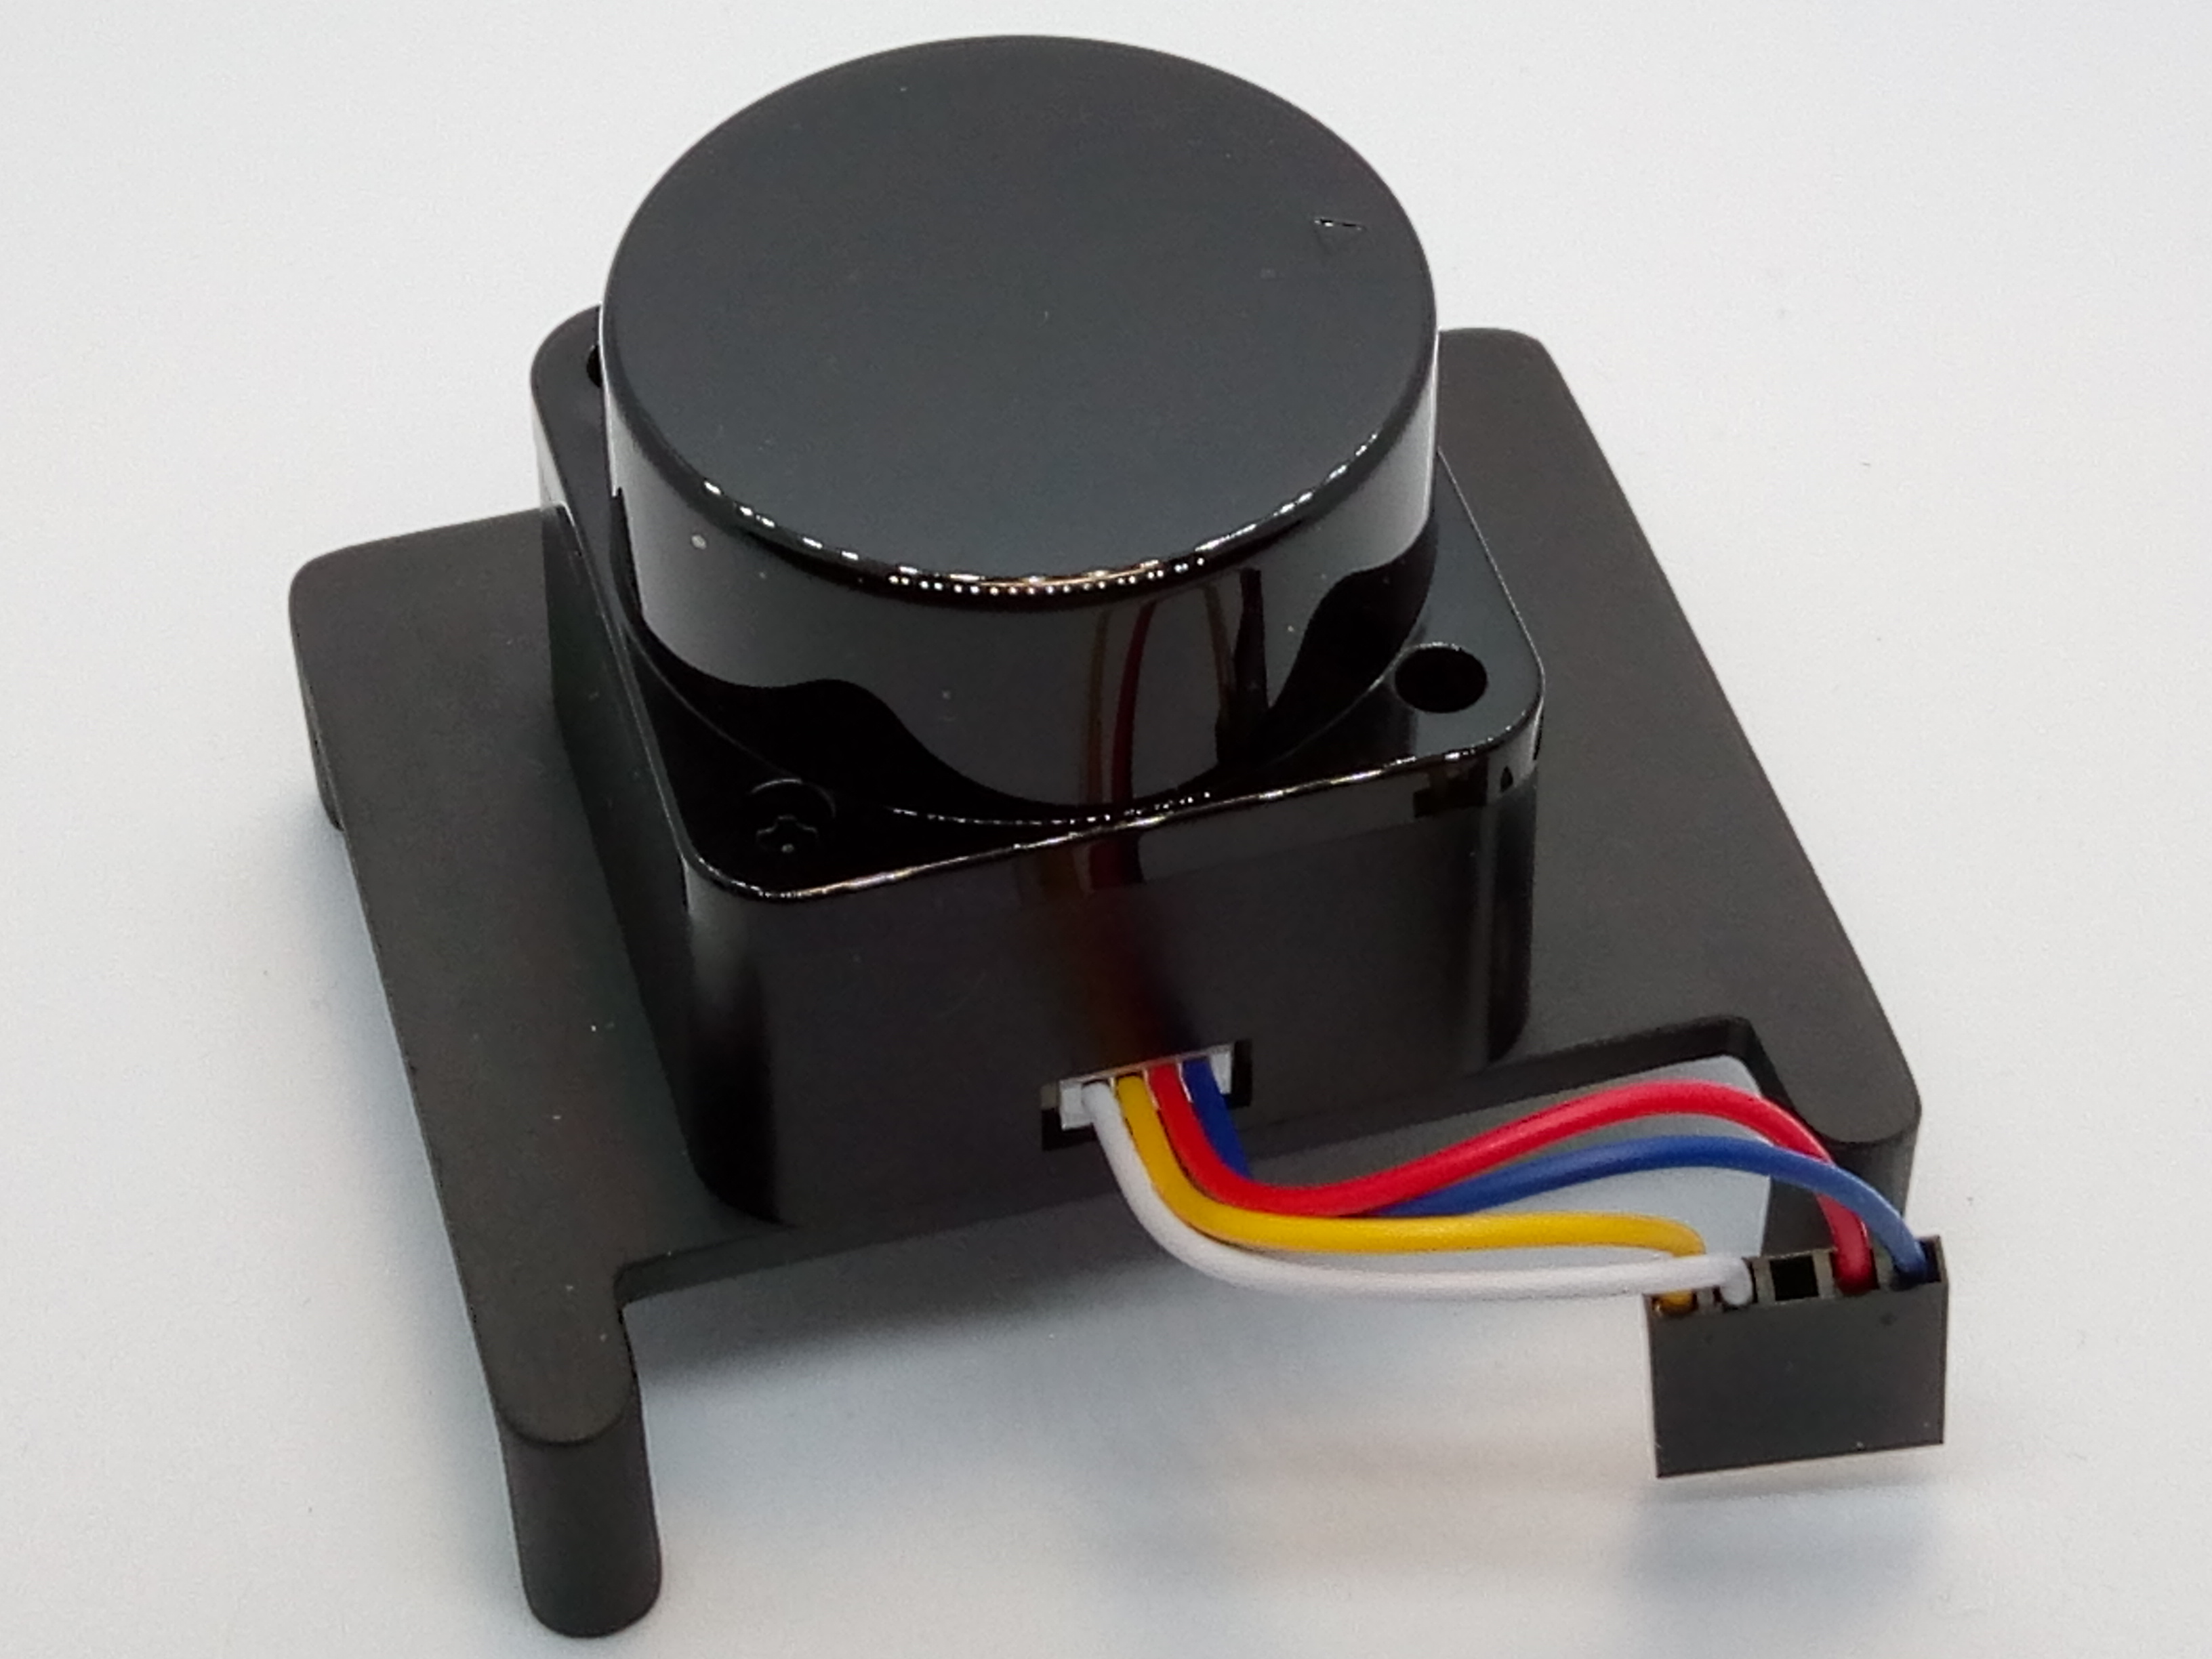
Attach Lidar module
Now attach the Lidar Module to the Raspberry Pi.
- Place the Lidar module onto the support bracket with the connector facing the cutout.
- Using two of the screws secure the module to the bracket.
- Orient the cable connector (it only mates one way round) and connect to the module.
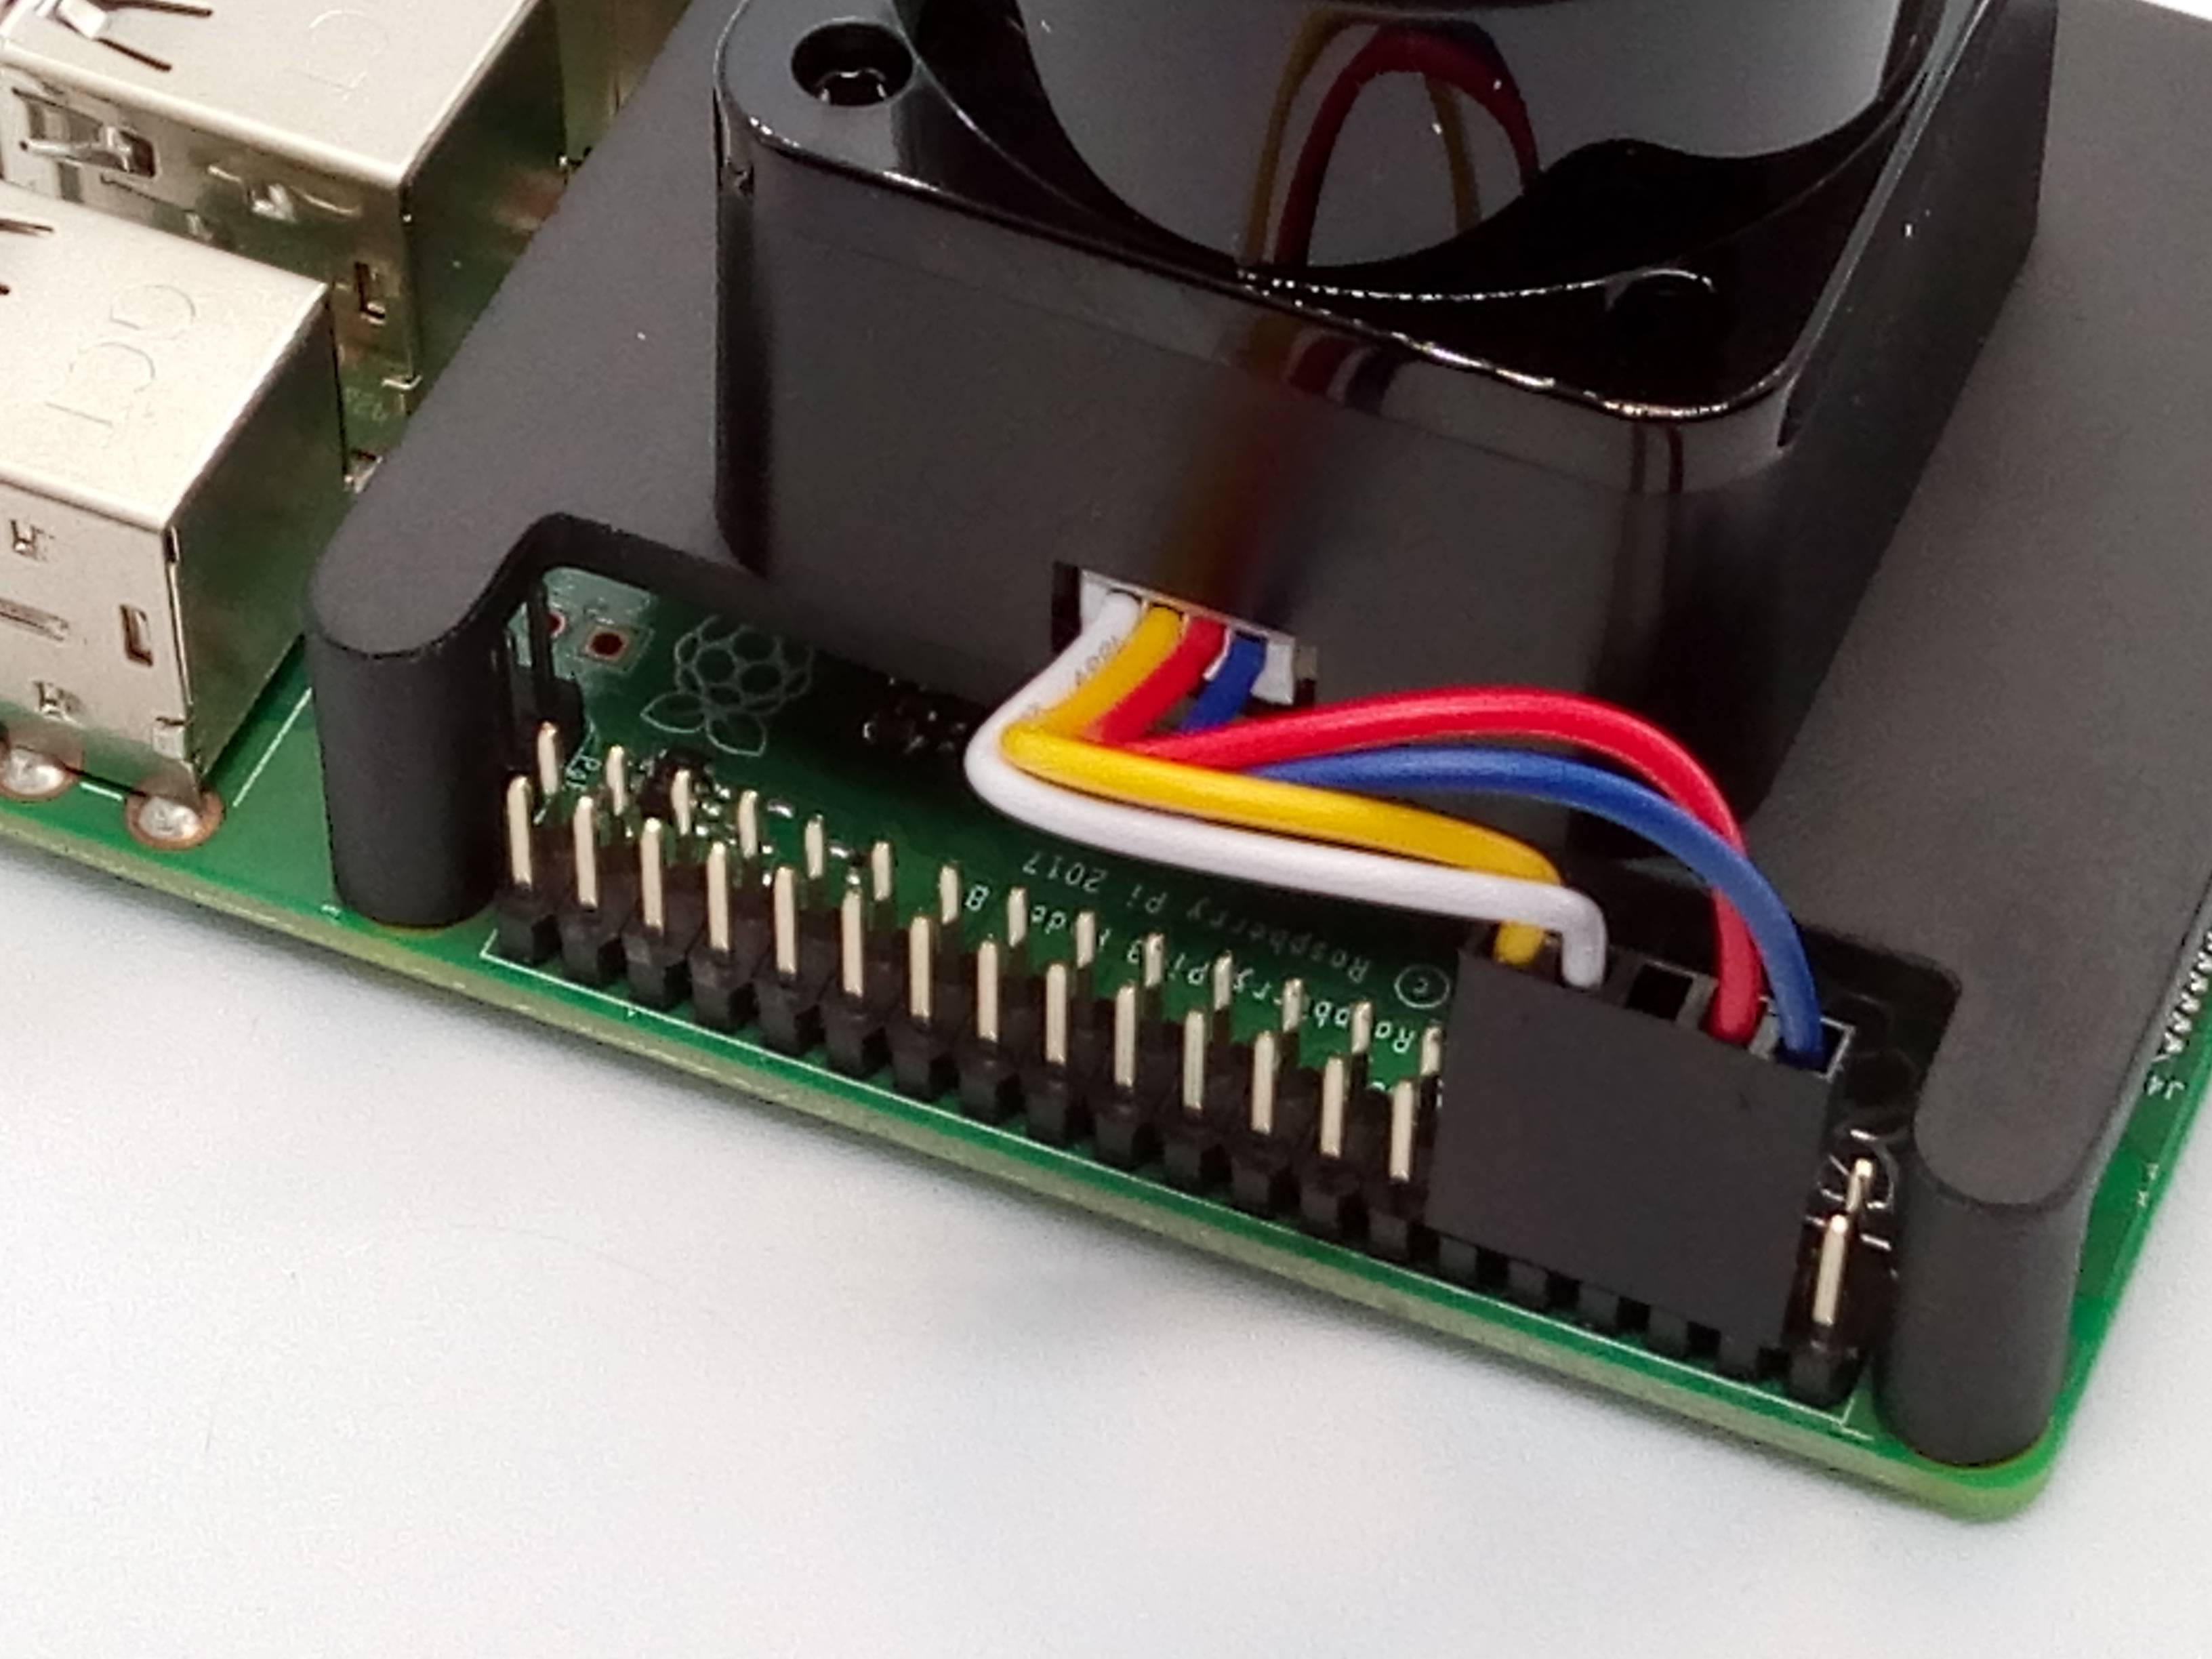
- Make sure the Raspberry Pi is powered off.
- Orient the Lidar unit so that the cutout is above the GPIO header pins.
- Attach the unit using the four remaining screws.
- Connect the cable socket to the GPIO pins as below. It does not follow conventional colour coding:
| Lidar Pin | Raspberry Pi Pin | Colour | Min | Typical | Max |
| Pin 1 (TX) | Pin 10 (RXD) | White | 0V | 3.3V | 3.5V |
| Pin 2 (PWM) | Pin 12 (PWMO) | Yellow | – | – | 3.3V |
| Pin 3 (GND) | Pin 6 (GND) | Red | 0V | 0V | – |
| Pin 4 (P5V) | Pin 4 (5V) | Blue | 5V | 5V | 5.5V |
Check the connector is aligned correctly before powering the Raspberry Pi
Lidar driver
A tested version of the Lidar driver is hosted on the OKdo GitHub along with a script lidar_driver_setup.sh to install and build it correctly.
https://github.com/LetsOKdo/sdk_ld06_raspberry_ros
- Connect the power supply and boot the Raspberry Pi.
- The Lidar head should spin up in the housing and a rotating blue led should be visible.
- Open a terminal and change to the sdk_ld06_raspberry_ros directory. users home dir.
cd sdk_ld06_raspberry_ros- Execute the driver installation script. Download the driver installation script and execute it.
./lidar_driver_setup.sh- When the script has finished, reboot the Pi.
Open a Terminal and test with the following command:
roslaunch ldlidar ld19.launchThe output should look something like this screenshot and shows that the driver was started:
- Leave the Terminal open and running for the next step.

Tip: If you get an error when starting the driver check that the Serial Console is disabled in Raspberry Pi Configuration
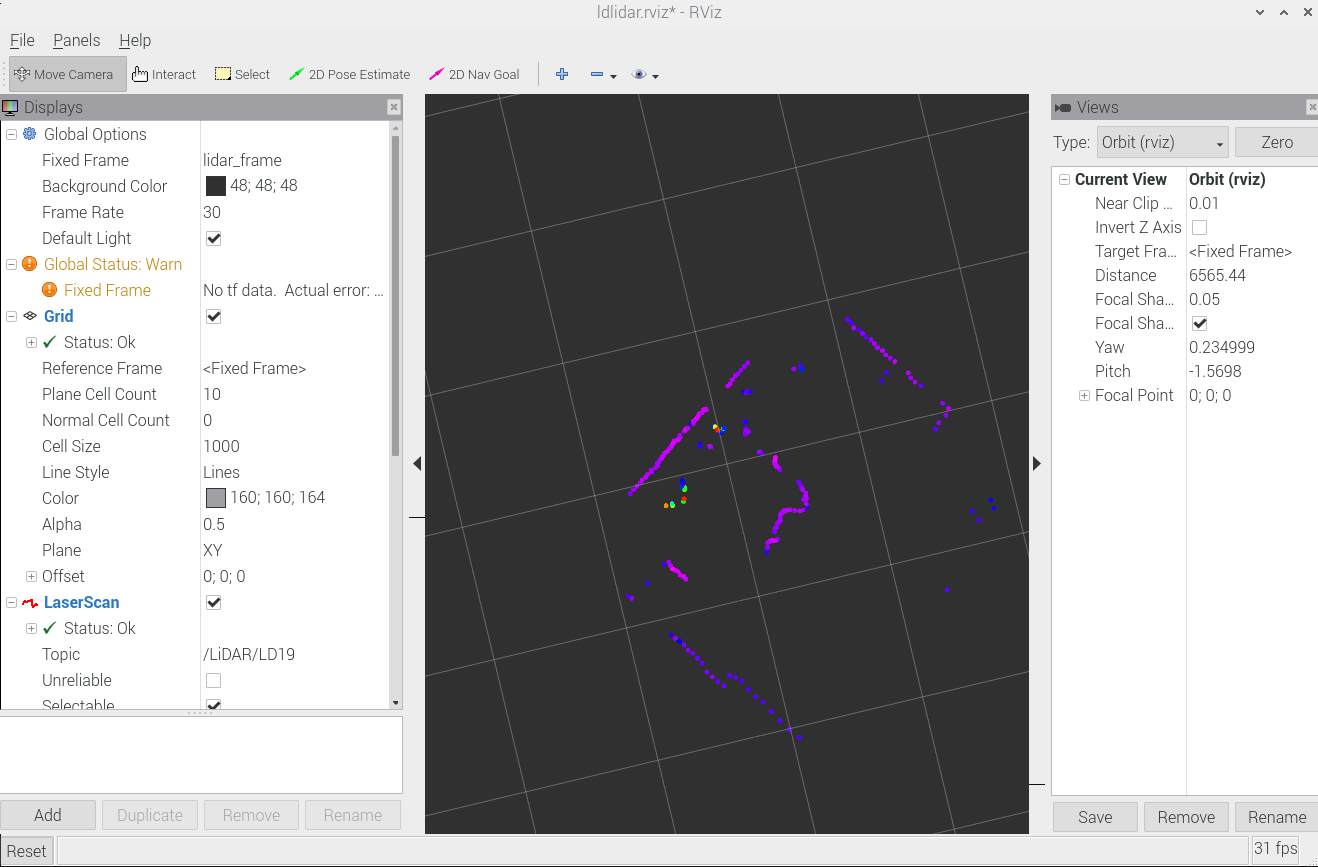
RViz
This final step uses RViz visualisation software to show the results of the Lidar scan. It displays the room and obstacles around the Lidar in real-time.
- Open another Terminal.
- Start RViz with the following command:
rosrun rviz rviz- The RViz application will open.
- From the File menu choose Open Config.
- Navigate to /home/pi/sdk_ld06_raspberry_ros/rviz and select ldlidar.rviz.
The room and the surroundings should now be visualized on the 2D Grid in real-time.
After you have finished experimenting:
- Close RViz from the menu.
- Use Ctrl + C to shutdown the driver session.
- Perform a safe shutdown of the Raspberry Pi.
- Disconnect the power supply to stop the Lidar.
Summary
We have shown how to set up and install the Lidar Module on a Raspberry Pi 4B, including building the Robot Operating System, configuring the serial interface and installing the Lidar driver with the help of custom shell scripts hosted on the OKdo GitHub.
Finally, the whole installation was tested by visualising the Lidar scan in RViz.
Refer to the latest datasheet and technical information on the OKdo GitHub: https://github.com/LetsOKdo/ld19