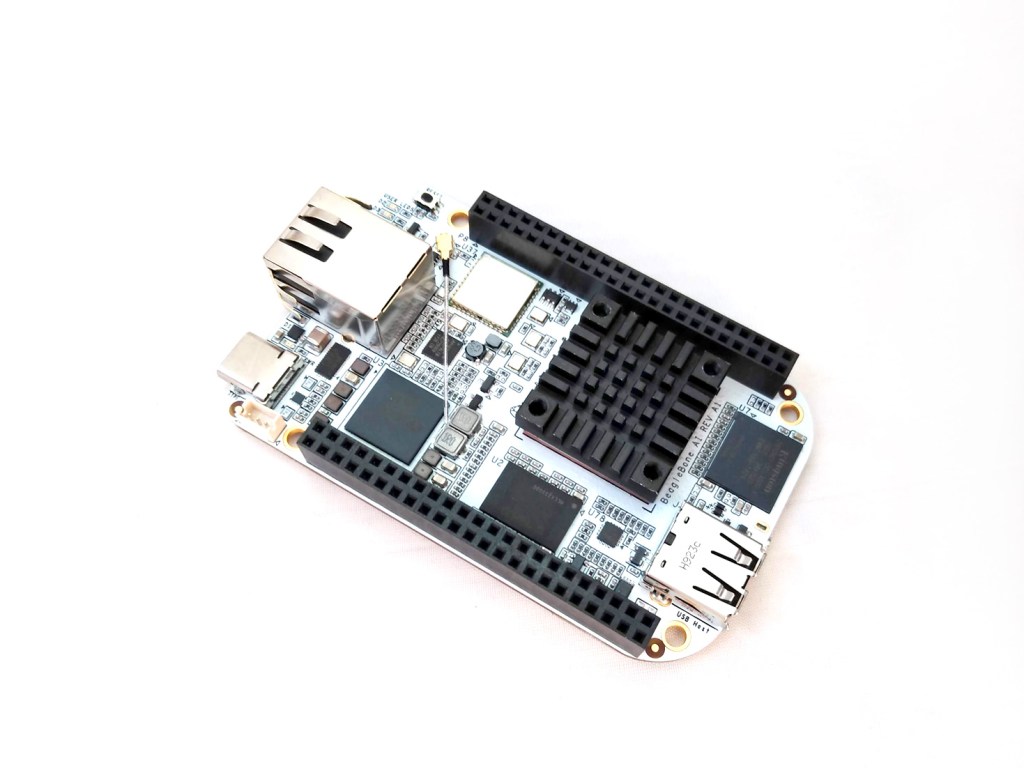
BeagleBone AI features powerful machine learning and artificial intelligence capabilities for embedded Linux automation, manufacturing and AI applications. This guide will get you started to explore the powerful features the board has to offer.
Power up
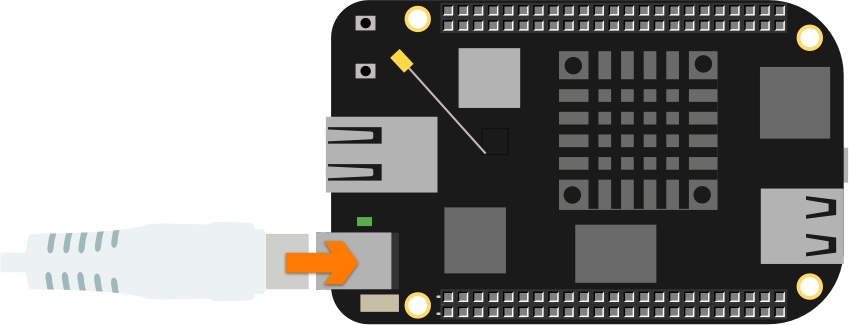
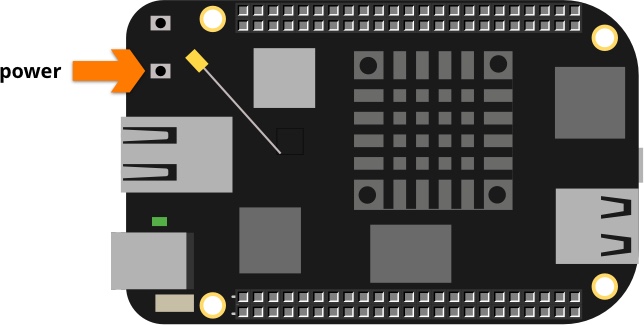
- Connect your USB C power supply to a socket and the BeagleBone’s power port.
The boot sequence will start, which takes about 60 seconds. The green LED next to the USB-C connector will turn on and the LED’s next to the ethernet port will be indicating as follows:
| LED | GPIO signal | Function | LED activity |
| D2 | GPIO3_17 | Linux running | Heartbeat |
| D3 | GPIO3_5 | Micro SD activity | Off |
| D4 | GPIO3_15 | CPU activity | Flashing |
| D5 | GPIO3_14 | eMMC Activity | Off |
| D8 | GPIO3_7 | WiFi/Bluetooth activity | Off |
After the boot sequence has completed, the BeagleBone AI will be hosting its own Wifi Access Point (AP) which should be visible in your host PC’s network manager. The SSID will be BeagleBone-XXXX where XXXX varies for each board.
Connect to WiFi
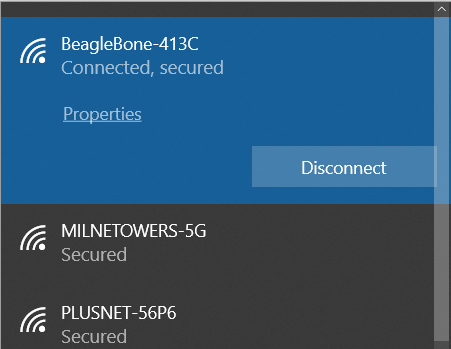
- Connect to the AP from your host PC using the password BeagleBone. Once a connection is established LED D8 will turn ON
Configure internet access
- Connect to BeagleBone-XXXX WiFI network from your computer, the default password is BeagleBone.
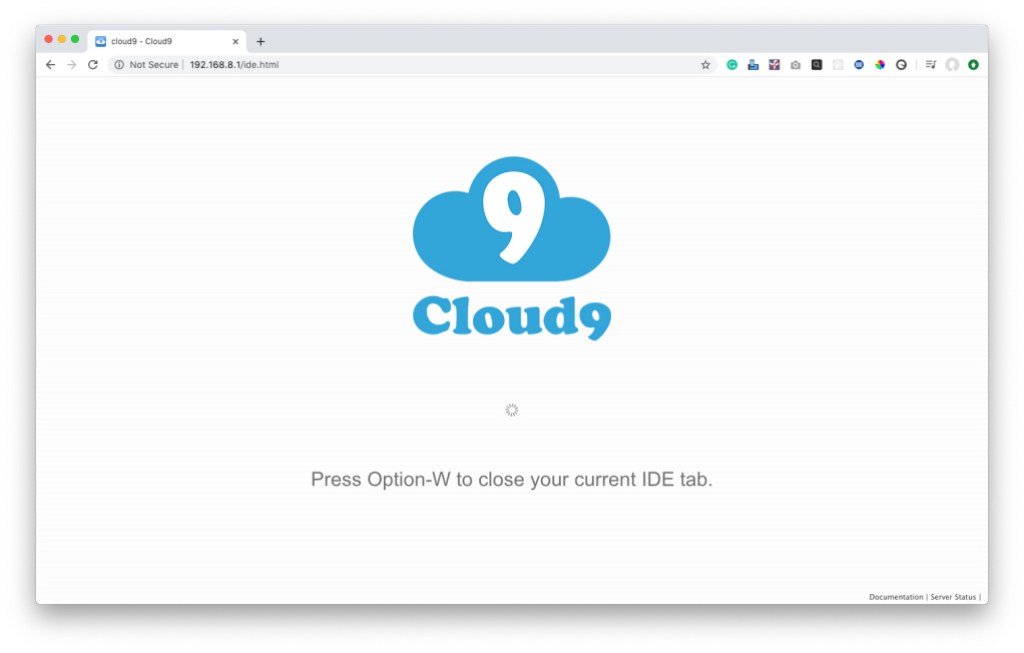
- Using Chrome or Firefox, navigate to the BeagleBone’s IP address: 192.168.8.1. You will briefly see the following Cloud 9 screen:
Internet Explorer will not work correctly
You will then be greeted with the BeagleBone’s Terminal interface showing a message about upgrading your software.
First, you’ll need to connect your BeagleBone to the internet through your WiFi.
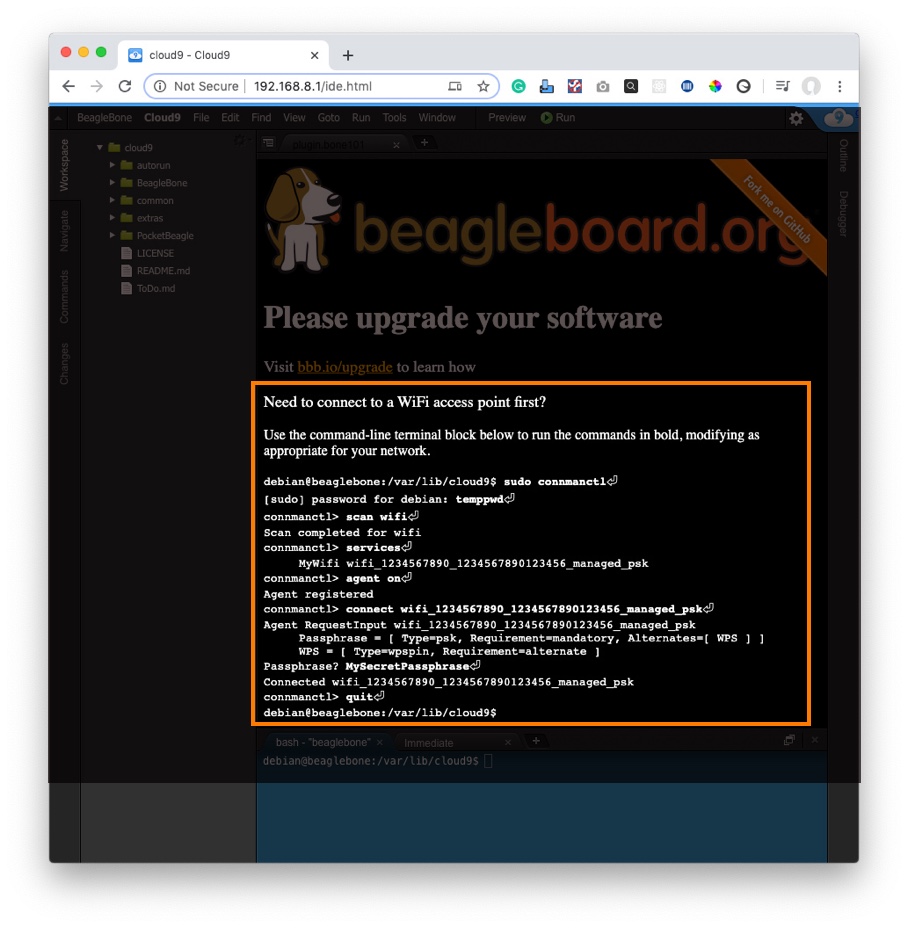
- Enter the commands listed in bold into the blue bash-“beaglebone” tab pressing return after each one. Ensure to replace the line starting MyWifi with your WiFi’s id which will appear in the Terminal window as you go through the process.
- Enter your WiFi’s password when prompted with Passphrase?
You should now have your BeagleBoard AI connected to your WiFi network and your host PC. This is a one-off process to configure the board and it should reconnect automatically when switched on.
On our BeagleBone, after re-booting the USB0 interface was configured as the default route. We edited /etc/network/interfaces in the bash terminal adding the following to the end of the file to set the gateway for wlan0 and re-booted:
iface wlan0
	# Your gateway IP
	gateway 192.168.1.254
Update Linux kernel & system components
To ensure the BeagleBone AI is using the latest Linux kernel, it is recommended to complete the following updates.
- Enter the following commands displayed in bold in the bash Terminal window:
debian@beaglebone:/var/lib/cloud9$ cd /opt/scripts
debian@beaglebone:/opt/scripts$ git pull
Already up-to-date.
debian@beaglebone:/opt/scripts$ sudo tools/update_kernel.sh
[sudo] password for debian:temppwd
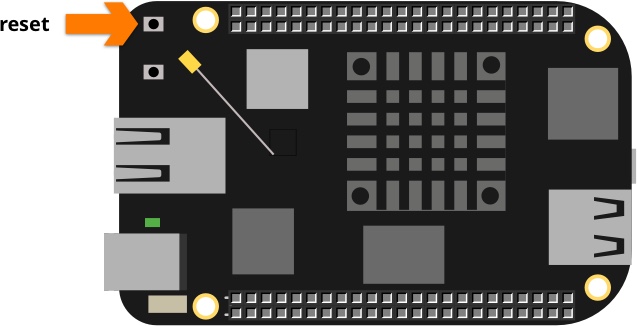
debian@beaglebone:/opt/scripts$ sudo shutdown -r now - Reboot the BeagleBone by pressing on the Reset button.
When the BeagleBone starts up and Cloud 9 IDE reconnects, you’ll need to update the distribution components and example code.Enter the following commands displayed in bold the bash terminal:
debian@beaglebone:/var/lib/cloud9$ sudo apt update
[sudo] password for debian:temppwd
debian@beaglebone:/var/lib/cloud9$ sudo apt upgrade
debian@beaglebone:/var/lib/cloud9$ sudo apt install -y ti-tidl mjpg-streamer-opencv-python
debian@beaglebone:/var/lib/cloud9$ git pull
Example code
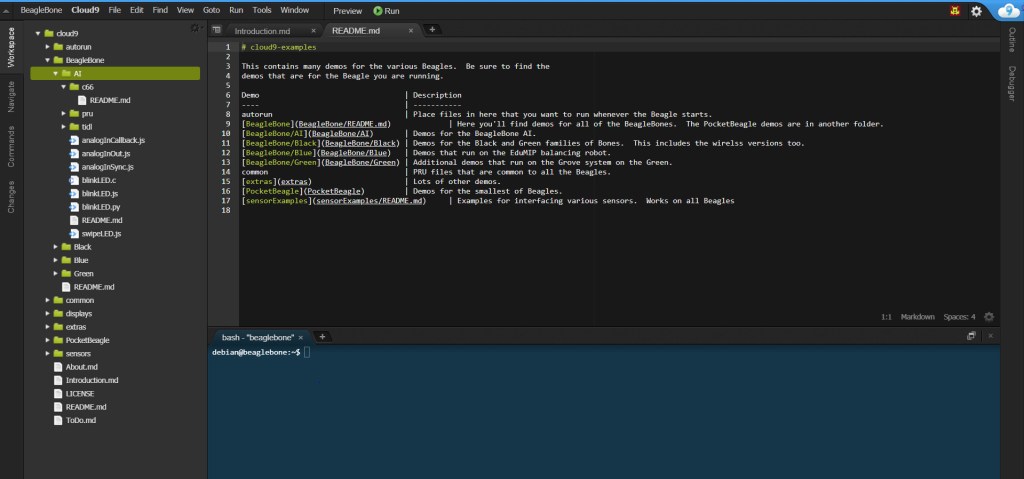
In the left-hand panel of the Cloud 9 IDE are several example applications each with information on how to run them, covering:
DSP programming with OpenCL
BeagleBone’s PRU (Programmable Real-time Unit)
TI Deep Learning (TIDL) API with mjpg-streamer
Shutdown
Avoid corrupting the eMMC storage by shutting down the system correctly.
- Enter the following command from the Cloud 9 bash terminal:
sudo shutdown -h now
The system can take up to a minute to shut down. Afterwards, all the LED’s on the board will be off and any Cloud 9 connections will terminate. Only remove the power supply once the shutdown sequence has completed.
BeagleBone AI has a Power button next to the Ethernet connector but this doesn’t shut the system down. It can, however, be used to boot the board after it has powered off.
Summary
Congratulations! You have setup the BeagleBone AI with a wireless connection to your network and updated the system and software to the latest versions.
You can now begin to explore the examples available from within the Cloud 9 IDE that demonstrate the capabilities of this powerful development board.
The board also comes with very detailed on-line technical documentation in the System Reference Manual.