The Raspberry Pi High-Quality Camera module opens up all sorts of possibilities for high-resolution image and video photography, but how do you turn it into a practical camera?
This project builds a tripod-mounted Raspberry Pi camera with a button trigger and LED indicator for taking still images and video. It uses off-the-shelf parts requiring no soldering for easy assembly and it shows how to link it to a laptop or tablet for portability.
The open-source Python script controlling the camera can be modified to suit your own specific photographic needs using the many software options for the camera module, including image quality and format, special effects and raw output to name a few.
Note: The camera requires Raspberry Pi OS (Legacy) with desktop.
1. Build
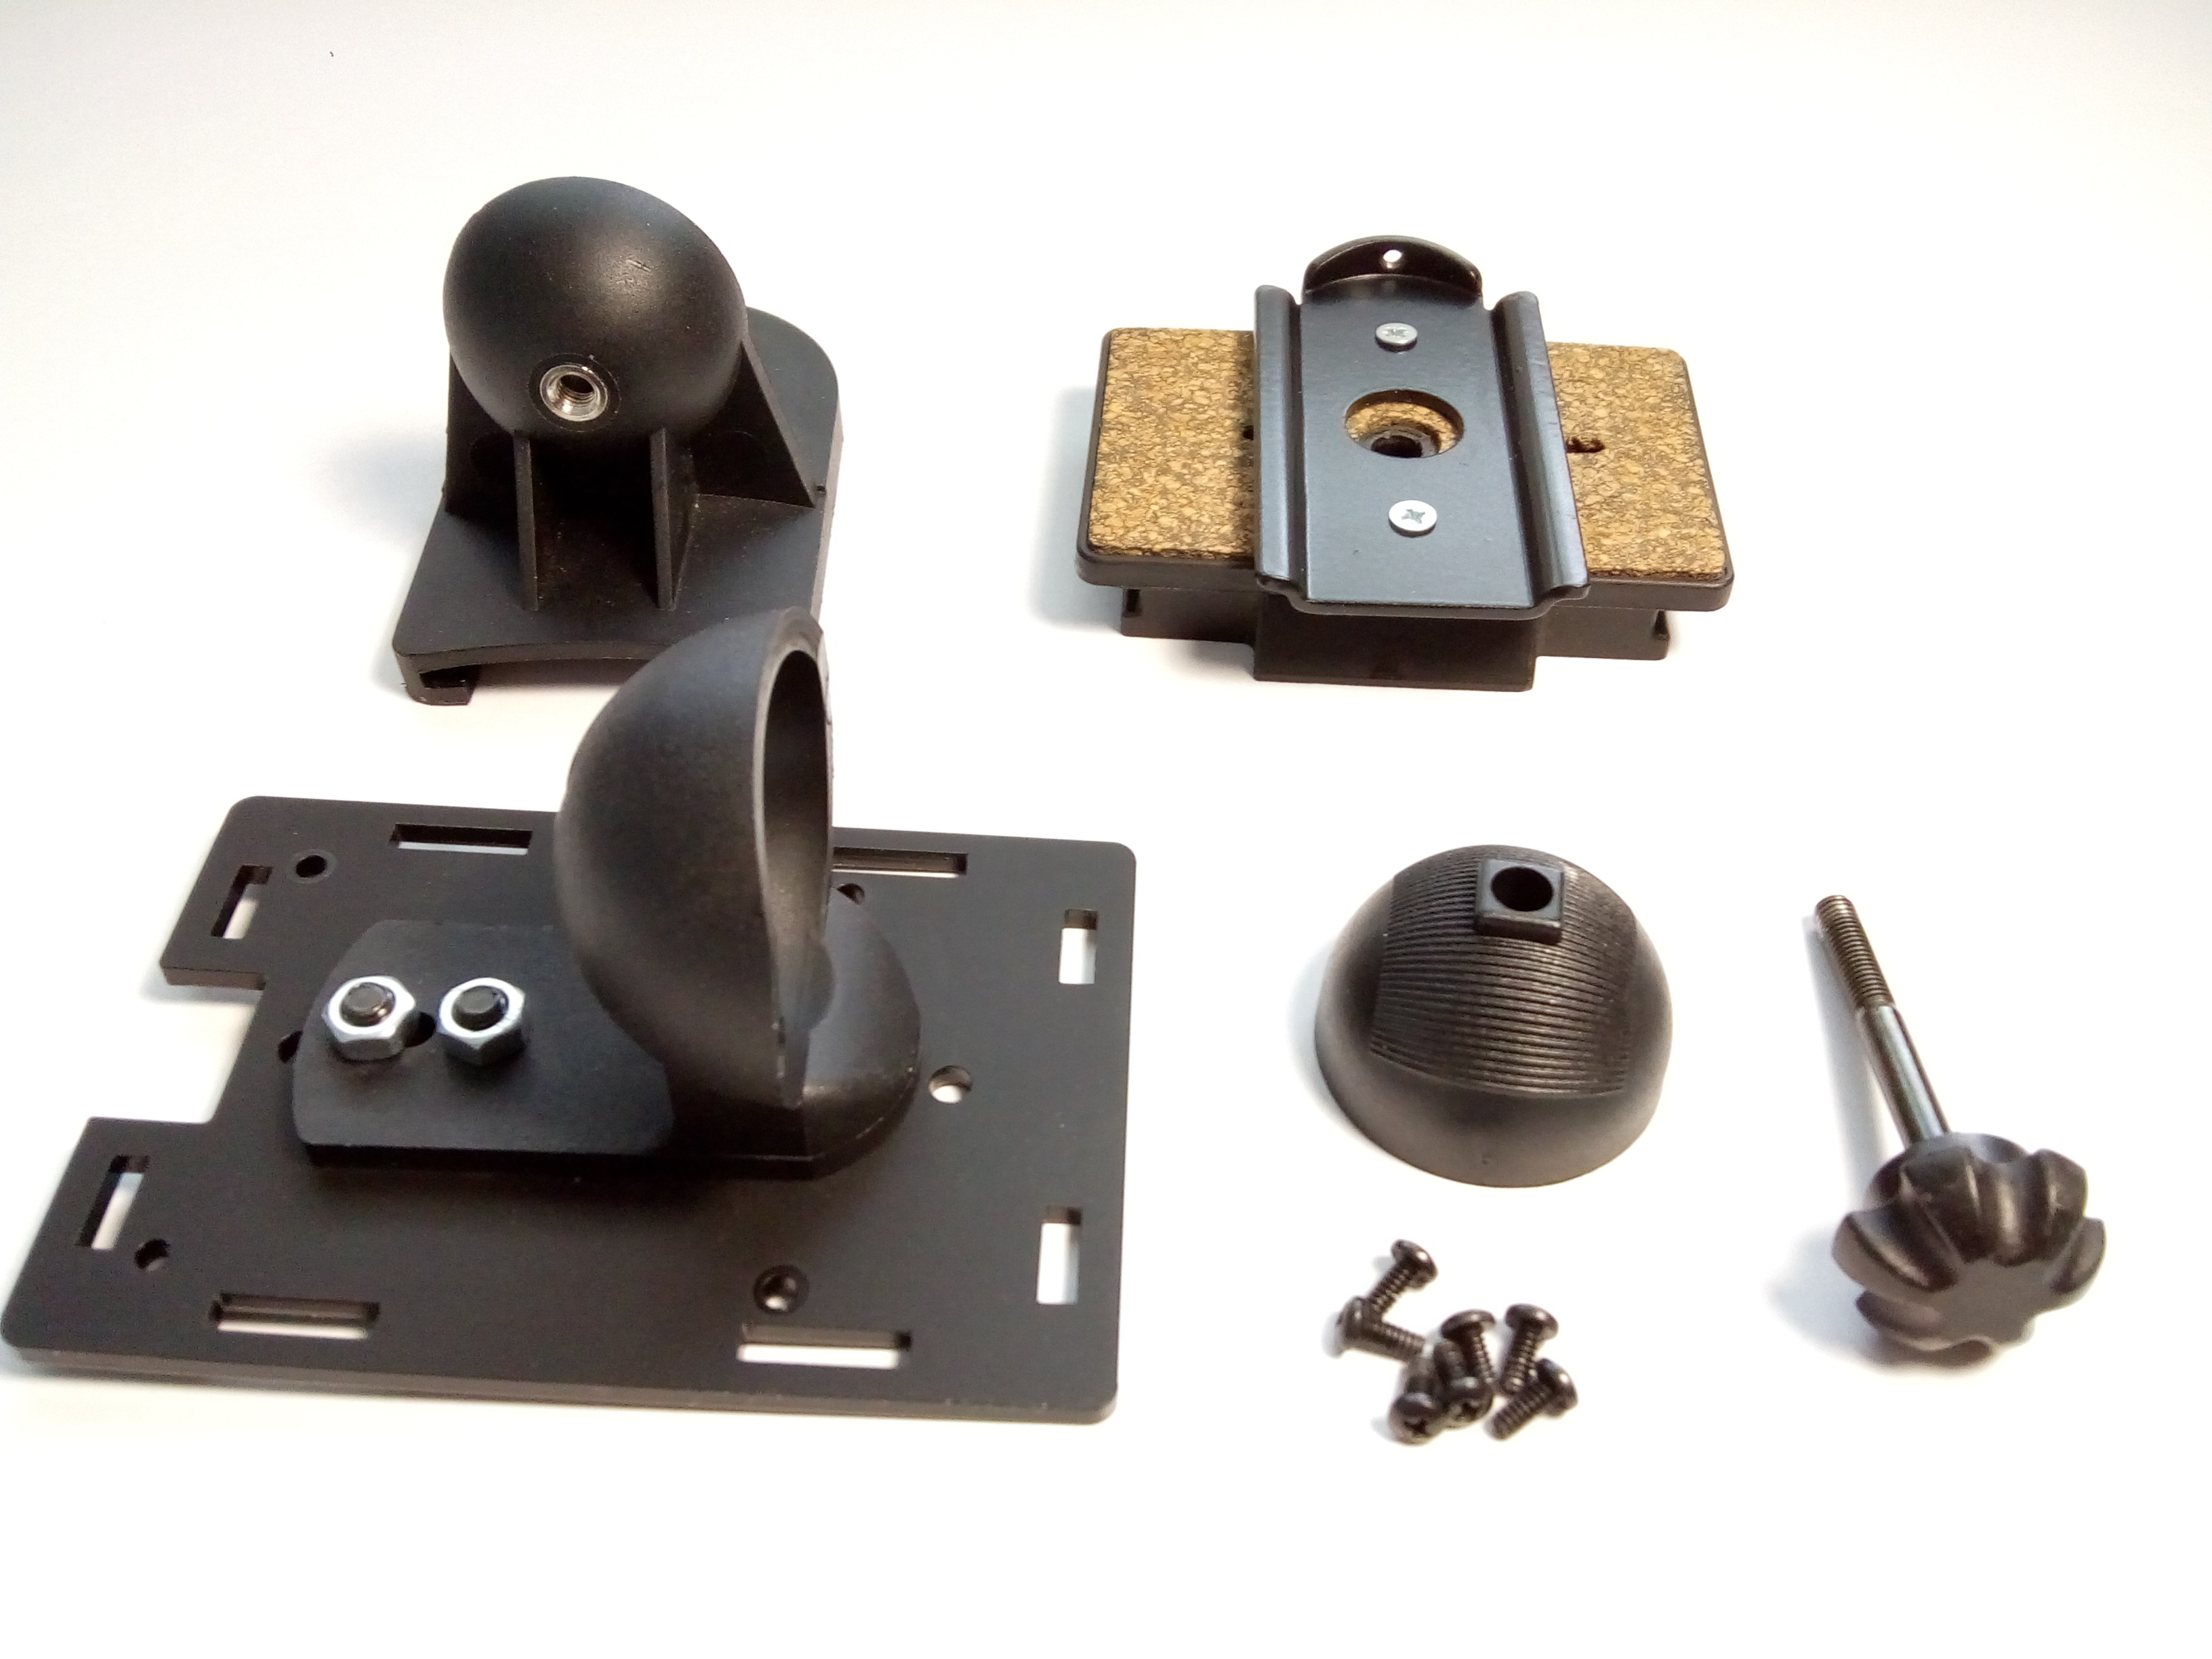
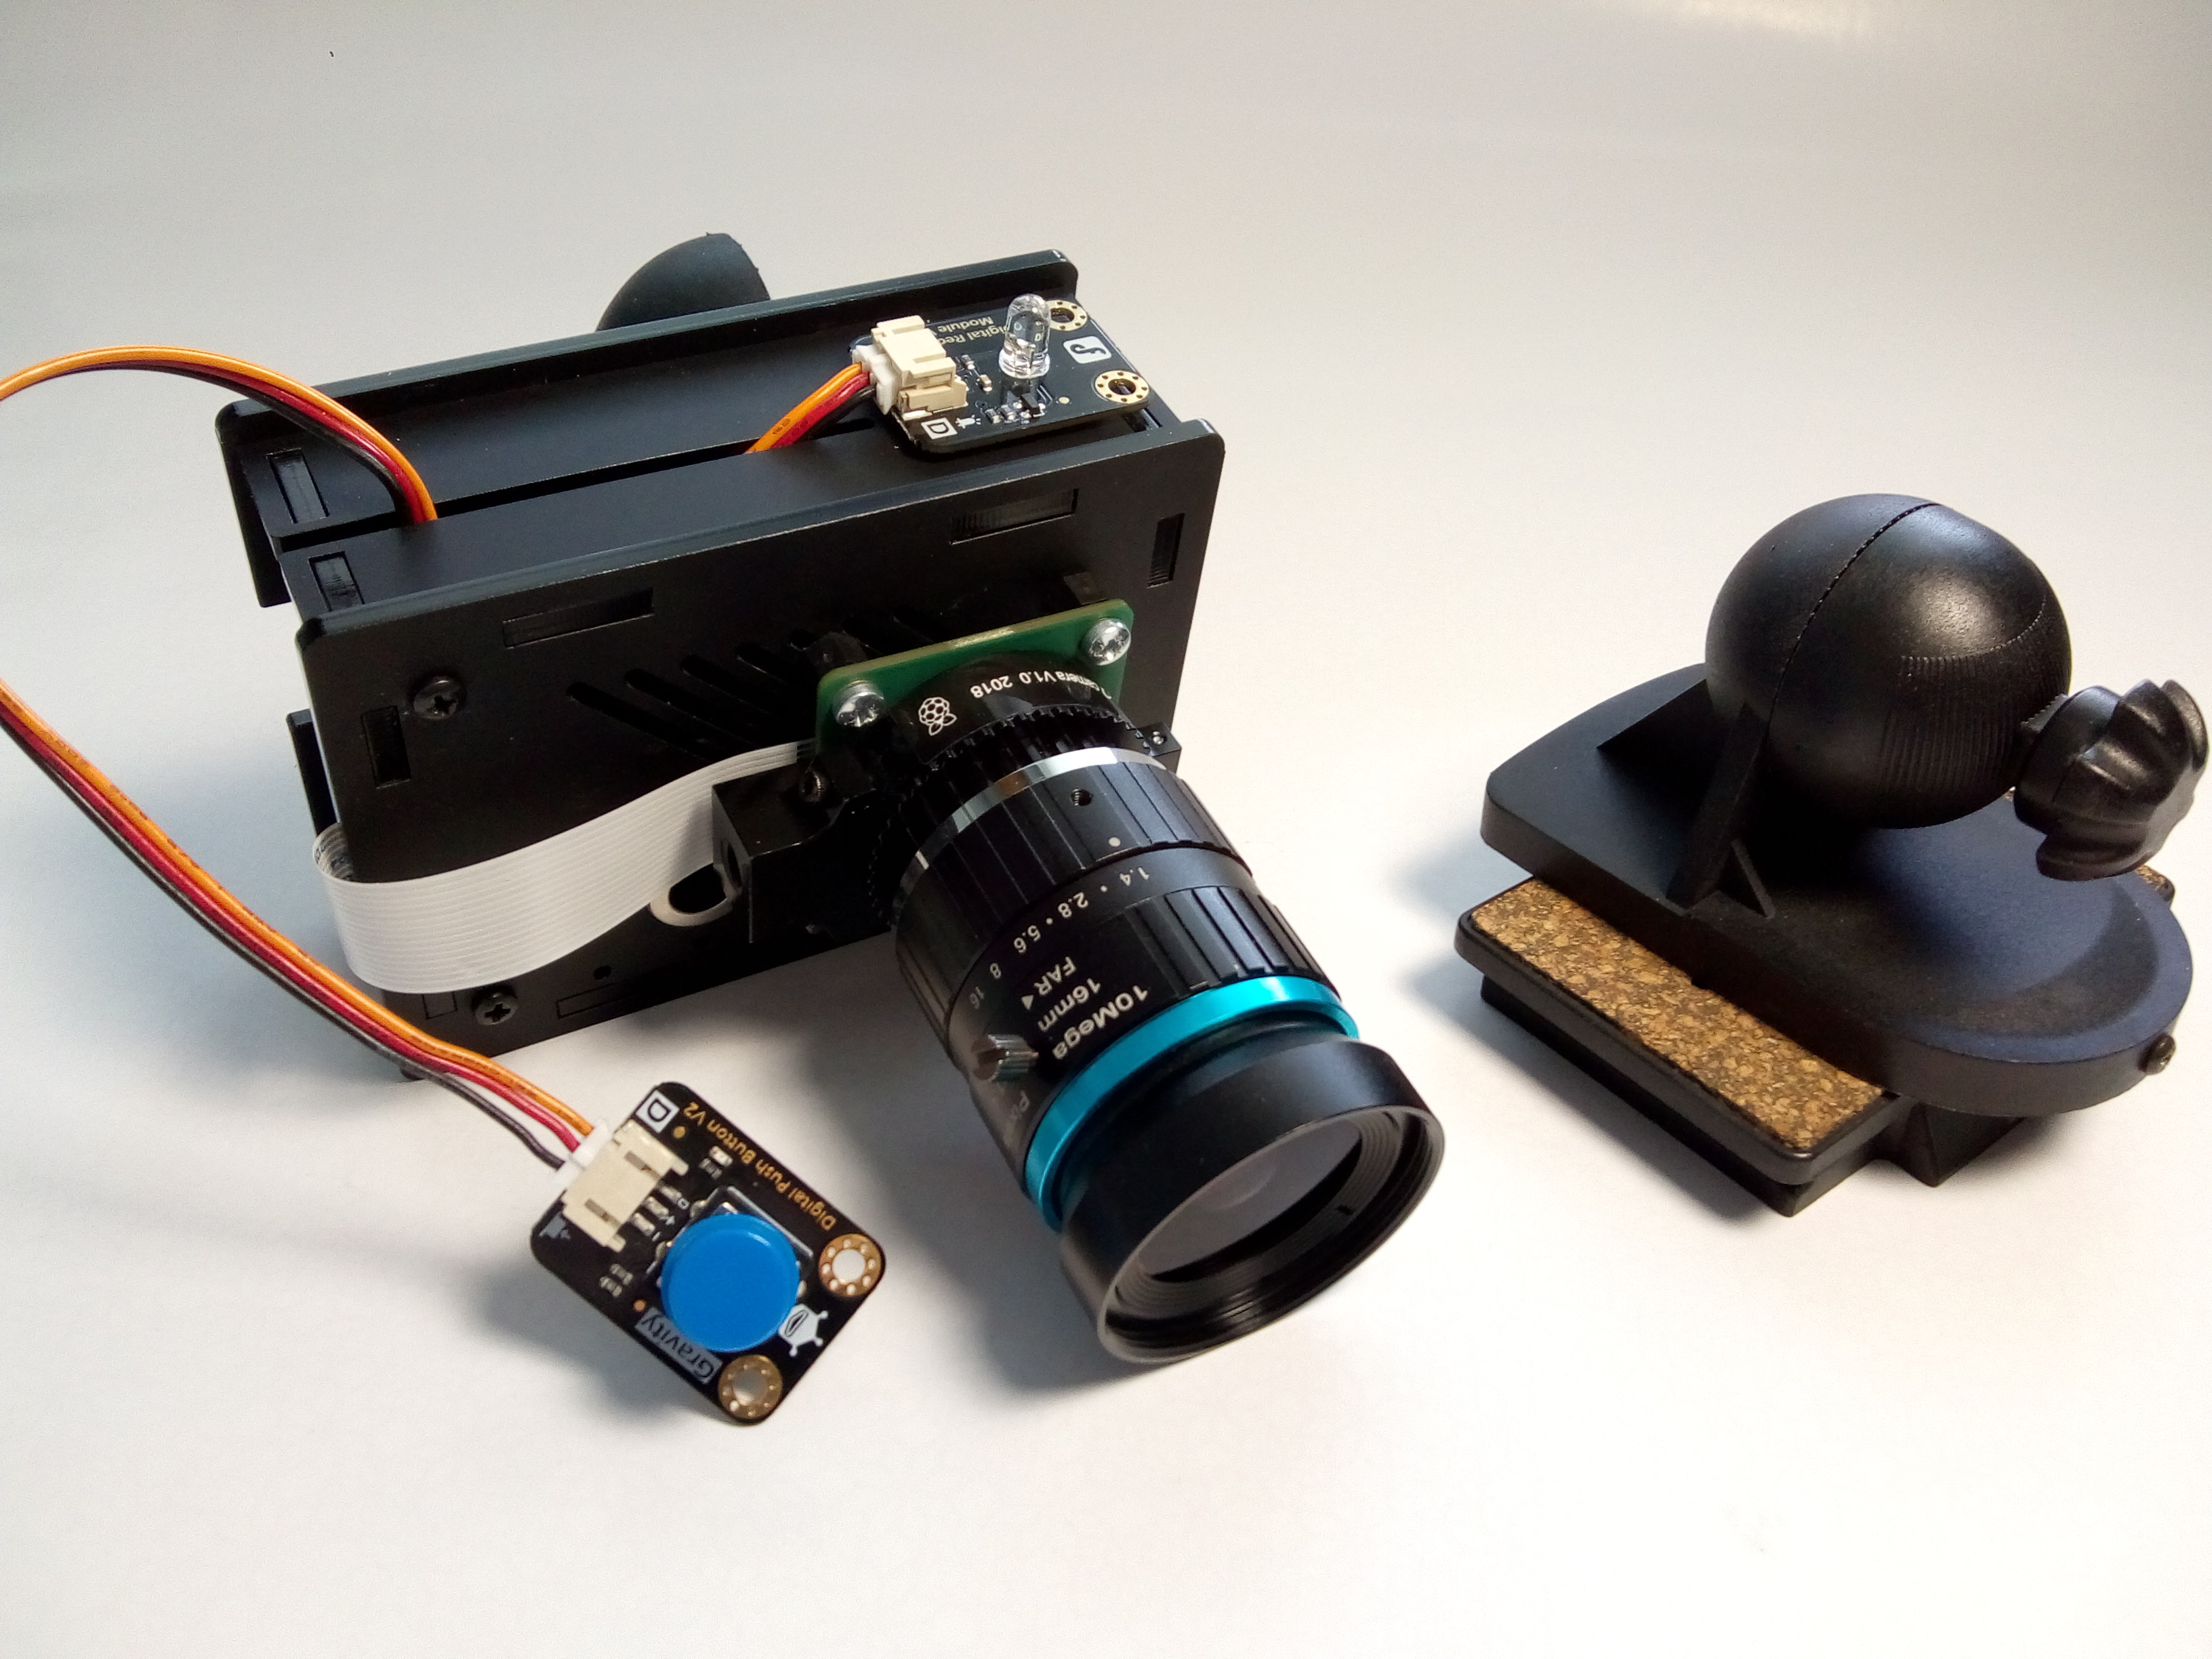
We enclosed the Raspberry Pi in a camera case and mounted the camera module to the outside. The case included a wall mount bracket that we attached to a standard camera tripod footplate.
- Mark out and drill 4 x 3mm holes in the camera case top plate where the camera module will be mounted.
- Fit 4 x nylon standoffs to the outside of the top plate and attach the camera module with M3 bolts.
- Fit the case stand-offs to the Raspberry Pi.
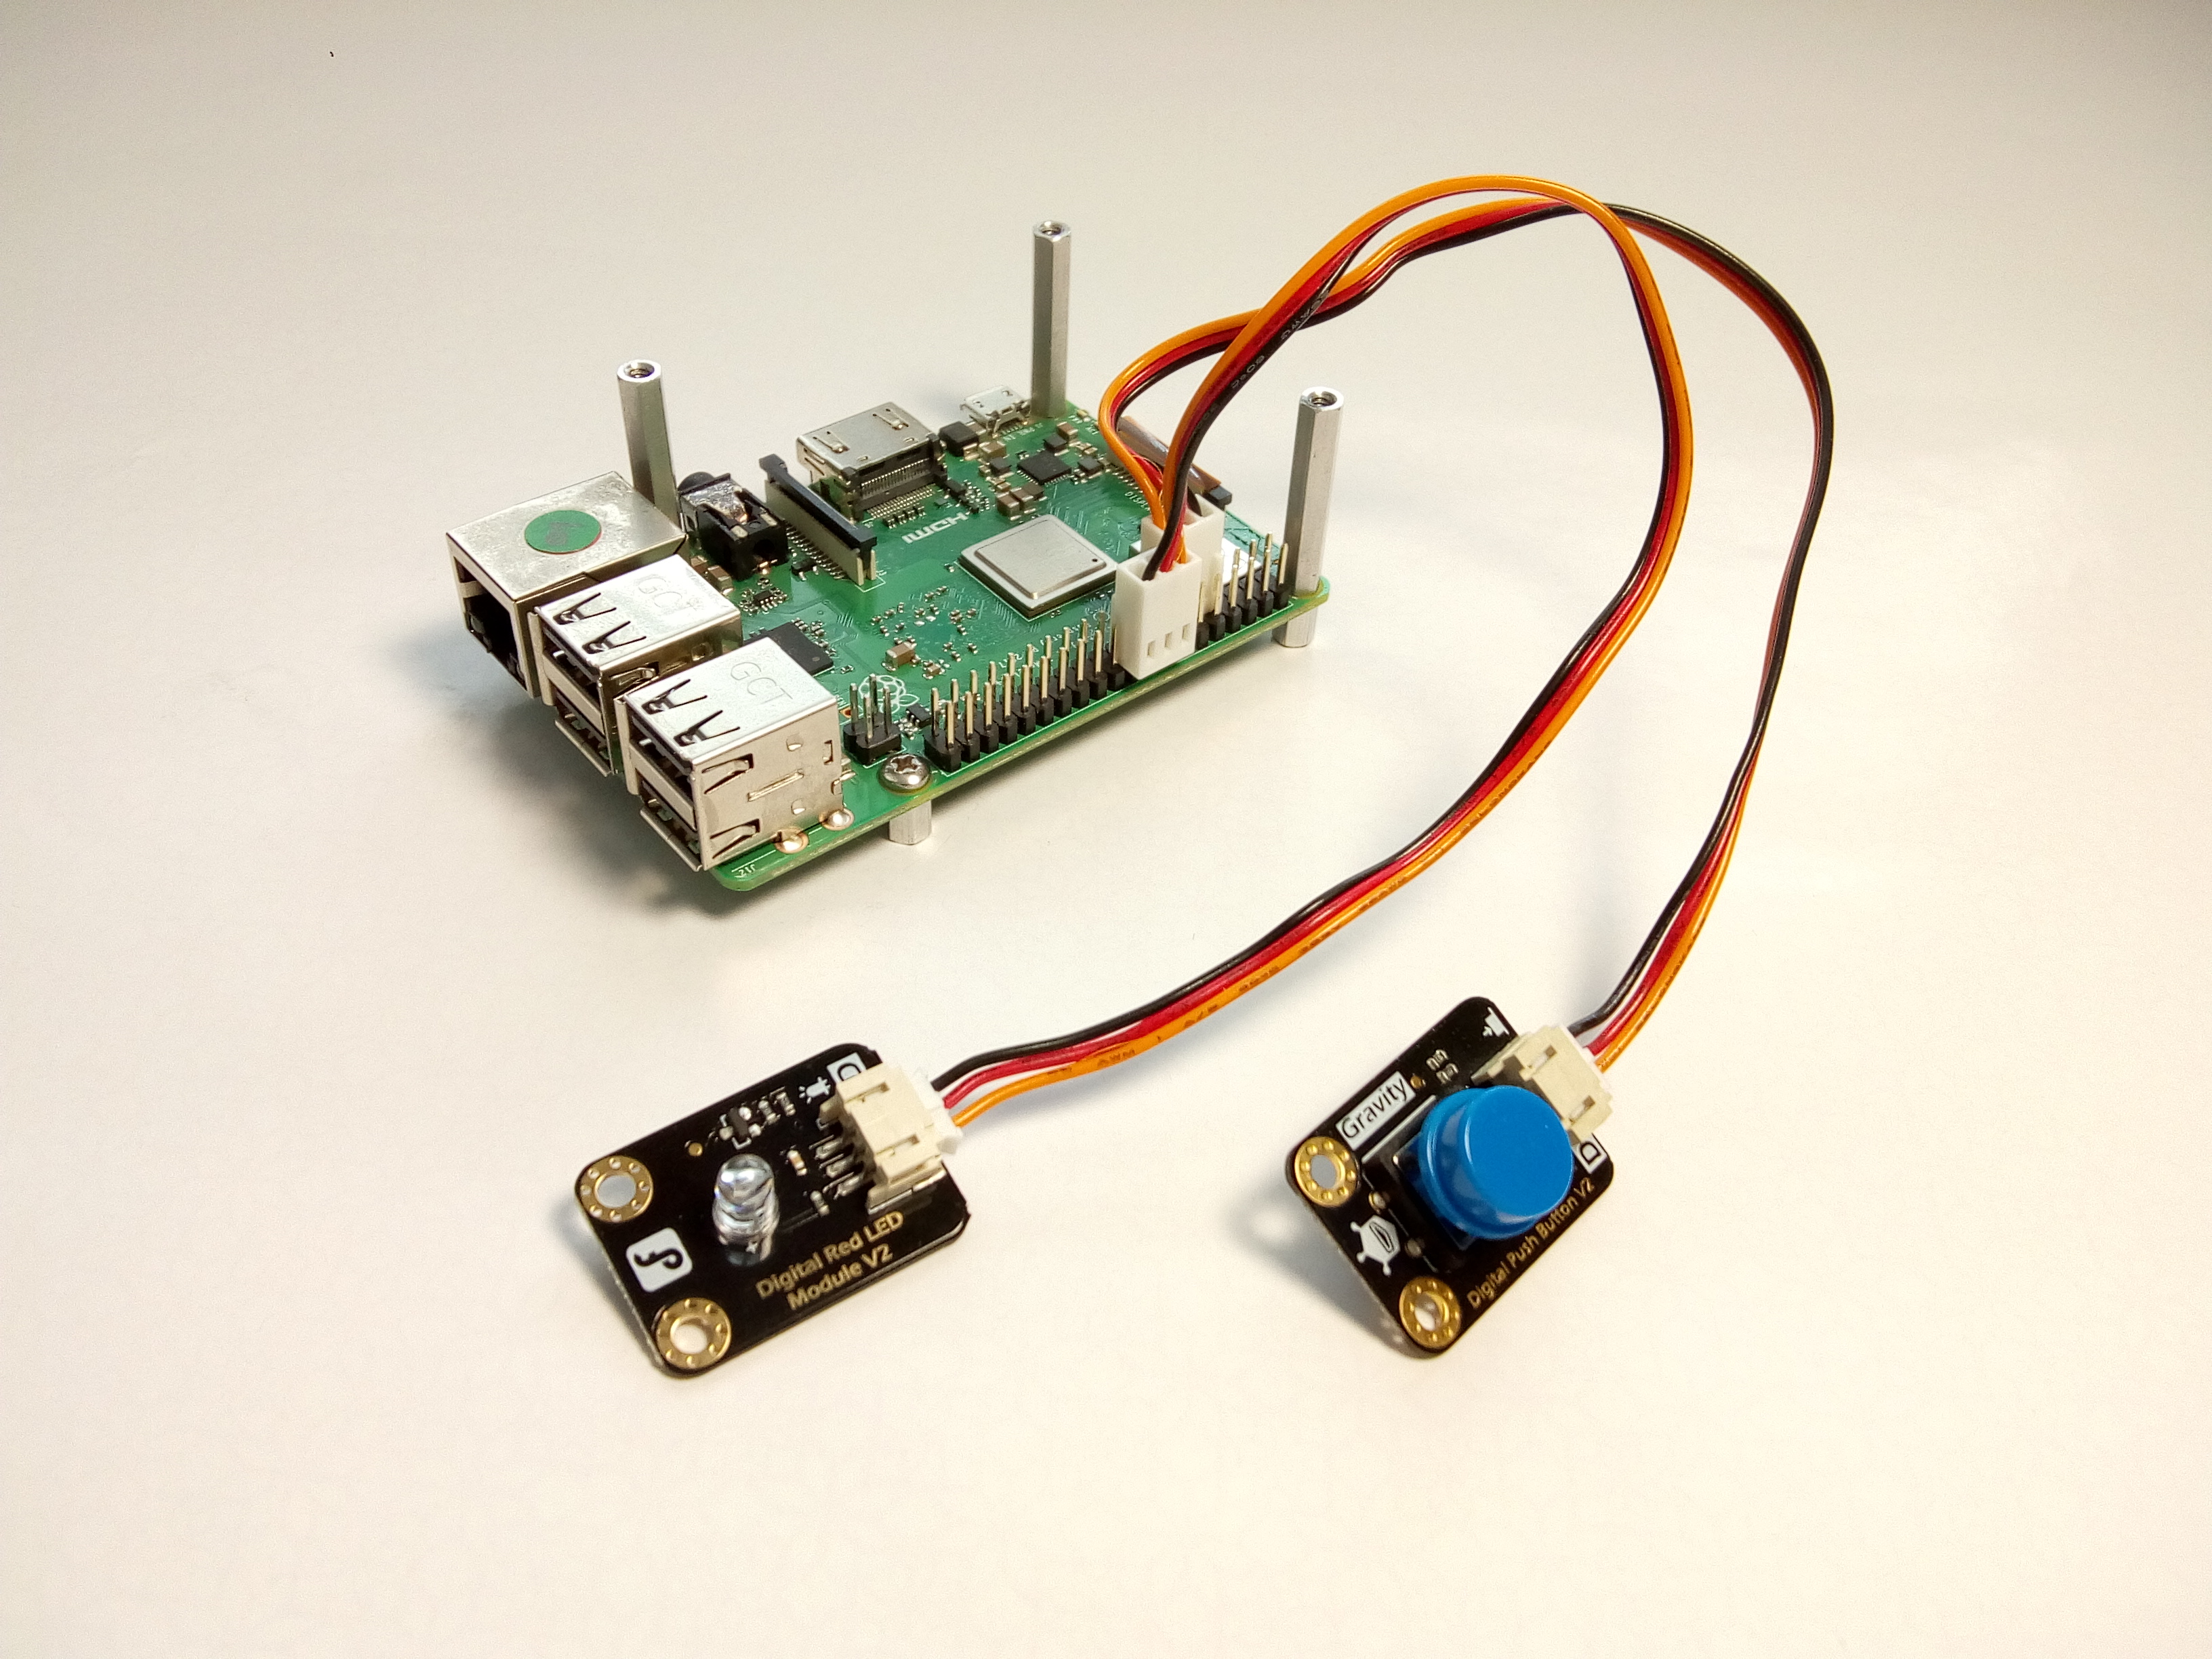
- Attach the cables to the Gravity LED and Button modules and connect them to the Raspberry Pi GPIO header.
Button module
| Pin | GPIO | Function | Colour |
| 09 | GND | GND | Black |
| 11 | GPIO17 | VCC | Red |
| 23 | GPIO27 | CTL | Orange |
LED module
| Pin | GPIO | Function | Colour |
| 16 | GPIO23 | CTL | Orange |
| 18 | GPIO24 | VCC | Red |
| 20 | GND | GND | Orange |
Gravity modules have onboard components making them safe to connect as shown. Other types of module connected this way may damage your Raspberry Pi.
- Drill 2 x 3mm holes in the tripod foot-plate and attach the ball bracket plate with M3 bolts.
- Attach the ball wall mount to the case backplate using included bolts.
- Build the rest of the case and screw down the Raspberry Pi to the mounting bosses.
- Feed the button and LED cables through the slot in the case and stick down the LED module.
- Attach the camera cable to the CSI connector on the Raspberry Pi and fit the top plate.
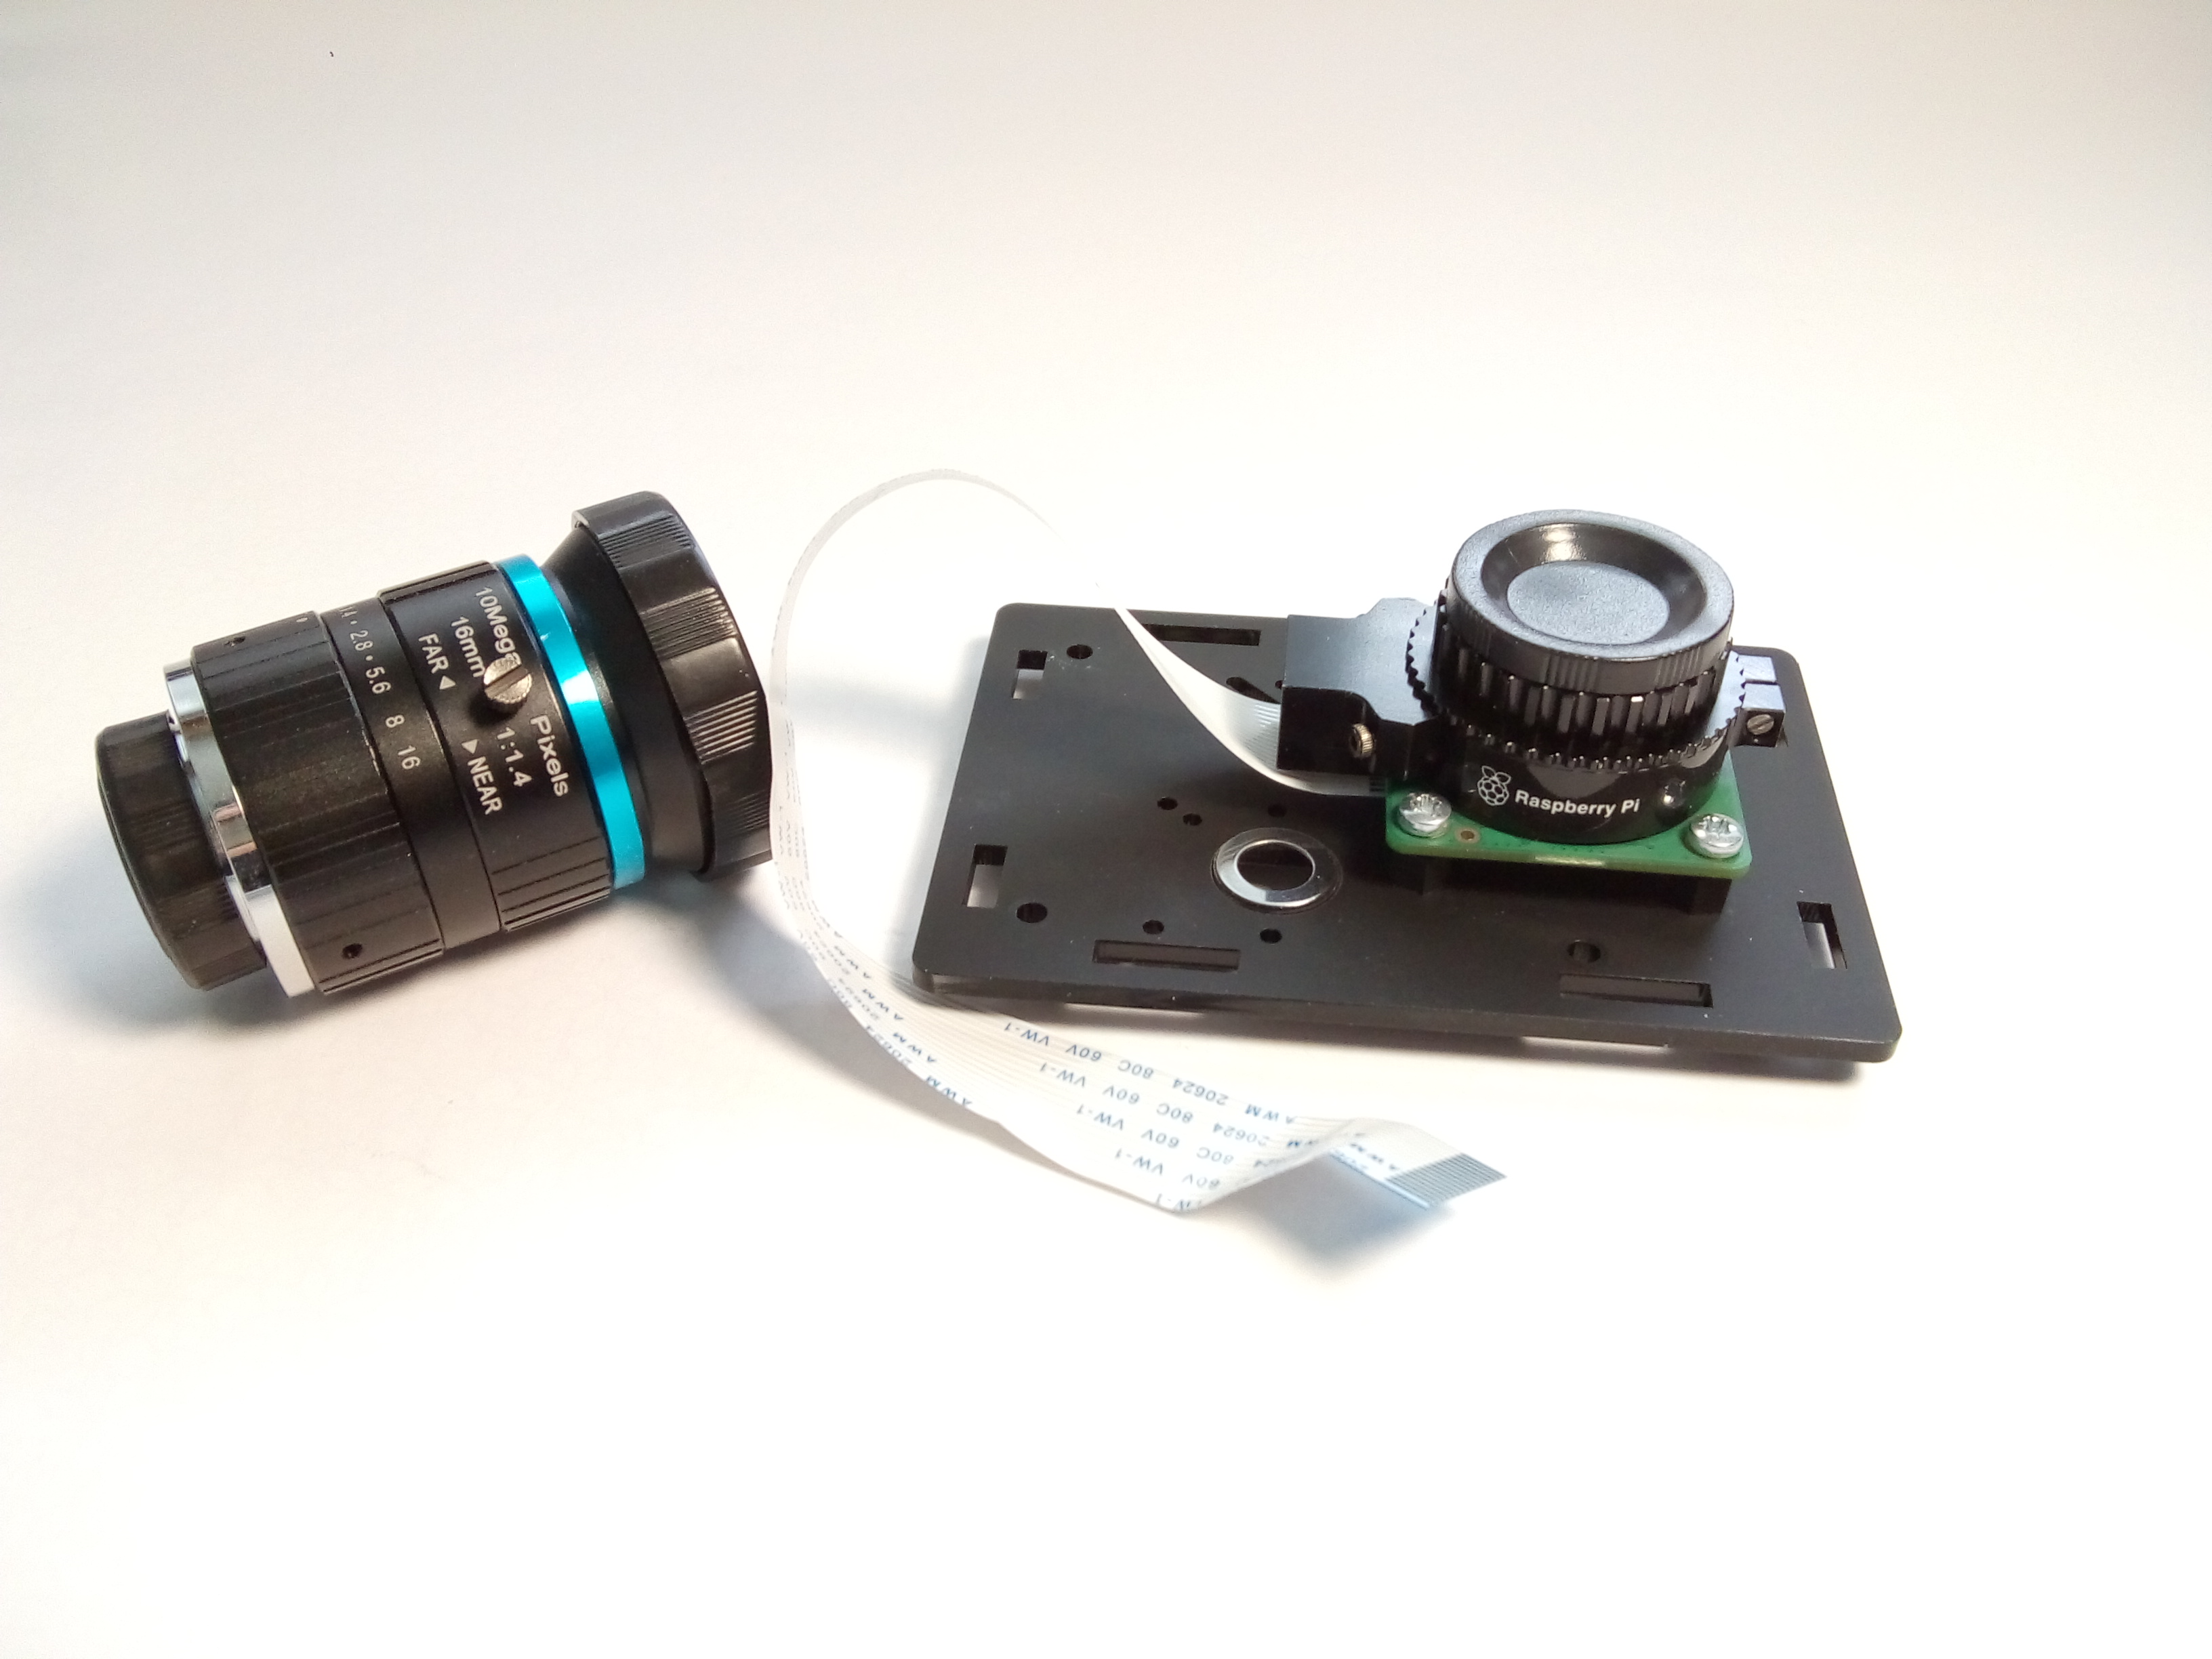
- Attach the lens to the camera module.
- Mount the camera on the tripod.
Detailed instructions for attaching lenses to the camera module can be found here: https://www.raspberrypi.org/products/raspberry-pi-high-quality-camera/
2. System setup & display
We used the full desktop version of Raspberry Pi OS on a 32GB microSD card. Use a card with the operating system already installed or flash a blank one using Raspberry Pi’s instructions:
https://www.raspberrypi.org/documentation/installation/installing-images/
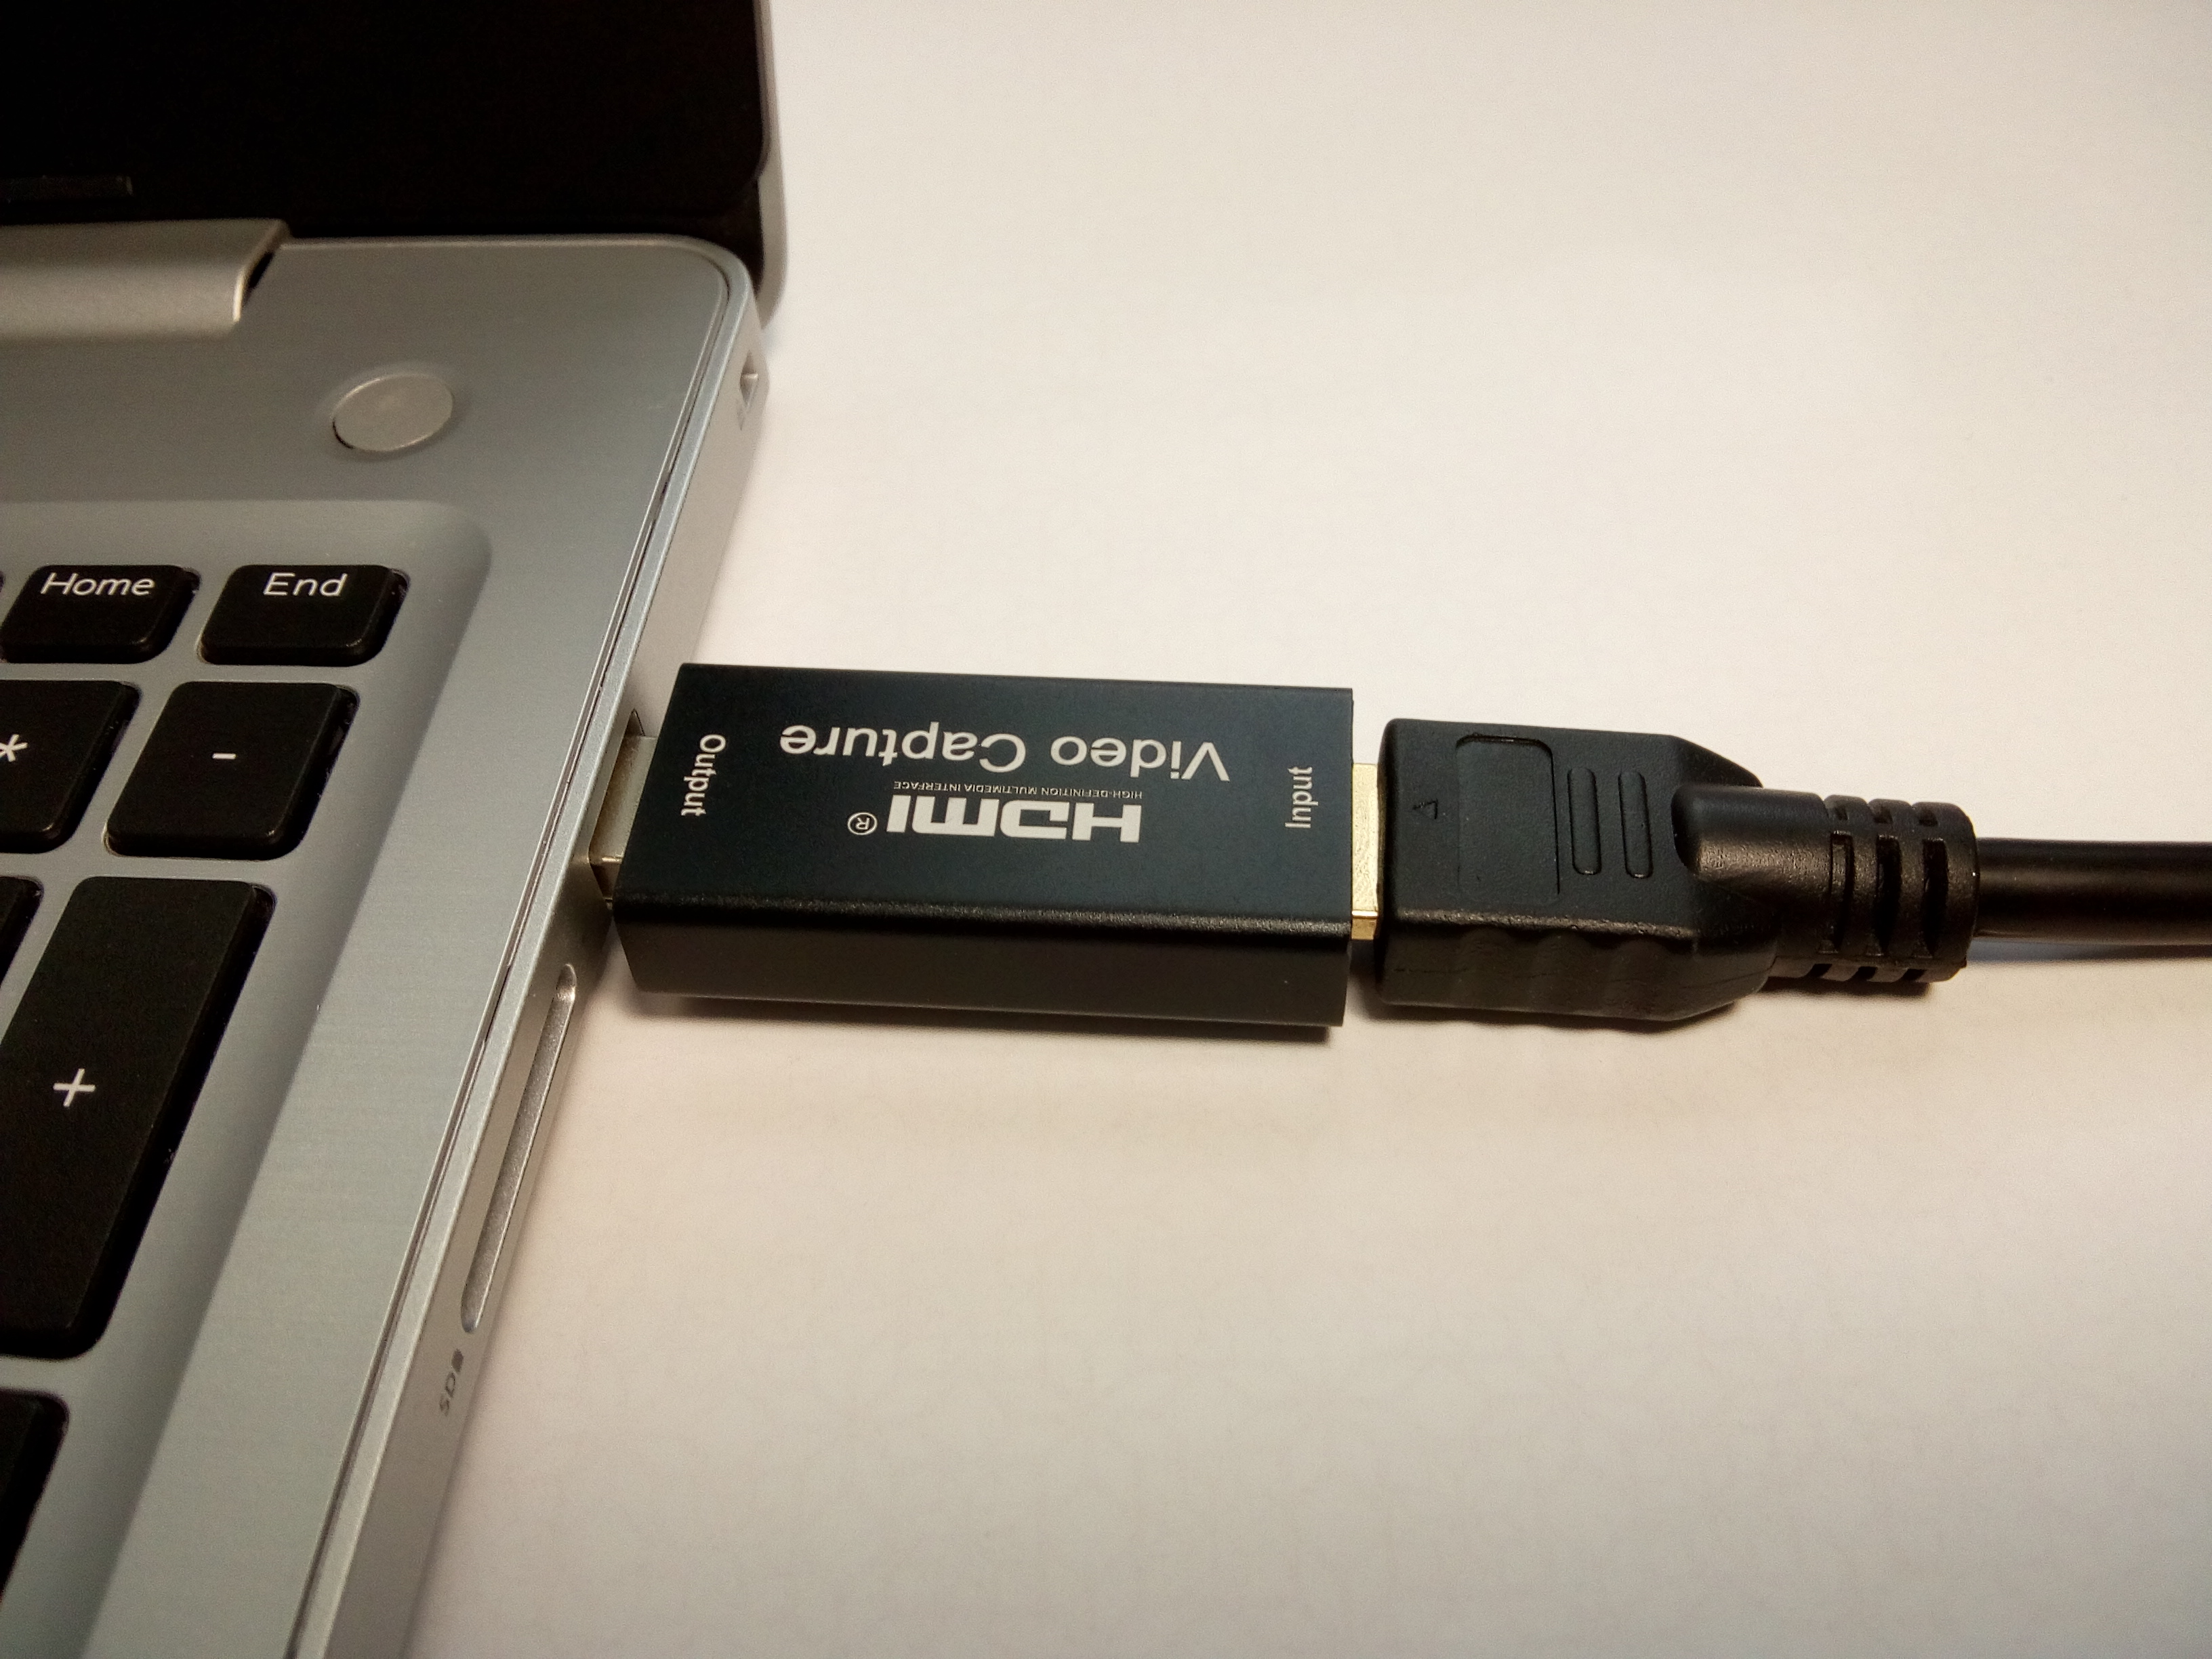
To view the camera HDMI output so you can frame and focus your shots, we used a Windows 10 laptop with an HDMI to USB video card adapter. You can also use a tablet or standard HDMI monitor.
- Connect the Raspberry Pi to the laptop using an HDMI cable via an HDMI to USB video capture card.
- Attach a keyboard and mouse to the Raspberry Pi, these can be removed later.
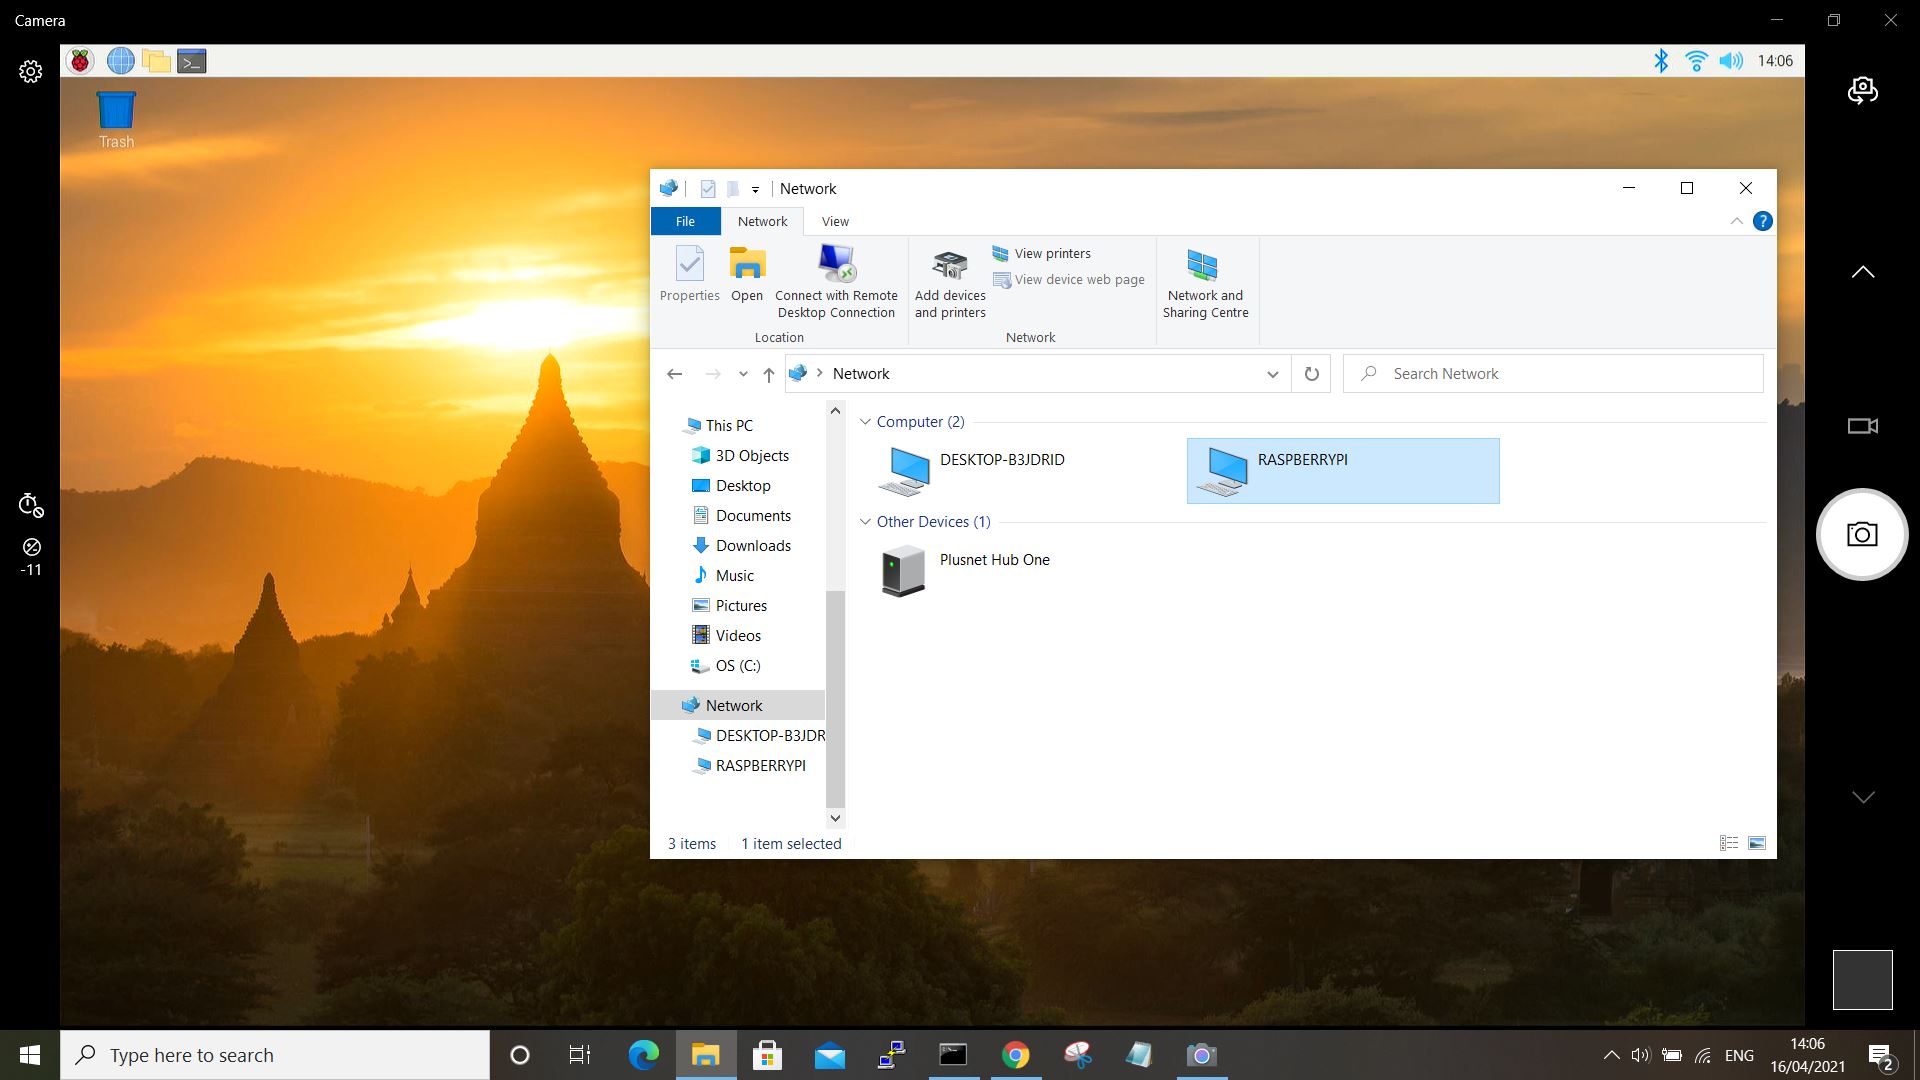
- Open Windows Camera app and change to USB video by clicking the camera icon in the top right of the pane.
- Power on Raspberry Pi – the desktop should appear in the camera app.
- Run through setup using the mouse and keyboard attached to the Raspberry Pi.
- Add WiFi credentials.
- From the Preferences menu open Raspberry Pi Configuration and enable camera and ssh.
- Reboot when asked.
3. Camera script
Next, you will install and test the Python script that will control the camera using the button. The script can be found on the OKdo GitHub page: https://github.com/LetsOKdo/pi-hq-camera
To install the script on the Raspberry Pi:
- Open Terminal on the Raspberry Pi and clone the script with the following command:
git clone https://github.com/LetsOKdo/pi-hq-camera.git- Add the MP4Box package – this will allow conversion of h.264 video to MP4.
sudo apt install gpac
- Run the script to test everything from the Terminal
sudo apt install gpac
python3 hq-camera.py
The camera has been programmed with 3 modes; Shutdown, Still and Video. It starts up in Shutdown mode with no preview, so DON’T press and release the button just yet – the LED will be ON solid indicating the current mode.
- Press and hold the button for 2 seconds to enter Still mode – the LED will blink slowly, once every second and the screen will change to preview.
- Frame a shot, focus the lens and set the aperture.
- Press and release the button to take the shot – preview mode will stop momentarily and then return to preview.
- Press and hold the button for 2 seconds to enter Video mode – the LED will blink quickly, once every half second.
- Press and release the button to start video recording. Press and release the button again to end recording. The preview will remain on.
- Press and hold the button for 2 seconds to return to Shutdown mode – the LED will be on solid and preview will end so the Raspberry Pi can be controlled again
Open the Raspberry Pi File Manager and check you have an image in /home/pi/Pictures and an MP4 video in /home/pi/Video
Shutdown mode has preview switched off so the Raspberry Pi can be controlled – If you ever need to get out of preview press and hold the button and cycle though back to Shutdown mode
4. Remote access
Images and video are stored on the Raspberry Pi’s microSD card but these can be accessed remotely from any computer on your network using Samba. This allows Windows, Mac and Linux PCs to access the images so you can use a File Manager to easily copy them to your local machine.
- Install Samba with the following command:
sudo apt install samba samba-common-bin smbclient cifs-utils- Accept the default WINS setting (No).
detailed information about Samba is here: https://www.raspberrypi.org/documentation/remote-access/samba.md
Adjust the Samba config to share the Raspberry Pi Pictures and Video directories:
- Edit /etc/samba/smb.conf as sudo adding the following entries at the end of the file:
[Pictures]
    path = /home/pi/Pictures
    read only = no
    public = yes
    writable = yes
[Videos]
    path = /home/pi/Videos
    read only = no
    public = yes
    writable = yes
- Open Windows File Manager.
- Turn on network discovery.
- Navigate to the shared folders – you should be able to open and view your photos and videos.
5. Auto startup
If you want the camera script to start automatically when the Raspberry Pi boots up, configure the systemd service unit. This will also allow the keyboard and mouse to be removed from the Raspberry Pi.
- Copy the service unit to /etc
cd ~/pi-hq-camera
sudo cp hq-camera.service /etc/systemd/system/- Enable the service
sudo systemctl enable hq-camera.serviceNow when the Raspberry Pi boots it will run the script automatically – the camera will be in Shutdown mode with no preview. To start taking photos, change mode by pressing and holding the button.
- To stop and disable the script use:
sudo systemctl stop hq-camera.service
sudo systemctl disable hq-camera.service
6. Safe shutdown
You can now shutdown the Raspberry Pi and remove the keyboard and mouse:
- Press and hold the button to enter Shutdown mode – the LED will be ON solid.
- Press and release the button to shutdown.
Wait until the green LED on the Raspberry Pi board has finished flashing before removing the power.
7. Modification
The advantage of the Raspberry Pi camera is that you can program it to function the way you want. There are loads of modes and effects to try out. Experiment using the command line in Terminal but if you want to change the camera script, create your own functions and replace the existing ones.
Here is the definition of the function that takes still images – this is triggered when the button is pressed and released in Still mode. It stops the preview, creates the filename with a date stamp, takes the shot and starts preview again:
def take_still():
    global filename
    camera.stop_preview()
    filename = datetime.now().strftime('%Y%m%dT%H%M%S')
    camera.capture(f'{image_dir}{filename}.jpg')
    camera.start_preview()
Create your own function then replace a call in the op() function with your own version:
def op():
    global state
    if state is 'still':
        take_still()  # replace with your own function
Summary
Hopefully you will now have a Raspberry Pi High-Quality Camera setup to easily take photos and video connected to a laptop or tablet so you can frame and focus the images, giving you the kind of functionality available with high-end cameras.
The Python script demonstrates how to control and automate image capture and can be used as a basis for your own version, adding special effects or making the camera work the way you want it.
Change the button for a motion sensor, fit a wide-angle lens and you have a pet cam that will take pictures or video when it detects movement. Program it to take shots every few minutes and create time-lapse videos or create animations with special effects, the possibilities are endless.
Full details of the Python picamera module is here:n https://picamera.readthedocs.io/en/release-1.13/index.html
As usual Raspberry Pi have produced very high quality documentation on setting up and using the High-Quality Camera module – their official guide can be found here: https://www.raspberrypi.org/products/raspberry-pi-high-quality-camera/
Happy snapping!
Like what you read? Why not show your appreciation by giving some love.
From a quick tap to smashing that love button and show how much you enjoyed this project.

