Kodi Media Centre on Rasperry Pi 4
Using Kodi you can easily create a fully fletched media centre. The Raspberry Pi4 introduced amazing 4K video capabilities, making it an awesome device to build your own media centre. An Okdo Pi kit is perfect for this project. You’ll have a fan-cooled, solid unit with a tiny footprint. You can control it from your IOS or Android device giving you access to media online, on a NAS, external devices…
![]()
Looking for a Raspberry Pi 4 alternative? Discover ROCK 4SE today and try this step-by-step guide on how to run a Kodi Media Centre on your ROCK 4SE SBC with LibreELEC OS.
![]()
1. Get your Pi ready
For this project you won’t be using the standard Pi OS, we’ll be using LibreELEC, an OS designed to run Kodi which is the software that will run your media centre.
- Download the LibreELEC USB-SD Creator, this is necessary to create the bootable SD card from which you’ll run the media centre software.
- Download the OS for Raspberry Pi4
- Insert your micro SD card into your host computer and open LibreElec USB-SD Creator.
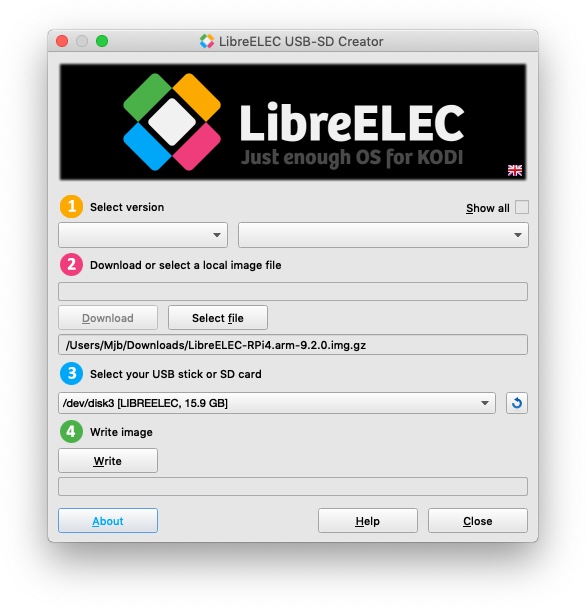
- You don’t need to bother with selecting a version, simply select the Pi4 OS that you just downloaded and select your SD card.
- Click Write.
- Once the process is complete, eject the SD card, insert it into your Pi which should be connected to a projector, monitor or TV, keyboard and mouse. The keyboard and mouse will only be necessary to set everything up.
- Startup your Pi.
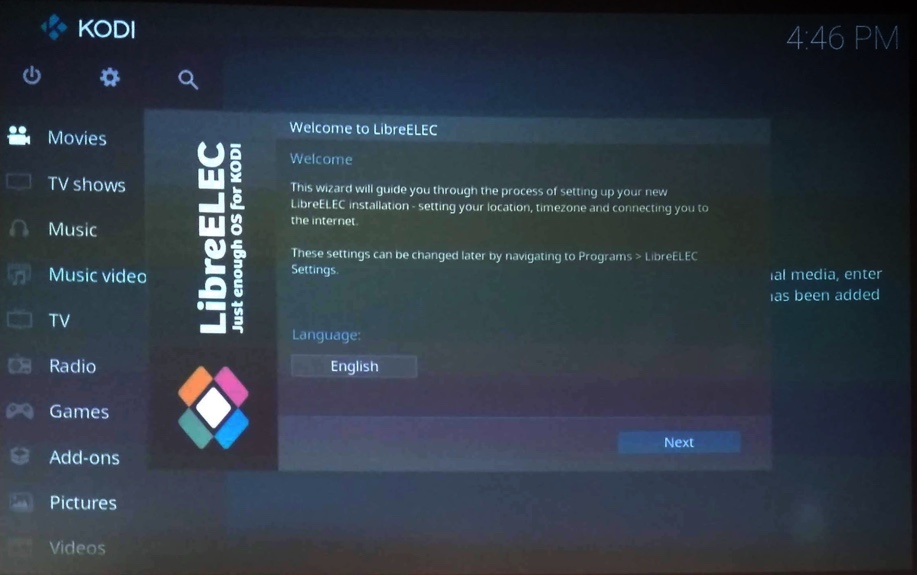
2. Set-up LibreElec & Kodi
Once your Pi has started up, LibreElec will run some processes and will automatically reboot. After this, you’ll be prompted to go through the set-up wizard. Follow the steps ensuring that you’ve set-up your WiFi connection properly. Nothing will work without it.
3. Add-ons
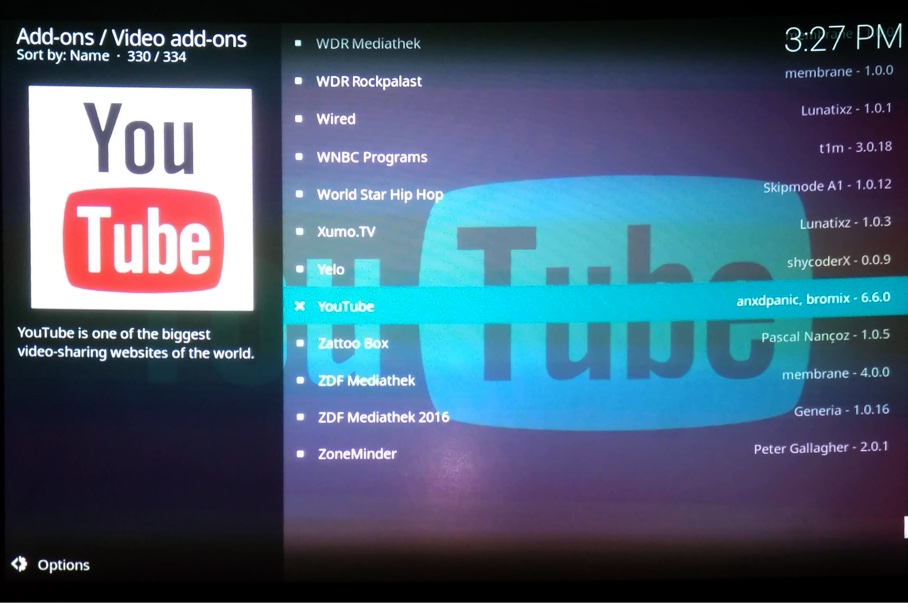
- Click on enter add-on browser
- Navigate to the YouTube add-on and click on it
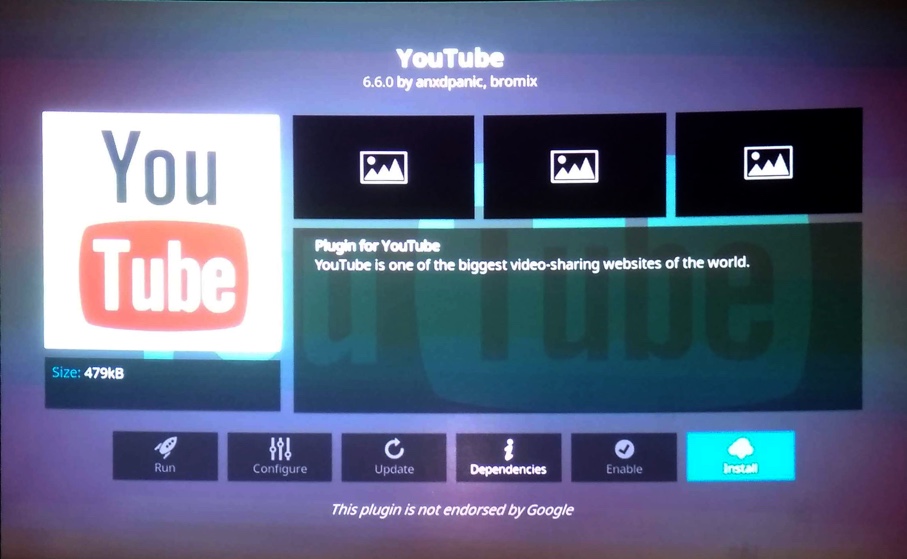
- Click on install and then on OK
- Once the add-on has downloaded you’ll be presented with the set-up wizard, click on yes and follow the prompts
- Exit the add-on browser by pressing escape on your keyboard
- You’ll now see the YouTube add-on in Add-ons >Video add-ons
- Clicking on the YouTube icon will now take you to YouTube
Installing too many add-ons can slow your system. It is good practice to uninstall any add-ons that you no longer need. You can do this by navigating to My add-ons and finding the add-on that you want to remove, from there you’ll find the option to uninstall it together with all the settings for that particular add-on.
3. Populate your library
It is recommended that you organise your files appropriately before adding them to Kodi. Structuring folders and naming everything properly will enhance your experience of Kodi.
- Navigate to Videos on the main menu
- Select Files > Add Videos
- Use the Browse option to locate your videos, this could be USB storage, an external hard drive or any device on your network.
- For the best experience make sure that you add your media according to Kodi’s predefined categories ie Movies, TV, Music and Photos. Doing this will ensure that Kodi will treat them accordingly and that any related add-ons will work as intended.
It is also possible to add media from a NAS. Refer to your specific NAS’ documentation to set it up correctly. If you need help you can refer to https://forum.kodi.tv/
4. Remote control
Kodi has official (and 3rd party) partner apps available for IOS and Android devices. They give you control of Kodi without the need for mouse or keyboard connected to your Pi. To use it follow these steps:
- Install Kodi Remote (IOS) or Kore (Android) on your device
- Ensure that your device and Kodi are connected to the same WiFi network
- Open the app on your device
- Tap ADD MEDIA CENTER
- Tap NEXT
- Your media centre should be found by the app, select it
- tap FINISH
You should now be able to control Kodi from your device
Like what you read? Why not show your appreciation by giving some love.
From a quick tap to smashing that love button and show how much you enjoyed this project.

