
What you'll need
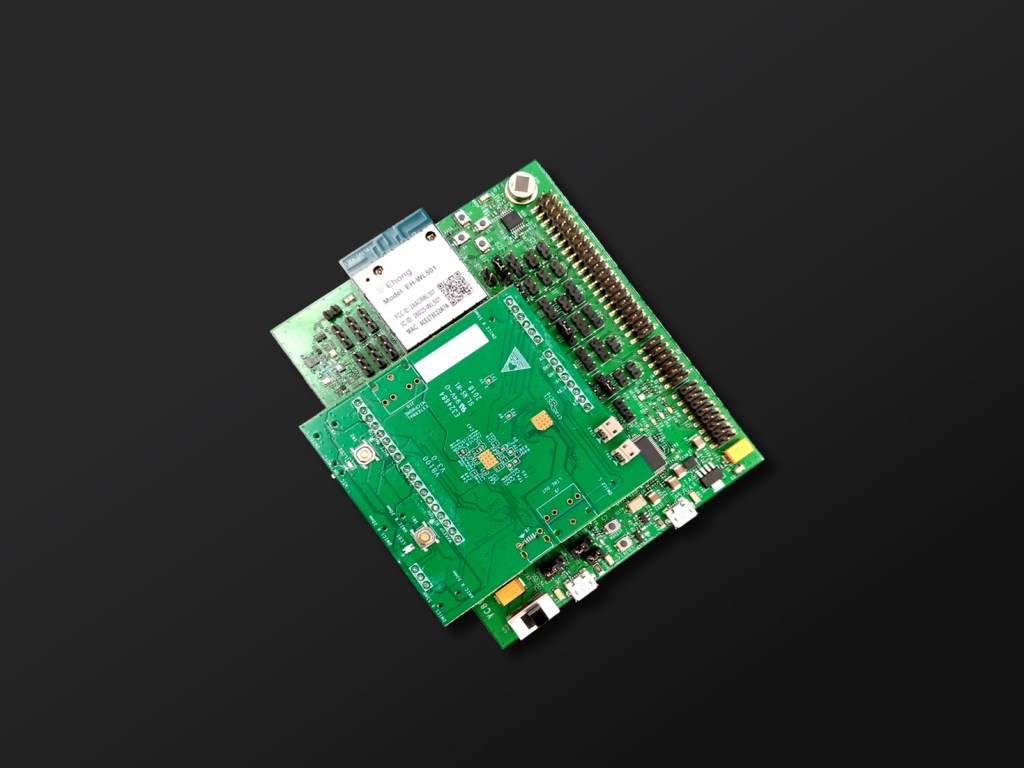
Qualcomm Home Hub 100 Development Kit
Host PC – Windows 10/Linux
Linux PC
Amazon AWS Account
Qualcomm Developer Account
Connect and test
Everything required to run the Alexa demo is provided in the Development Kit, including two on-board microphones, two external mini-speakers and two micro-USB cables for host connectivity.
In this step, the Home Hub is connected to its speakers and is attached to a Windows 10 host to test communication with the QCA4020 module. The module comes with the demo firmware installed.
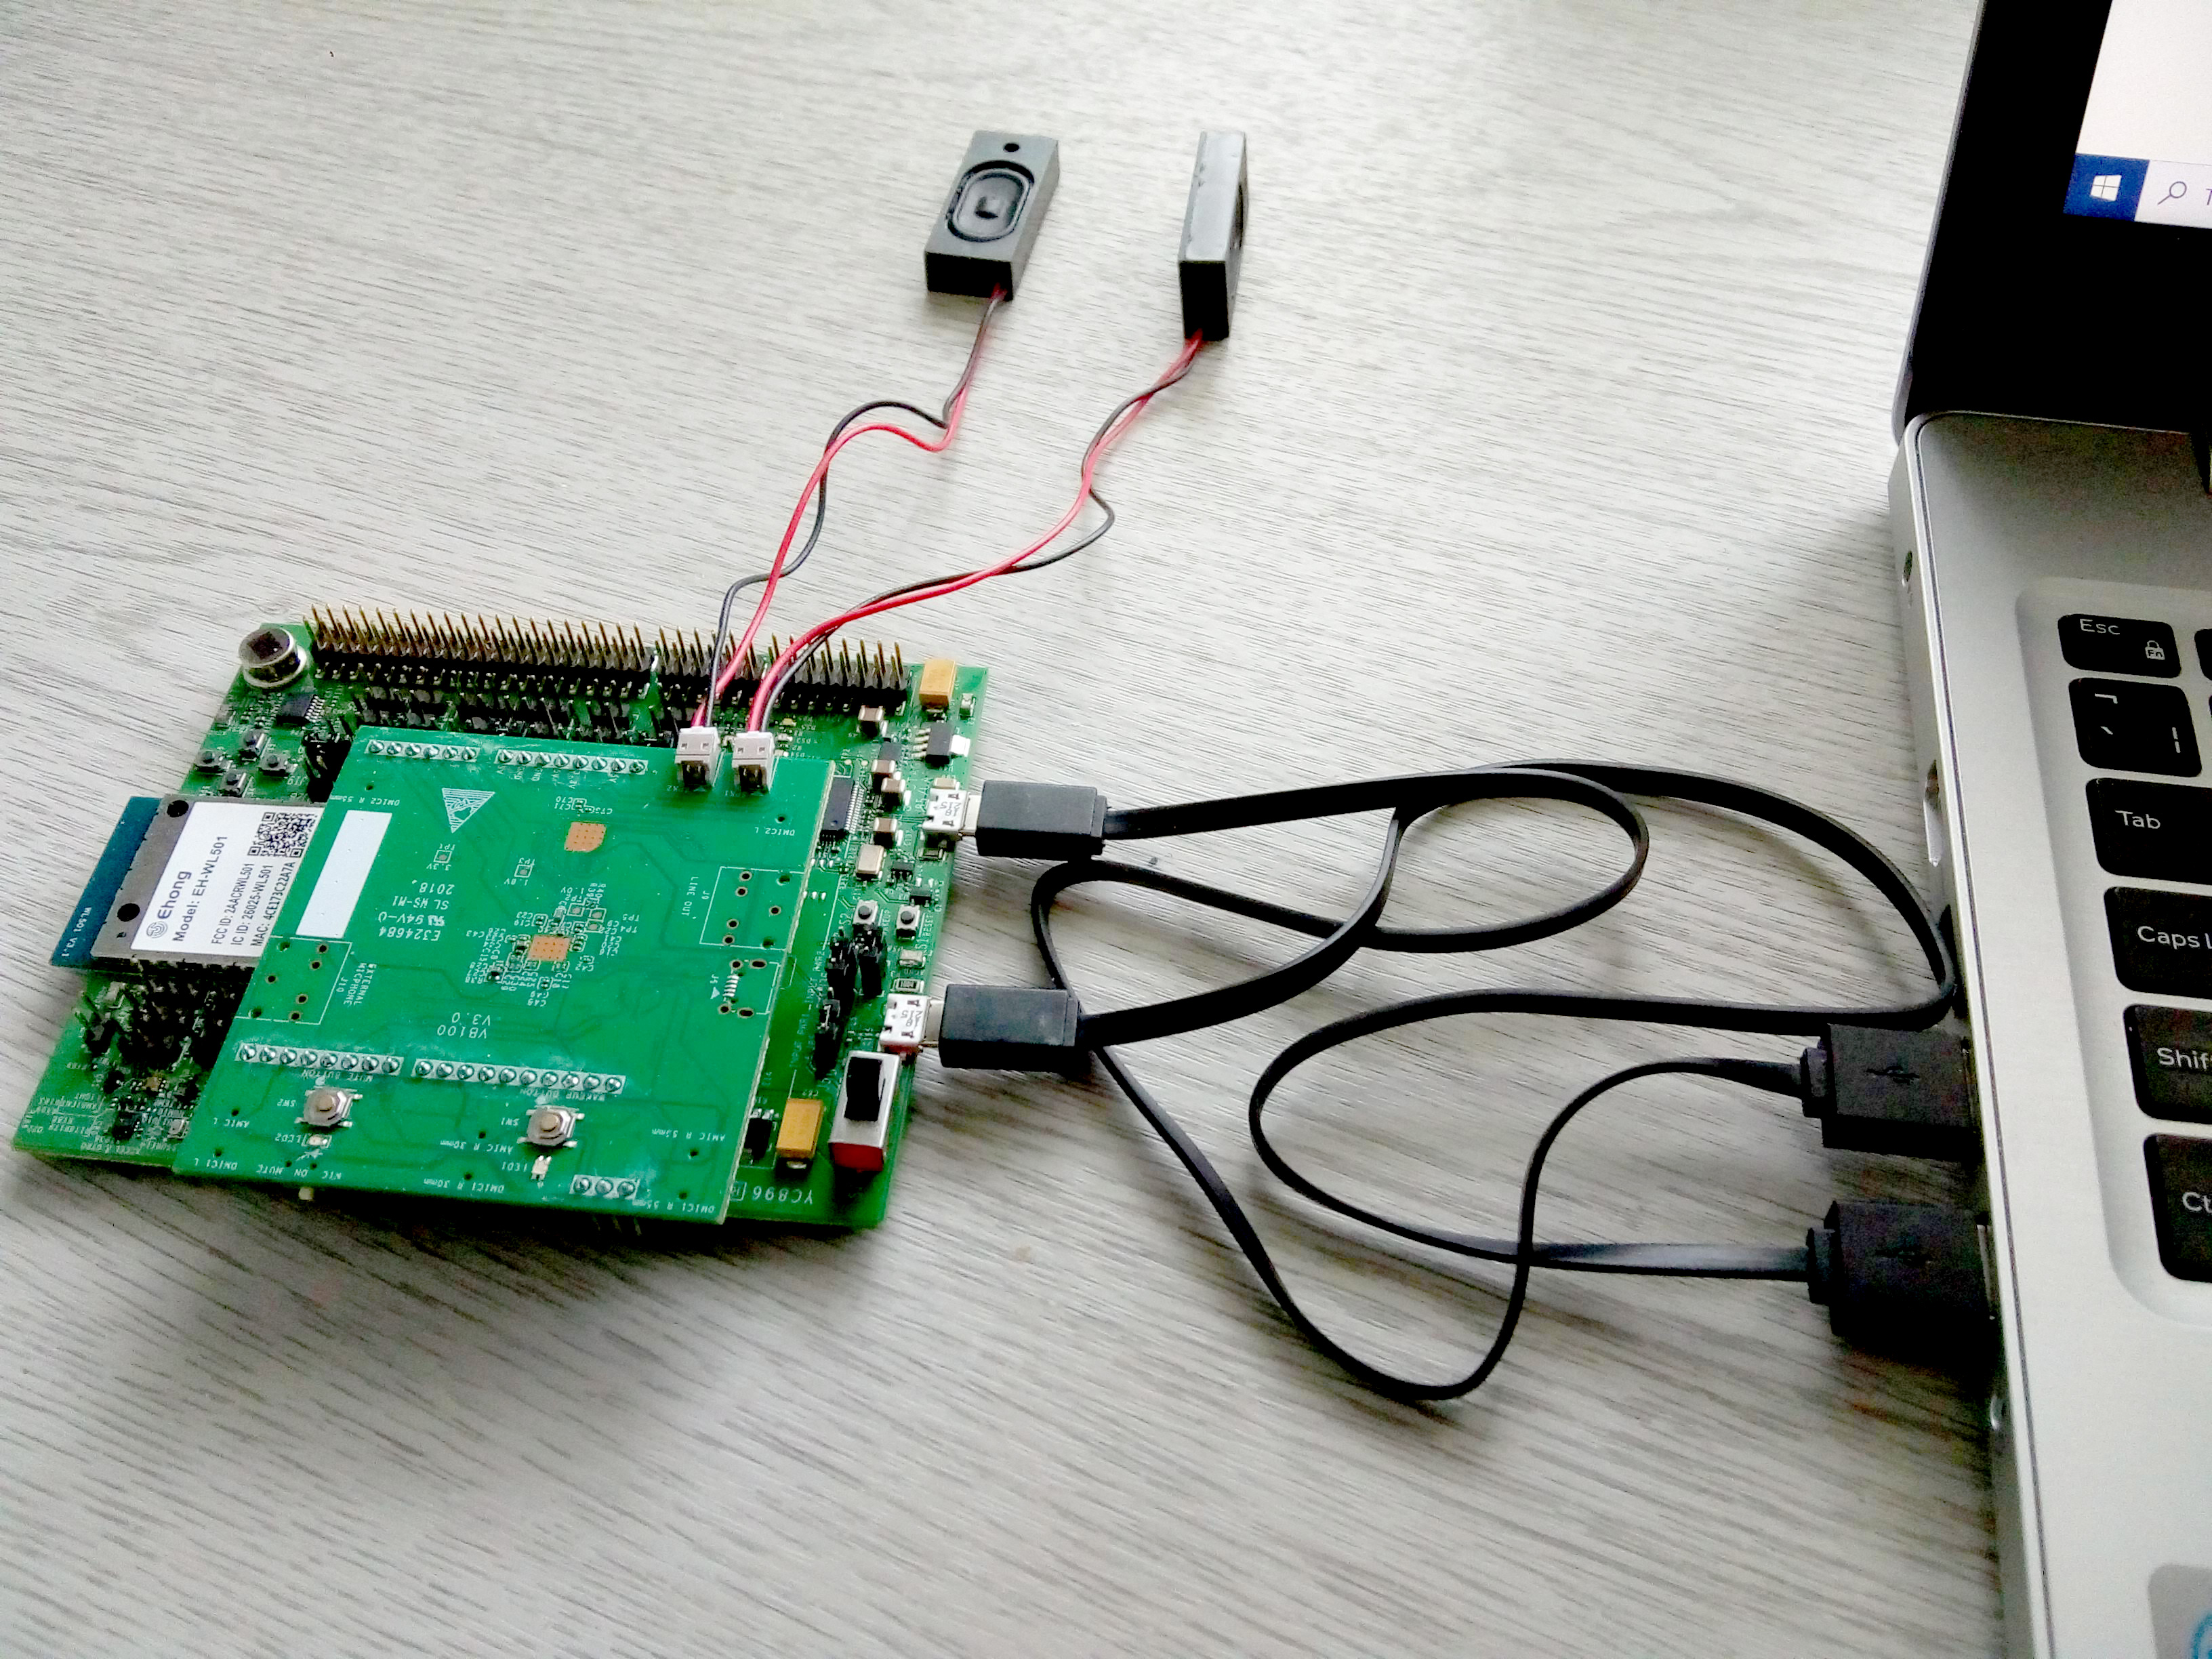
- Plug the two speakers into the Smart Audio Processing Daughter Board.
- Connect J6 to PC with micro-USB port for flashing and RF testing.
- Connect J95 to PC with Micro-USB port for JTAG and firmware logging.
- A USB to serial driver should begin installing and two USB serial ports will be listed in Windows Device Manager
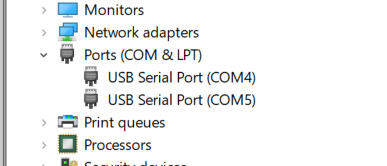
The first time we connected the board, Windows Device Manager indicated issues with the driver. We fixed this by choosing Update Driver, then checked Windows Updates for optional drivers and installed them.
- Open a Serial terminal (we used PuTTY) on one of the ports set to 115200 baud.
- Power the board on using the switch.
- Alexa Voice Demo will start, displaying a menu and prompt.
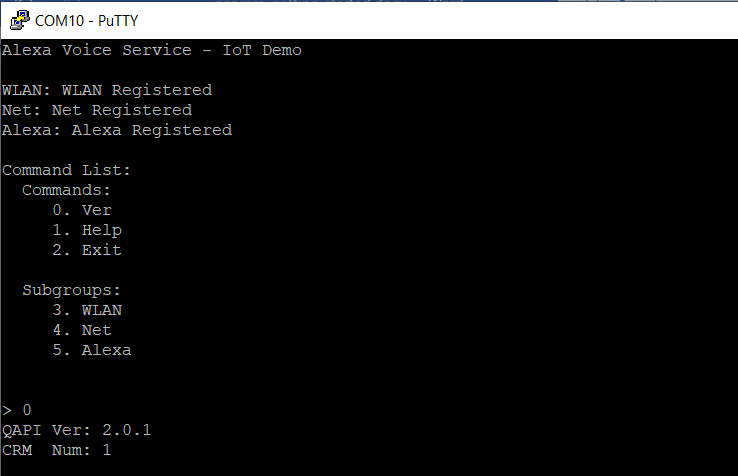
- Enter 0 to show the version
Green LED on main board will be on.
LED1 on Daughter Board will flash blue several times.
LED2 on Daughter Board will be solid red.
If nothing is displayed choose the other COM port. If text is garbled check baud rate is set to 115200
This completes the system test and demonstrates that communication with the device is working.
Amazon Web Service (AWS) Setup
In this step, you’ll register Home Hub with the AWS IoT Core so that it can connect with this service. The process generates security certificates and keys which need to be safely stored for use in step 6 when the device is provisioned.
If you do not already have a AWS account, visit https://developer.amazon.com/ and follow the instructions to create an AWS Developer Account.
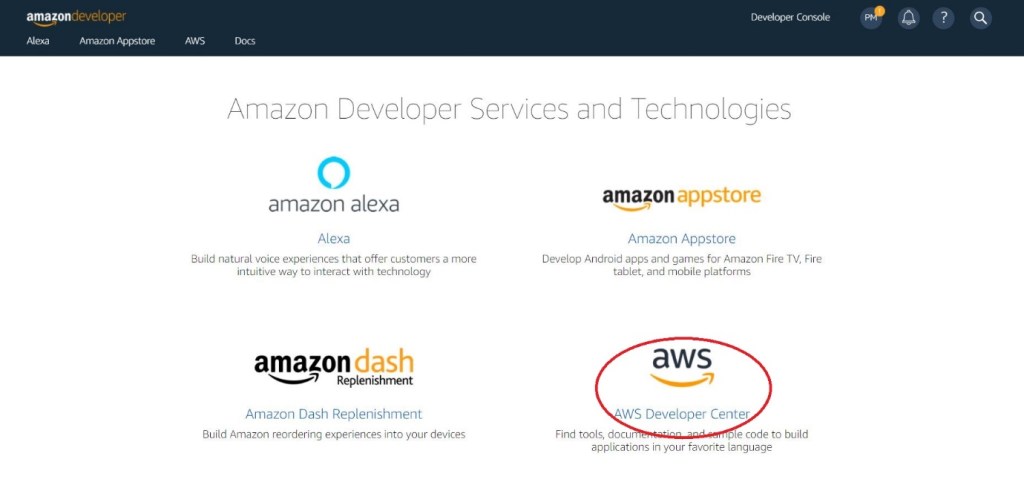
- Visit https://developer.amazon.com/ and sign in.
- Open the AWS Developer Centre https://aws.amazon.com/developer/
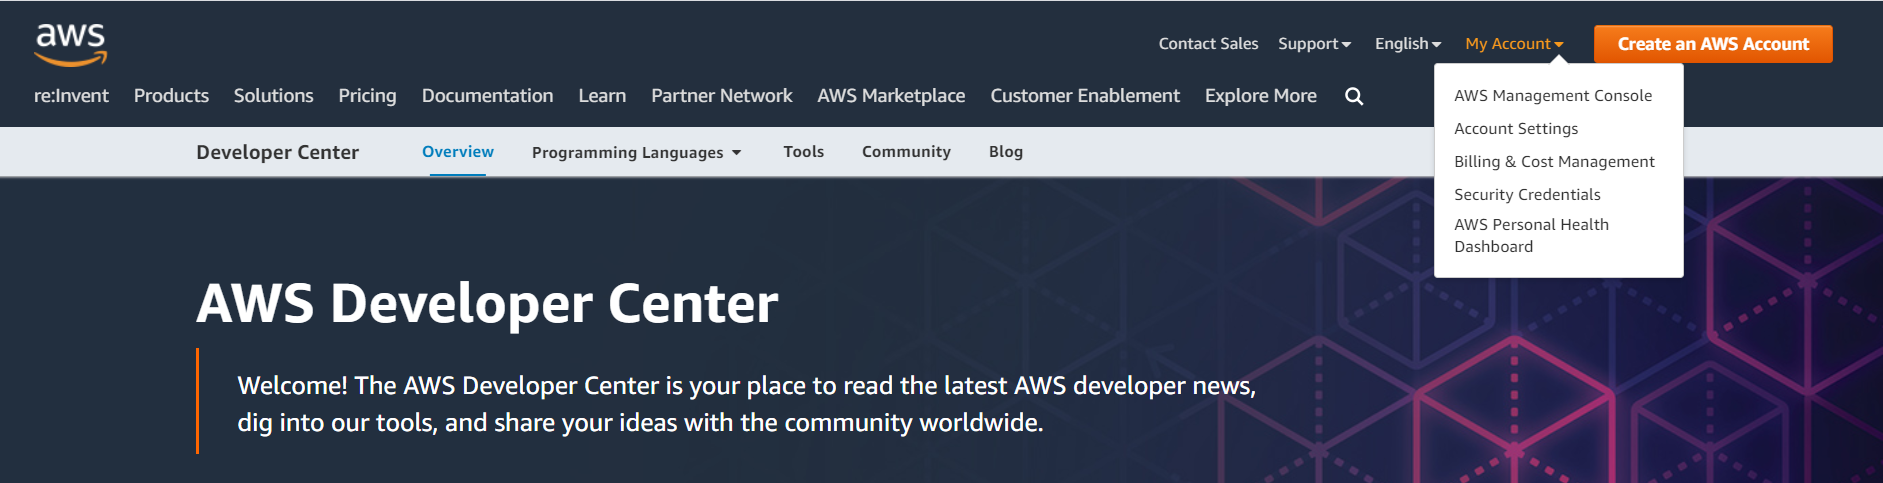
- Open the AWS management console from My Accounts.
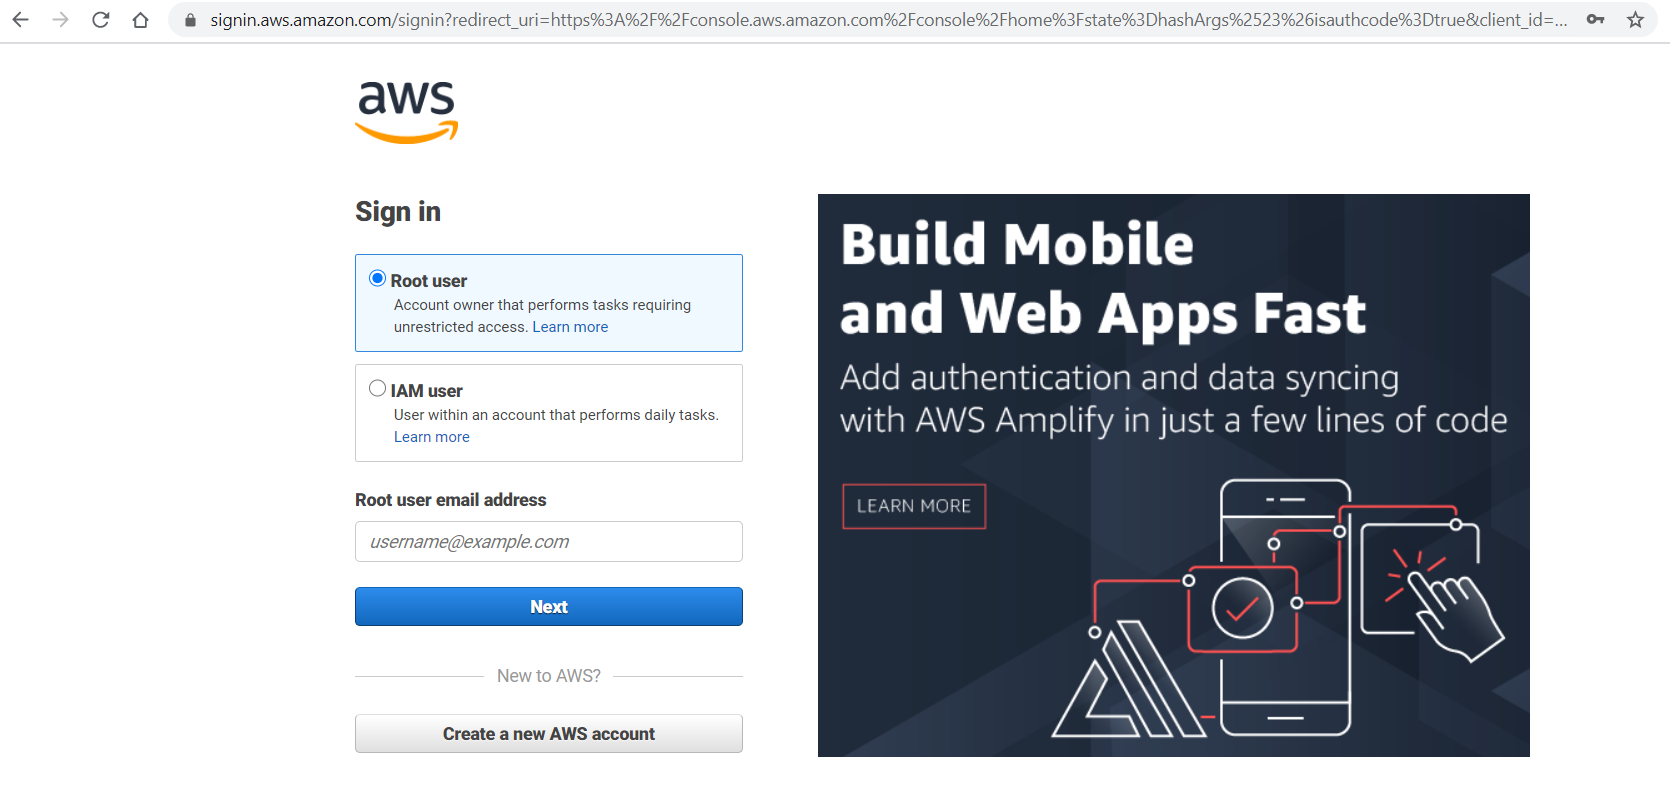
- Sign in as root user.
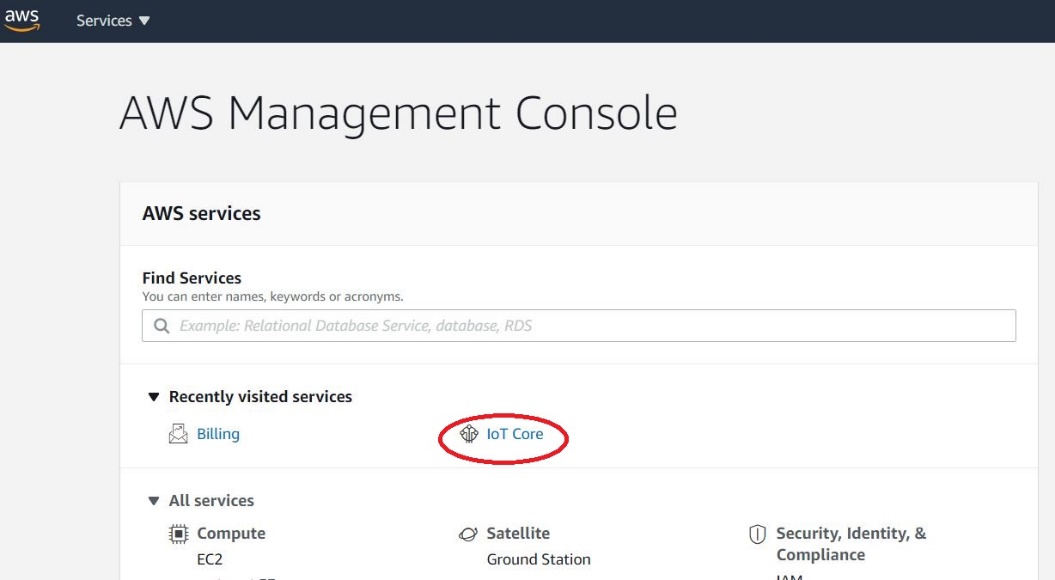
- Open AWS IoT Core from the Internet of Things section.
On the AWS IoT home page:
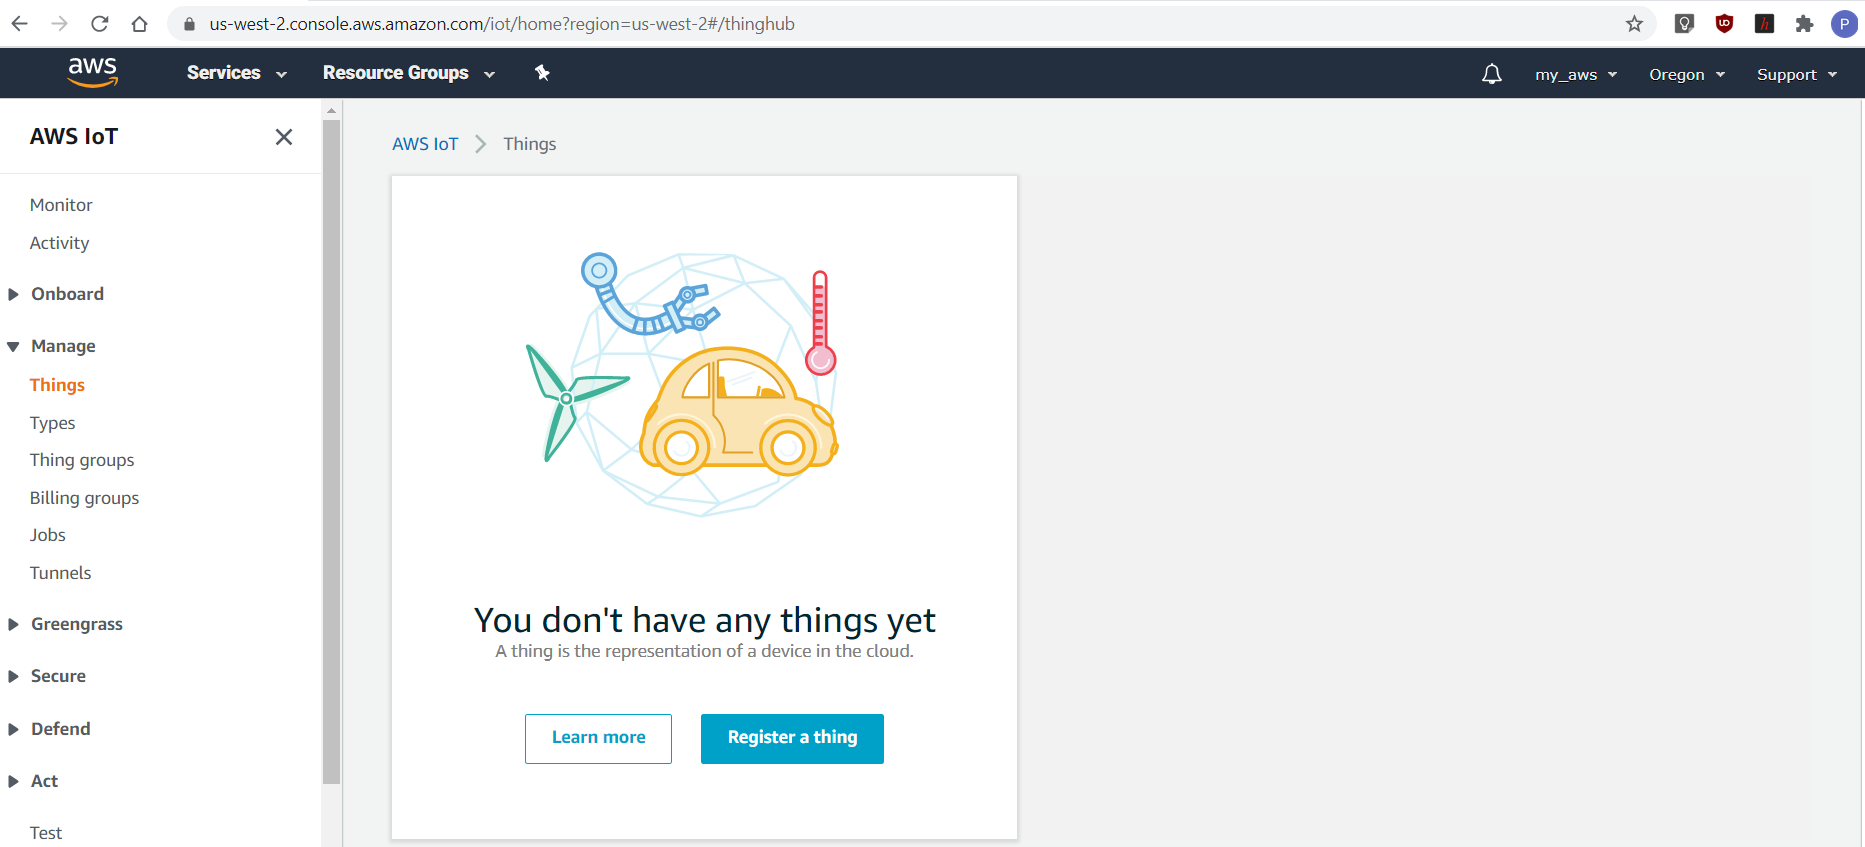
- From the left navigation pane, choose Manage.
- Expand the choices, and select Things.
- Click Register a thing.
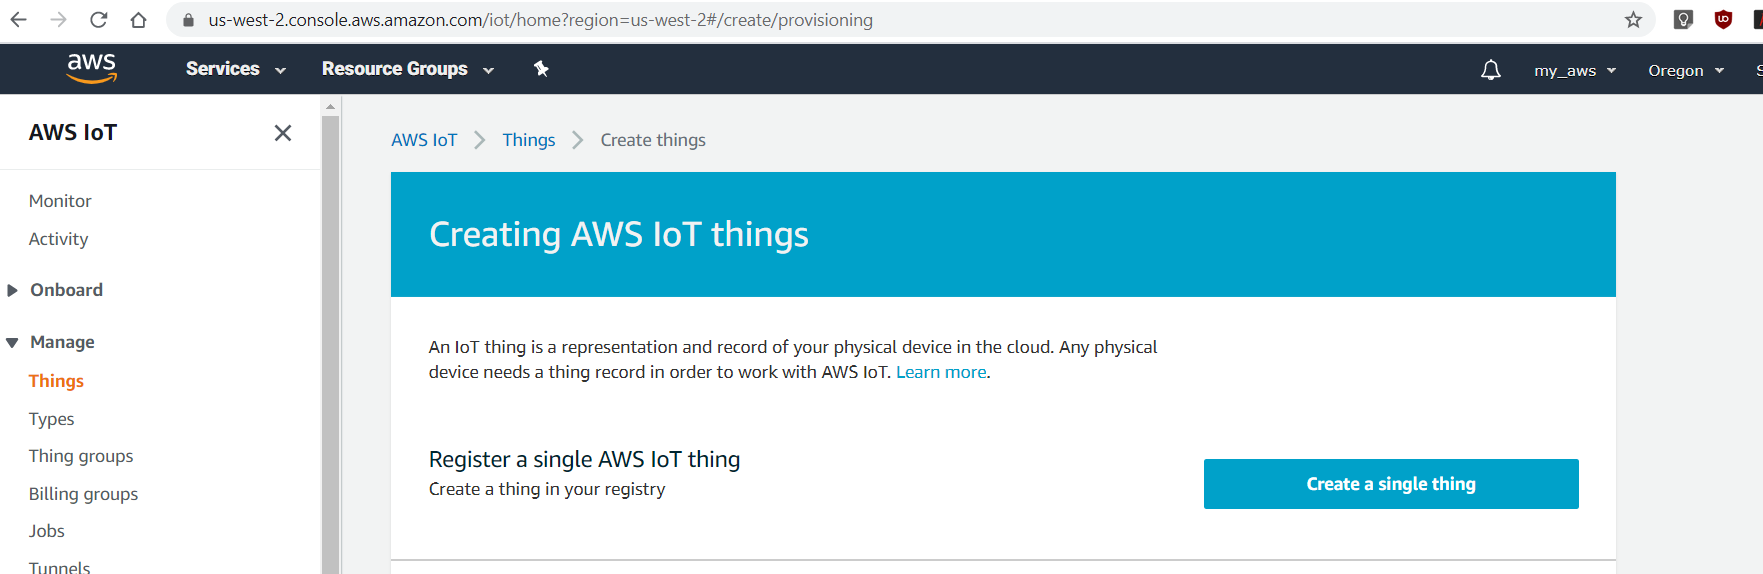
On the Creating AWS IoT Things page:
- Click Create a single thing.
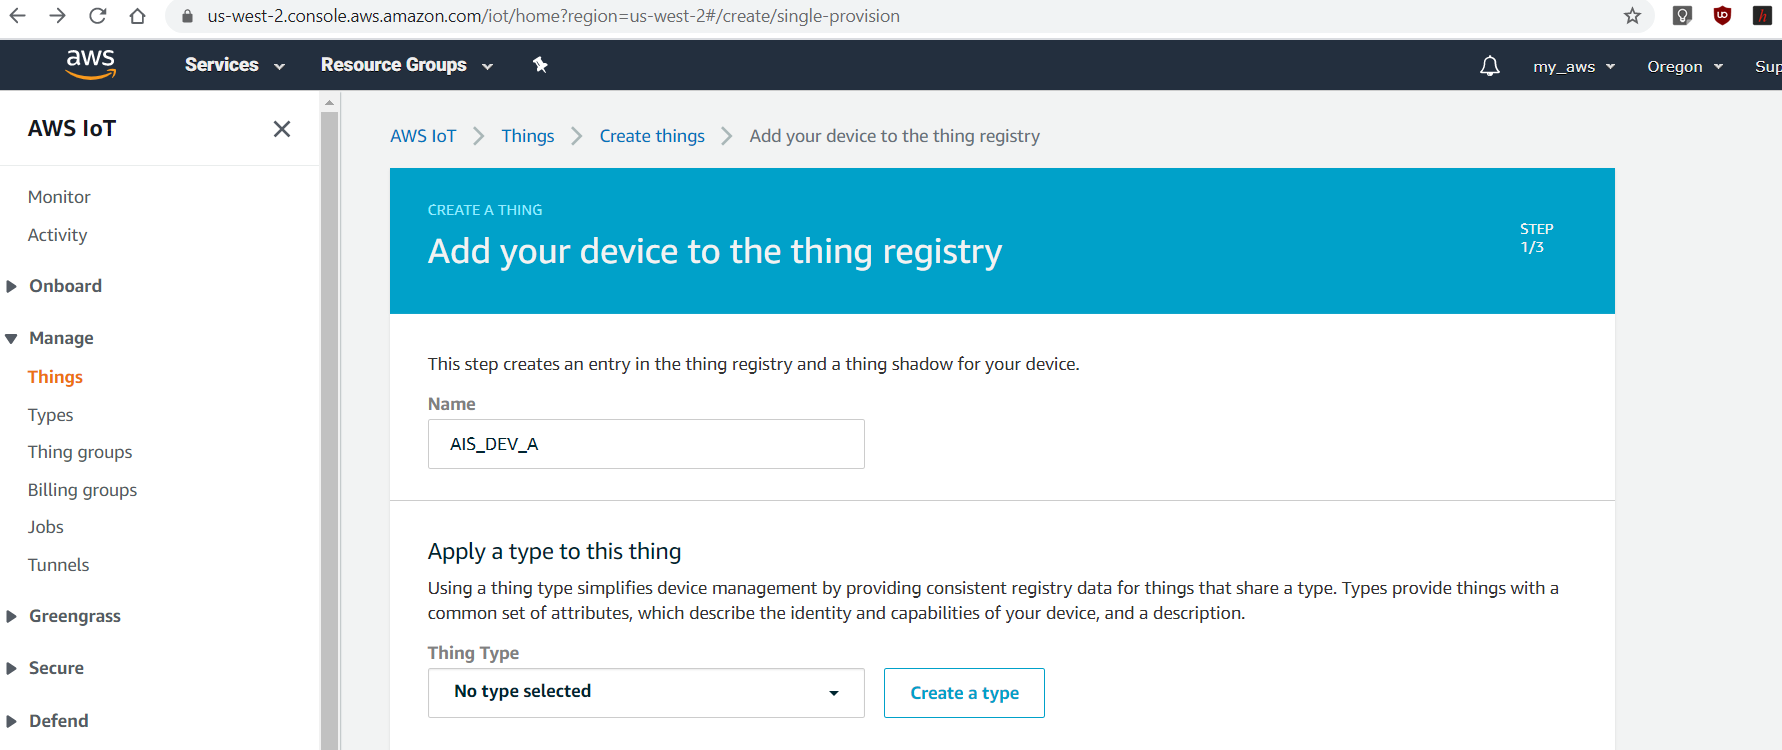
On the Add your device to the thing registry page:
- Give your device a name – we called ours AIS_DEV_A
- No other options are required.
From the Add a certificate for your thing page:
- Use One-click certificate creation and click Create certificate.

Your Thing will be created, and the Certificate generated:
- Create a temporary directory on the PC to hold all the certificates and keys for use later.
- Download the certificate, public & private keys to certificates directory.
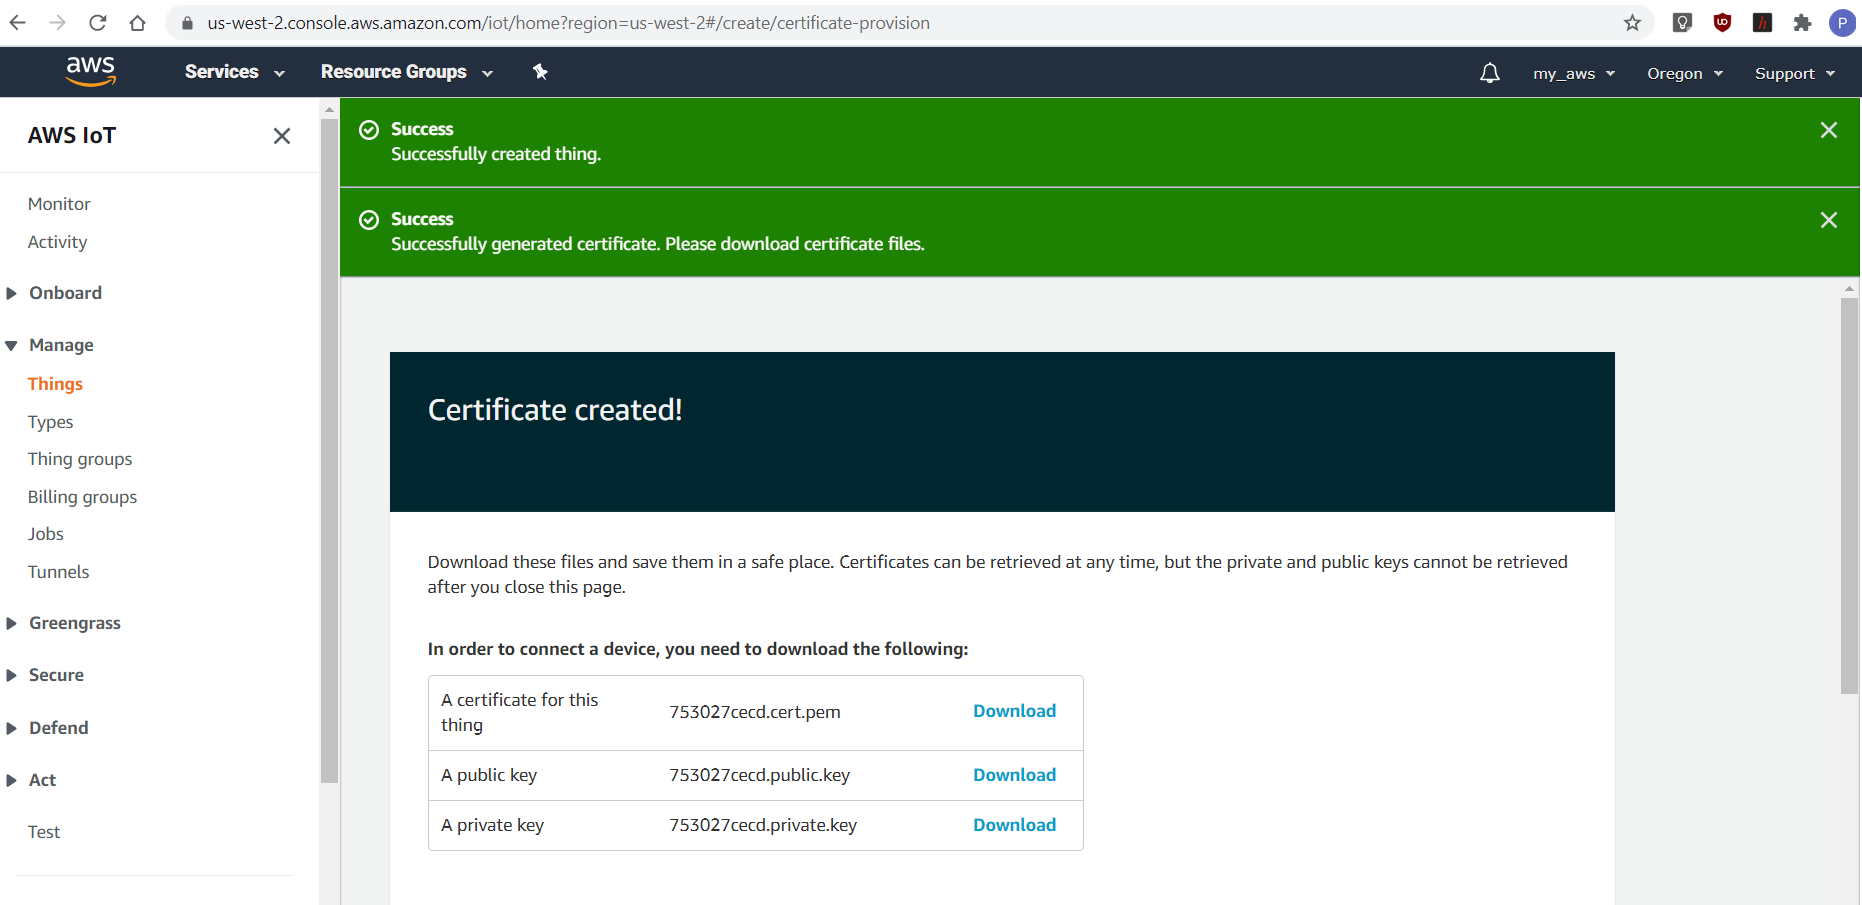
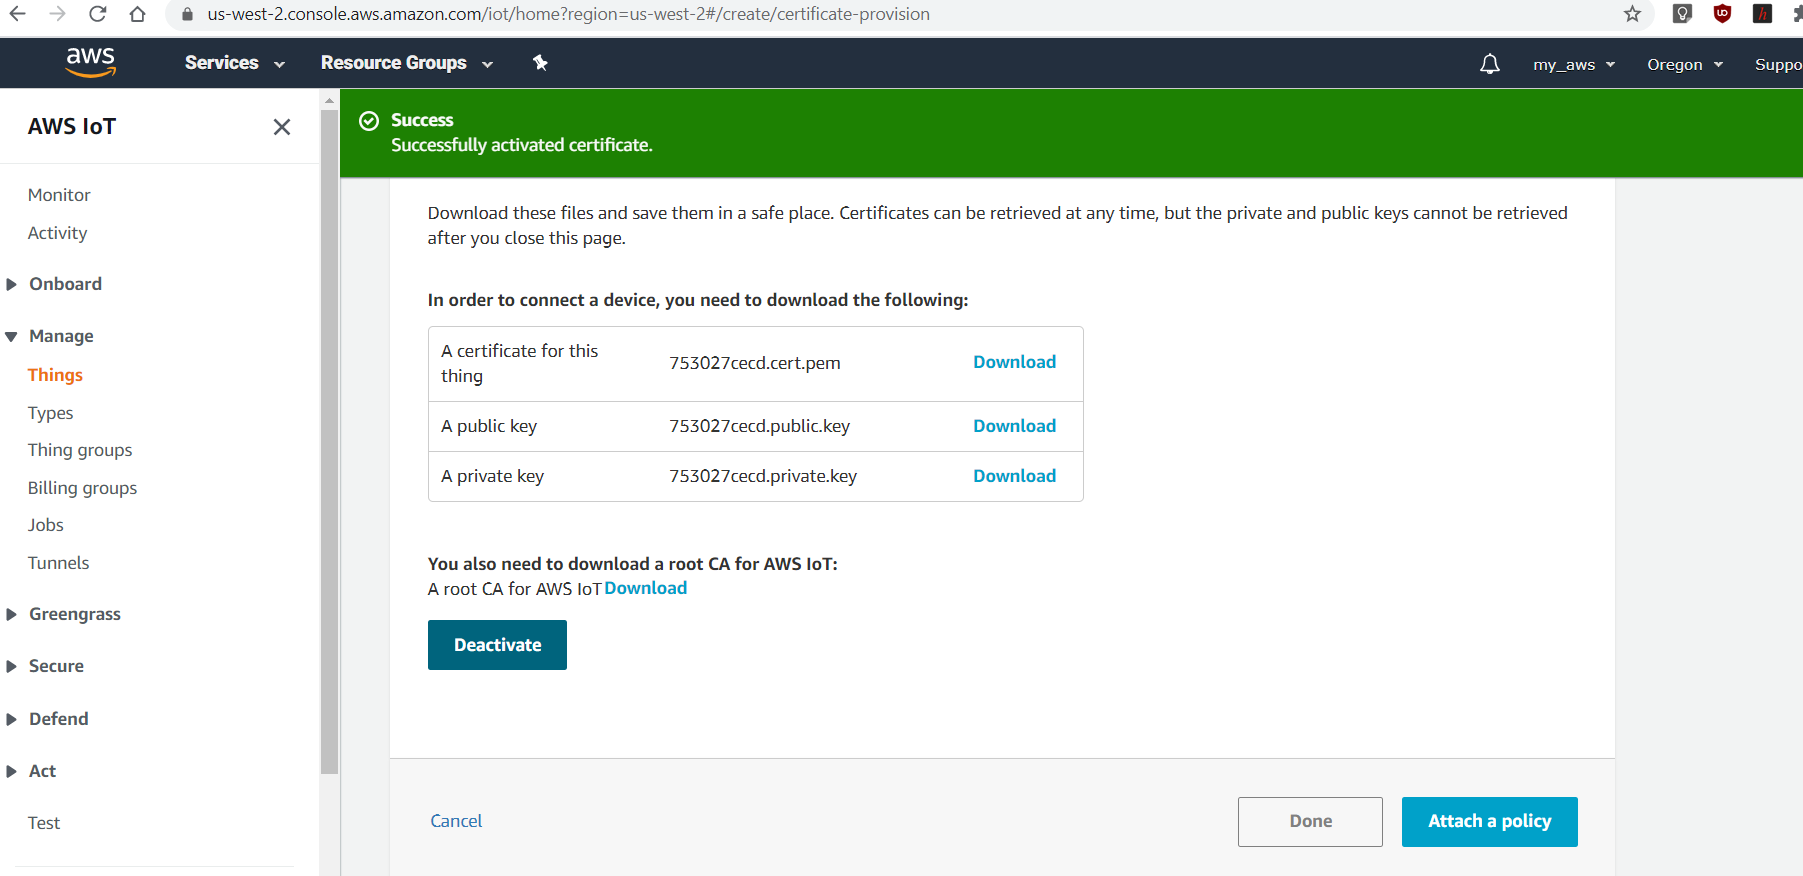
- Activate the certificate.
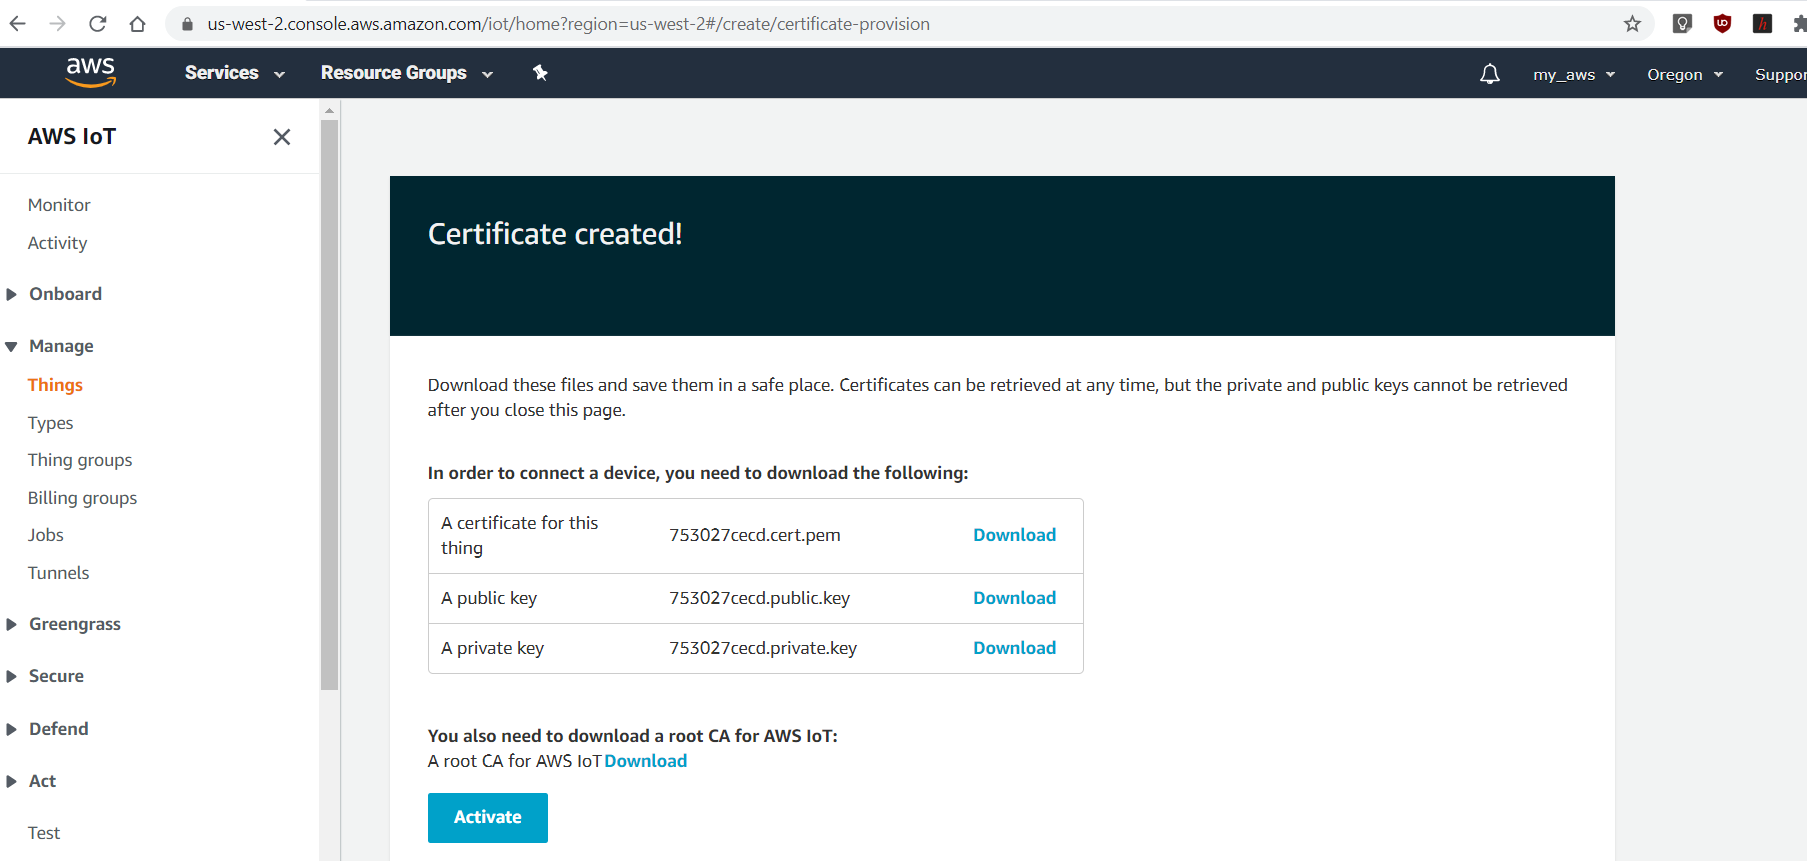
The certificate should be successfully Activated.
- Click on Done.
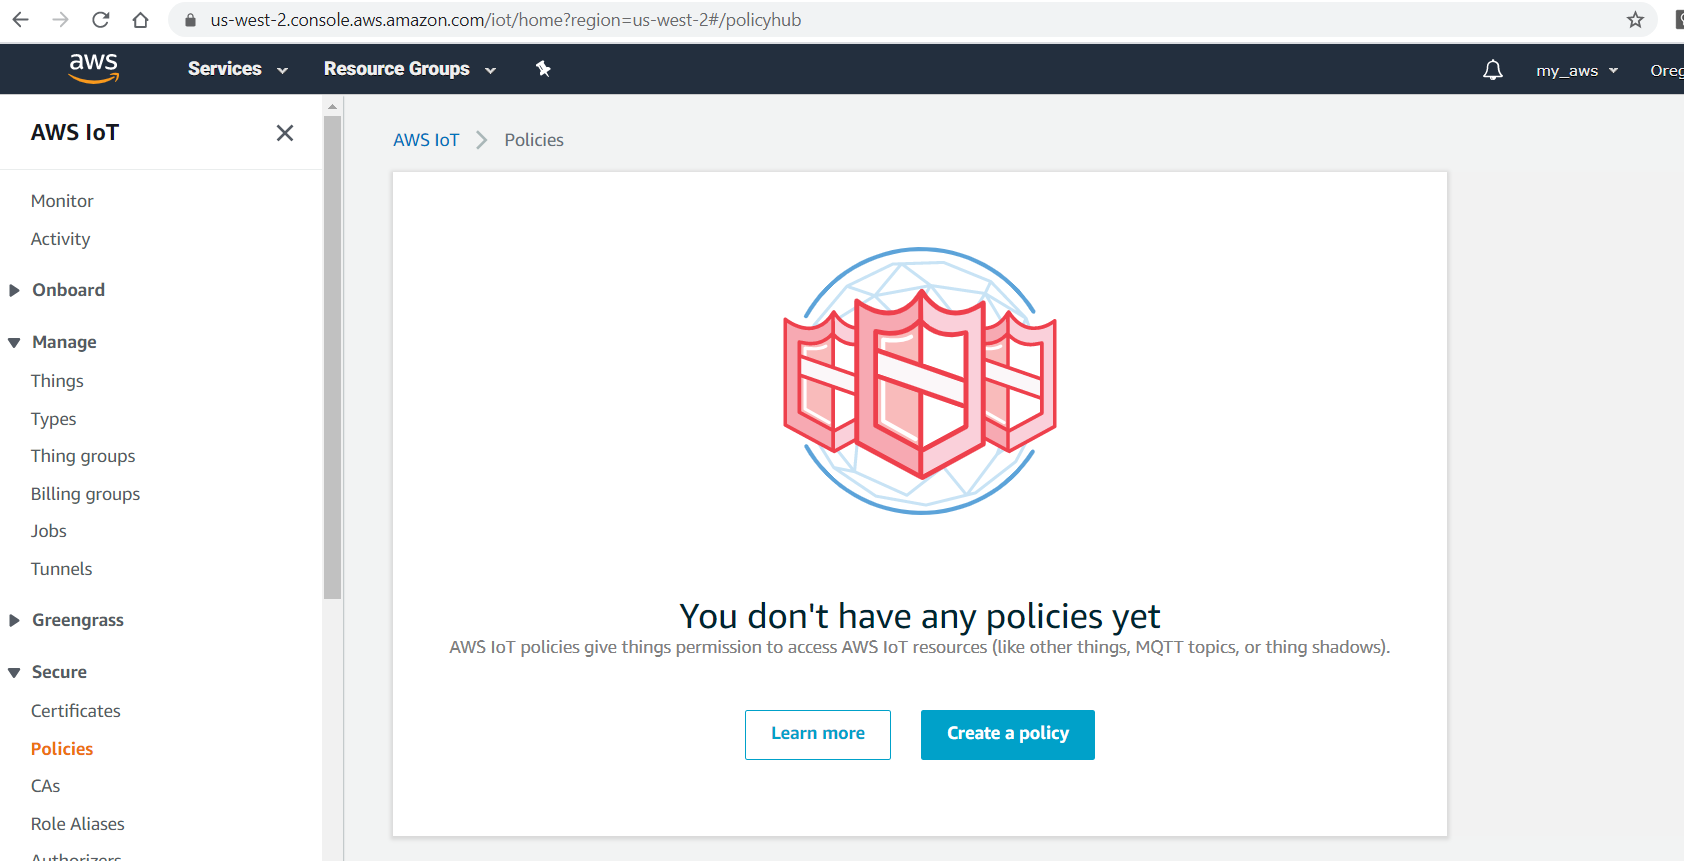
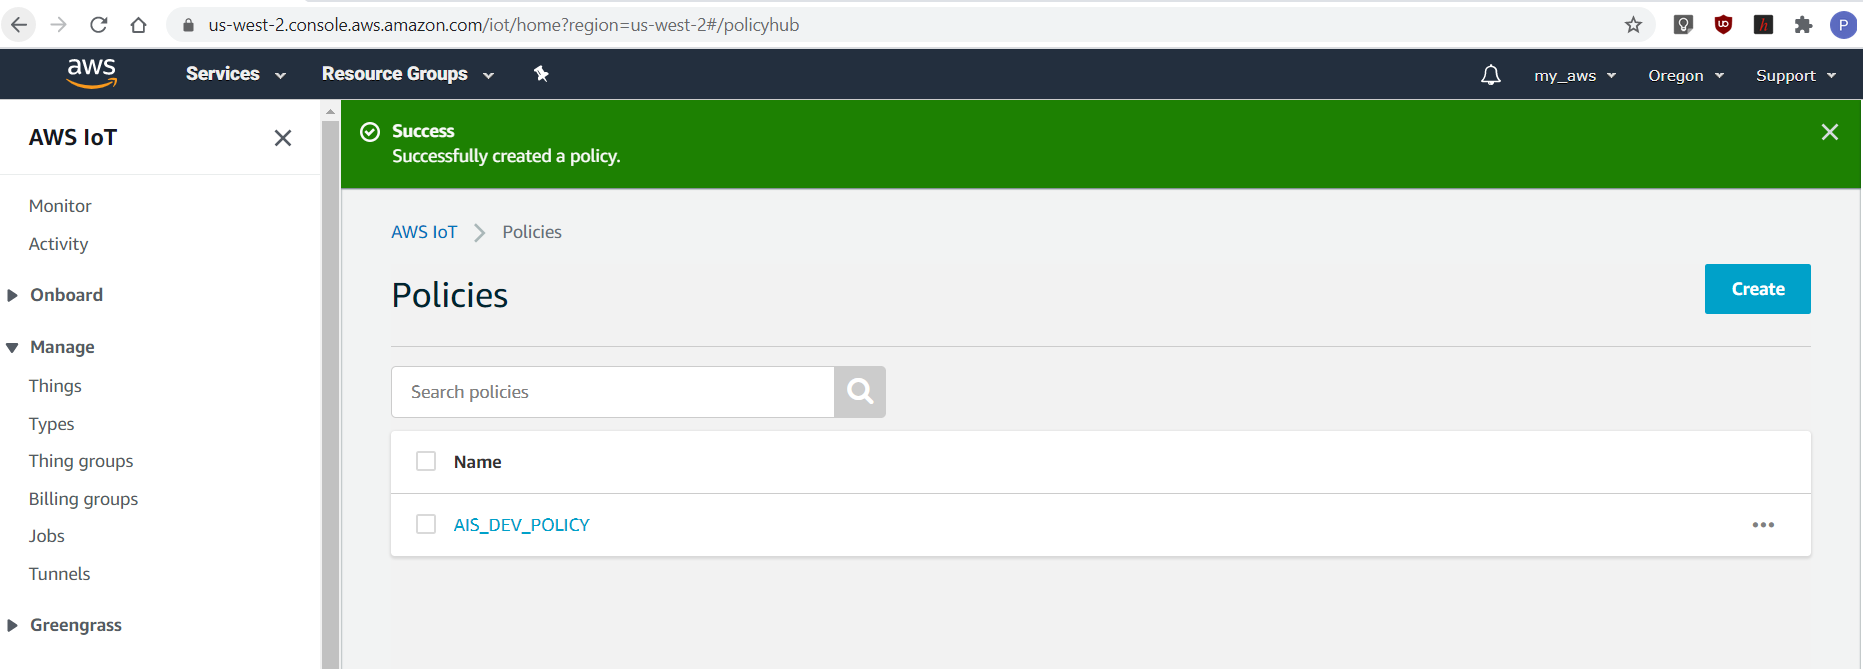
- From the left-hand menu expand the Secure option and select Policies.
- Create a new policy, we called ours AIS_DEV_POLICY.
- Set Action to iot:*
- Set Resource ARN to *
- Set Effect to Allow
- Click Create.
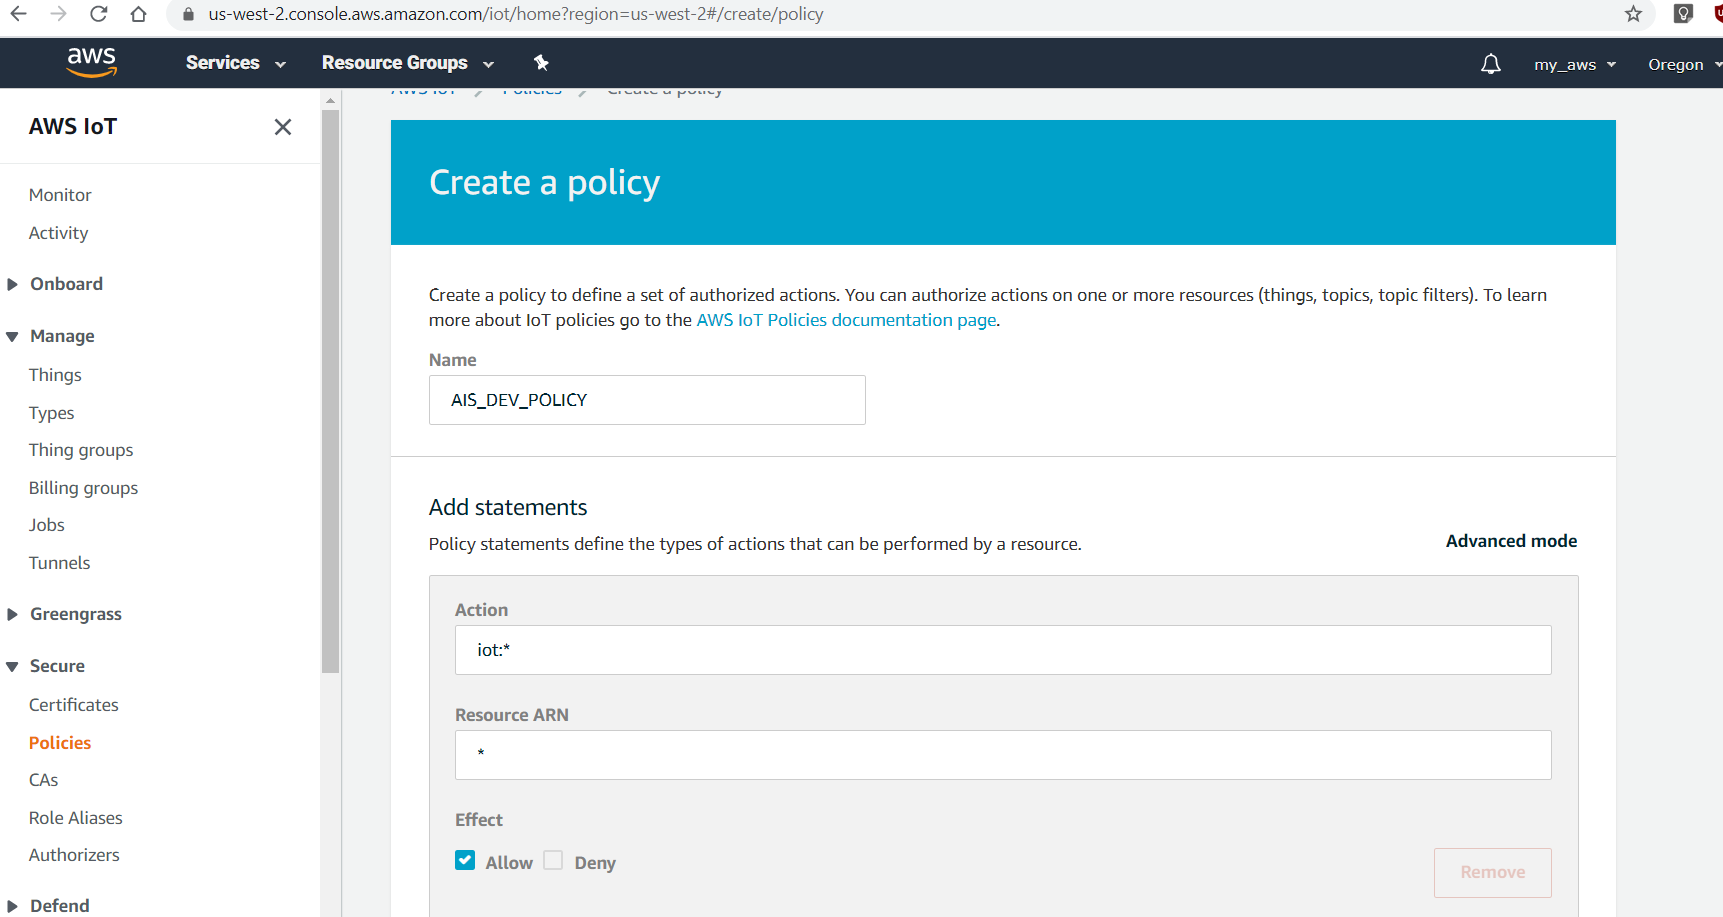
The policy should be created successfully.
- From the left-hand menu select Secure.
- Expand the menu and select Certificates.
- Select the previously created certificate.
- In the actions drop-down select Attach Policy.
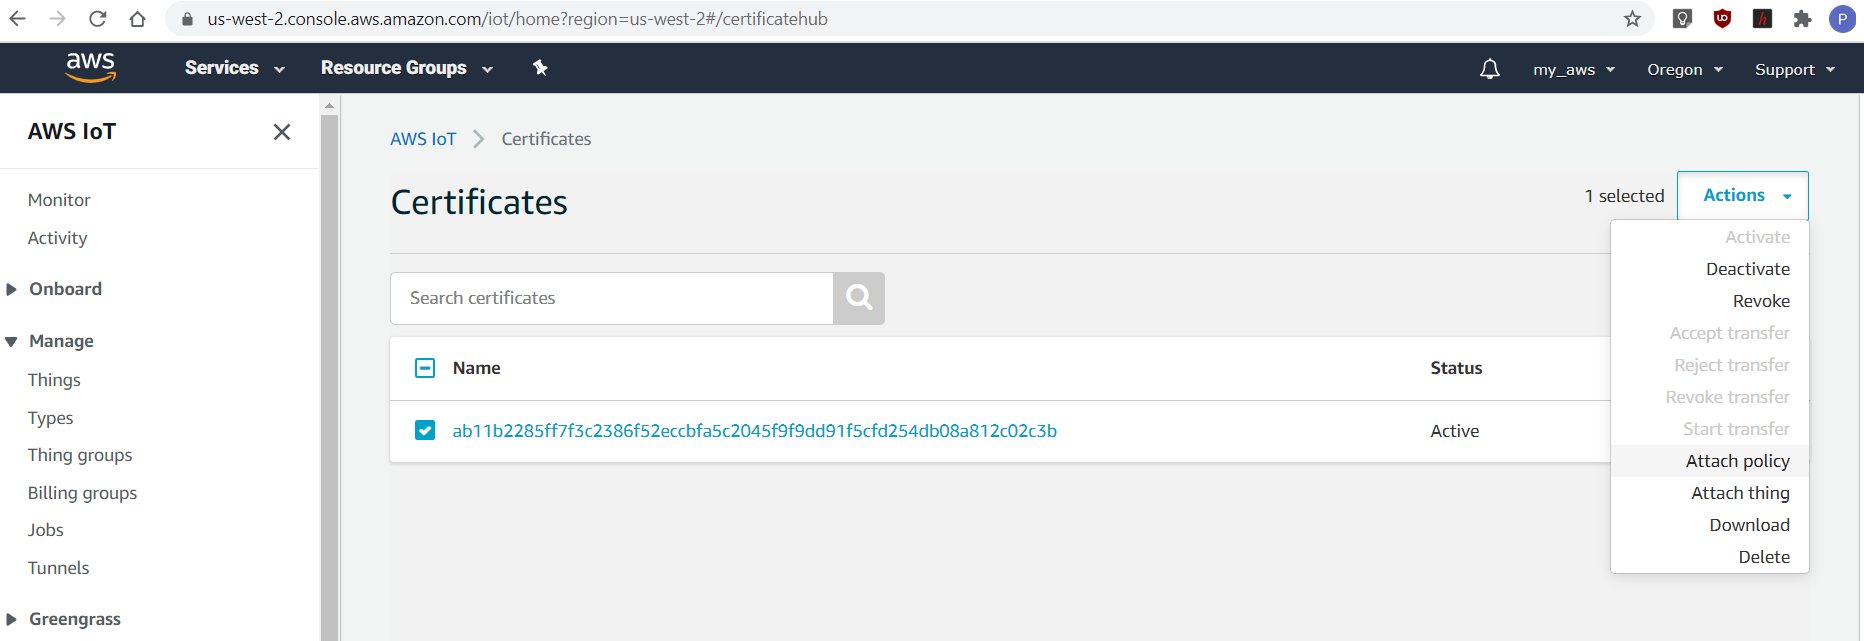
- From the pop-up select the AIS_DEV_POLICY previously created and click Attach.
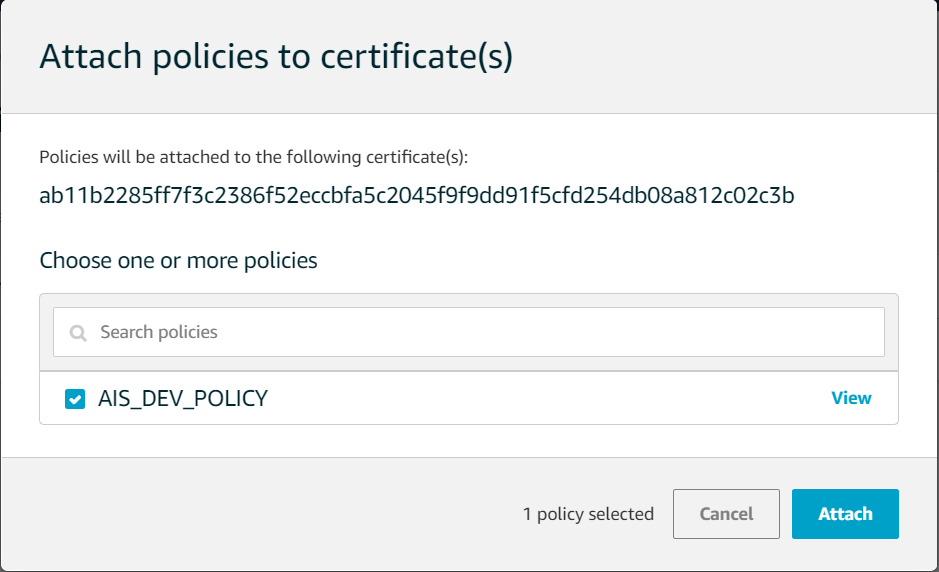
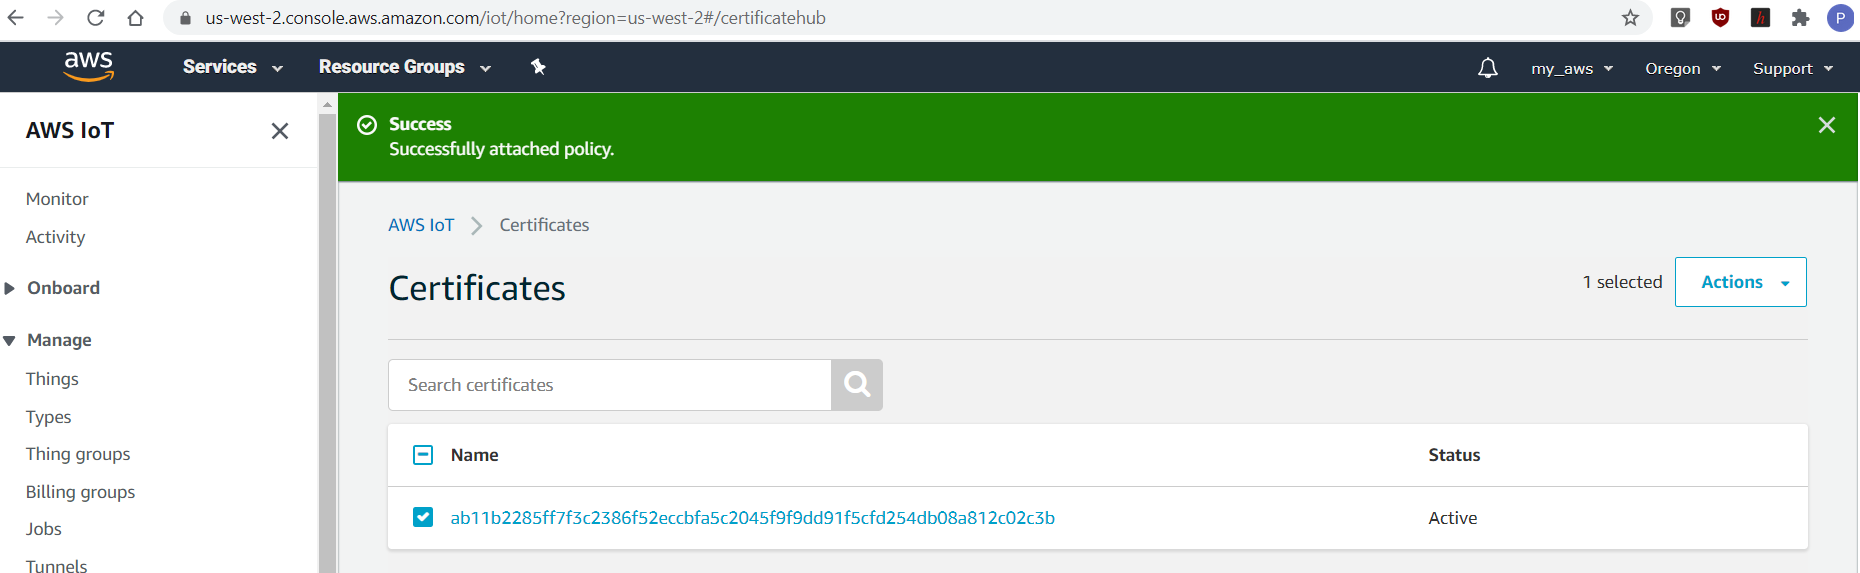
The policy should be successfully attached to the certificate.
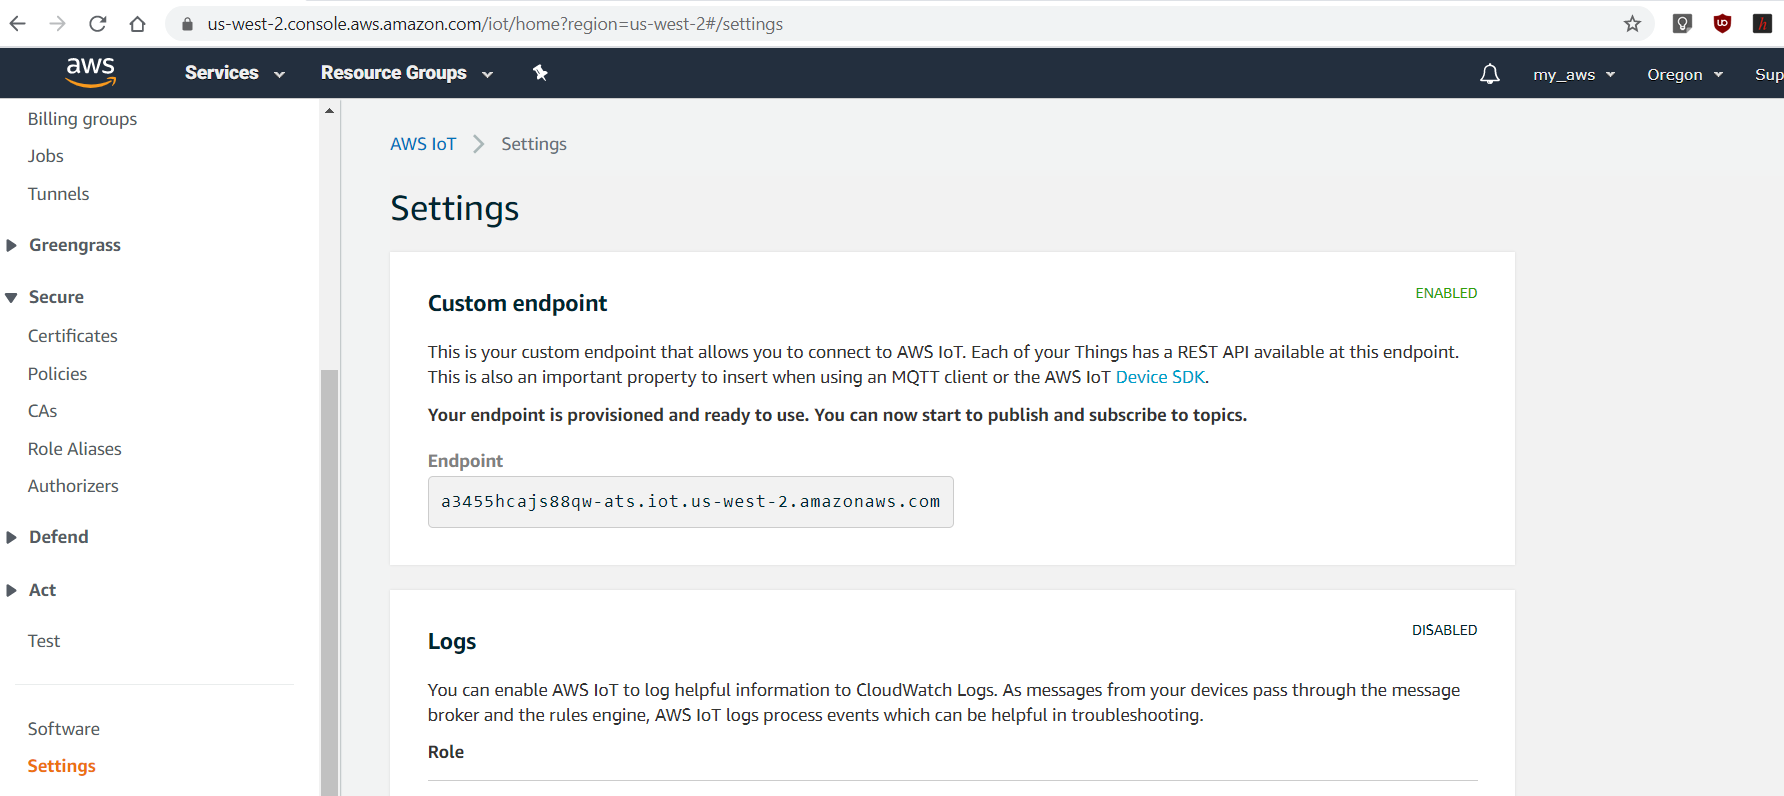
From the Left-Hand menu select Settings
- Make a note of the Endpoint – this will be used to configure the Home Hub in a later step
The endpoint should be marked enabled
- From the top menu bar expand the account drop-down and select My Account.
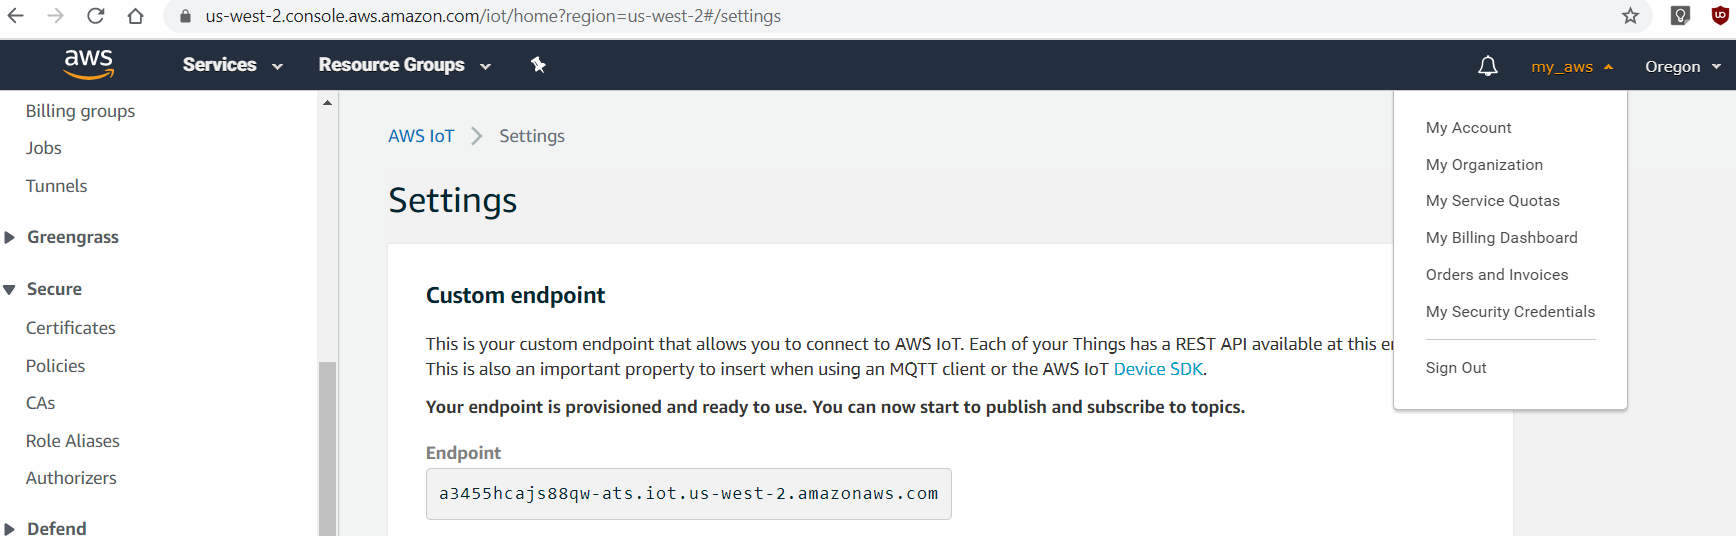
- Make a note of the Account ID as this will also be used in the Home Hub configuration.

AWS Setup Summary
At this point your Home Hub is registered as a Thing in the AWS IoT Core, the Certificate and Keys have been created and a Security Policy registered against them.
You should have a similar set of information and files as in the table below:
| AWS Account Number | XXXXXXXXXX |
| AWS Endpoint | XXXXXXXXXX -ats.iot.us-west-2.amazonaws.co |
| AWS Thing name | AIS_DEV_A |
| Certificate file | XXXXXXXXXX-certificate.pem.crt |
| Private key file | XXXXXXXXXX -private.pem.key |
| Public key file | XXXXXXXXXX f-public.pem.key |
AVS Account Creation
This step creates an Amazon Voice Service (AVS) product which provides the Alexa voice capabilities to the Home Hub. It also associates the AVS product with the AWS IoT Core Thing created in the previous step.
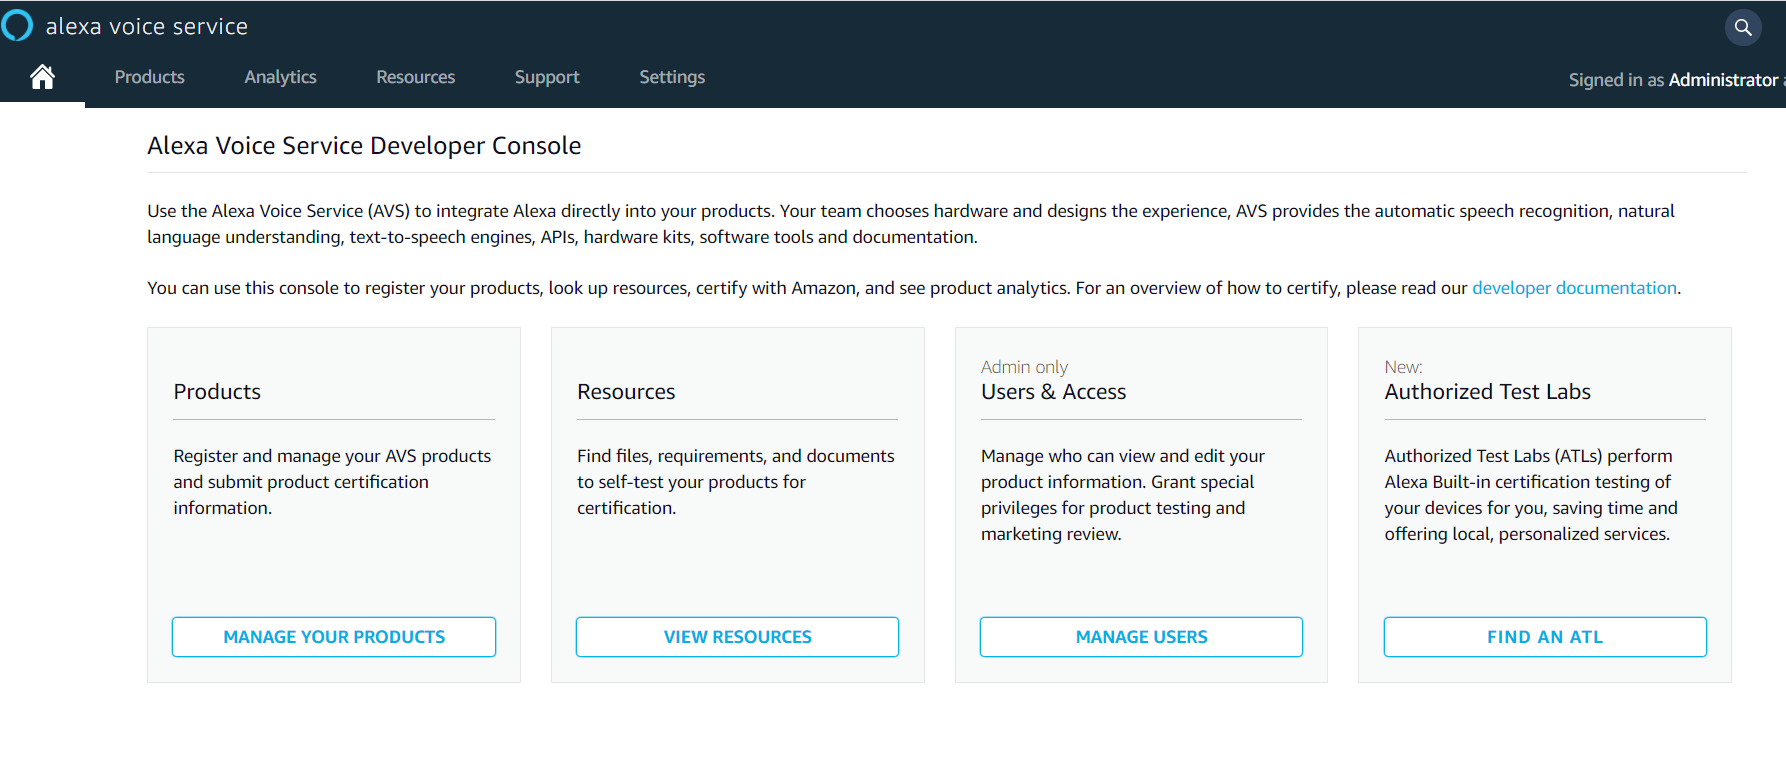
- Visit https://developer.amazon.com/alexa/console/avs/home
- Create an Amazon account if you do not already have one.
- log in to the AVS service.
- From the console select Products to create a new AVS product.
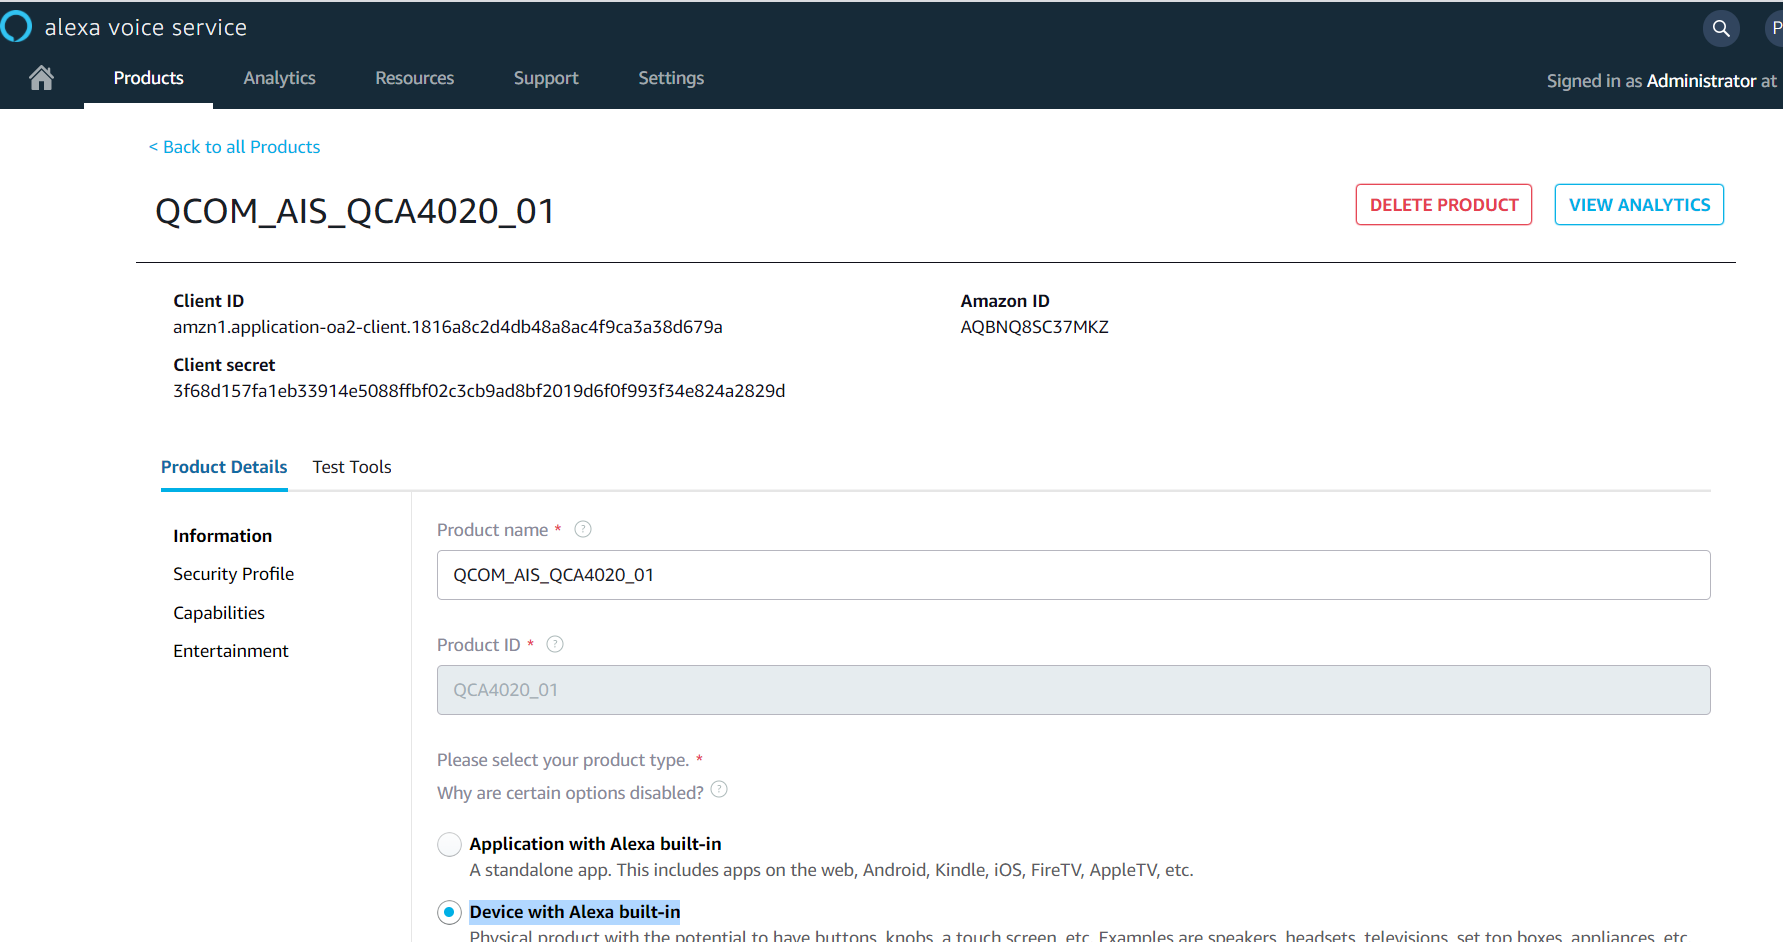
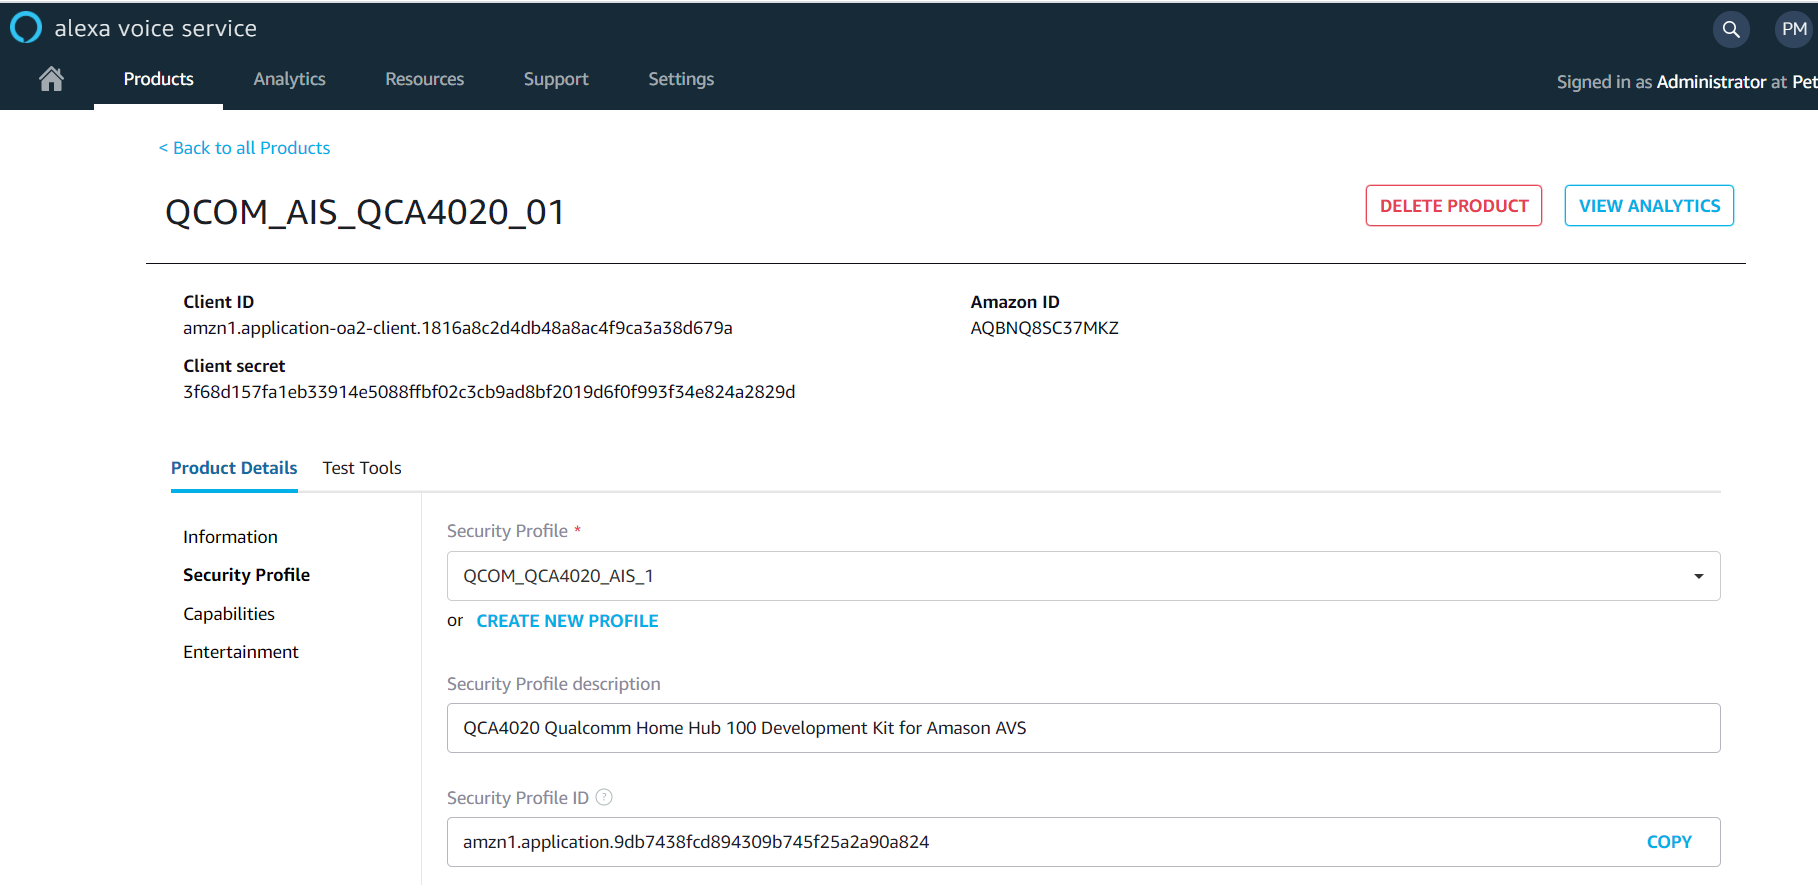
- Enter the Product Name as QCOM_AIS_QCA4020_01
- Product ID as QCA4020_01
- Select Device with Alexa built-in.
Further down on the same page:
- Set Will your device use a companion app to Yes.
- Set Product Category to Other and enter: Development Kit.
- Check the Far-Field check box.
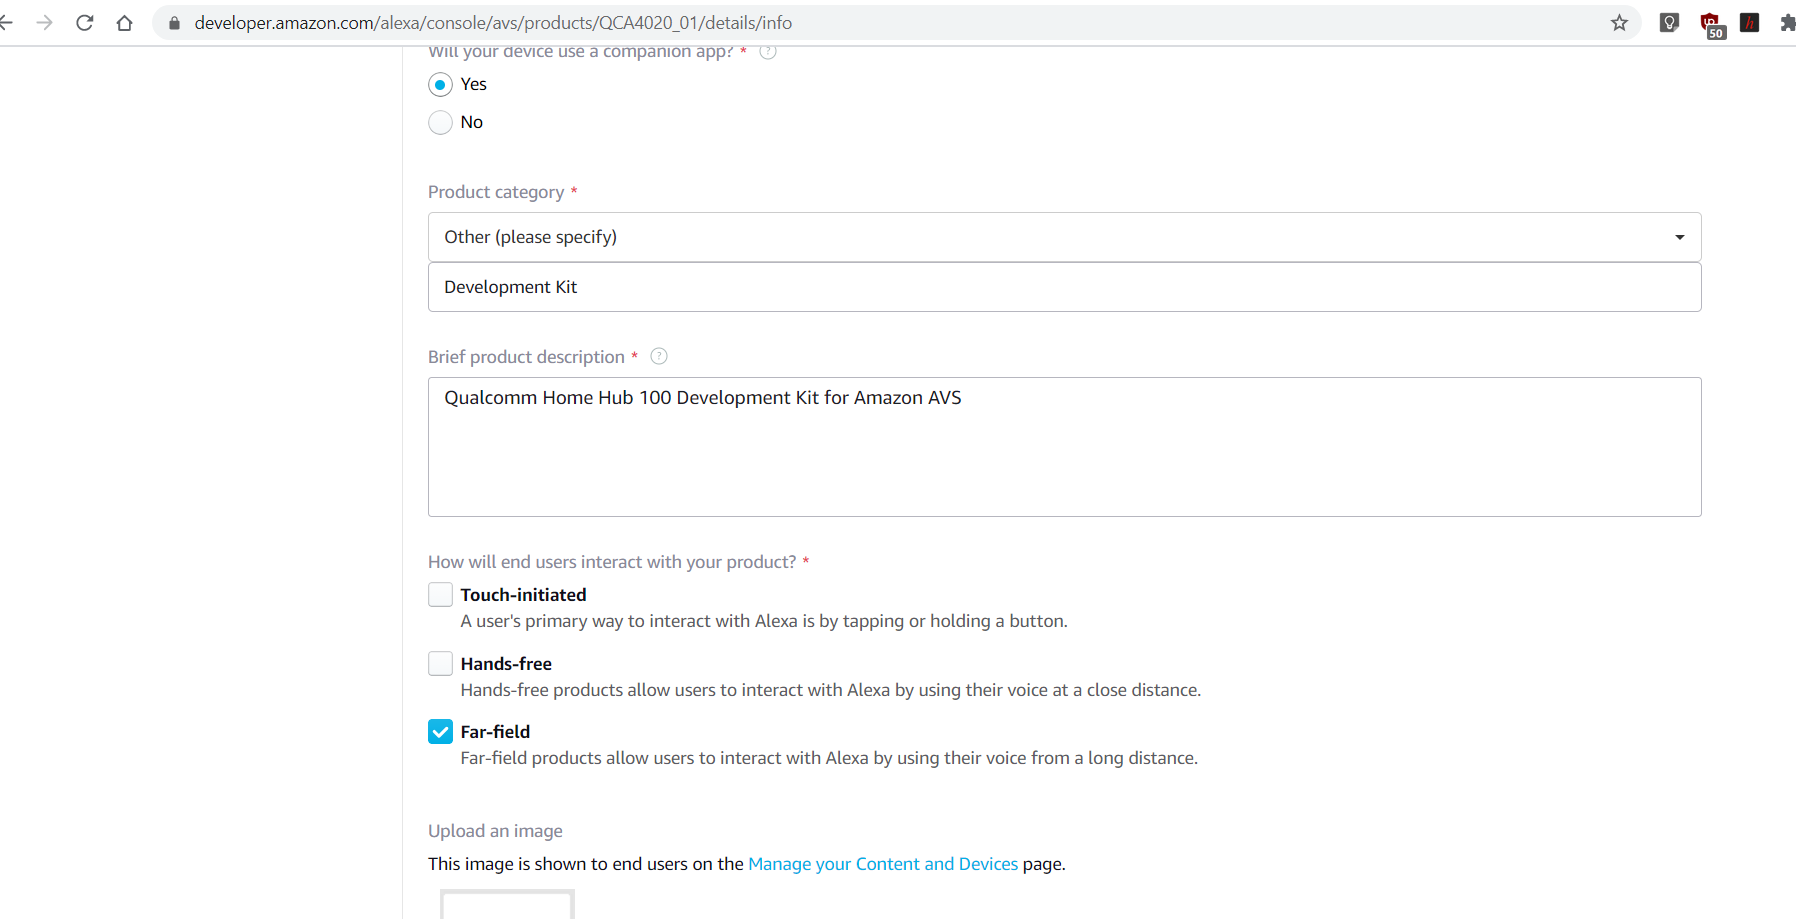
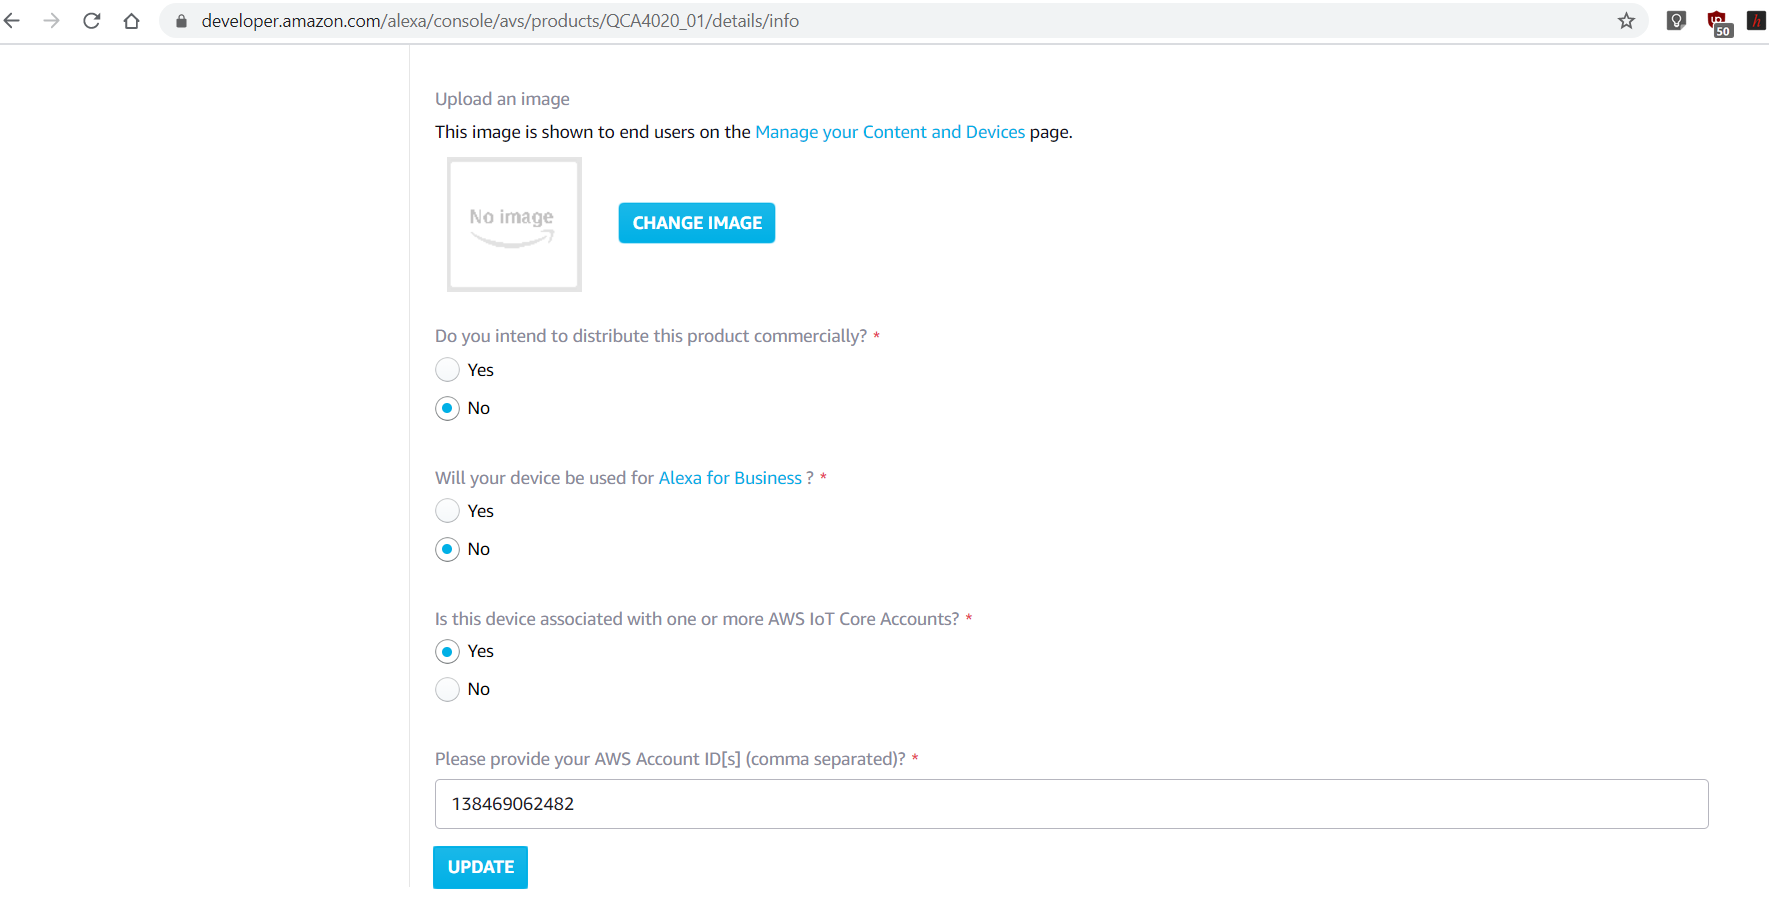
- Set Commercial distribution to No.
- Set Alexa for Business to No.
- Set Associated with AWS account to Yes.
- Enter your AWS Developer Account number from step 2.
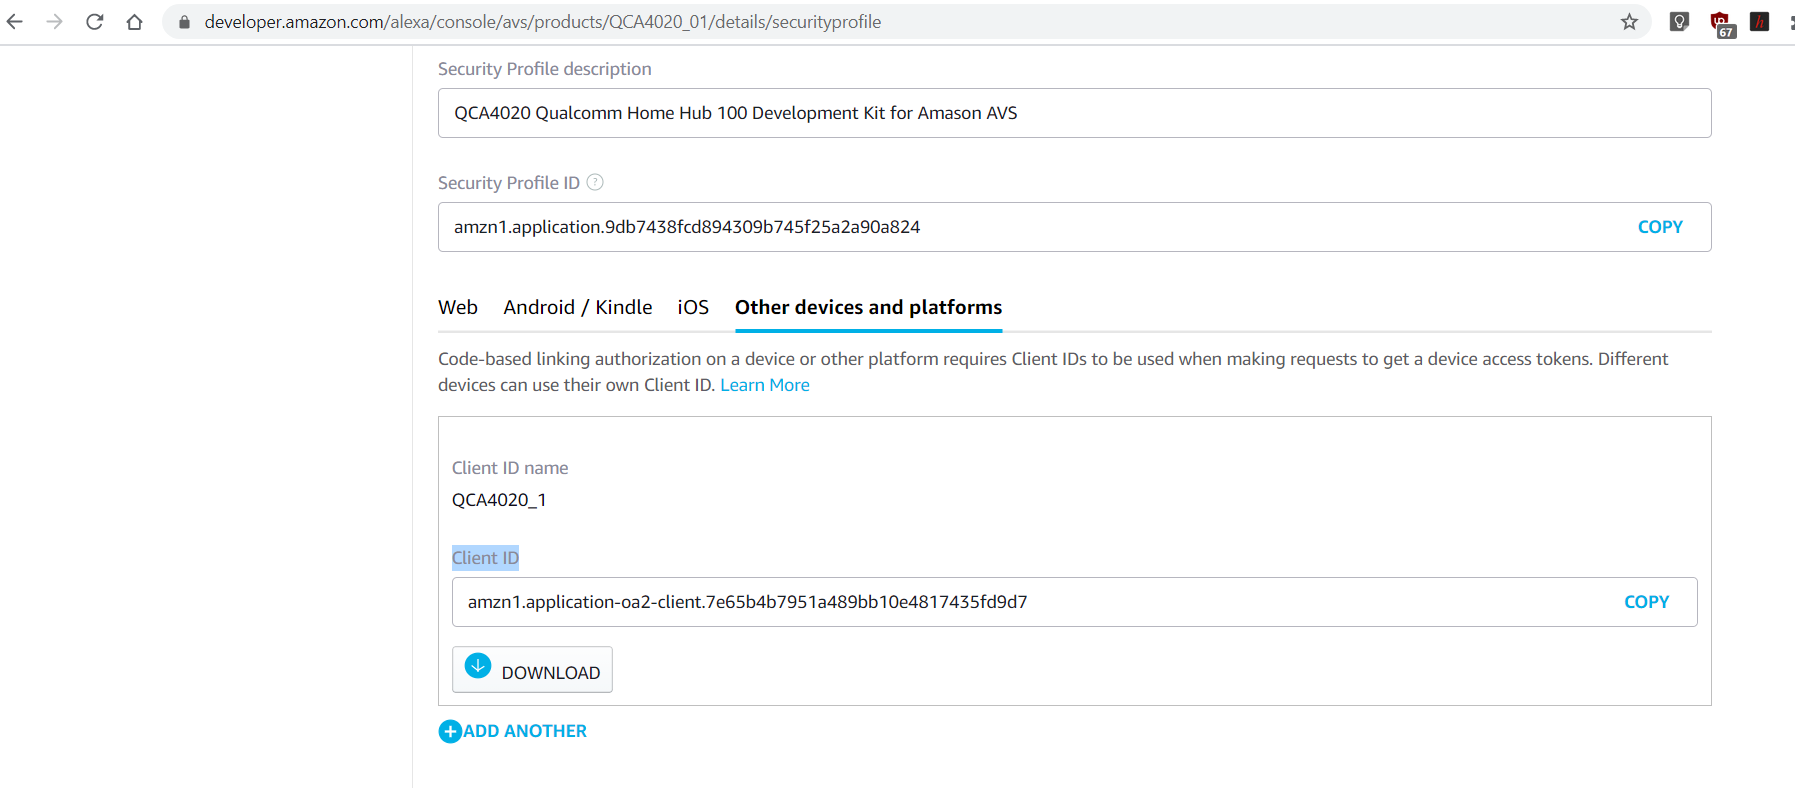
- Select Security Profile from the menu.
- Enter the Security Profile name as QCOM_QCA4020_AIS_1
- Enter Description as QCA4020 Qualcomm Home Hub Development Kit for Amazon AVS
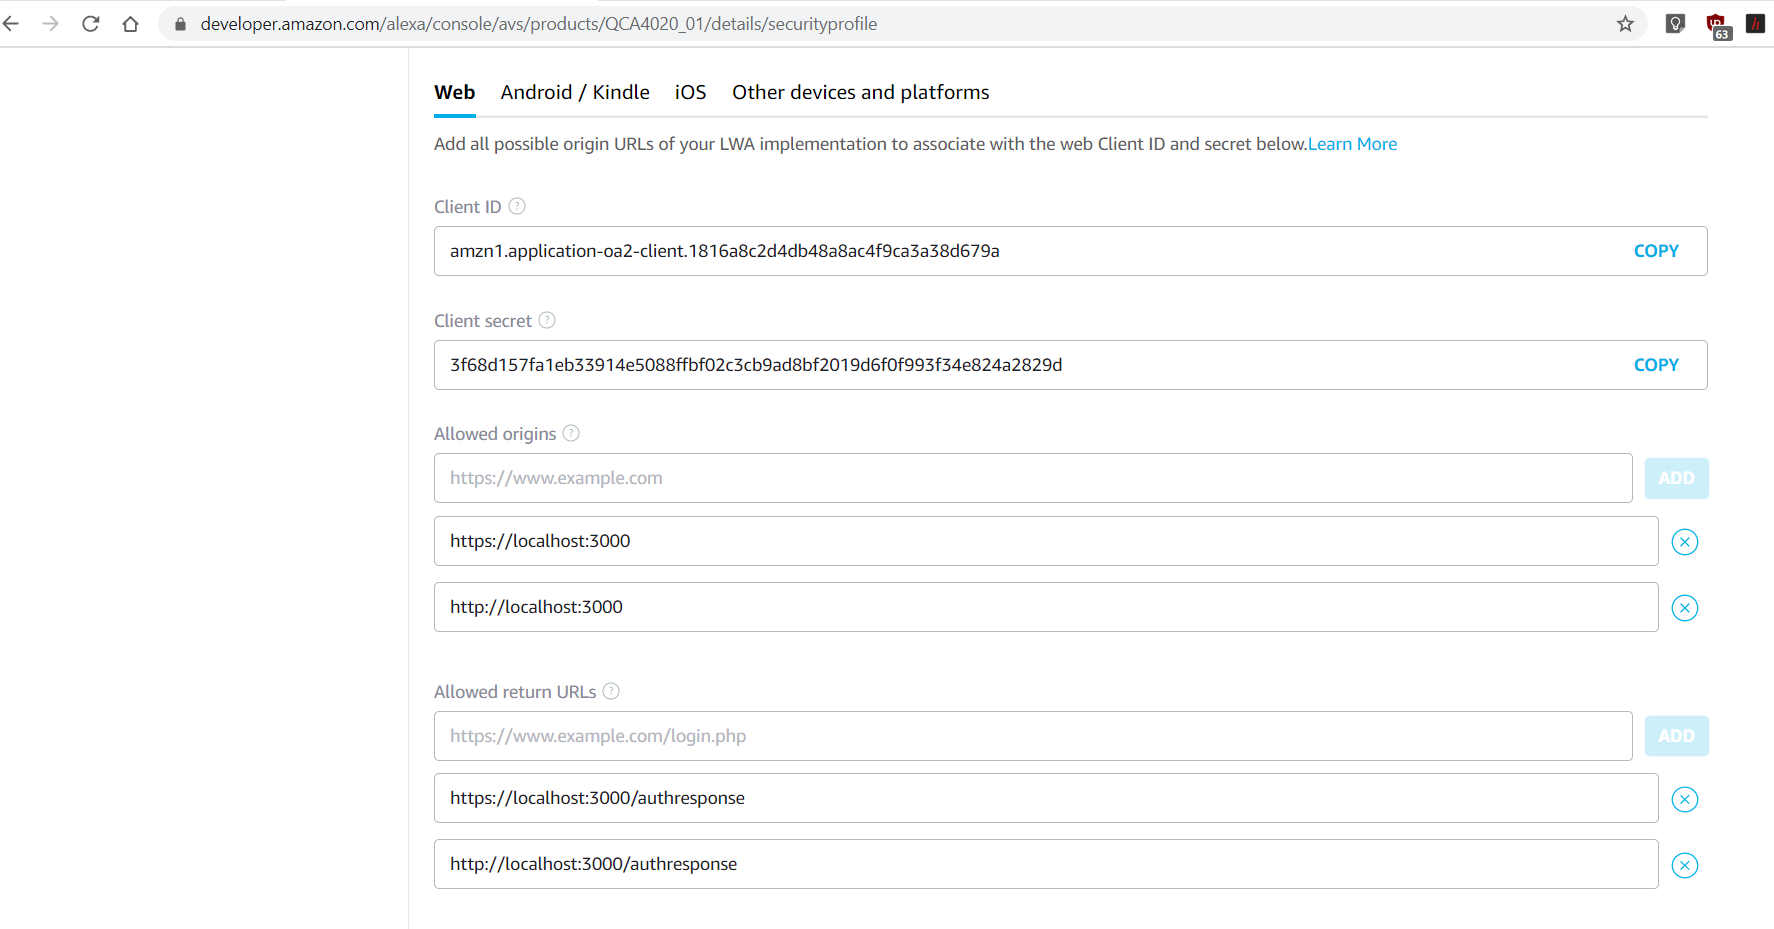
Further down the same page add the following urls:
- Allowed origins
- Allowed return URLs
https://localhost:3000/authresponse
http://localhost:3000/authresponse
- On the same page, select the Other devices and platforms tab.
- Click Download.
- Save the config.json file in the same directory as your certificates and key.
This file contains the Product ID and Client ID which will be used to configure the Development Kit later on.
- Agree to the Terms of Use.
- Click Finish to complete the AVS creation.
AVS Setup Summary
At this point your AVS product is setup and associated with your AWS IoT Thing. You should have the following information obtained from the config.json file, similar to below:
| AVS Product ID | QCA4020_01 |
| AVS Client ID | amzn1.application-oa2-client.XXXXXXXX |
Create Root Certificate Binary
To authenticate with the AWS IoT core, Home Hub needs the AWS IoT root CA certificates installing in binary format. Qualcomm provide a tool for this purpose in the QCA4020 SDK.
This step installs the SDK and creates the root CA certificate binary which will be used in step 6 when the Home Hub is provisioned.
- If you do not already have one, setup a Qualcomm Developer Account by visiting https://developer.qualcomm.com
- Visit https://www.qualcomm.com/products/qca4020/software
- Download and install the Software Development Kit – QCA4020.OR.3.3 OEM QCA SDK+CDB
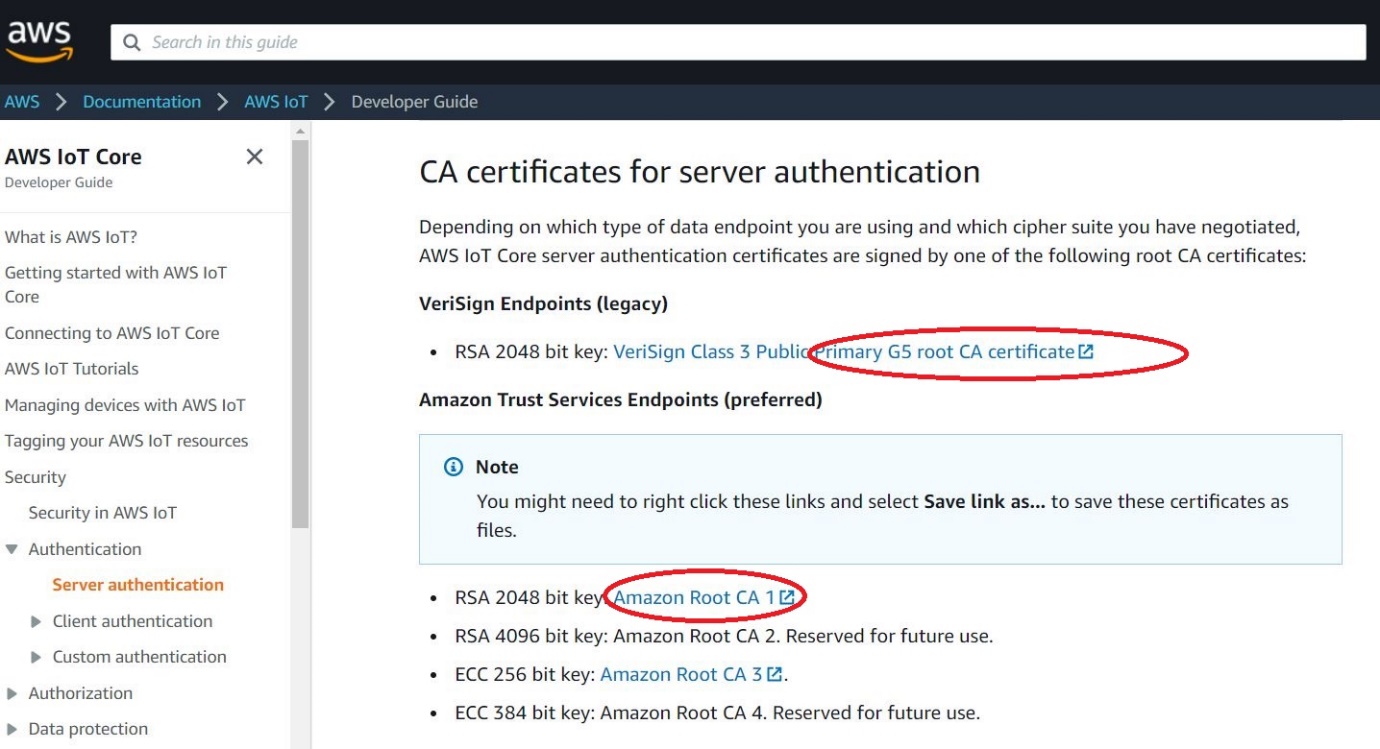
- Obtain the root CA certificates from Amazon and save them in your certificates directory: https://docs.aws.amazon.com/iot/latest/developerguide/server-authentication.html#server-authentication-certs
- Download the VeriSign Endpoints (legacy) certificate:
RSA 2048 bit key: VeriSign Class 3 Public Primary G5 root CA certificate
- Download the Amazon Trust Services Endpoints (preferred) certificate:
RSA 2048 bit key: Amazon Root CA 1
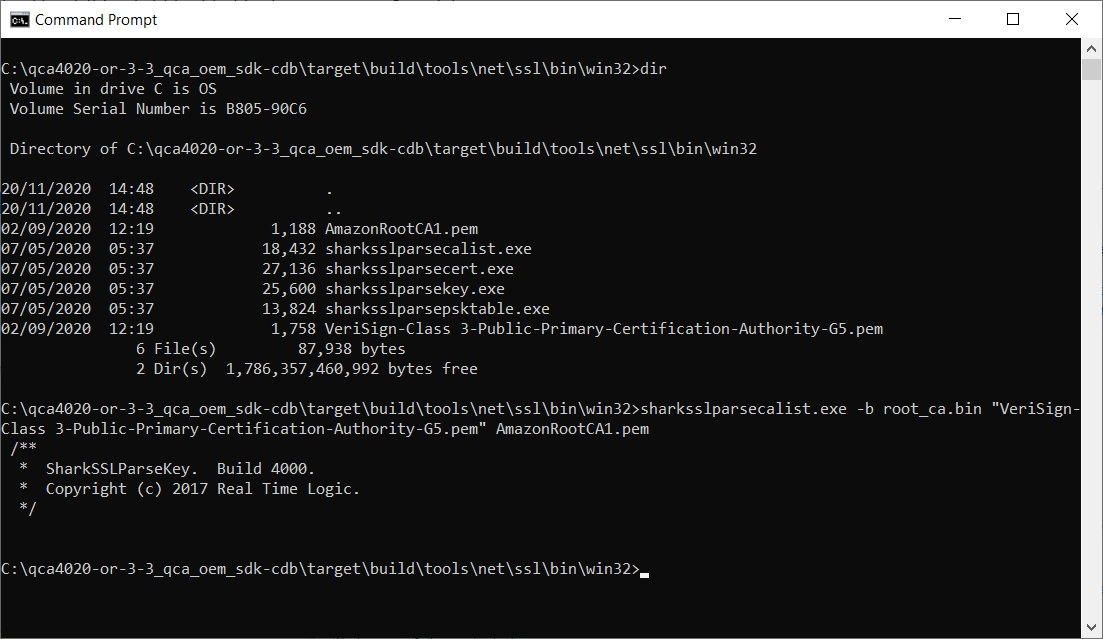
- Open a command prompt.
- Change to the following directory in the SDK: target\build\tools\net\ssl\bin\win32
- Copy the VeriSign and Amazon CA1 certificates to the above directory
- Run the following command to generate the root certificate binary – order is significant:
sharksslparsecalist.exe -b root_ca.bin "VeriSign-Class 3-Public-Primary-Certification-Authority-G5.pem" AmazonRootCA1.pem- The output file (root_ca.bin) contains the root CA certificates in binary format.
- Copy the file to the same directory as your certificates and keys.
Create the AIS Configuration
The Home Hub must be configured with the AWS and AVS service endpoints and details. This step prepares the configuration file that will be used in step 6 to provision the device.
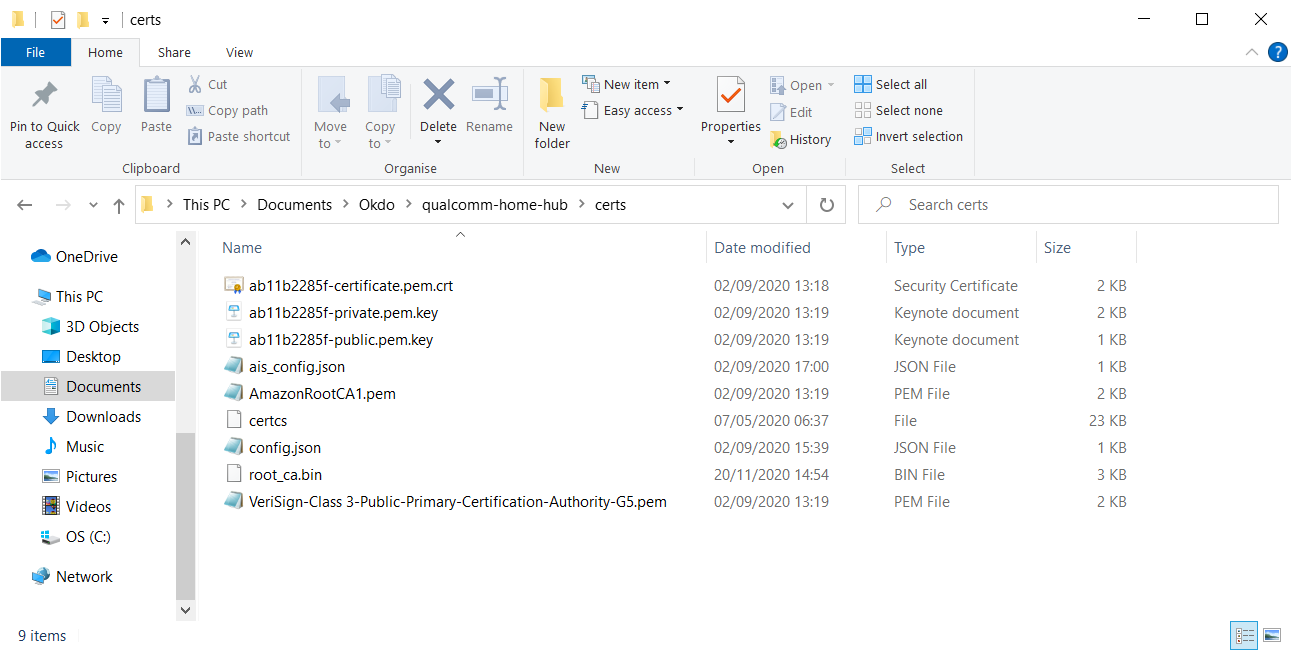
In the directory where you saved your certificates and keys:
- Create a file named ais_config.json
- Add the following information in Json format. Replace the example values with your own collected from Step 3
- Validate the file using a Json parser before saving it.
OEM Device Serial Number is user defined – we used 123456789
{
	"avs_client_id": "amzn1.application-oa2-client.XXXXXXXXX",
	"avs_product_id": "QCA4020_01",
	"oem_device_serial_number": "123456789",
	"ais_topic_root": "qualcomm/quartz",
	"ais_api_version": "v1",
	"ais_client_id": "AIS_DEV_A",
	"aws_iot_endpoint": "XXXXXXX-ats.iot.us-west-2.amazonaws.com",
	"aws_iot_thing_name": "AIS_DEV_A",
	"aws_iot_mqtt_client_id": "AIS_DEV_A",
	"aws_iot_client_cert_name": "client.bin",
	"aws_account_number": "XXXXXXXX"
}
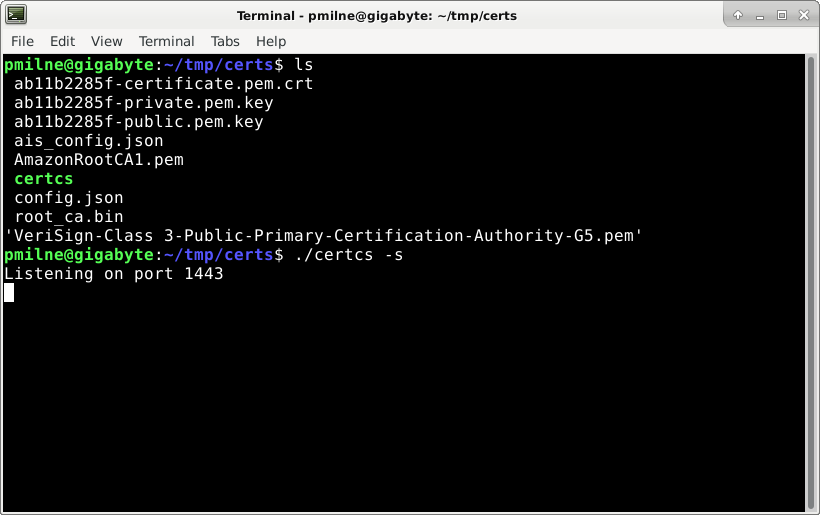
Prepare Certificate Server
This step sets up a certificate server on the local network to provision the AWS / AVS configuration, certificates and keys. This enables the Home Hub to load the configuration settings, security certificates and keys into secure non-volatile memory on the SoC.
We could not get Home Hub to connect to the Windows version of the certificate server (certcs.exe) but it did work when we ran the server (certcs) on a Debian Linux PC.
- Open a command prompt.
- Copy the certificate server executable from the SDK to your certificate’s directory:
target\build\tools\net\ssl\certcs\linux\certcsYou should have the following files stored in a single directory (your certificate and key will have different names):
| AIS Config | ais_config.json |
| AWS Client Certificate | XXXXXXX-certificate.pem.crt |
| AWS Client Private Key | XXXXXXX -private.pem.key |
| AWS Root Certificate | root_ca.bin |
| Certificate server | certcs |
- Copy the certificates directory to a Linux PC.
- Open Terminal.
- Change directory to the certificates directory
- Start the certificate server
certcs -sThe server should now be listening for connections on port 1443.
Run Alexa demo
In this final step the Alexa demo is connected to the network, the configuration, certificates and keys are loaded from the certificate server and Home Hub is authenticated with Alexa. You will then be able to speak to Alexa and Alexa will respond.
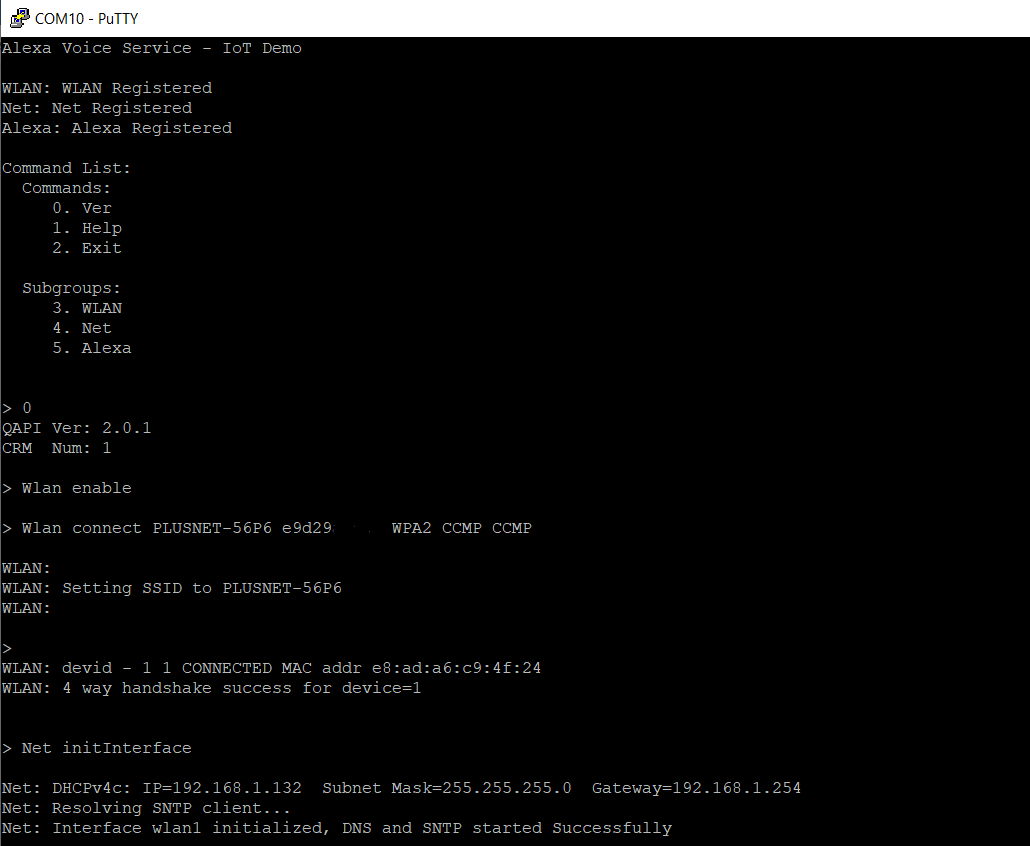
- Return to the Serial Terminal.
- Enter the following commands at the prompt using your own Wifi credentials:
Wlan enable

Wlan connect my_SSID my_passwd WPA2 CCMP CCMP

Net initInterface
Your Home Hub 100 will now be connected to your network.
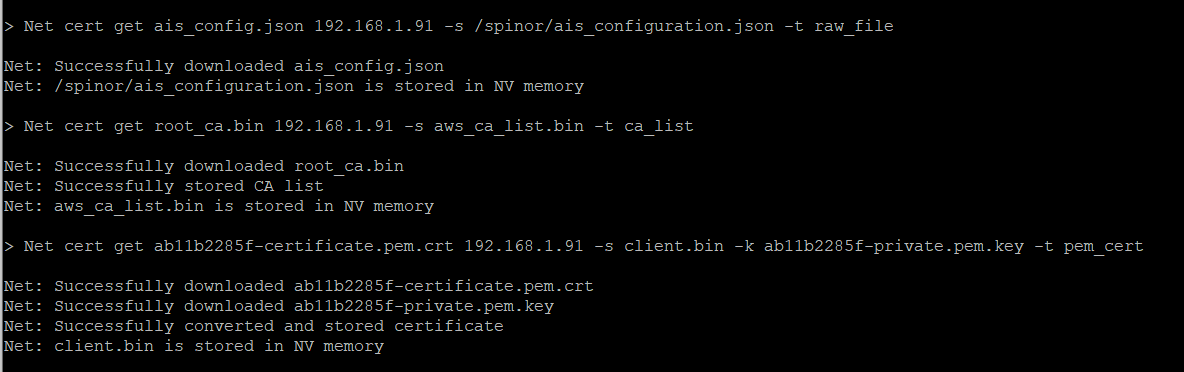
- Run the following commands to copy the configuration, certificates and keys to the device. Replace the certificate server IP address, certificate file and private key with your own.
Net cert get ais_config.json 192.168.1.91 -s /spinor/ais_configuration.json -t raw_file

Net cert get root_ca.bin 192.168.1.91 -s aws_ca_list.bin -t ca_list

Net cert get ab11b2285f-certificate.pem.crt 192.168.1.91 -s client.bin -k ab11b2285f-private.pem.key -t pem_cert
If you receive errors then check your configuration, certificates, keys and root certificates are correct and repeat steps 6 & 7. If you get json parsing errors, you may need to reflash the demo firmware – see next step
- Initialise the device and connect to Alexa.
Alexa ais_init
Alexa ais_run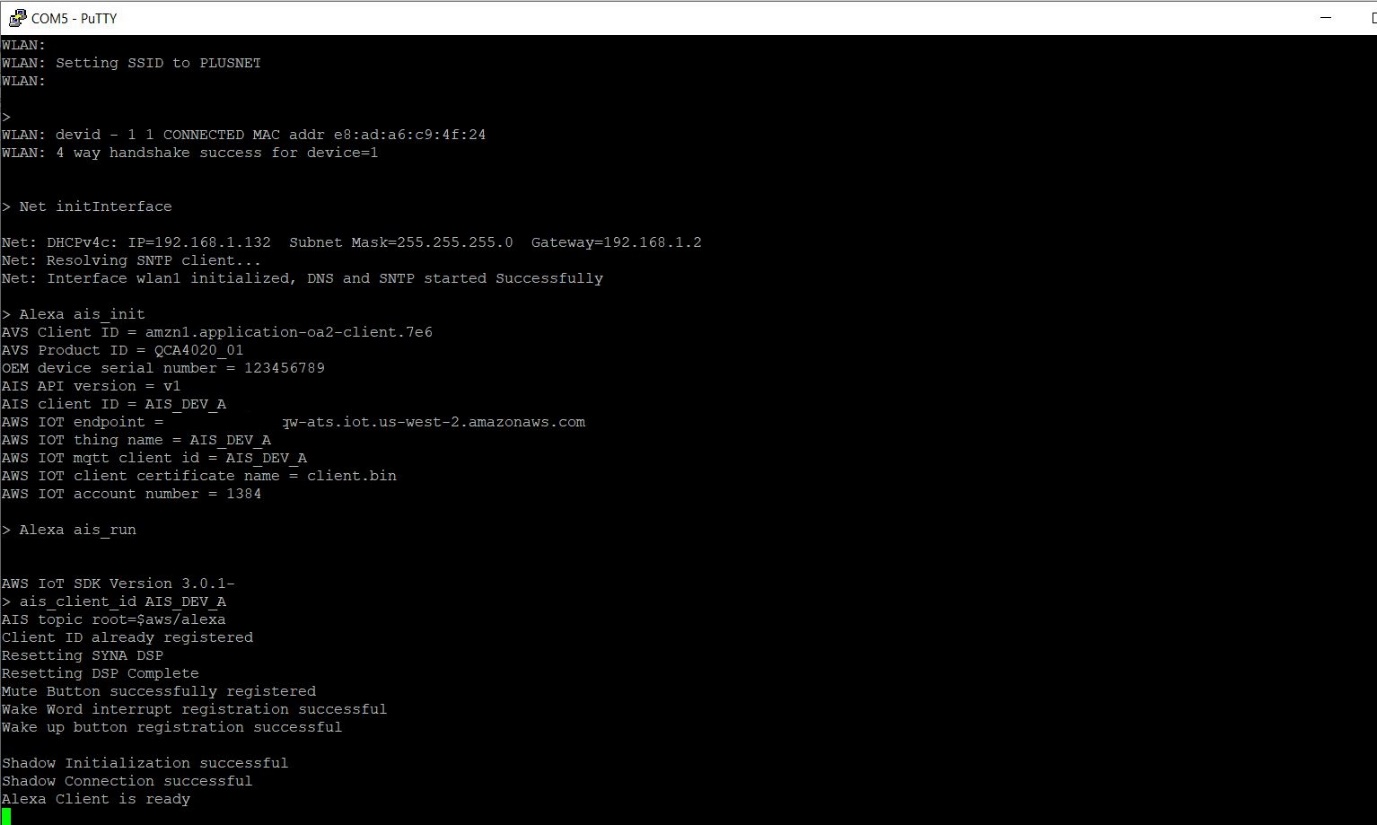
- Once Home Hub connects, go to https://amazon.com/us/code
- Login with your Amazon credentials
- Enter the code returned in the terminal
After a few seconds Home Hub will be authenticated.
Wake-up Alexa with the command “Alexa” and the BLUE LED will turn ON. Now you can speak to Alexa and the response will be played back through the speakers.
Build and flash firmware (Optional)
The Home Hub development kit comes with the Alexa demo firmware pre-loaded so this step is optional.
To build the firmware from source, obtain the latest instructions (QUALCOMM HOME HUB 100 DEVELOPMENT KIT FOR AMAZON AVS ) from Qualcomm and follow the directions:
https://www.qualcomm.com/products/qca4020/documentation
QCA4020 SDK (QCA4020.OR.3.3 OEM QCA SDK+CDB) and Alexa demo source code (QCA4020.OR.3.3 OEM QCA AIS):
https://www.qualcomm.com/products/qca4020
There is a tested pre-compiled firmware binary along with flashing instructions on the OKdo GitHub:
https://github.com/LetsOKdo/qualcomm-home-hub-alexa
Summary
Congratulations! You have setup the Home Hub 100 so you now have a device that can communicate with Alexa.
The development kit comes with a host of other features; Bluetooth 5, dual-band Wi-Fi, and 802.15.4 Technologies, eight different on-board environmental sensors, including drivers, Arduino headers and JTAG debugging support giving plenty of scope for further development.
Further information about the Home Hub 100 is available from Qualcomm:
https://www.qualcomm.com/products/home-hub-100-platform