

The BBC micro:bit is a microcontroller featuring Bluetooth, microphone, speaker, compass, accelerometer and a 5×5 LED matrix, an extra touch input button and a power button. This get started with micro:bit and MakeCode guide will take you through the first steps to start enjoying its possibilities using the MakeCode programming environment.
Connect the micro:bit
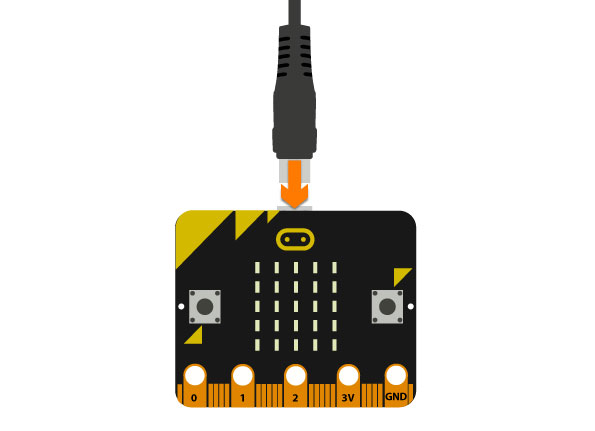
Connect the micro:bit to your computer using a micro USB cable.
Set up MakeCode
MakeCode is a versatile programming environment ideal for starting off on your programming endeavours. It integrates a graphic programming environment in which you simply combine visual blocks with Python and JavaScript counterparts that you don’t need to see at all, yet it shows how your block constructions translate to Python and JavaScript. It’s a great tool to start getting used to code without having to use it directly.

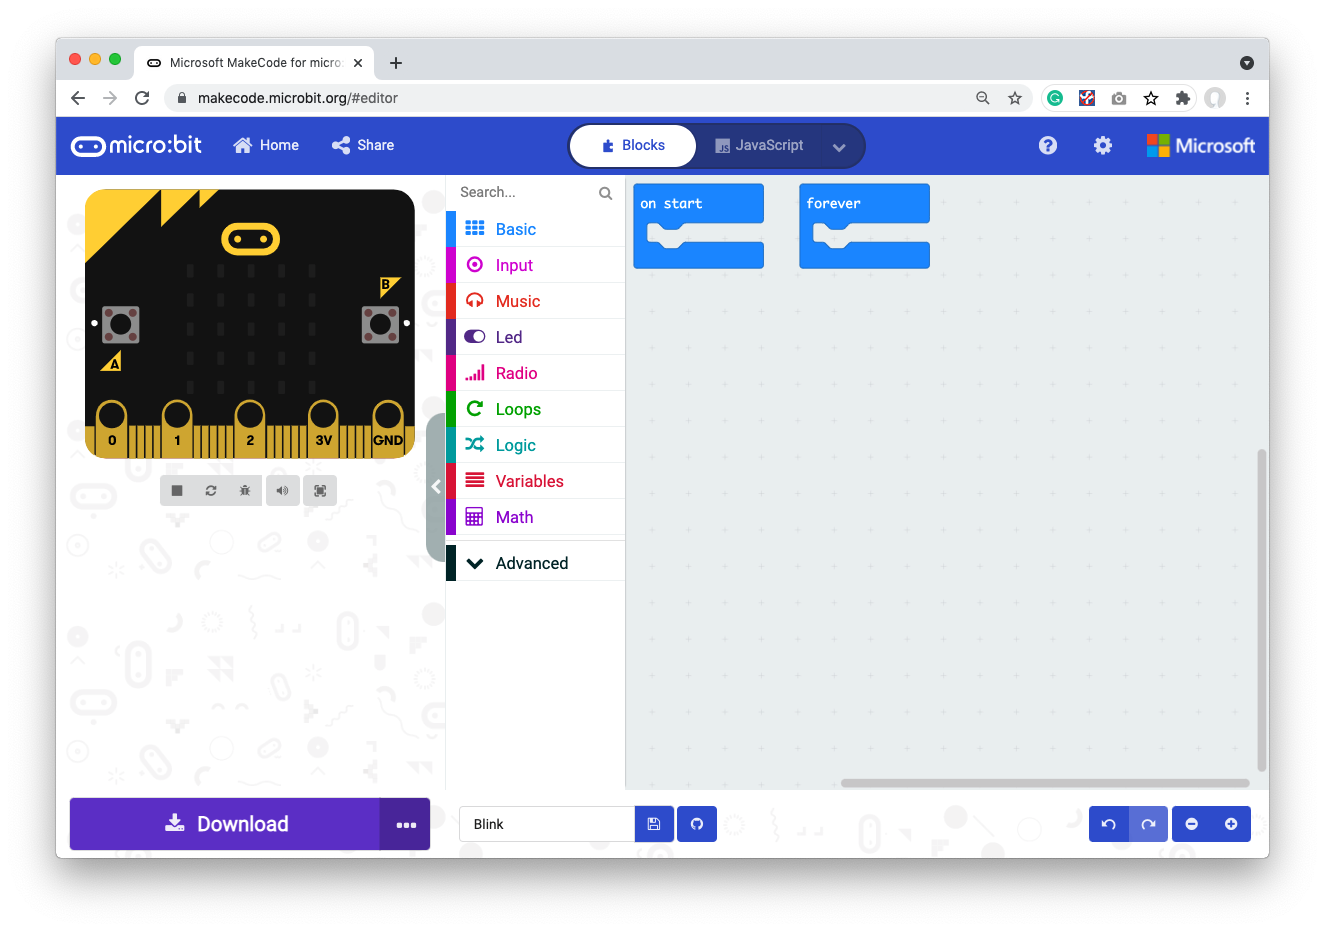
You will be presented with the MakeCode homepage.
You don’t need to create an account, MakeCode will save your projects to your browser’s cache. While this is great for simplicity, beware that you’ll lose your work if you clear your browser’s cache and that you won’t be able to access your projects from other computers.
If you want to save your projects securely, always download them to a safe place on your machine.
- Click on New Project and name your project. We called ours Blink.
- Click on the three dots to the right of the Download button.
- Click on Pair device, a window will pop-up.
- Click on Pair device again.
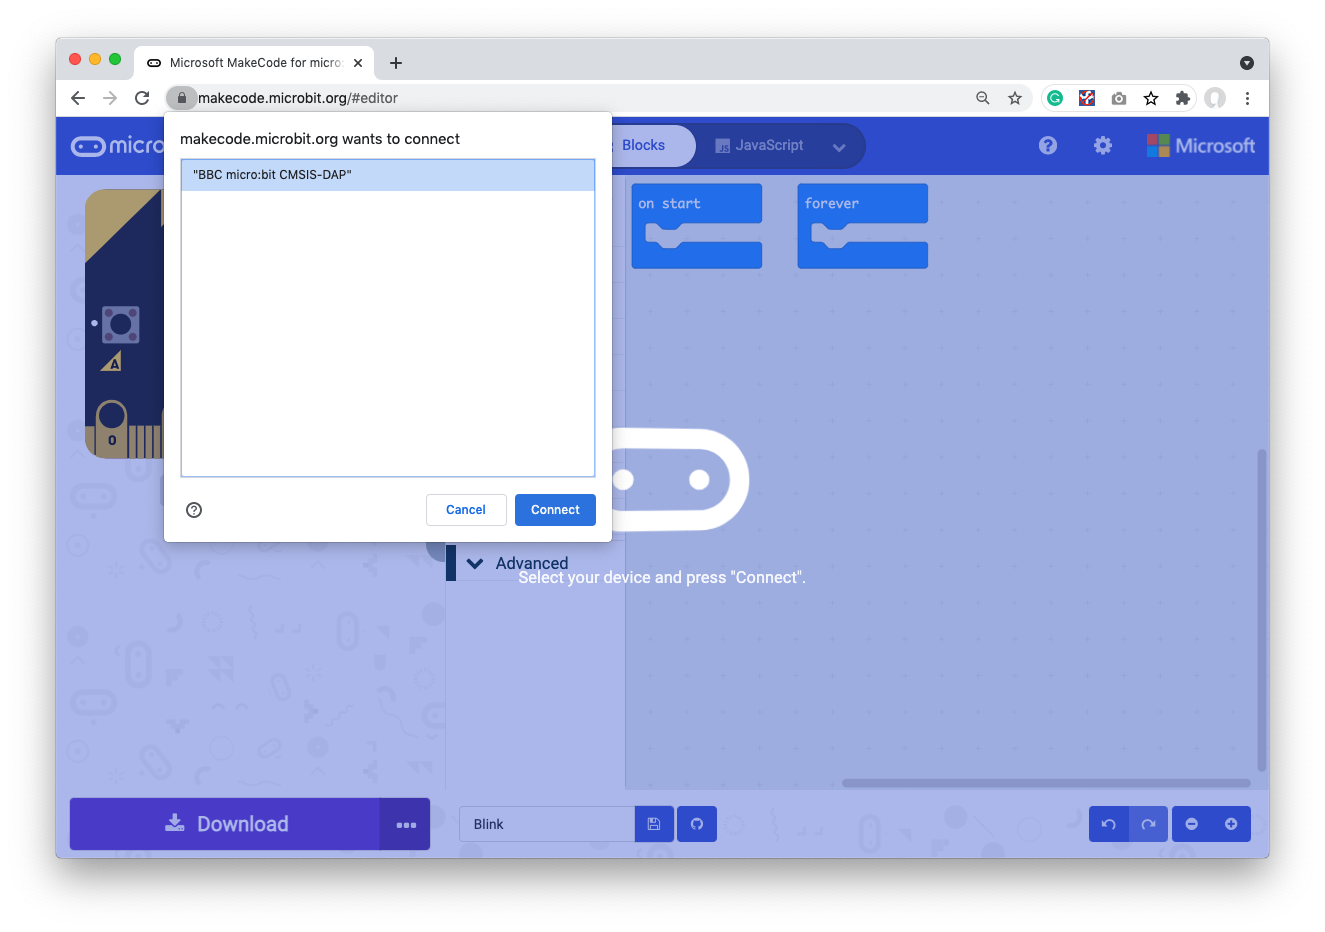
- Select your micro:bit from the list and click Connect.
Your micro:bit should now be ready to be programmed.
Blink
- Delete the on start block from the canvas.
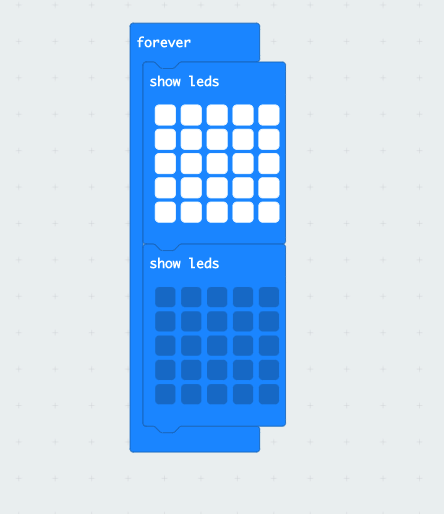
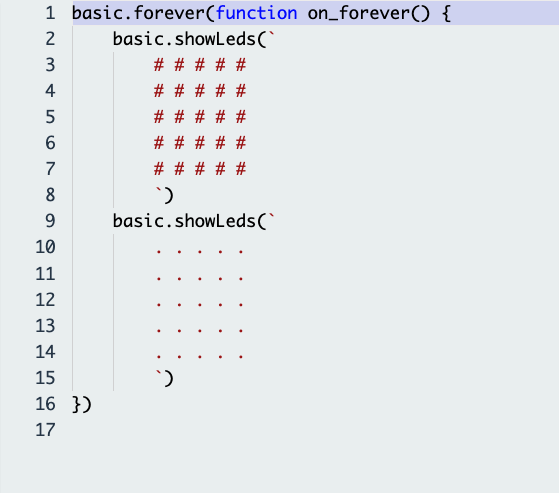
- Drag 2 instances of show leds into forever.
- Fill the LED matrix of one of the show leds.
The micro:bit avatar in the MakeCode interface will start flashing its LED matrix.
- Click on the Download button to transfer the code to your micro:bit.
Your micro:bit should now be flashing the LED matrix on and off.
As we mentioned earlier, if you want to keep your MakeCode projects safe you should store them on your computer.
- Download your .hex code file by clicking on the disk icon.

This will save the file to your hard drive. If you want to re-import the file to MakeCode, you can do so by clicking on Import from the MakeCode home page and selecting the hex file when prompted.
You can also load the hex file directly to the micro:bit by dragging and dropping.
Other languages
- Flick the switch on the top of the MakeCode interface to JavaScript.

This will transform your Blocks code into JavaScript.
- Now switch from JavaScript to Python by using the option on the dropdown.
These options allow you to start familiarising yourself with the syntax of different languages and also do some actual programming. You can quickly start a project by using Blocks and then fine-tune it or edit it in a different programming language.
Note that you can do a lot more with programming than you can with blocks, so pasting some JavaScript or Python and then trying to convert it back to blocks might not always work!
Do more
The MakeCode home page has a bunch of projects, games and tutorials to get you started using all the functions of the micro:bit so head over to https://makecode.microbit.org/ and have fun!
