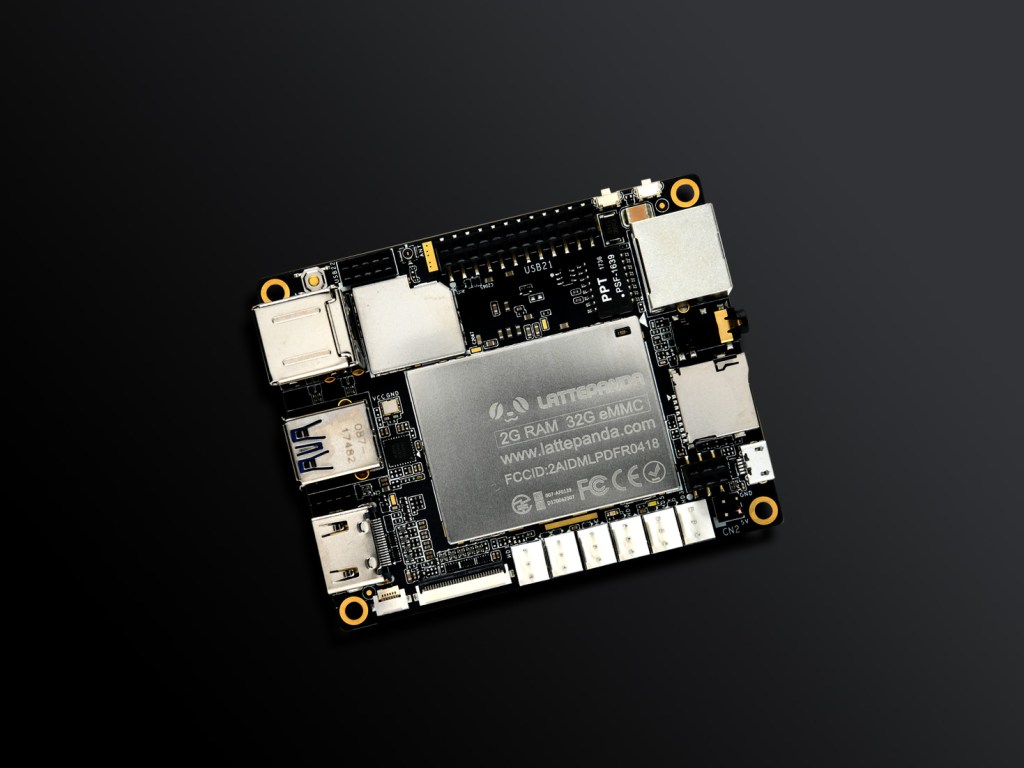
LattePanda is a low-cost single-board computer that runs Windows 10. It comes with a quad core Intel(R) Atom(™) Z8350 processor and integrated Arduino microcontroller core on board. It is available in 2GB RAM / 32GB storage or 4GB / 64GB storage options, with or without Windows pre-installed.
This guide will show you how to get started and create your first physical computing projects using C# with Microsoft Visual Studio and the LattePanda Sensor Starter Kit.
What you'll need
LattePanda (2G/32Gb) With Win10 License
5V / 2.5A USB Power Supply
Starter Sensor Set For LattePanda V1.0
Monitor / TV with HDMI connector
HDMI Cable
USB Keyboard
USB Mouse
Powering up
Our version of LattePanda comes with 2GB RAM and 32GB eMMC storage and Windows 10 already installed and pre-activated, so it’s super easy to get started. Just connect up your peripherals and power on:
- Connect the monitor to the HDMI port.
- Connect the keyboard and mouse to the USB 2.0 ports.
- Connect the ethernet cable to LAN port (Wifi aerial is also supplied).
- Connect a good quality 5V – min 2.0A power supply to the micro USB power socket (we used a 5.1V / 2.5A supply).
- Boot Windows by switching on the power supply. The red LED on the underside of the board will turn on for 30 seconds.
- Wait until the red LED has turned off, then press the white button next to the Arduino pinouts.
- Windows 10 will boot into Desktop.
Make sure to shut down using the Windows Shut Down in the Start menu before disconnecting the power supply
System update
We found issues using GitHub buttons without upgrading to MS Edge browser. This involves updating Windows which can take between 1 – 2 hrs. Incremental updates are then much faster and your system is more secure.
Update Windows before installing Visual Studio to ensure enough storage is available – free up space by using Delete Temporary Files from the Windows search box if necessary
- Type updates in the Windows search box.
- Select Windows Update and follow prompts. Allow about 1.5 Hrs to complete.
- Reboot Windows.
- Install Edge browser when prompted.
Visual Studio
The following steps will install Microsoft Visual Studio and prepare Windows 10 ready for programming the Arduino core.
Microsoft provides a free, fully-featured C# development environment: Visual Studio Community Edition. It has all the tools necessary to develop Windows apps.
- Go to https://www.visualstudio.com/downloads/download-visual-studio-vs
- Follow the on-screen instructions.
- Select .Net Workloads. Only select the required software (~7GB download).
- Additional items can be added later if storage space is available.
- Make your favourite drink.
- Visual Studio will open once installation has completed.
You will need to enable Windows Developer Mode, this gives standard users elevated privileges to control hardware:
- Type developer in the Windows search box.
- Select Use Developer features.
- Select Developer mode in the configuration window and accept prompts.
- Extra Windows development software will install.
- Restart Windows and allow updates to complete.
Firmata
Communication between the Intel and Arduino cores is performed using Firmata which is a type of serial protocol. LattePanda has provided an open-source Firmata library suitable for Windows apps developed in Visual Studio. The code is hosted on GitHub: https://github.com/LattePandaTeam/LattePanda-Development-Support
- Click the Code button and download the zip.
- Expand the zip file into a directory. It contains Arduino.cs used later.
Arduino provides a version of Firmata that must be uploaded to the Arduino core. These steps will update the Arduino IDE and install Firmata on the Arduino core. We recommend updating to the latest Arduino IDE version, the pre-installed version needs removing first:
- Type add in the Windows 10 search box and select Add or Remove programs.
- Select Arduino and Uninstall.
- Go to the Arduino download page and install the latest version of the IDE.
- Start the Arduino IDE.
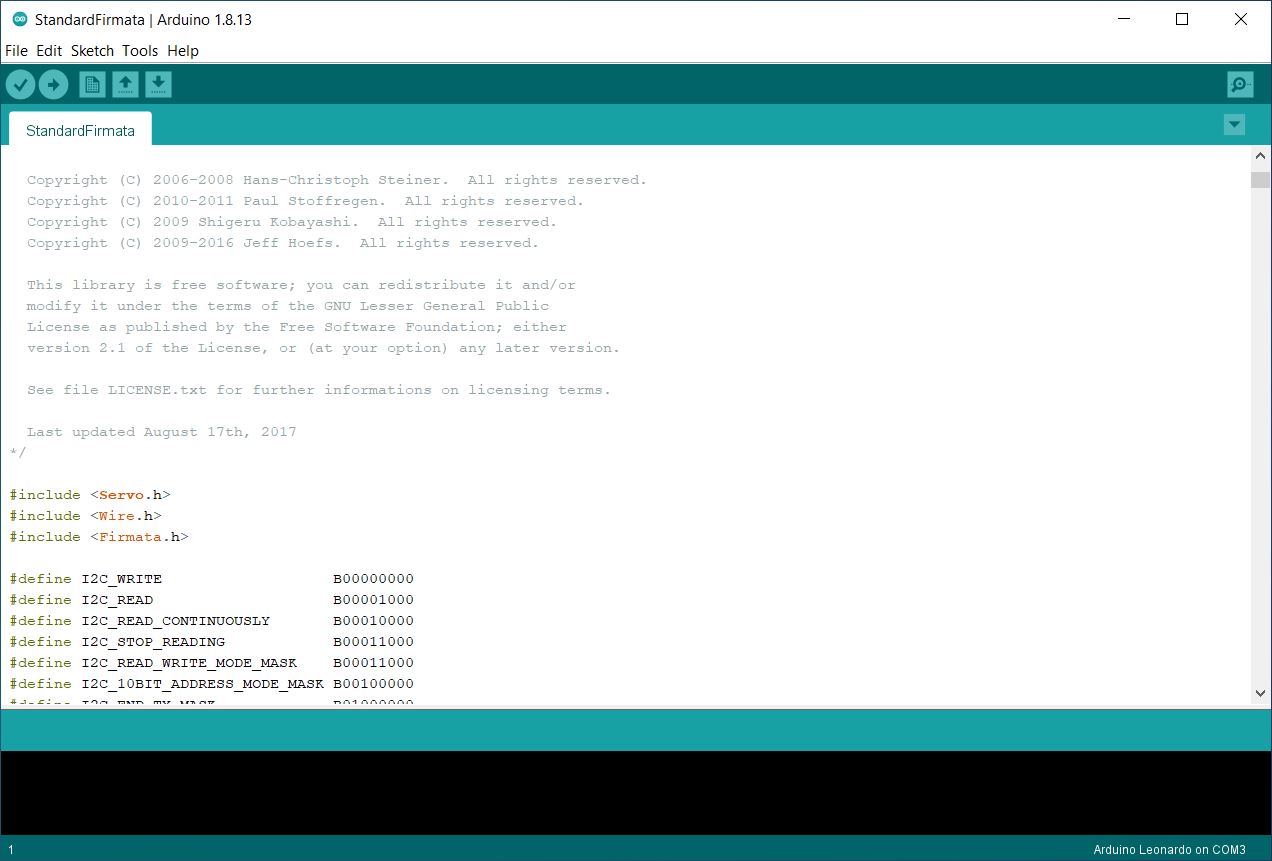
- Open the StandardFirmata sketch from File > Examples > Firmata > StandardFirmata.
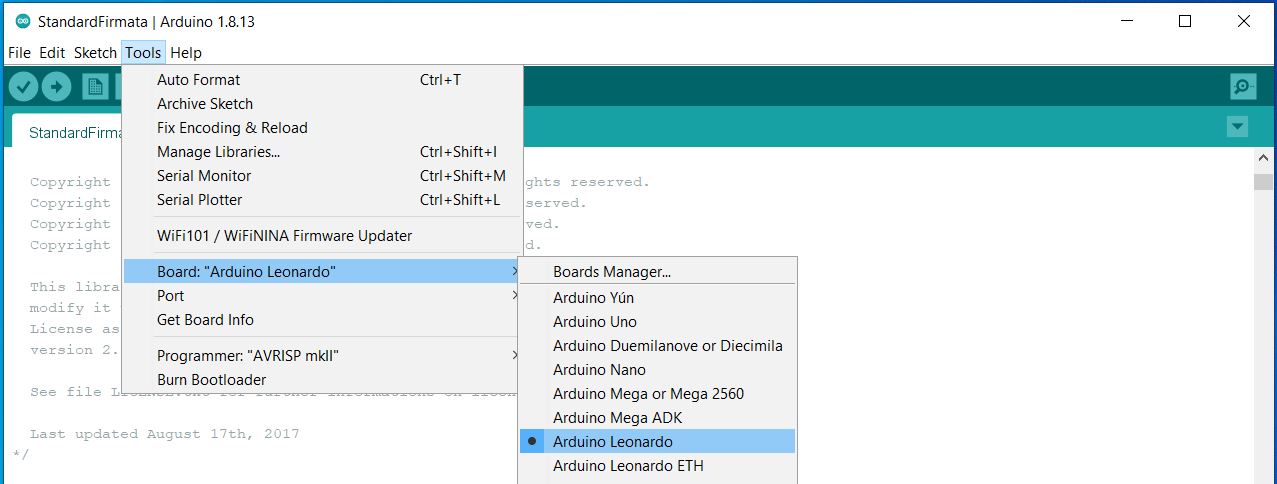
- Set the board type to Leonardo from Tools > Board > Arduino Leonardo.
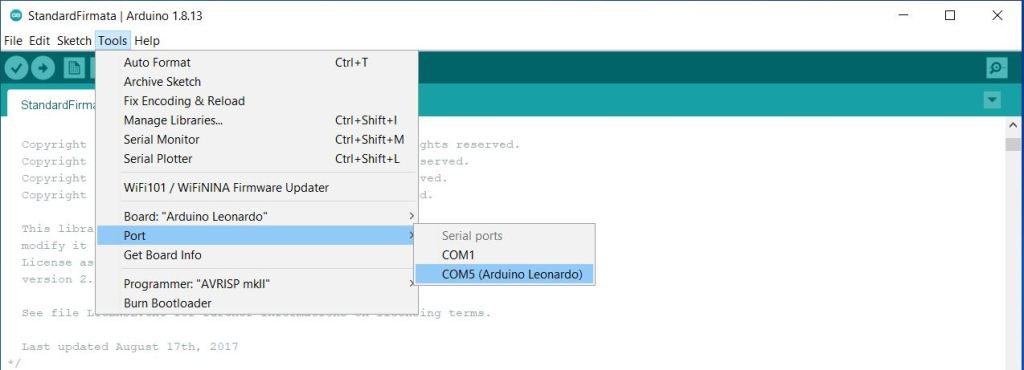
- Set the port from Tools > Port > COM5 (Arduino Leonardo)
- Upload the Firmata sketch from Sketch > Upload.
- Exit the Arduino IDE.
Firmata is now installed on the Arduino core.
Blink
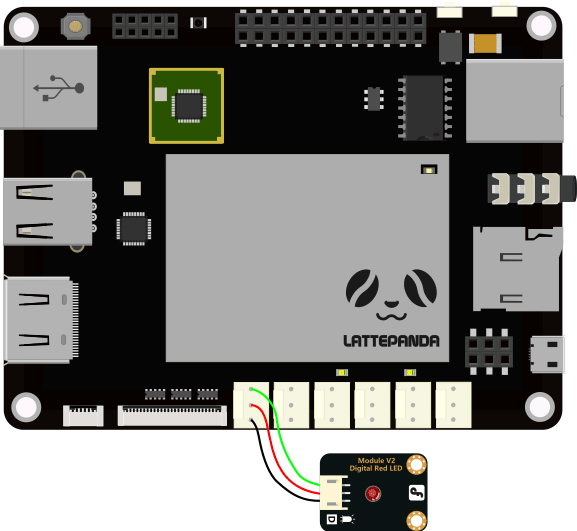
The LattePanda Sensor Starter Kit comes with 14 different digital, analogue and I2C devices that connect safely to the board. We start by connecting an LED module and blinking it with a simple Windows console app to test our setup:
- Connect a red LED module to pin D9 on the White 3-pin connectors.
- Open Visual Studio.
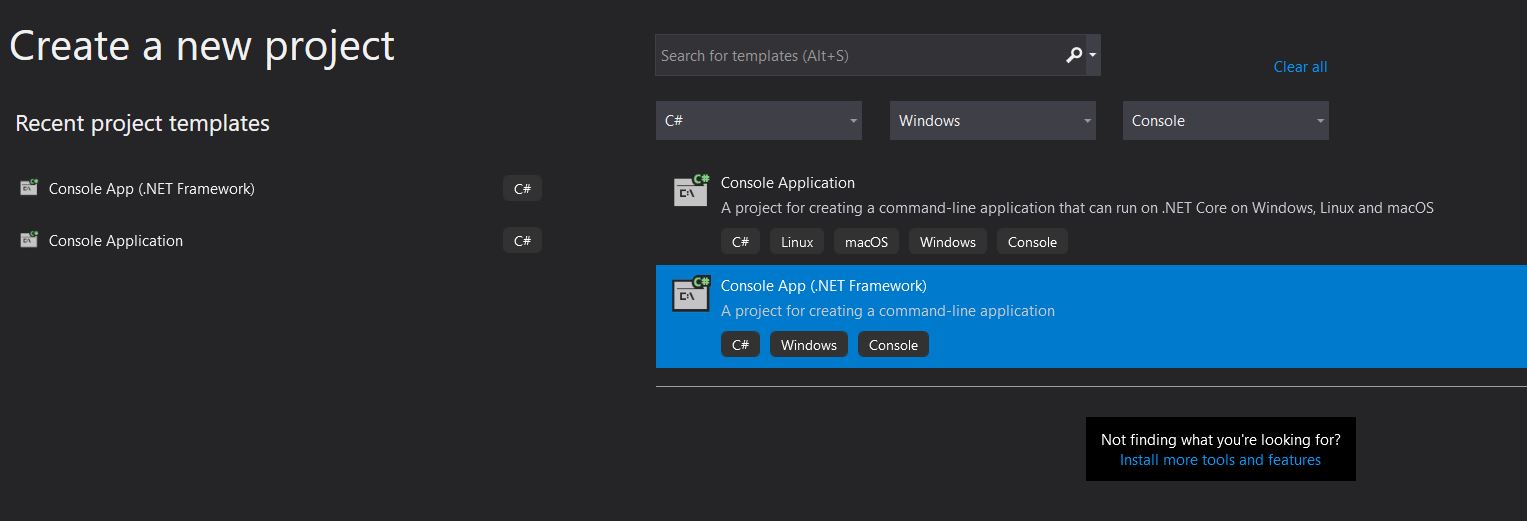
- Select Create a new project.
- Select C# Console App (.NET Framework) and click Next.
Make sure to choose the C# Console App with .NET Framework.
- Name the project. We called ours BlinkLed.
- Choose a directory to save it in then click Create and wait for the project to be created.
- In Solution Explorer right-click the project name and then Add > Existing item…
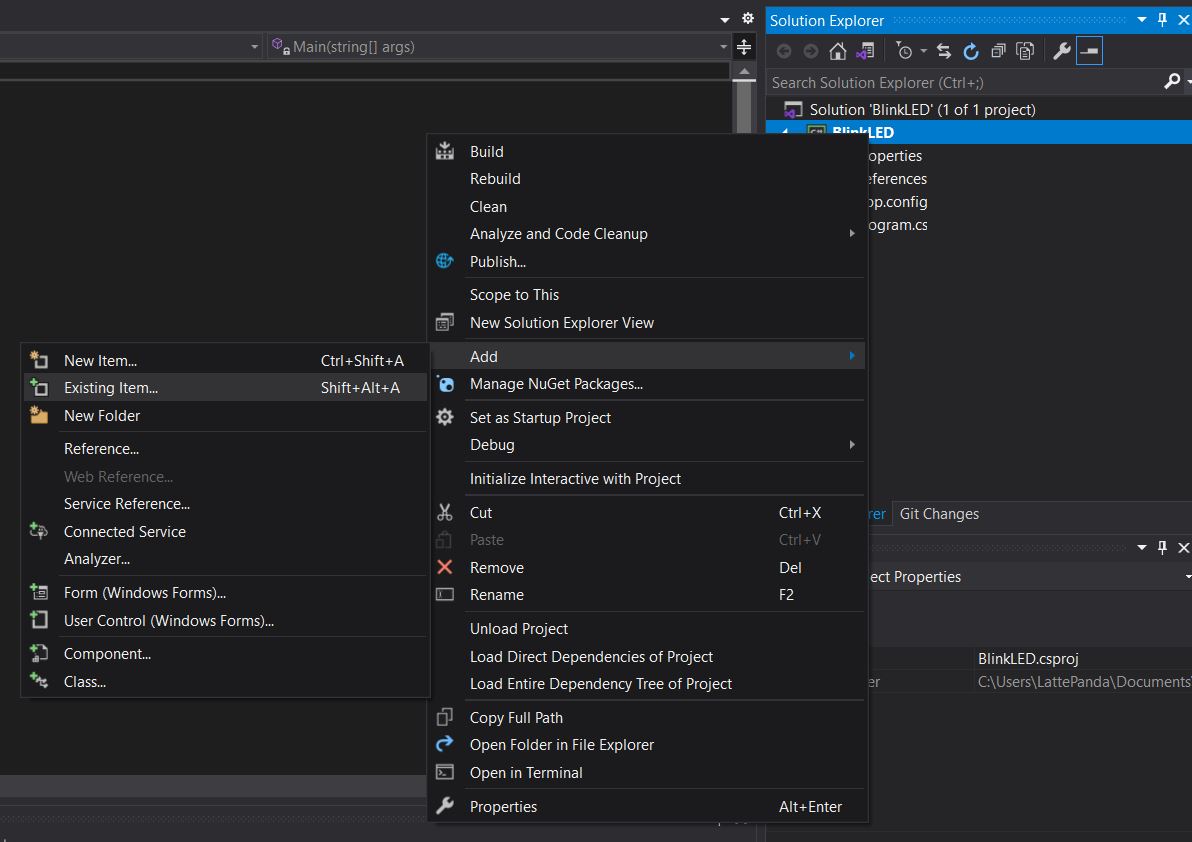
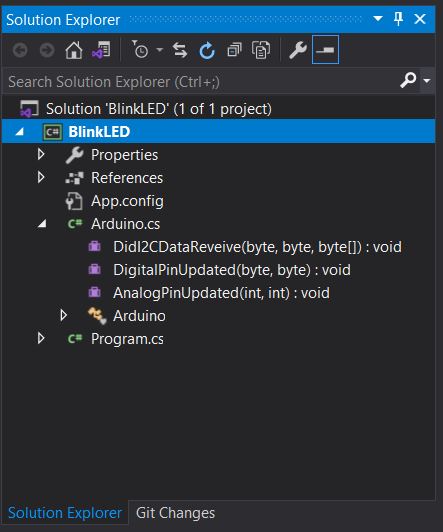
- Navigate to Arduino.cs in the Firmata download directory created in step 4 and click Add.
Arduino.cs is added to your project.
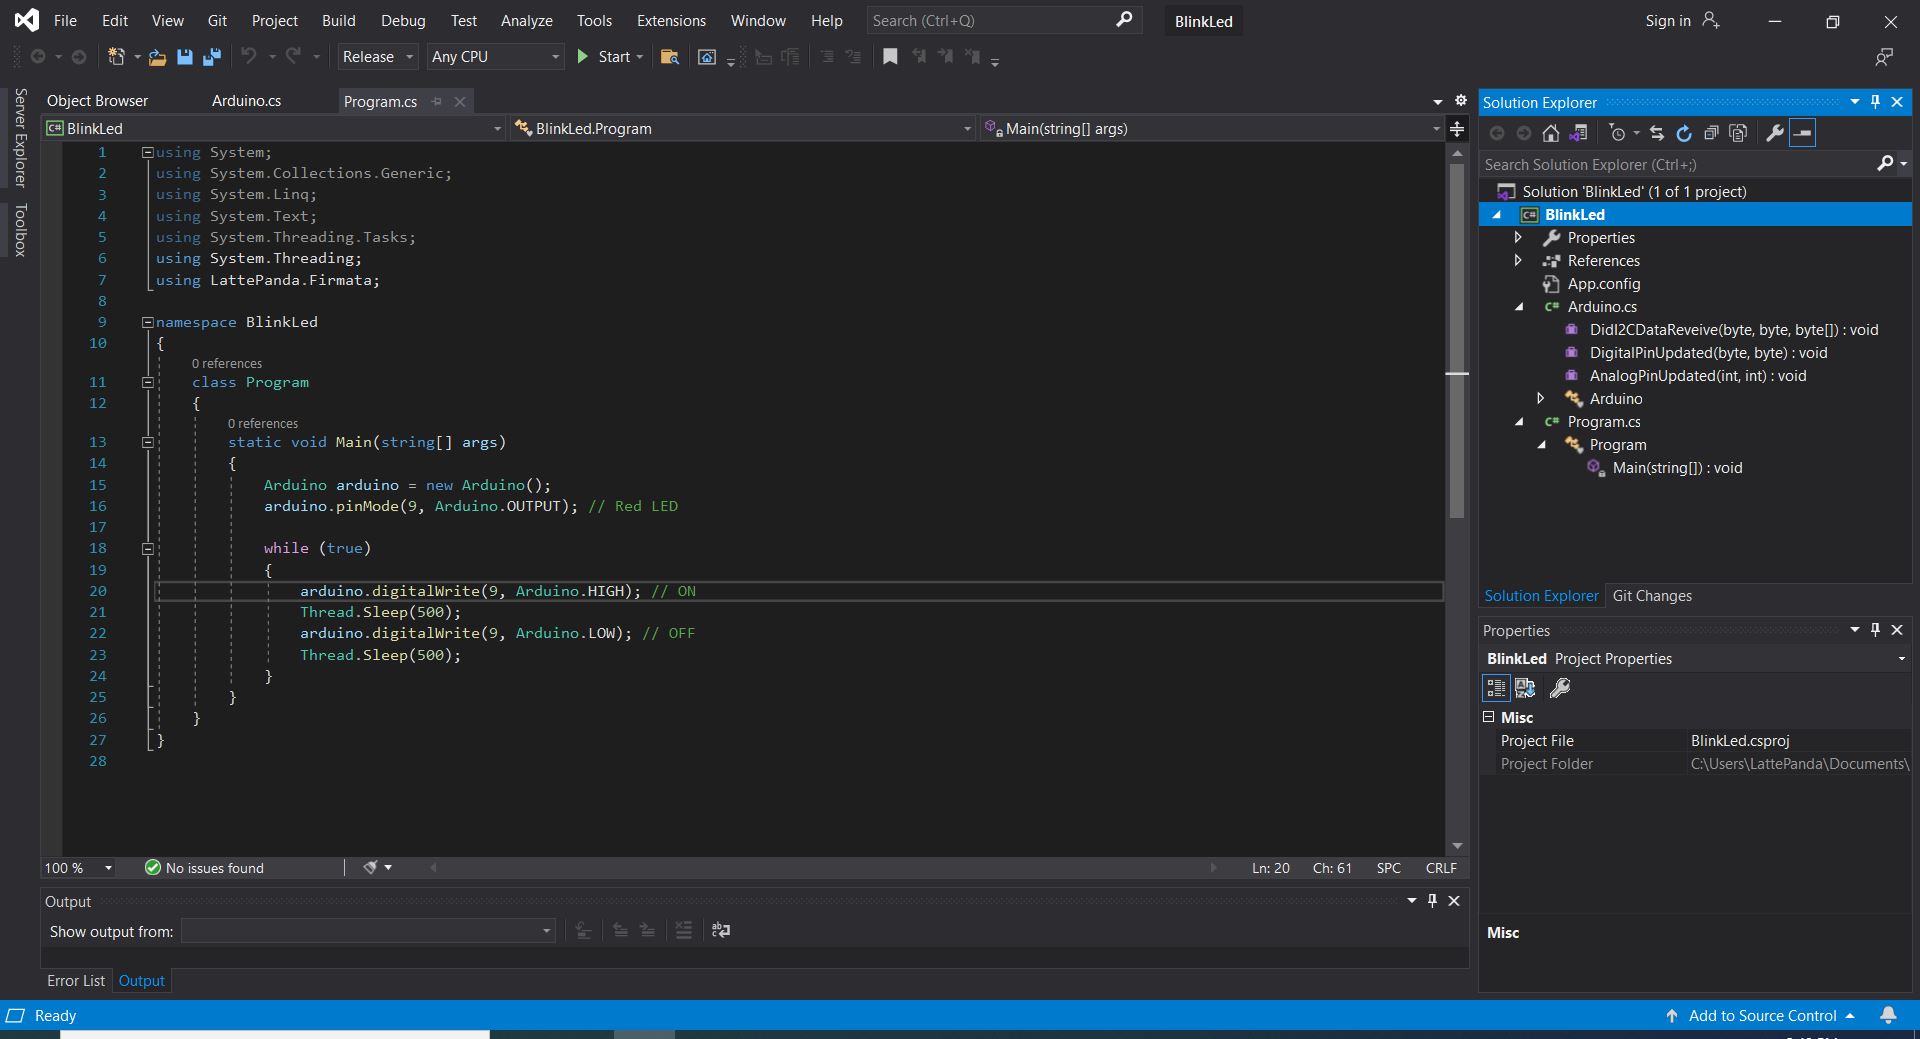
- Copy and paste the following C# code into Programs.cs:
 p.p1 {margin: 0.0px 0.0px 8.0px 0.0px; font: 10.0px 'Courier New'; color: #000000; background-color: #d0d0d0} p.p2 {margin: 0.0px 0.0px 8.0px 0.0px; font: 10.0px 'Courier New'; color: #000000; background-color: #d0d0d0; min-height: 11.0px} p.p3 {margin: 0.0px 0.0px 8.0px 0.0px; font: 10.0px 'Courier New'; color: #000000} span.s1 {background-color: #d0d0d0}
 using System;
 using System.Collections.Generic;
 using System.Linq;
 using System.Text;
 using System.Threading.Tasks;
 using System.Threading;
 using LattePanda.Firmata;


 namespace BlinkLed
 {
     class Program
     {
         static void Main(string[] args)
         {
             Arduino arduino = new Arduino();
             arduino.pinMode(9, Arduino.OUTPUT); // Red LED


             while (true)
             {
                 arduino.digitalWrite(9, Arduino.HIGH); // ON
                 Thread.Sleep(500);
                 arduino.digitalWrite(9, Arduino.LOW); // OFF
                 Thread.Sleep(500);
             }
         }
     }
 }
Visual Studio will parse and check the code. There should be No issues found in the indicator at the bottom of the window.
Issues are indicated by underlining the offending code. You can also view them in the Error List window by clicking on the red-cross icon
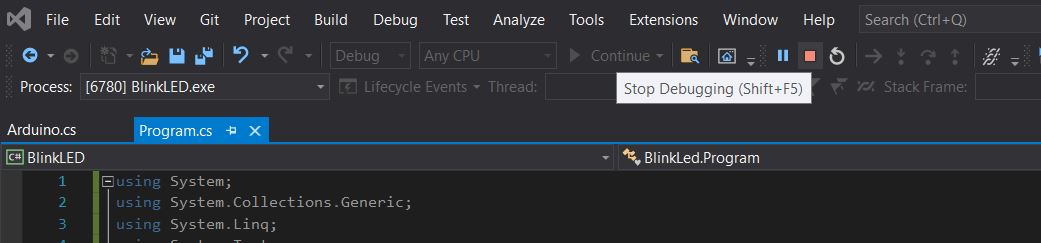
To build and run the project:
- Click the Start button to run in debug mode.
The project will take a few seconds to build and afterwards, a console window will open and the LED will start blinking.
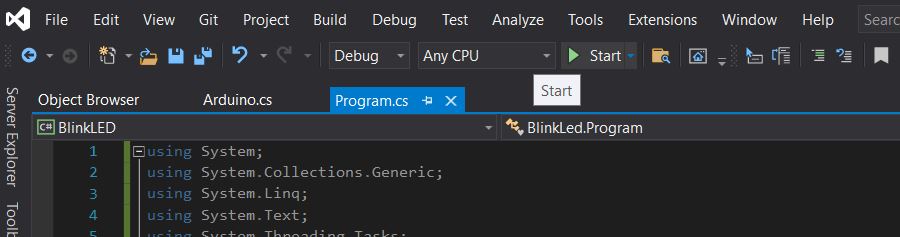
- Click the Stop button to end debugging.
If all went well you have a working Visual Studio and Arduino Firmata setup!
Inputs & outputs
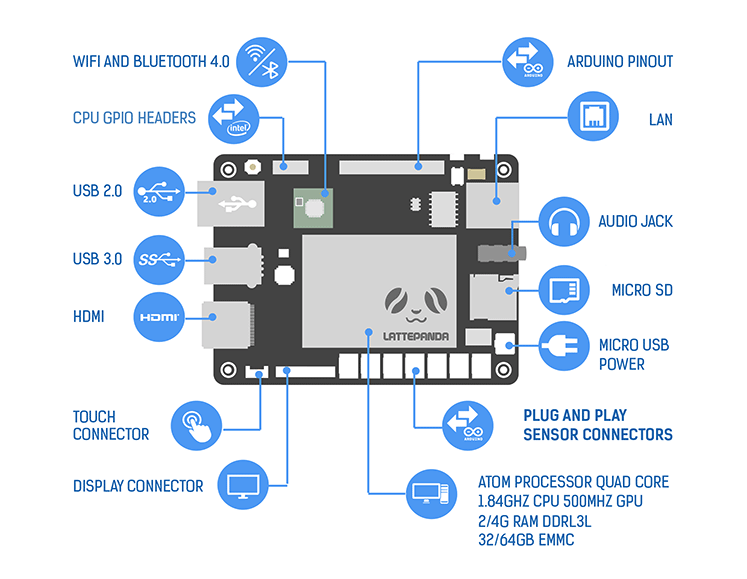
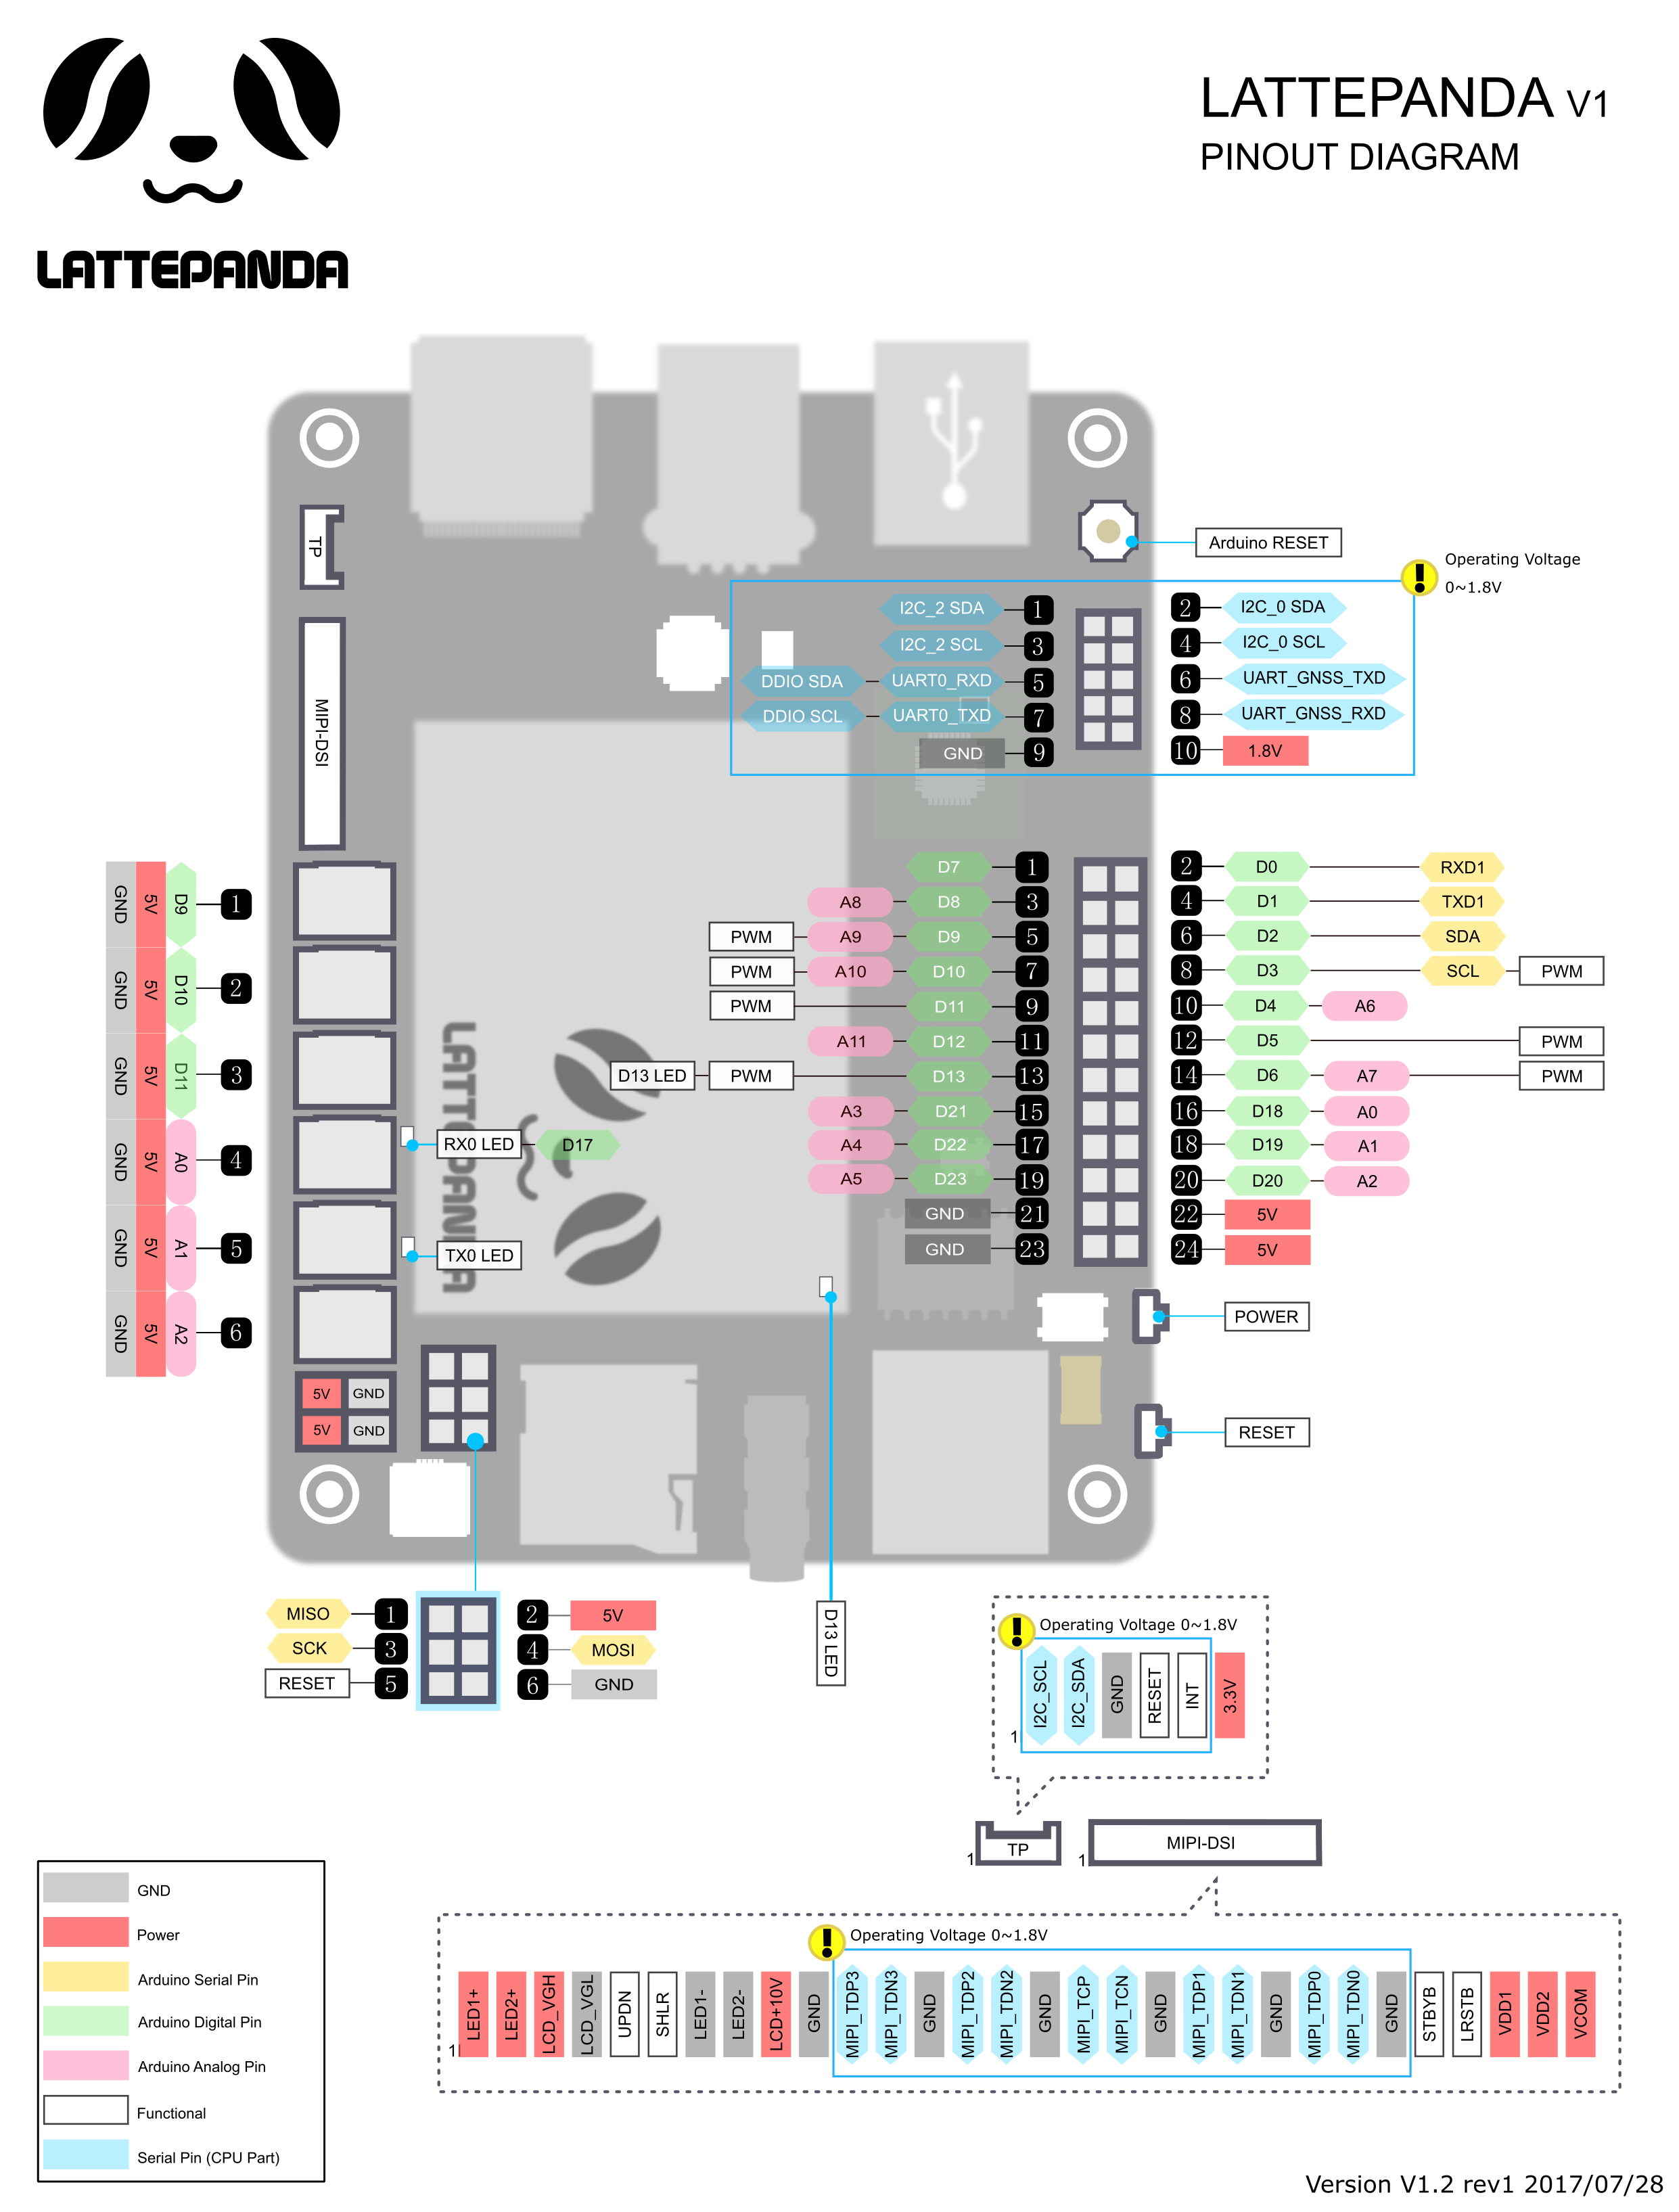
The pinout diagram below shows many options for connecting sensors and devices to LattePanda.
In this section, we show the Intel and Arduino cores working together in a simple Input / Output, event-driven Windows app. A potentiometer (input) is used to control the brightness of 2 LEDs (output). When the potentiometer is changed, one LED will brighten and the other one will dim.
- Connect a potentiometer and 2 LED modules to the White connectors.
- Connect the potentiometer to Pin A0.
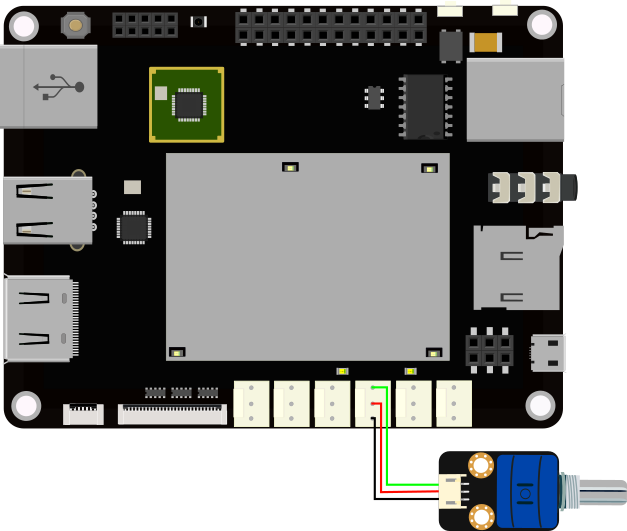
- Connect the red LED module to Pin D9.
- Connect the blue LED module to Pin D10.
- Start a New Project from the Visual Studio File menu.
- Choose C# Console App (.NET Framework) again.
- Name your project ReadPot and save it to your project directory.
- Add the Arduino.cs file from the LattePanda.Firmata download as before.
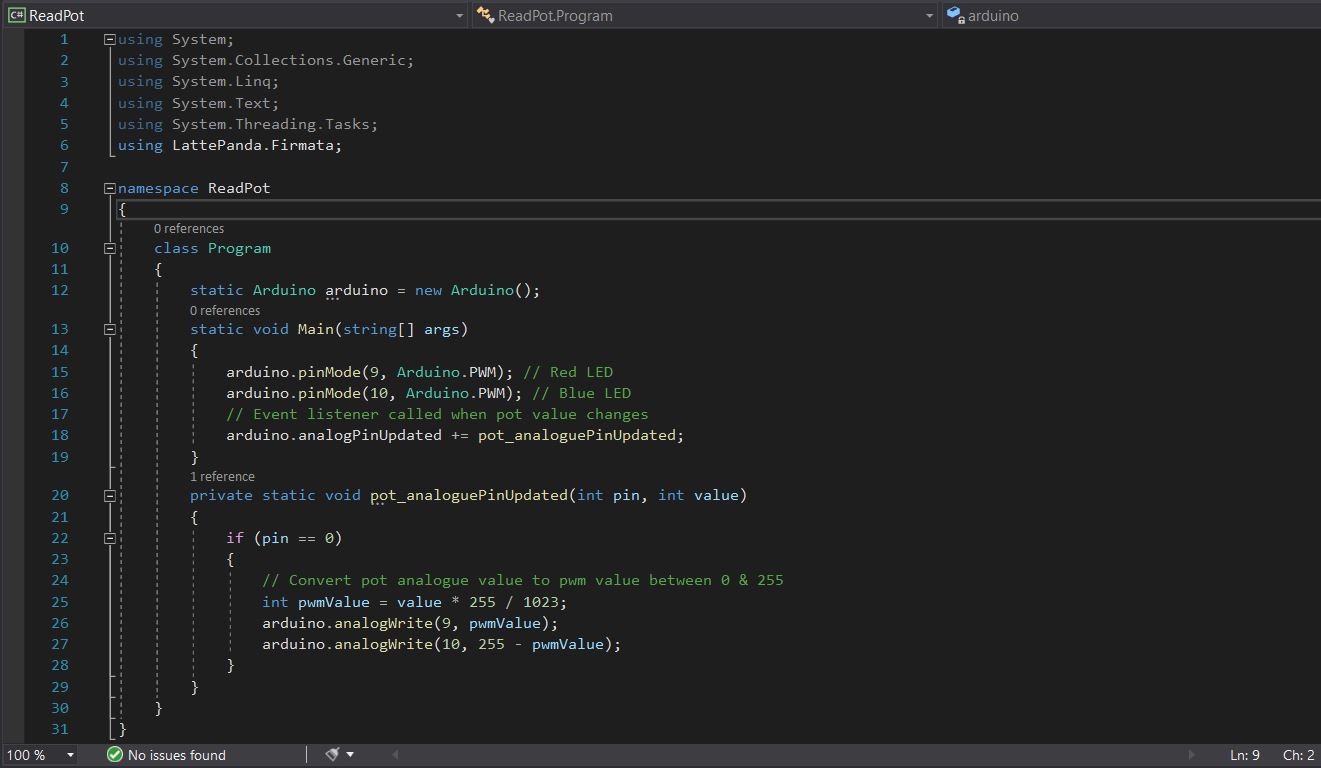
- Copy and paste the following C# code into Program.cs:
 p.p1 {margin: 0.0px 0.0px 8.0px 0.0px; font: 10.0px 'Courier New'; color: #000000; background-color: #d0d0d0} p.p2 {margin: 0.0px 0.0px 8.0px 0.0px; font: 10.0px 'Courier New'; color: #000000; background-color: #d0d0d0; min-height: 11.0px} p.p3 {margin: 0.0px 0.0px 8.0px 0.0px; font: 10.0px 'Courier New'; color: #000000} span.s1 {background-color: #d0d0d0}
 using System;
 using System.Collections.Generic;
 using System.Linq;
 using System.Text;
 using System.Threading.Tasks;
 using LattePanda.Firmata;


 namespace ReadPot
 {
     class Program
     {
         static Arduino arduino = new Arduino();
         static void Main(string[] args)
         {
             arduino.pinMode(9, Arduino.PWM); // Red LED
             arduino.pinMode(10, Arduino.PWM); // Blue LED
             // Event listener called when pot value changes
             arduino.analogPinUpdated += pot_analoguePinUpdated;
         }
         private static void pot_analoguePinUpdated(int pin, int value)
         {
             if (pin == 0)
             {
                 // Convert pot analogue value to pwm value between 0 & 255
                 int pwmValue = value * 255 / 1023;
                 arduino.analogWrite(9, pwmValue);
                 arduino.analogWrite(10, 255 - pwmValue);
             }
         }
     }
 }
Inside the main function, the LED outputs (pins 9 & 10) are set to PWM (Pulse Width Modulation). PWM creates a square wave that switches the LEDs on and off rapidly, controlling their brightness.
Following that, an event listener is setup which triggers when the potentiometer changes. The code that executes is defined in a private event handler method.
The handler checks if the potentiometer (analogue pin 0) has changed and gets its value. The Arduino core has a 10-bit analogue to digital converter so the value will be in the range 0 – 1023. PWM frequency must be scaled to an 8-bit value in the range 0 – 255. The conversion is performed and an analogue write sets the PWM frequency for the Red LED on pin 9. The PWM value is subtracted from 255, calculating the difference to set the Blue LED on pin 10. This way, one LED will increase in brightness and the other one will decrease.
When the potentiometer is turned fully clockwise, the red LED is off and the blue LED is on, at its maximum brightness.
- Run the code by clicking Start.
- Turn the potentiometer to control the LEDs.
- Click the Stop button to end debugging.
Summary
This Get Started guide has shown how to power on the LattePanda for the first time and setup a development environment for physical computing with Visual Studio and Arduino Firmata.
We started with a simple Blink test, then a more advanced application demonstrating communication between the Intel and Arduino cores. This principle can be applied to many control and sensing applications, from robots to IoT devices connected to the internet. The Intel core performs the complex logic, connectivity and GUI with the Arduino core doing the input, output.
Graphics performance was adequate but slow on the 2GB RAM model so we would recommend the 4GB RAM version for serious development, with the lower spec version suitable for embedded applications.
If you are more comfortable or need to work in a Windows environment the LattePanda could be a great starting point to learn embedded systems or to create your next Windows SMART app.
Further documentation is available on the LattePanda site: http://docs.lattepanda.com/