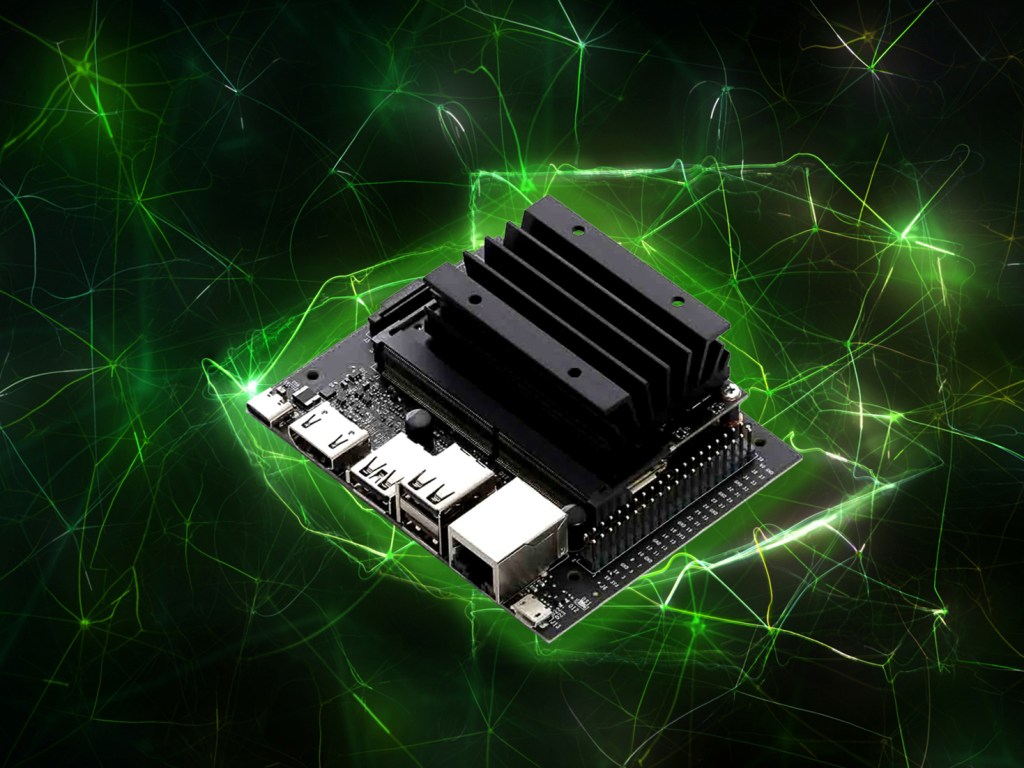

NVIDIA® Jetson Nano™ Developer Kit is a small, powerful single-board computer designed to make AI accessible to makers, learners, and embedded developers. It lets you run multiple neural networks in parallel for applications like image classification, object detection, segmentation, and speech processing.
This Getting Started will guide you through setting up your Jetson Nano and configuring it for AI image processing using the Pi Camera Module V2 with Python and C++.
What you'll need
NVIDIA Jetson Nano 4GB Development Kit
5V/4A DC power supply
64 GB MicroSDHC Card Class 10
Power cable
Host computer Windows/Mac/Linux
HDMI monitor
USB keyboard
USB mouse
HDMI cable
Ethernet cable
Internet connection and router
Additional Hardware
Jetson Nano uses a microSD card for its operating system and storage. Use a high-performance card with a minimum 32GB capacity. We used a Samsung Evo Plus 64GB UHS-1 rated at Speed Class 10 (C10) and UHS Speed Class 3 (U3) for this guide.
Power Supply
There are 3 options to power the Jetson Nano:
- Via the micro USB connector at 5V / 2A (10W). This defaults to using 2 of the 4 CPU cores only (5W power mode).
- Using the Barrel Jack at 5V / 4A (20W). Defaults to using all 4 cores (Max power mode).
- Via the GPIO header at 5V / 6A (24W) for use with higher power peripherals (Max power mode).
This guide used a 5V / 4A (20W) desktop power supply with 2.1 mm inner diameter and 5.5 mm outer diameter, centre positive plug via the Barrel Jack.
Flash microSD Card
Prepare the microSD card system image using a Windows, MacOS or Linux PC with an SD card writer or adapter. balenaEtcher was used on a Windows 10 PC to flash the image. The steps are similar for MacOS and Linux PC’s.
- Download the Jetson Nano Developer Kit SD Card Image to the PC. The image file was named nv-jetson-nano-sd-card-image-r32.3.1.zip
- Insert the microSD card into the PC.
- Start balenaEtcher, select the Jetson Nano image and SD card drive.
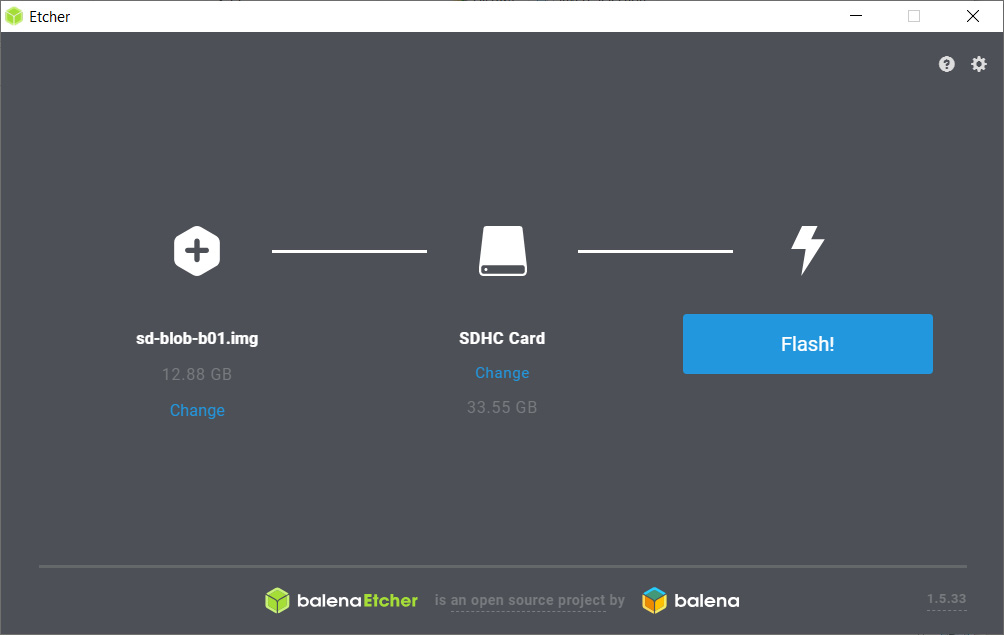
- Select Flash and wait for the image to be written and verified.
- Eject the SD card and remove it from the card reader.
Base setup and first boot
Set up the board and peripherals, including the Pi Camera module V2 for first boot.
- Unbox the Jetson Nano Developer Kit.
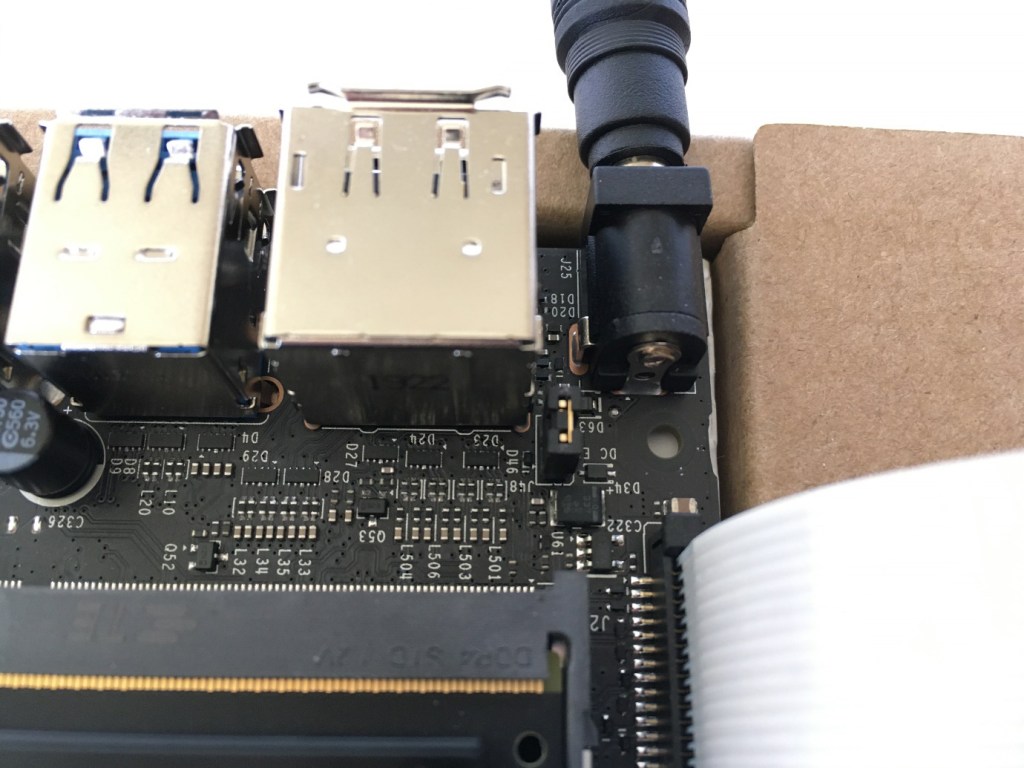
- Using the jumper, connect the J48 power select header pins to enable 5V / 4A supply via the J25 barrel jack. This will disable power supply via Micro-USB socket.
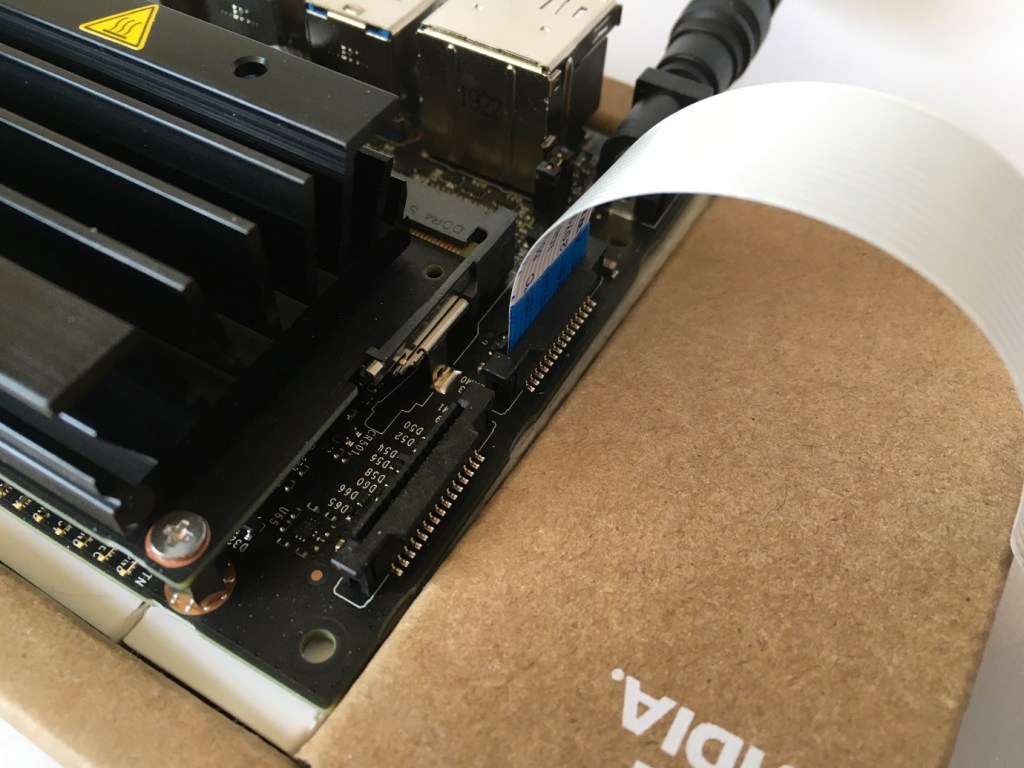
- Insert the microSD card into the card socket beneath the heat sink. This is a push and release connector.
- Attach the Pi Camera Module V2 to the CSI connector closest to the barrel jack (Camera 0). Open the connector latch by lifting the tab. Slide the ribbon cable into the connector with the blue marking facing away from the heat sink. Gently push down on the latch to secure.
- Attach the HDMI monitor, keyboard, mouse and ethernet cables.
- Insert the power cable and the Jetson Nano will boot.
- The green LED next to the USB power connector will turn on.
- Follow the on-screen prompts to set up the Ubuntu Linux system.
- Review and accept NVIDIA Jetson software EULA.
- Select system language, keyboard layout, and time zone.
- Create username, password, and computer name.
- Select APP partition size. It is recommended to use the maximum size suggested.
The Jetson Nano basic setup is now complete.
CSI-camera setup
JetsonHacks.com have provided useful scripts to test the camera operation and ensure the Python and C++ environment is setup ready for AI development.
- Open a Terminal window (Ctrl + Alt + T) and execute the following commands:
- Clone the CSI-Camera repository
Git clone https://github.com/JetsonHacksNano/CSI-Camera.git- Change directory to CSI-Camera
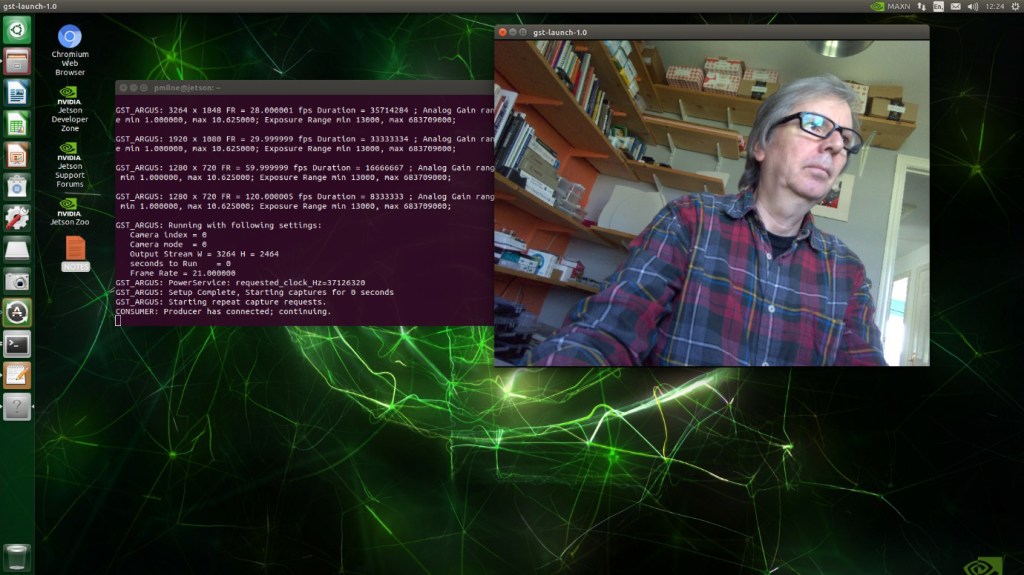
cd CSI-Camera- Test camera – this is a single GStreamer pipeline command
gst-launch-1.0 nvarguscamerasrc sensor_id=0 !

   'video/x-raw(memory:NVMM),width=3280, height=2464, framerate=21/1, format=NV12' !

   nvvidconv flip-method=2 ! 'video/x-raw, width=816, height=616' !

nvvidconv ! nvegltransform ! nveglglessink -e- Ctrl + C to exit.
Depending on the orientation of your camera, you may need to adjust the flip-method index in the above command line. Here are the different settings:
flip-method: video flip methods
Default: 0, “none”
(0): none – Identity (no rotation)
(1): counterclockwise – Rotate counter-clockwise 90 degrees
(2): rotate-180 – Rotate 180 degrees
(3): clockwise – Rotate clockwise 90 degrees
(4): horizontal-flip – Flip horizontally
(5): upper-right-diagonal – Flip across upper right/lower left diagonal
(6): vertical-flip – Flip vertically
(7): upper-left-diagonal – Flip across upper left/low
The camera should display a video image in a new window.
Python image processing
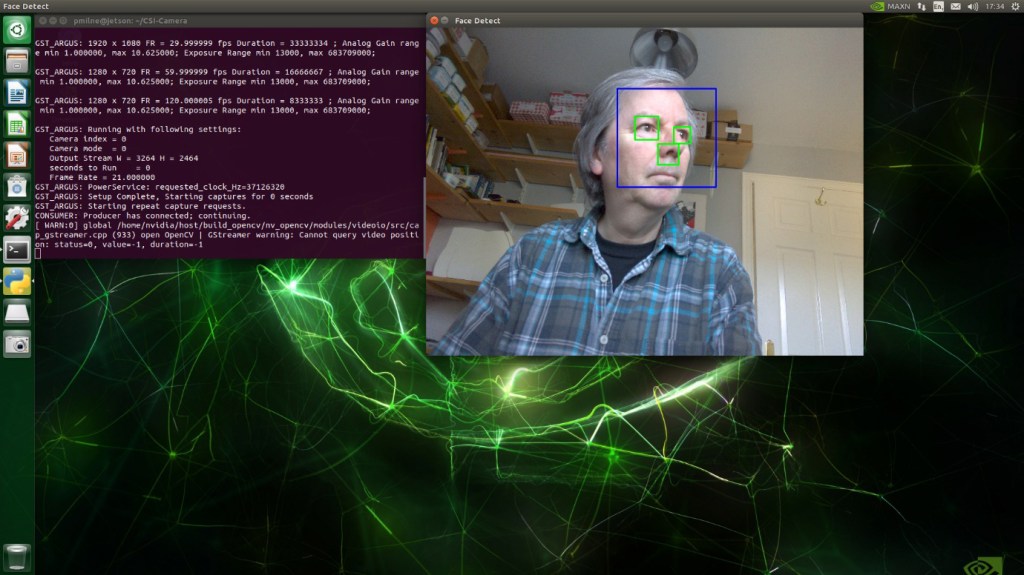
Face Recognition Test
This AI test uses Python3 libraries and a trained model to recognise faces in the video image.
- Install numpy library module.
sudo apt install python3-numpy- Install libcanberra
sudo apt install libcanberra-gtk-module- Run face_detect.py script
python3 face_detect.pyYou may need to edit the flip-method in the definition of gstreamer_pipeline in face_detect.py:
def gstreamer_pipeline(
    …
    framerate=21,
flip_method=2,- A new window will open and a blue highlight box will appear around any faces that are recognised in the video capture.
- Close window to exit.
C++ Image Processing
This test uses a C++ framework to compile a video test from simple_camera.cpp.
- Compile simple_camera with the following command line:
g++ -std=c++11 -Wall -I/usr/include/opencv4 simple_camera.cpp -L/usr/lib/aarch64-linux-gnu -lopencv_core -lopencv_highgui -lopencv_videoio -o simple_cameraYou may need to open simple_camera.cpp and edit the flip_method in the main function.
int main()
{
…
    int framerate = 60 ;
int flip_method = 2;- Run simple_camera.
./simple_camera- A new window will open displaying the video image.
- Ctrl + C to terminate the application and close the window
Safe shutdown
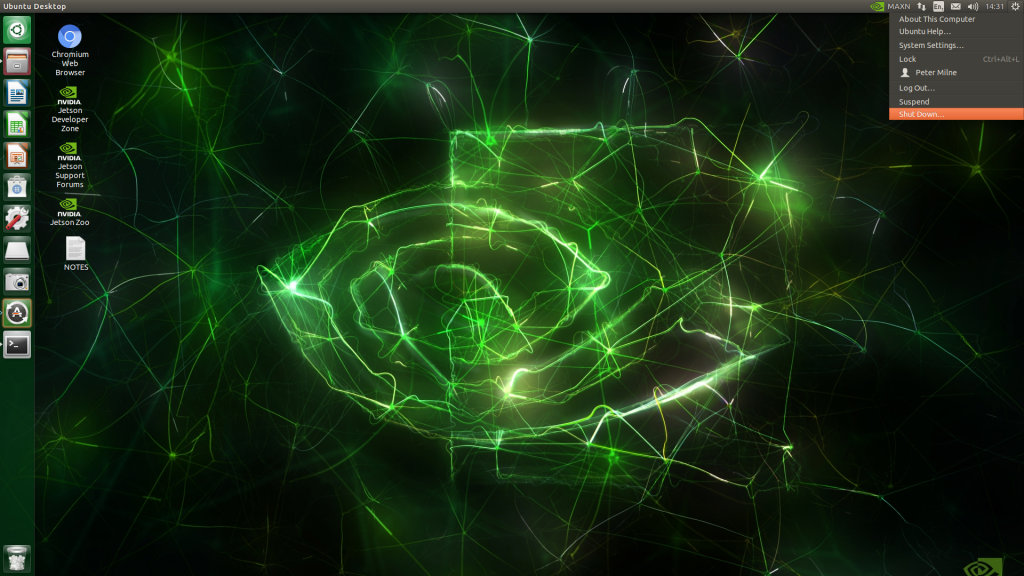
Avoid corrupting the SD card image by shutting down the system correctly.
- Click the Cog icon in the top right-hand corner of the desktop and select Shut Down.
- After a few seconds, the green power LED will go off and the power connector can be removed.
- The system is now powered off.
Summary
Congratulations! You should have successfully set up and configured your Jetson Nano Developer Kit. The Pi Camera V2 module was connected and tested using Python & C++ code examples. Everything is now ready to start exploring the AI image processing capabilities of the Jetson Nano.
NVIDIA produces excellent documentation for their products. For tutorials, a series of Deep Learning examples and projects visit: https://developer.nvidia.com/embedded/learn/get-started-jetson-nano-devkit#next