
- Step 1: Download OS
- Step 2: Imaging software
- Step 3: Flash SD card
- Step 4: Connect Ethernet
- Step 5: Boot
- Step 6: SSH
- Step 7: Change Password
- Step 8: Update System
- Step 9: Set Keyboard (Optional)
- Step 10: Set Timezone (Optional)
- Step 11: Set Hostname (Optional)
- Step 12: Reboot
- Step 13: Configure Wifi (Optional)
- Step 14: Adding Applications
- Step 15: Shutdown
- Summary
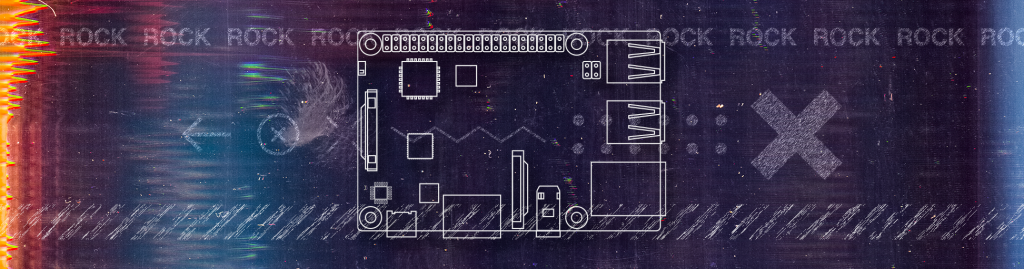
ROCK 4 boards are capable of running a number of different Linux-based operating systems. This Getting Started guide shows how to install Ubuntu Server 20.04 (Focal) onto the SD card and perform a base system setup.
Ubuntu Server has no desktop, so it is suited to applications like media servers, network storage and IoT gateways. Because there is no monitor attached, access is via remote login over SSH, and the Linux command line is used throughout.
Once the OS is set up, you can choose to add additional software from a selection of 1000’s Open Source applications in the Ubuntu repository.

Parts Needed to set up the Ubuntu Server with ROCK 4 SE board:
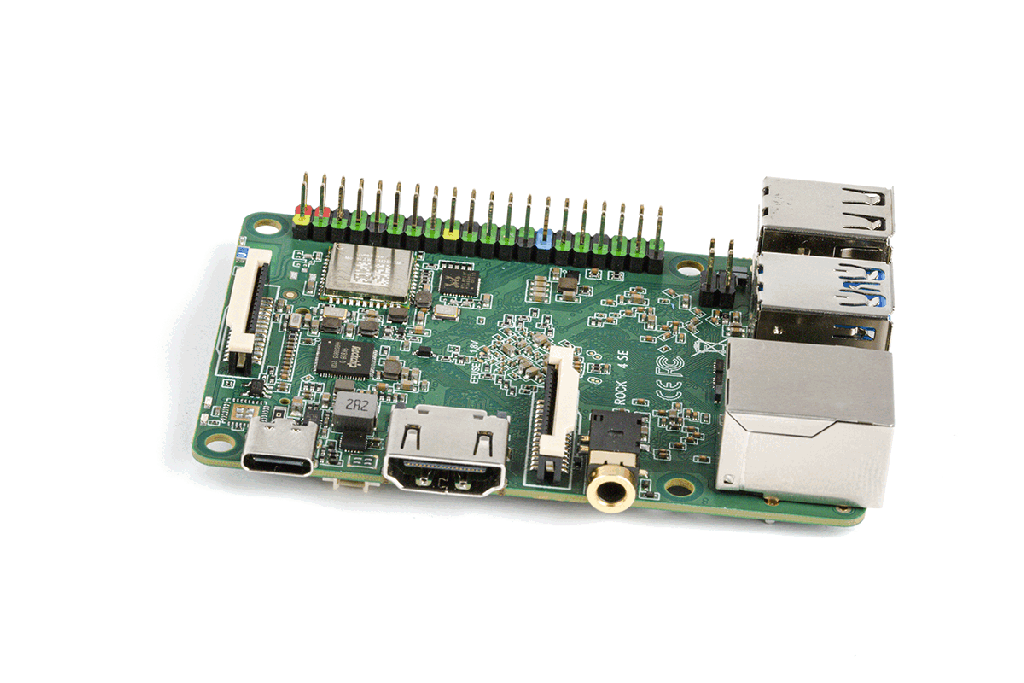
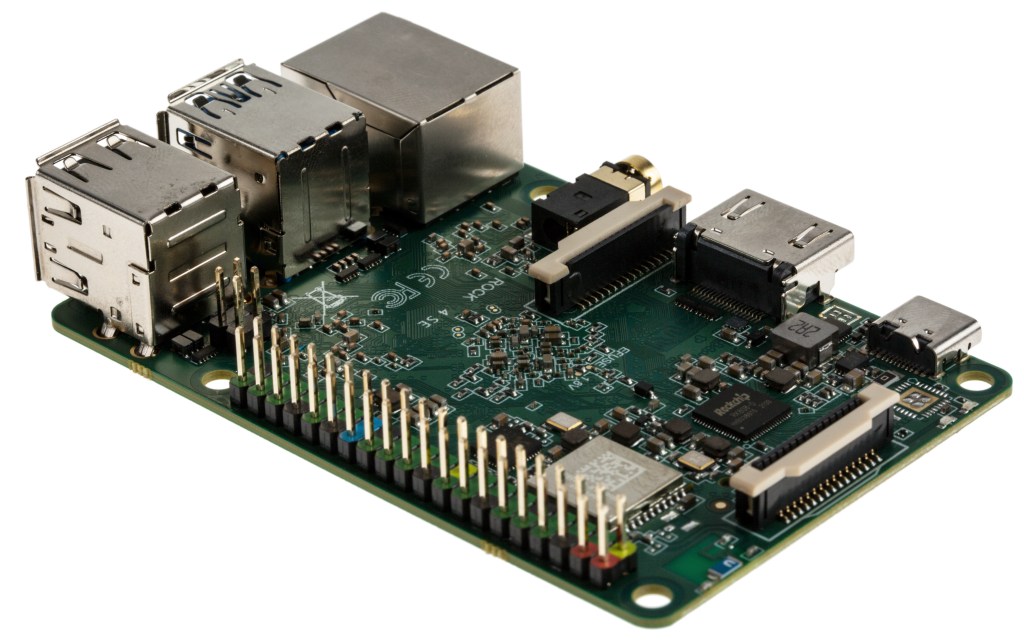
ROCK 4 SE Single-Board Computer
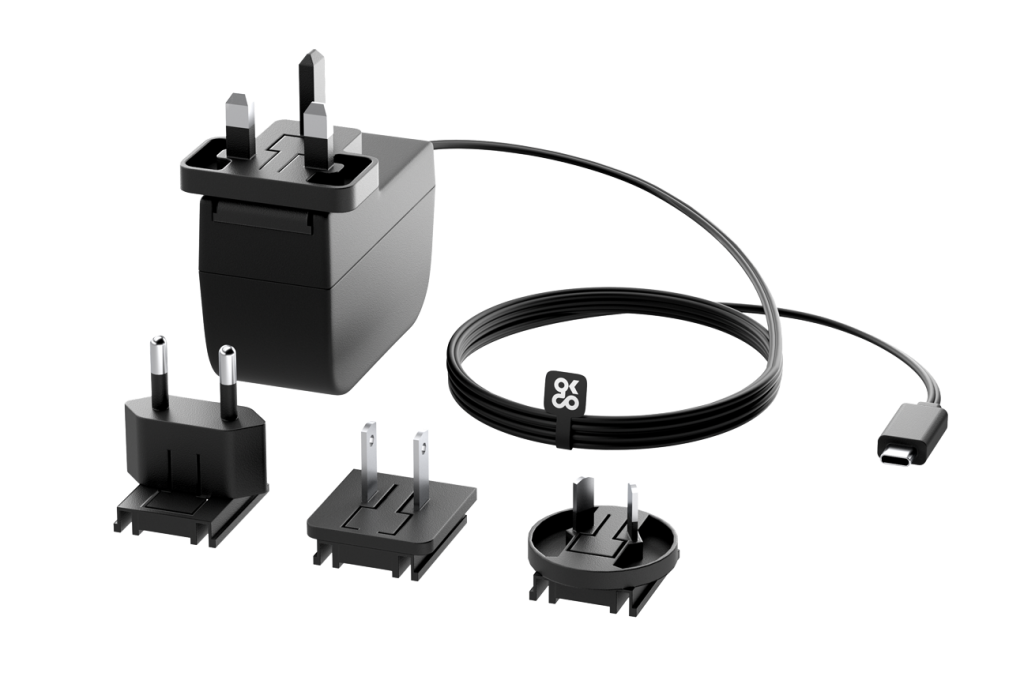
OKdo Universal Power Supply
All parts needed to get started:
- The ROCK 4 SE single-board computer
- 5.1V / 3A Universal Power Supply 15.3W USB-C
- 32 GB MicroSDHC Card Class 10
- Host computer Windows/Mac/Linux
- HDMI cable – Full size
- Cat 5 Ethernet cable
- Internet connection and router
Step 1: Download OS
Download a copy of the Ubuntu Server OS for your ROCK 4 SE board. You can do this using either a Windows, Mac or Linux PC or laptop host. Save the image file to somewhere convenient on your storage. We used the Downloads directory on a Windows PC:
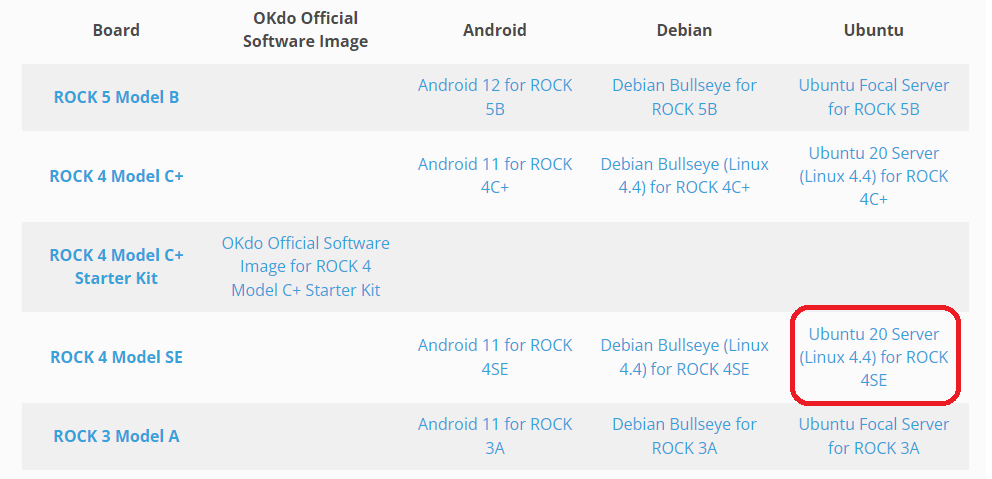
- Visit the OKdo Software & Downloads hub and click the Ubuntu Server link for your ROCK 4 model SE
- Allow the image file to download – it is about 300 MB in size
- The filename will be similar to this depending on the version date (the same image is used for the 4B board); rockpi-4b-ubuntu-focal-server-arm64-20220804-0446-gpt.img.xz
- There is no need to expand the compressed file
Step 2: Imaging software
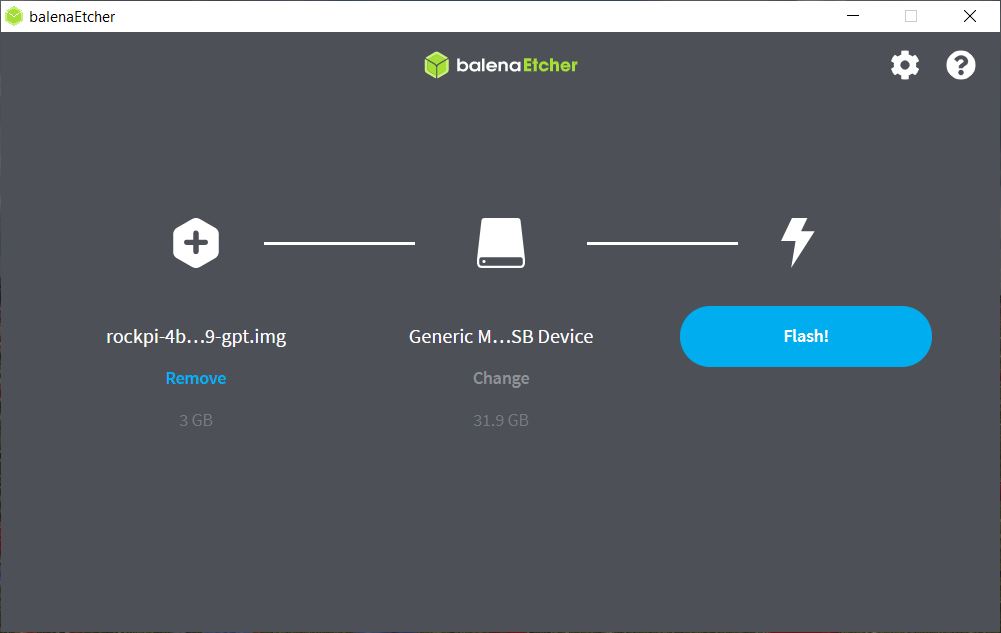
OS images need special purpose imaging software to flash the image file to the SD card. We recommend the Open Source balenaEtcher, which is available for Windows, Mac or Linux. It also performs some validation checks on the flashed image:
- Visit the download page at balenaEtcher and install the version for your host operating system.
Step 3: Flash SD card
Now everything is ready to flash the OS image onto the microSD card. Use a good quality, branded, 32GB card. We use SanDisk Ultra cards which are fast, durable and reliable.
- Insert the SD card into a card reader on your host PC
- Open balenaEtcher and select the OS image you downloaded in Step 1
- Select the SD card to flash – be careful to choose the correct one
- Click the Flash button
- Wait for the imaging and validation process to complete, then eject the SD card and remove it from your host PC.
Tip: If your system asks you to format the card at any time, just click cancel.
Step 4: Connect Ethernet
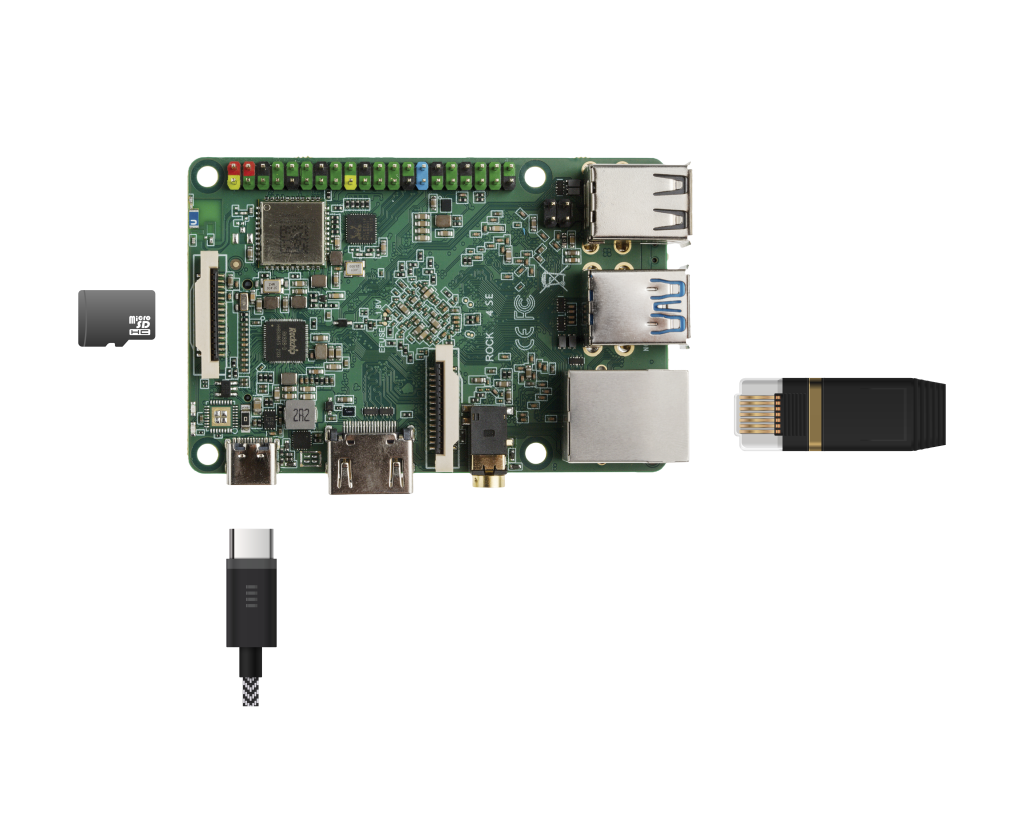
Now that your SD card is prepared, connect your ROCK 4 SE board to Ethernet to allow network access. No keyboard, monitor or mouse is required.
- Connect a CAT5 Ethernet cable to the Ethernet port and your internet Router / Switch
- Carefully insert the SD card into the card socket with the gold pins on the card facing upwards
- Connect the power supply to the USB-C socket but do not plug it in yet.
Tip: We recommend fitting stand-offs to the board mounting holes to lift the board off the bench and to improve cooling.
Step 5: Boot
Check that everything is prepared as in the steps above and plug in the power supply into the ROCK 4 SE board and wait for it to boot:
- The green power LED will turn on and the blue activity LED should start blinking after a few seconds
- The first boot can take 2 – 3 minutes. Just be patient!
- Once the boot process has finished, the board should be visible on your Router admin page.
Open a Terminal on your host PC and check you can reach the ROCK 4 SE board over the network by sending a ping request using the hostname above:
ping rockpi-4bYou should get a response showing the IP address of the ROCK 4 on your network and other details. On some networks you may need to use Multicast DNS (mDNS) by adding .local to the hostname:
ping rockpi-4b.localOr even the IP address in place of the hostname:
ping 192.168.1.194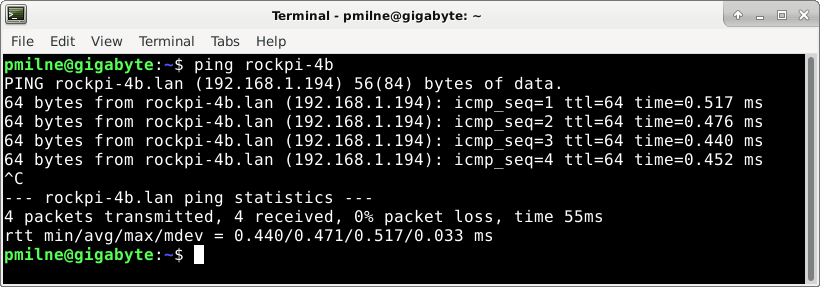
Step 6: SSH
Once connectivity with your board is confirmed, you can start a remote session over SSH. This gives you secure access to the ROCK 4 SE from a Terminal on your host PC.
- Open a Terminal session on your host PC and perform a remote login as user rock using the hostname or IP address in Step 5.
ssh rock@rockpi-4b- When prompted, use the default password rock.
- You should now see that your shell prompt has changed to show that you are logged into your ROCK 4 SE remotely.
Tip: Windows 10 users can use SSH directly from the CMD window – no need to install Putty or other terminal emulators.

Step 7: Change Password
In the remote session, change the default password. Use a secure password to keep your system safe. Passwords should consist of a min 8 characters, including one or more characters from each of the following sets:
- Upper and lower-case characters
- digits 0 thru 9
- punctuation marks
passwd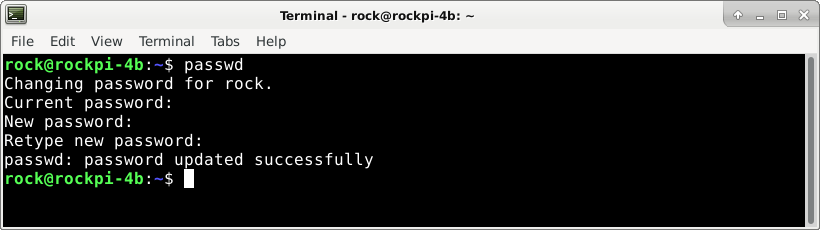
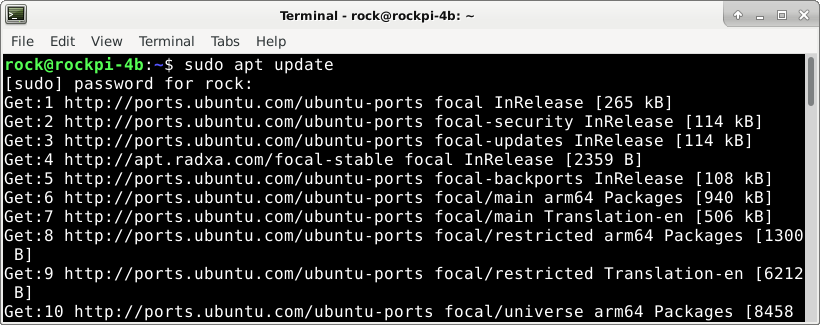
Step 8: Update System
The OS and installed software are constantly updated to maintain system security and fix issues. It is recommended to perform a system update from the remote session initially and regularly after that:
sudo apt update
sudo apt upgrade
Tip: All important system commands require root privileges which can be obtained temporarily by prepending the sudo command – the rock user password should be used.
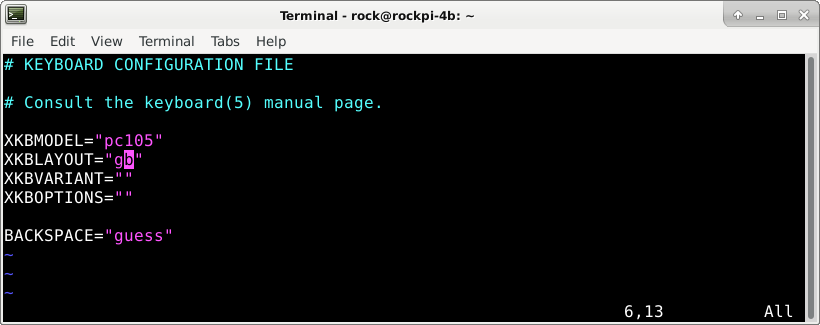
Step 9: Set Keyboard (Optional)
The correct keyboard setting should be detected from your SSH session. You can change it by editing the XKBLAYOUT value in /etc/default/keyboard using vi or nano, for example:
XKBLAYOUT=”us” to XKBLAYOUT=”gb”
The keyboard setting will change after rebooting.
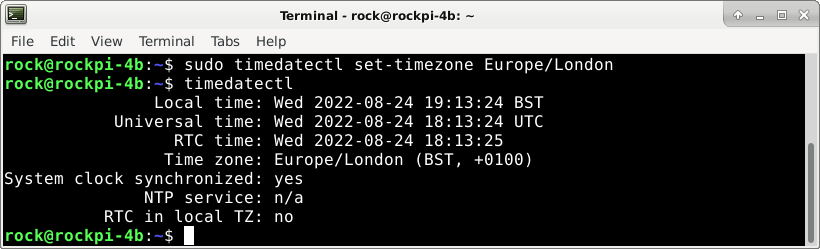
Step 10: Set Timezone (Optional)
The default time setting is Universal Time (UTC). Local Time can be set this using the timedatectl in the remote setting:
- Display a list of available timezones (press F key to page forward):
timedatectl list-timezones- Set your local timezone from the list using this command with the example for London, UK:
sudo timedatectl set-timezone Europe/London- Check the settings with the following command:
timedatectlTip: Linux commands are case sensitive, so follow any capitalization exactly, and once you have typed a few characters, press the Tab key to use autocompletion.
Step 11: Set Hostname (Optional)
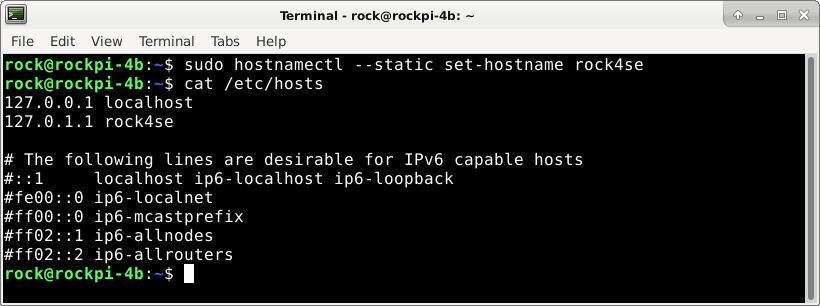
You can set a new Hostname for your system using the hostnamectl command. (use only ascii characters, numbers and hyphens) – we set ours to rock4se to match our board:
sudo hostnamectl --static set-hostname rock4seYou should also replace any old entries in the hosts file by editing /etc/hosts:
sudo vi /etc/hostsThe hostname will change following a reboot.
Step 12: Reboot
Now that everything is configured how you want, reboot the system from your remote session. The session will be automatically closed by the remote host.
sudo rebootOnce the system comes back up SSH in again – if you changed the hostname use the new name:
ssh rock@ock4se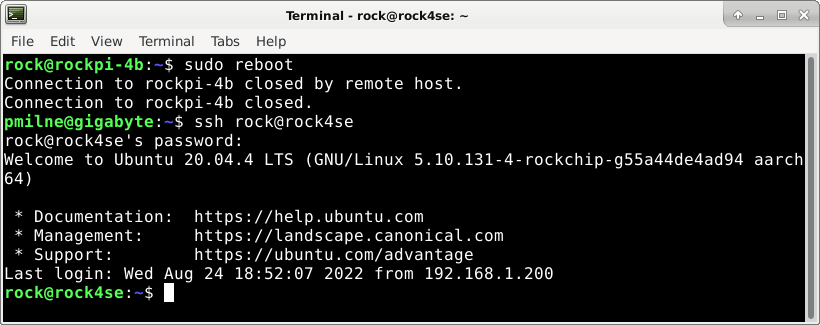
Step 13: Configure Wifi (Optional)
Wifi can be configured from the Terminal as superuser with the following commands, replacing the text in angle brackets with your own settings:
sudo nmcli radio wifi onScan AP’s:
sudo nmcli device wifiActivate connection:
sudo nmcli device wifi connect ”<ssid>” password “<password>”Wifi settings are stored in the file /etc/NetworkManager/system-connections/<SSID>.nmconnection
Wifi can be turned off with:
sudo nmcli radio wifi offStep 14: Adding Applications
The Ubuntu package repository contains over 60K Open Source software applications, most of which will work with the ROCK 4 boards. You can search or browse the repo.
Once you know the name of the package, it can be installed from a remote session, along with any dependencies: Here we are installing the Emacs editor:
sudo apt install emacs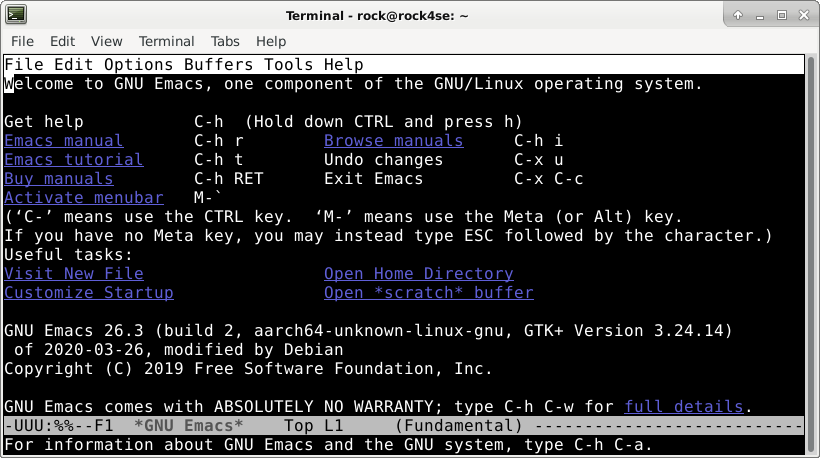
Step 15: Shutdown
Always shut down your system properly before removing the power supply to avoid corrupting the SD card. Perform the poweroff command and wait for the blue activity LED to stop flashing before removing power:
sudo poweroffSummary
If you have followed all the steps in this guide, you will have a nicely configured Ubuntu Server system for your ROCK 4 SE board. This is a base setup for a network-attached device that you can administer over SSH from anywhere on your network.
Check out our other projects for ideas of how to build out a full application for your ROCK 4 board.
Are you ready to ROCK? A wide range of ROCK single-board computers, compute modules and accessories are coming into our shop soon. Find the perfect Raspberry Pi alternative in our ROCK Shop.
ROCK Shop
Looking for something else? Learn how to download and install Debian Bullseye (64-bit) onto an SD card and perform the basic system setup using the ROCK 4 SE single-board computer.
Are you interested to buy ROCK in bulk? Get in touch with our Sales team to learn more.
Discover our Blogs, Getting Started Guides and Projects for more inspiration!