
This Get Started guide with Arduino Nano RP2040 Connect steps through installing the Arduino IDE on a host PC, adding support for the Arduino Nano RP2040 Connect board and testing that it all works. We finish by installing a demo app that acts as a Wifi Access Point and simple Web Server controlling the onboard RGB LED.
Arduino has added Wifi and Bluetooth capability to the Raspberry Pi RP2040 microcontroller with the Arduino Nano RP2040 Connect making the board ideal for IoT and edge Machine Learning applications.
The RP2040 microcontroller features a dual core 32-bit Arm® Cortex®-M0+ processor clocked at 133 MHz with Wifi / Bluetooth provided by a separate U-blox® Nina W102 module and integrated antenna. Arduino also added in ST Micros LSM6DSOX 6-axis IMU, a Microchip ATECC608A Cryptographic Coprocessor and an ST Micro MP34DT05 Omnidirectional Digital Microphone, RGB LED and reset button.
I/O is plentiful with 20 Digital, 8 Analogue, 20 PWM and 20 External Interrupts. UART, SPI and I2C busses provide peripheral connectivity.
Operating voltage is 3.3V with an input voltage range of 5 – 21V at VIN. The board is available with and without male header pins.
What you'll need
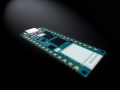
Arduino Nano RP2040 Connect
1m USB Type-A to Micro-B USB Noodle Cable
Host computer Windows/Mac/Linux
Internet connection and router
Arduino IDE
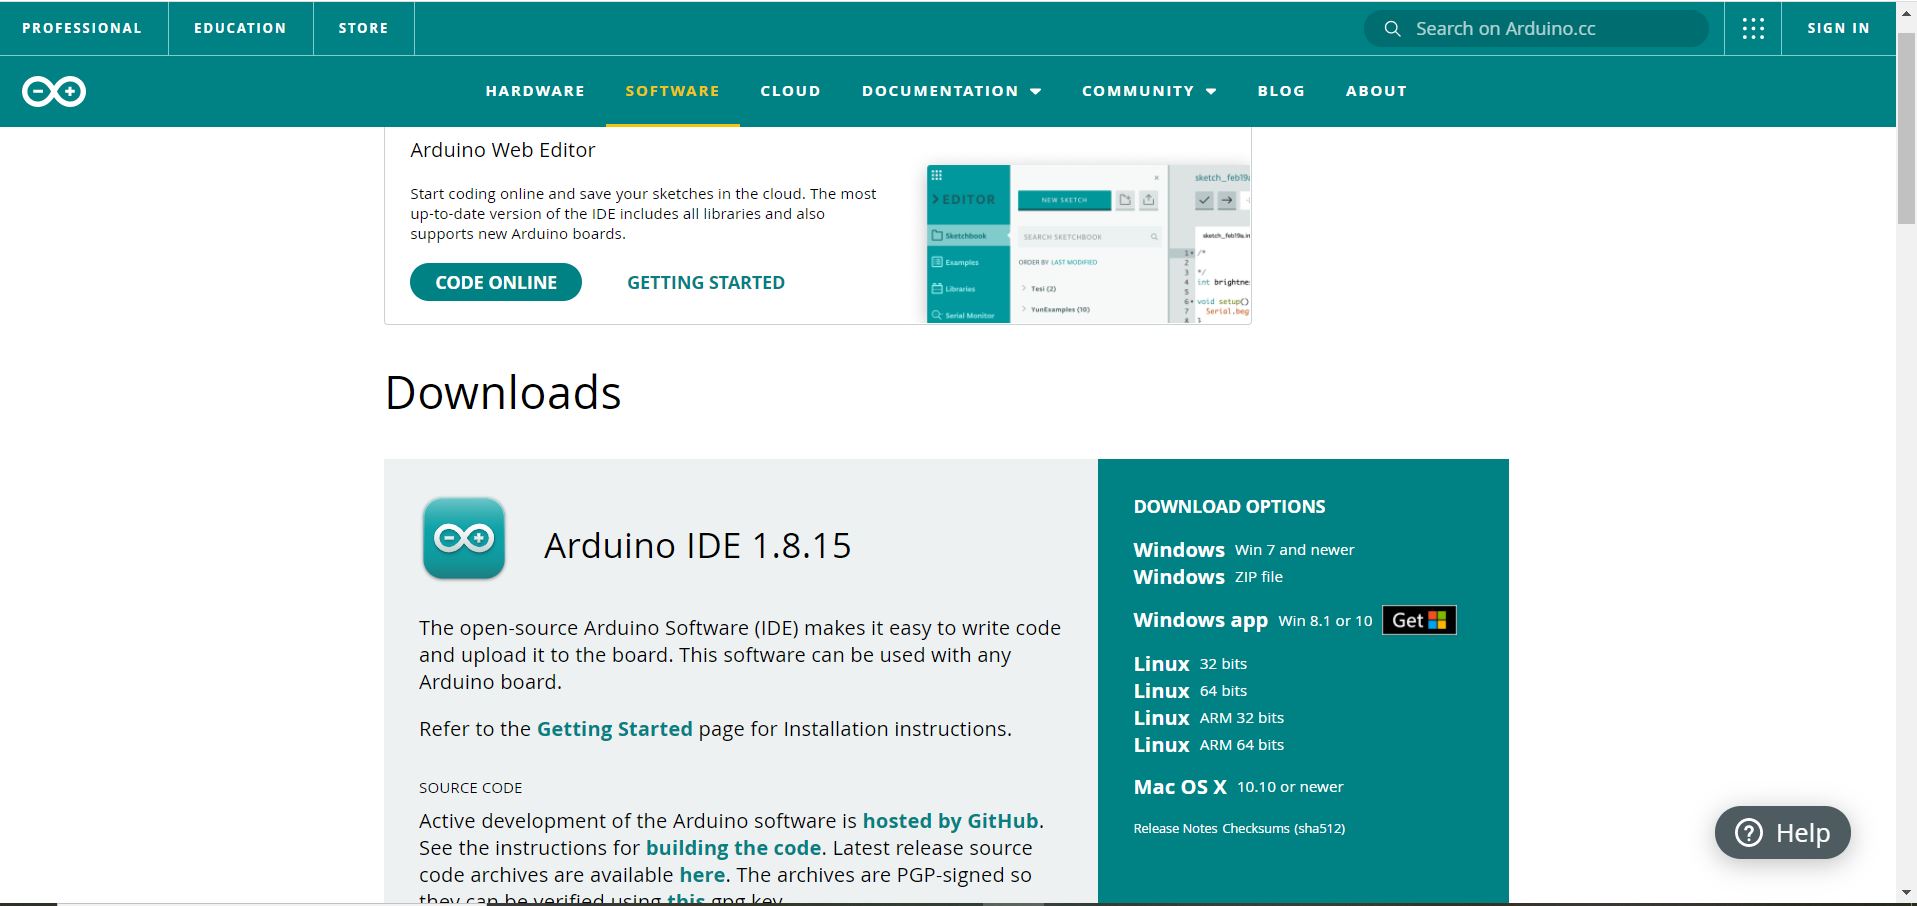
Download and install the latest version of the Arduino IDE for your host computer from the Arduino downloads page: https://www.arduino.cc/en/software
Board package
When the installation completes, open the IDE from your Apps menu or desktop icon and add support for the Arduino Nano RP2040 Connect:
- Open the board manager from Tools > Board – Board Manager.
- Search for rp2040 and install the Arduino Mbed OS Nano Boards package – accept any pop-ups.
- Close the board manager and return to the IDE.

Blink
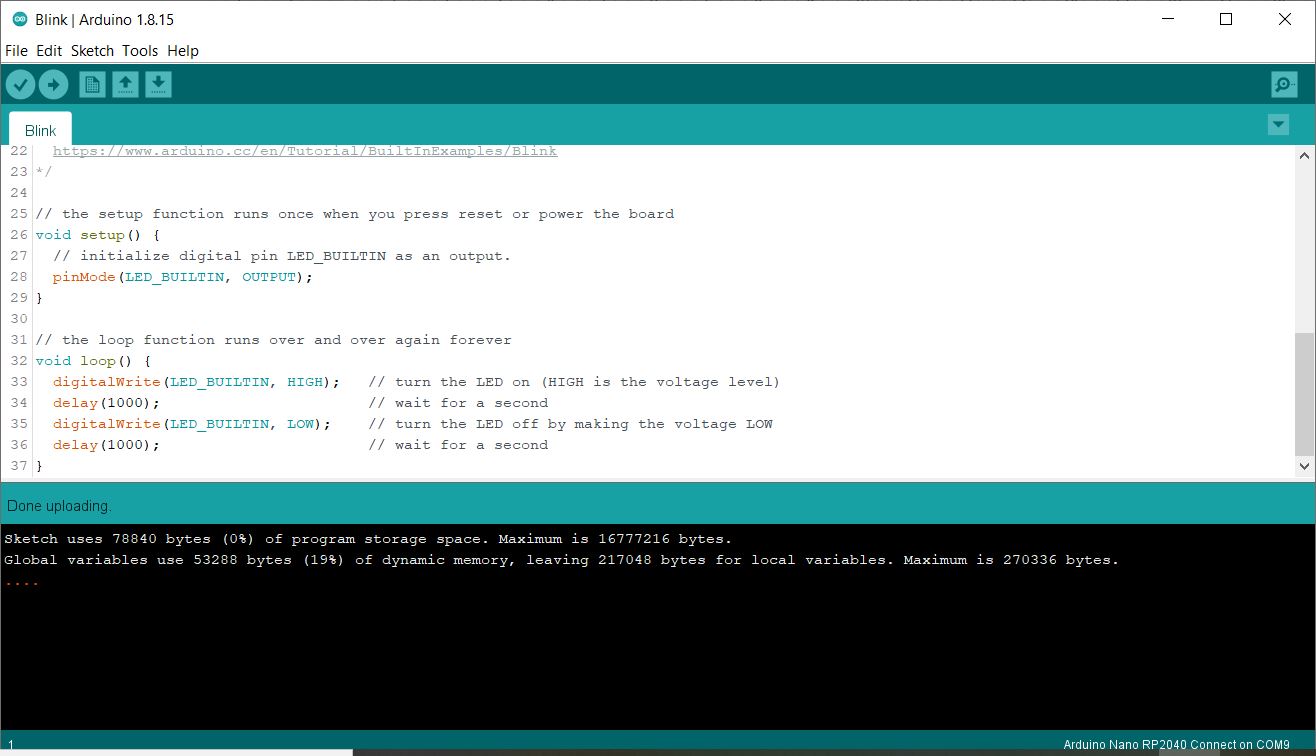
Test the development environment is working as expected by loading the Blink sketch which blinks the on-board LED:
- Connect your Arduino Nano RP2040 Connect using a micro-USB cable to the host PC and let any drivers load.
- The factory default code should run. The green power LED should be solid, the built-in LED should be flashing orange and the RGB LED should cycle through red/green/blue.
- From the file menu open File > Examples > Basics > Blink to load the code into the editor.
- Open Tools > Board > Arduino Mbed OS Nano Boards > Arduino Nano RP2040 Connect to set the board type.
- Select the port from Tools > Port > Com9 (Arduino Nano RP2040 Connect) or whatever port your device connected to.
- Click the Upload button to transfer the code to the Arduino Nano RP2040 Connect.

- Wait for the Done Uploading message in the IDE.
Now the orange LED next to the USB connector should blink once every second, meaning your code was successfully uploaded.
WifiNINA
Support for the U-blox® Nina Wifi & Bluetooth module is provided by the Arduino WifiNINA library. This must be installed from the Library Manager:
- Click Tools -> Manage Libraries to open the Library Manager.
- Search for WifiNINA and install the latest version of the library.
To use the module in your code, include the following at the top of the listing:
 #include <SPI.h>
#include <WiFiNINA.h> 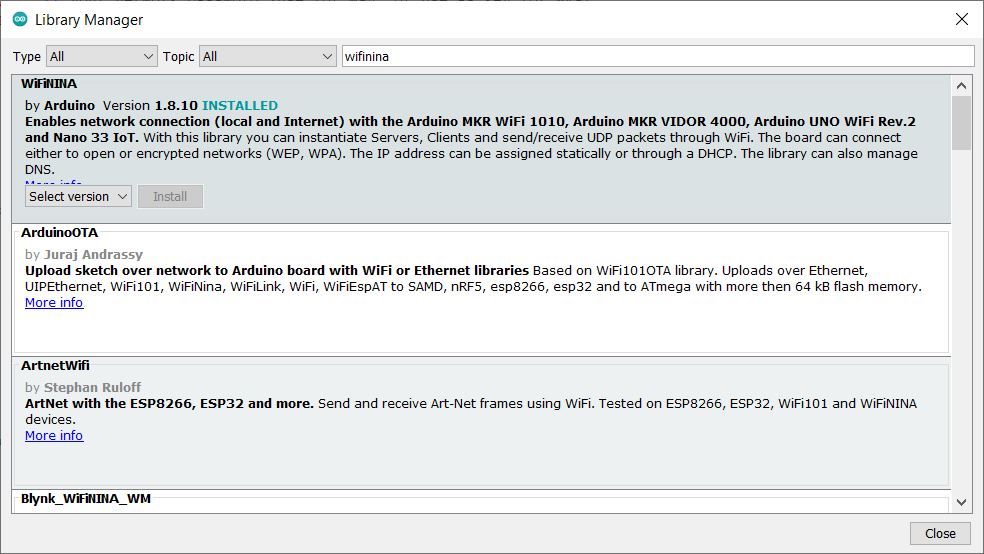
Web Server Example
Arduino has provided example code that turns the Arduino Nano RP2040 Connect into a wireless Access Point (AP) and simple Web Server.
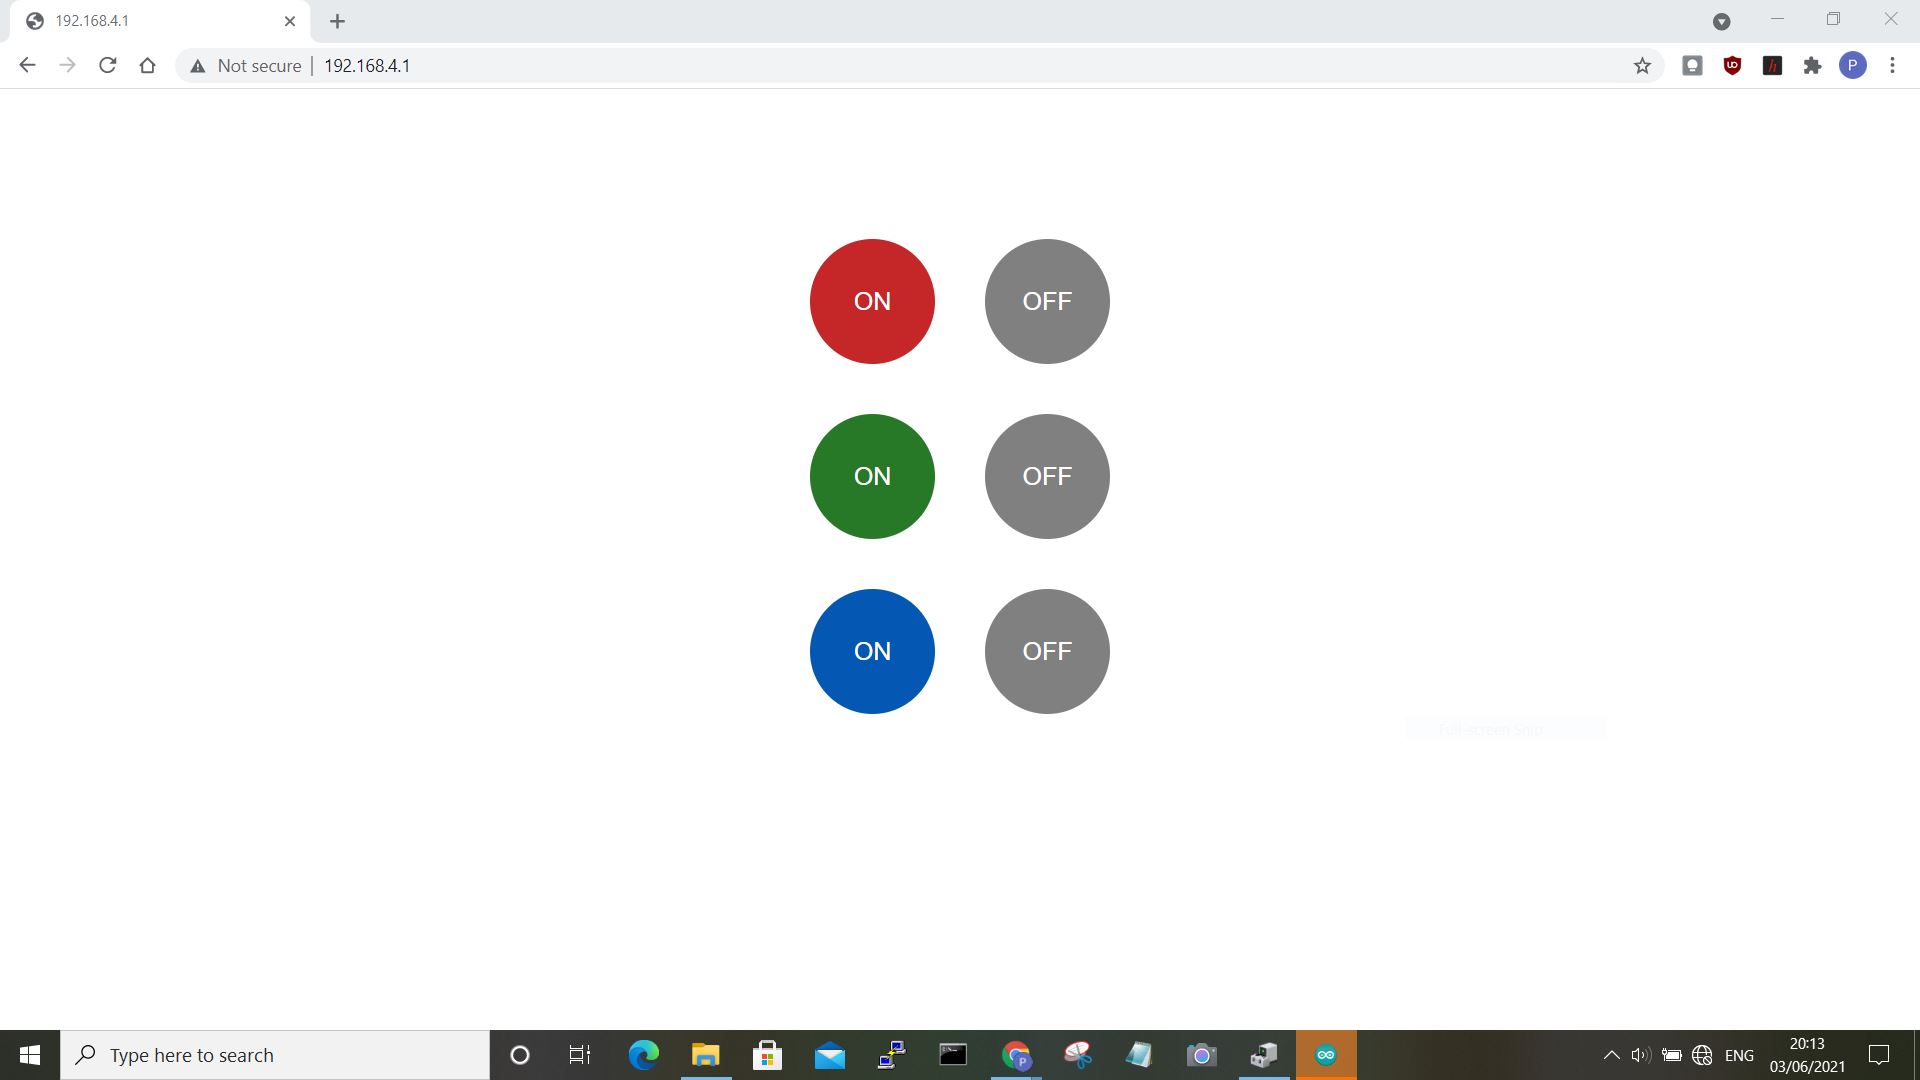
The Arduino Nano RP2040 Connect broadcasts an SSID which you can connect to using a PC or Mobile. A simple web page can then be found at address 192.168.4.1 displaying buttons that control the RGB LED on the board.
To install the example copy and paste the listing below into a new sketch and upload it – you can change the SSID and password:
//code by Karl Söderby

 #include <SPI.h>
 #include <WiFiNINA.h>


 char ssid[] = "nano-rp2040";        // your network SSID (name)
 char pass[] = "VeryDifficultToCrack#@!";    // your network password (use for WPA, or use as key for WEP)
 int keyIndex = 0;                // your network key index number (needed only for WEP)


 int status = WL_IDLE_STATUS;
 WiFiServer server(80);


 void setup() {
   //Initialize serial and wait for port to open:
   Serial.begin(9600);
   while (!Serial) {
     ; // wait for serial port to connect. Needed for native USB port only
   }


   Serial.println("Access Point Web Server");


   pinMode(LEDR, OUTPUT);
   pinMode(LEDG, OUTPUT);
   pinMode(LEDB, OUTPUT);


   // check for the WiFi module:
   if (WiFi.status() == WL_NO_MODULE) {
     Serial.println("Communication with WiFi module failed!");
     // don't continue
     while (true);
   }


   String fv = WiFi.firmwareVersion();
   if (fv < WIFI_FIRMWARE_LATEST_VERSION) {
     Serial.println("Please upgrade the firmware");
   }


   // by default the local IP address will be 192.168.4.1
   // you can override it with the following:
   // WiFi.config(IPAddress(10, 0, 0, 1));


   // print the network name (SSID);
   Serial.print("Creating access point named: ");
   Serial.println(ssid);


   // Create open network. Change this line if you want to create an WEP network:
   status = WiFi.beginAP(ssid, pass);
   if (status != WL_AP_LISTENING) {
     Serial.println("Creating access point failed");
     // don't continue
     while (true);
   }


   // wait 10 seconds for connection:
   delay(10000);


   // start the web server on port 80
   server.begin();


   // you're connected now, so print out the status
   printWiFiStatus();
 }


 void loop() {
   // compare the previous status to the current status
   if (status != WiFi.status()) {
     // it has changed update the variable
     status = WiFi.status();


     if (status == WL_AP_CONNECTED) {
       // a device has connected to the AP
       Serial.println("Device connected to AP");
     } else {
       // a device has disconnected from the AP, and we are back in listening mode
       Serial.println("Device disconnected from AP");
     }
   }

   WiFiClient client = server.available();   // listen for incoming clients


    if (client) {                             // if you get a client,
     Serial.println("new client");           // print a message out the serial port
     String currentLine = "";                // make a String to hold incoming data from the client
     while (client.connected()) {            // loop while the client's connected
       if (client.available()) {             // if there's bytes to read from the client,
         char c = client.read();             // read a byte, then
         Serial.write(c);                    // print it out the serial monitor
         if (c == '\n') {                    // if the byte is a newline character


           // if the current line is blank, you got two newline characters in a row.
           // that's the end of the client HTTP request, so send a response:
           if (currentLine.length() == 0) {
             // HTTP headers always start with a response code (e.g. HTTP/1.1 200 OK)
             // and a content-type so the client knows what's coming, then a blank line:
             client.println("HTTP/1.1 200 OK");
             client.println("Content-type:text/html");
             client.println();


             // the content of the HTTP response follows the header:
             client.print("<style>");
             client.print(".container {margin: 0 auto; text-align: center; margin-top: 100px;}");
             client.print("button {color: white; width: 100px; height: 100px;");
             client.print("border-radius: 50%; margin: 20px; border: none; font-size: 20px; outline: none; transition: all 0.2s;}");
             client.print(".red{background-color: rgb(196, 39, 39);}");
             client.print(".green{background-color: rgb(39, 121, 39);}");
             client.print(".blue {background-color: rgb(5, 87, 180);}");
             client.print(".off{background-color: grey;}");
             client.print("button:hover{cursor: pointer; opacity: 0.7;}");
             client.print("</style>");
             client.print("<div class='container'>");
             client.print("<button class='red' type='submit' onmousedown='location.href=\"/RH\"'>ON</button>");
             client.print("<button class='off' type='submit' onmousedown='location.href=\"/RL\"'>OFF</button><br>");
             client.print("<button class='green' type='submit' onmousedown='location.href=\"/GH\"'>ON</button>");
             client.print("<button class='off' type='submit' onmousedown='location.href=\"/GL\"'>OFF</button><br>");
             client.print("<button class='blue' type='submit' onmousedown='location.href=\"/BH\"'>ON</button>");
             client.print("<button class='off' type='submit' onmousedown='location.href=\"/BL\"'>OFF</button>");
             client.print("</div>");


             // The HTTP response ends with another blank line:
             client.println();
             // break out of the while loop:
             break;
           } else {    // if you got a newline, then clear currentLine:
             currentLine = "";
           }
         } else if (c != '\r') {  // if you got anything else but a carriage return character,
           currentLine += c;      // add it to the end of the currentLine
         }


         // Check to see if the client request was /X
         if (currentLine.endsWith("GET /RH")) {
           digitalWrite(LEDR, HIGH);
         }
         if (currentLine.endsWith("GET /RL")) {
           digitalWrite(LEDR, LOW);
         }
         if (currentLine.endsWith("GET /GH")) {
           digitalWrite(LEDG, HIGH);
         }
         if (currentLine.endsWith("GET /GL")) {
           digitalWrite(LEDG, LOW);
         }
         if (currentLine.endsWith("GET /BH")) {
           digitalWrite(LEDB, HIGH);
         }
         if (currentLine.endsWith("GET /BL")) {
           digitalWrite(LEDB, LOW);
         }
       }
     }
     // close the connection:
     client.stop();
     Serial.println("client disconnected");
   }
 }


 void printWiFiStatus() {
   // print the SSID of the network you're attached to:
   Serial.print("SSID: ");
   Serial.println(WiFi.SSID());


   // print your WiFi shield's IP address:
   IPAddress ip = WiFi.localIP();
   Serial.print("IP Address: ");
   Serial.println(ip);


   // print where to go in a browser:
   Serial.print("To see this page in action, open a browser to http://");
   Serial.println(ip);


 }
Connecting
Now connect to the AP and open the page hosted there:
- Open the Serial Monitor by clicking on the magnifier glass button and make sure it’s set to 9600 baud rate – this will display debug output.

- With the host PC or a Mobile with Wifi, scan for the AP SSID and connect using the password shown at the top of the listing.
- Open a web browser and go to http://192.168.4.1
- Switch the RGB LED colours using the buttons on the page.
Summary
Arduino Nano RP2040 Connect adds Wifi and Bluetooth capability to the Raspberry Pi RP2040 microcontroller making it a capable IoT device for connecting sensors and actuators to the Cloud and deploying Machine Learning at the Edge.
At the time of writing we tested the Arduino Web Editor but found several difficulties so we recommend using the Standard IDE for development at the moment but do try this out as support matures.
All the excellent documentation for the Arduino Nano RP2040 Connect can be found at a single point: https://docs.arduino.cc/hardware/nano-rp2040-connect