
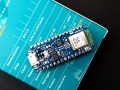
In this guide, you’ll learn how to get started with ArduinoNano 33 BLE to develop applications to run on the board, learning how to program the Nano 33 BLE as a BLE beacon that broadcasts a greeting message that can be read on a mobile phone.
The Nano 33 BLE adds Bluetooth Low Energy (BLE) capabilities to your projects, in a very small PCB footprint. It supports BLE, Bluetooth and NFC connectivity.
Download Arduino iDE
- Go to https://www.arduino.cc/en/main/software and download the correct IDE for your operating system, Windows in our case.
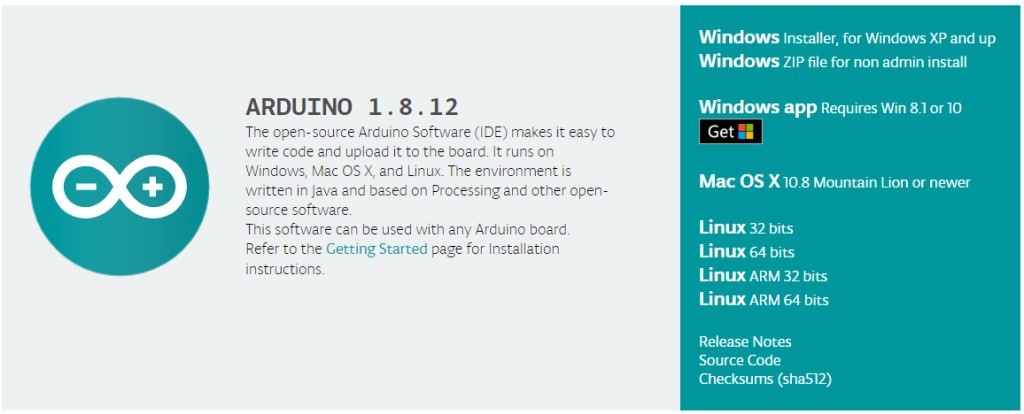
- Once downloaded, install the package by opening it and following any prompts.
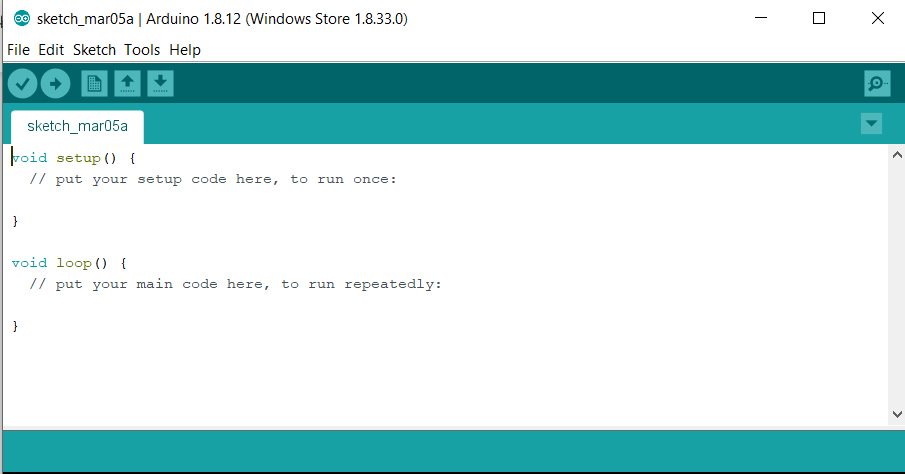
- After installation, you will be presented with a window containing a blank “sketch” which is an Arduino program.
Configure IDE
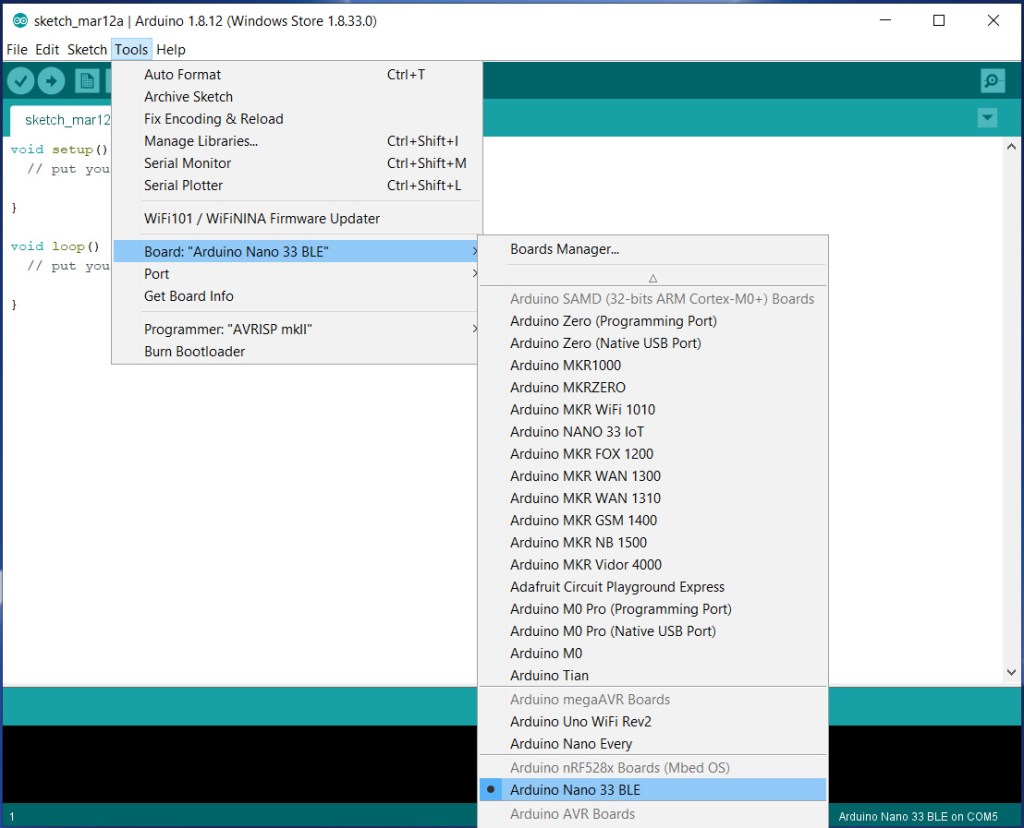
Before you start programming you’ll need to configure the IDE to work with your specific Arduino model.
- On the main menu of Arduino IDE, go to Tools>Boards>Boards Manager.

- Enter nano 33 ble in the search window and install Arduino nRF528x Boards (Mbed OS).
- The installation process will take a little while, once finished, click on close.
- Connect the Arduino to your host computer using the USB cable.

The green power LED on the Arduino will come on and the orange LED will be flashing, indicating that the board is powered up and running the default Blink sketch which comes pre-installed
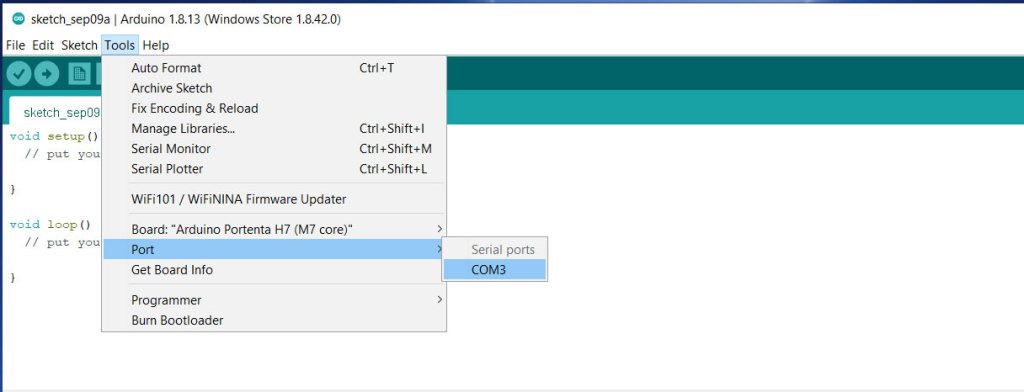
- Go to Tools>Board and select Arduino 33 BLE from the menu
- From Tools>Port, select COM (Arduino NANO 33 BLE), on a Mac it will appear as dev/cu.usbmodem14101 (Arduino Nano 33 BLE)
Programme the Arduino
- Go to Sketch>Include library>Manage Libraries and install ArduinoBLE
- Copy the code example below into the IDE window
/*
Arduino Nano 33 BLE Getting Started
BLE peripheral with a simple Hello World greeting service that can be viewed
on a mobile phone
Adapted from Arduino BatteryMonitor example
*/
#include <ArduinoBLE.h>
static const char* greeting = "Hello World!";
BLEService greetingService("180C"); // User defined service
BLEStringCharacteristic greetingCharacteristic("2A56", // standard 16-bit characteristic UUID
BLERead, 13); // remote clients will only be able to read this
void setup() {
Serial.begin(9600); // initialize serial communication
while (!Serial);
pinMode(LED_BUILTIN, OUTPUT); // initialize the built-in LED pin
if (!BLE.begin()) { // initialize BLE
Serial.println("starting BLE failed!");
while (1);
}
BLE.setLocalName("Nano33BLE"); // Set name for connection
BLE.setAdvertisedService(greetingService); // Advertise service
greetingService.addCharacteristic(greetingCharacteristic); // Add characteristic to service
BLE.addService(greetingService); // Add service
greetingCharacteristic.setValue(greeting); // Set greeting string
BLE.advertise(); // Start advertising
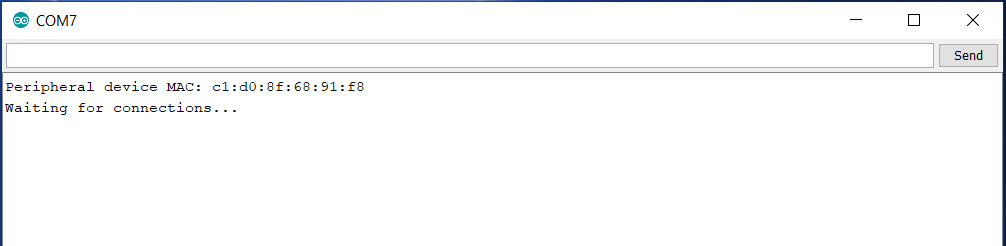
Serial.print("Peripheral device MAC: ");
Serial.println(BLE.address());
Serial.println("Waiting for connections...");
}
void loop() {
BLEDevice central = BLE.central(); // Wait for a BLE central to connect
// if a central is connected to the peripheral:
if (central) {
Serial.print("Connected to central MAC: ");
// print the central's BT address:
Serial.println(central.address());
// turn on the LED to indicate the connection:
digitalWrite(LED_BUILTIN, HIGH);
while (central.connected()){} // keep looping while connected
// when the central disconnects, turn off the LED:
digitalWrite(LED_BUILTIN, LOW);
Serial.print("Disconnected from central MAC: ");
Serial.println(central.address());
}
- Upload the code to the Arduino by going to Sketch>Upload or by clicking the right side pointing arrow on the IDE window
- The bottom pane of the IDE will show the code compiling then the TX and RX LEDs on the Arduino will flash for a few seconds while the code uploads. Once it’s done it will run automatically on the Arduino.
BLE mobile app
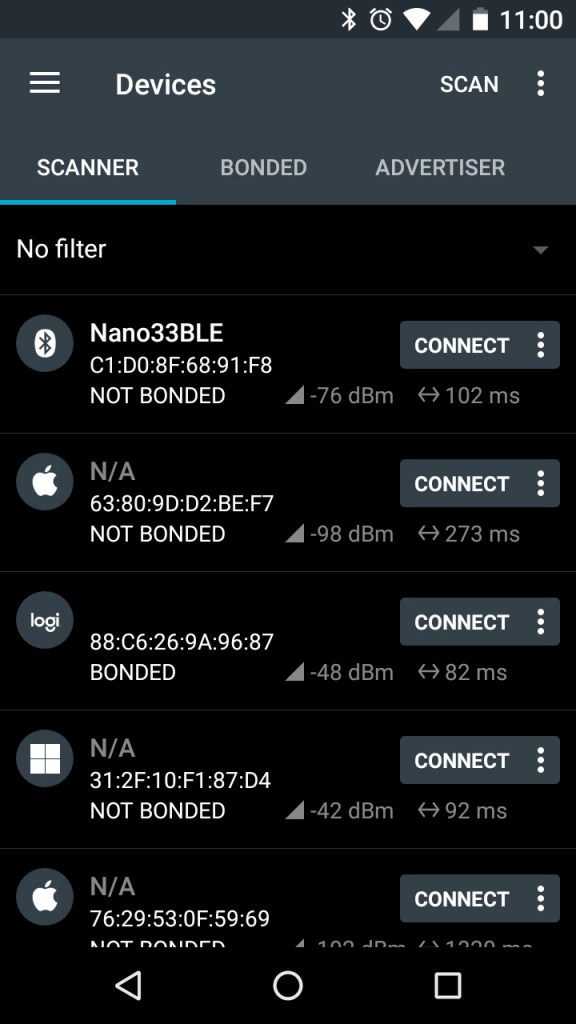
- On your mobile, install Nordic Semiconductors nRF Connect App. There are Android and IOS versions.
- In the Arduino IDE open Serial Monitor by clicking on the magnifying glass icon on the top right.
The Nano will start sending BLE advertising packets and wait for a Central (Mobile Phone) to connect.
- In the nRF App on your mobile select Scan and you should see Nano33BLE as a device you can connect to.
- Connect to the Nano and select the Unknown Service.
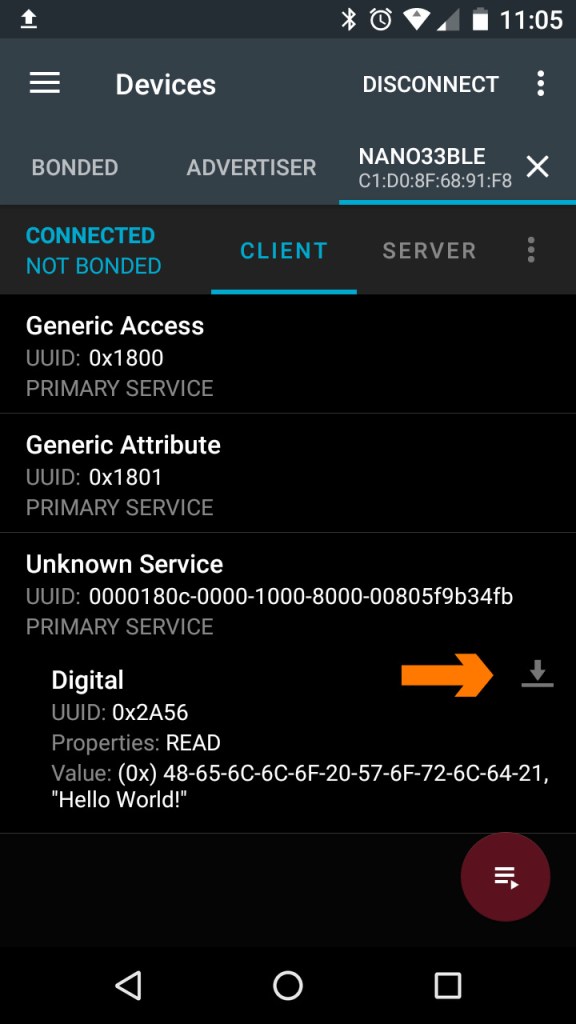
- Touch the down arrow next to the Digital characteristic and it will read the “Hello World!” message being broadcast by the Nano33BLE
Summary
Congratulations! You have set up the Arduino IDE for use with your NANO 33 BLE board and configured it to act as a BLE Peripheral device that broadcasts a simple message using the BLE standard.
The Nordic Semiconductors nRF Connect App is a very useful tool for working with BLE devices to view the information they are broadcasting. You can drill down through the BLE services to individual characteristics and the data they contain.
You can explore many more examples available from within the IDE by opening them from File -> Examples. These can give you a starting point to modify and adapt code for your own projects.