How to add a Raspberry Pi 7-inch display to ROCK Single Board Computers
Author: Peter Milne, engineer and Linux advocate with probably more SBCs than a Chandrayaan-3 moon lander.
ROCK Single Board Computers are compatible with many of the accessories and add-on boards available for the Raspberry Pi and the popular Raspberry Pi 7-inch display with a touch screen is one of them.
This guide shows you how to easily connect any of your ROCK boards to the 7-inch display.
We cover the physical connection, any additional cables you may need, and how to use the Radxa Rsetup utility built into the Debian images to make the display work.
There is even a PVC case available that can be adapted to house the ROCK and display, making mounting simple.
Applications include control panels, kiosks, and building portable computers.
Here’s a summary of board support and additional FPC Cable if required:
| ROCK | FPC Cable | Cable SKU | Device Tree Binary |
| ROCK 3A | Standard | rock-3a-raspberrypi-7inch-touchscreen.dtbo | |
| ROCK 3C | Standard | rock-3c-raspberrypi-7inch-touchscreen.dtbo | |
| ROCK 4SE | Standard | rock-4-raspi-7inch-touchscreen.dtbo | |
| ROCK 4C+ | MIPI DSI Adapter Cable | 2564995 | rock-4c-plus-raspi-7inch-touchscreen.dtbo |
| ROCK 5A | MIPI DSI Adapter Cable | 2564995 | rock-5a-raspi-7inch-touchscreen.dtbo |
| ROCK 5B | MIPI DSI Adapter Cable | 2564995 | rock-5b-raspi-7inch-touchscreen.dtbo |
Step 1: Hardware
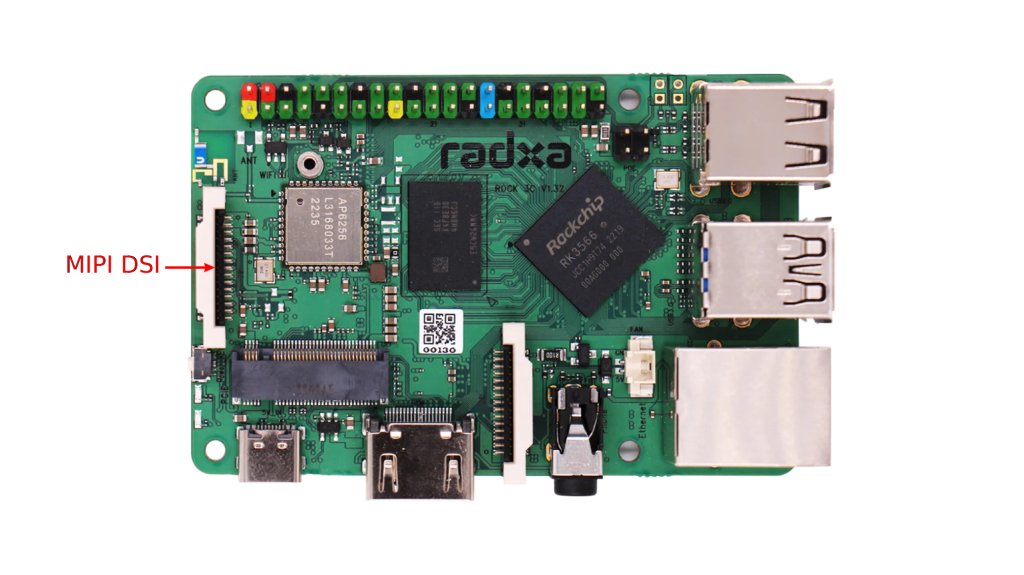
ROCK 3A / 3C and 4SE all have full size MIPI DSI connectors located at the edge of the board above the SD card connector. These all use the FPC Cable supplied with the 7-inch display.
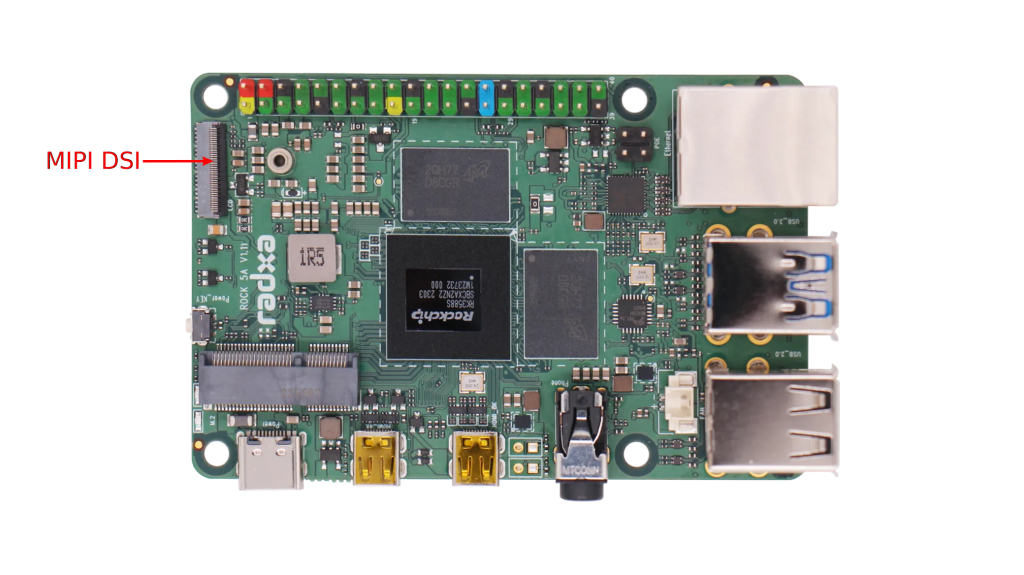
ROCK 4C+ and 5A both have a mini MIPI DSI connector located near the top corner of the board.
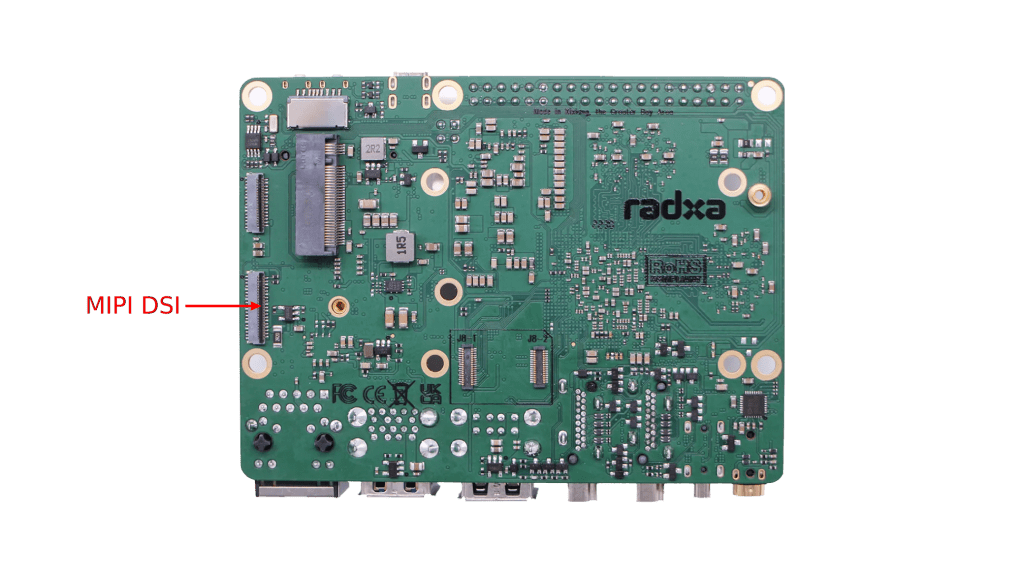
ROCK 5B has a mini MIPI DSI connector located on the underside of the board close to the centre line.
ROCK 4C+ / 5A & 5B all require an FPC Adapter Cable sold separately to the 7-inch display.
Step 2: Mounting
All the boards with the exception of the ROCK 5B can be mounted directly on the back of the display using the stand-offs provided.
With slight modification to the connector outlets, these will fit into the Raspberry Pi Display Case sold separately.
Due to the larger form factor of the ROCK 5B a custom mounting solution is required.
Step 3: Connections
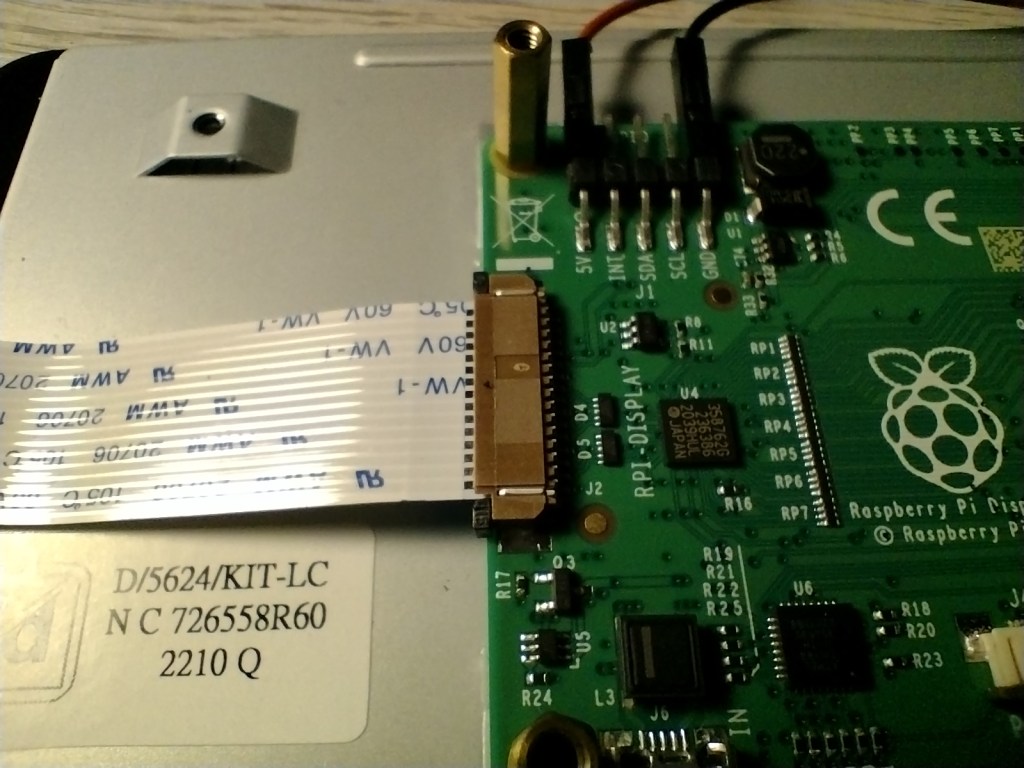
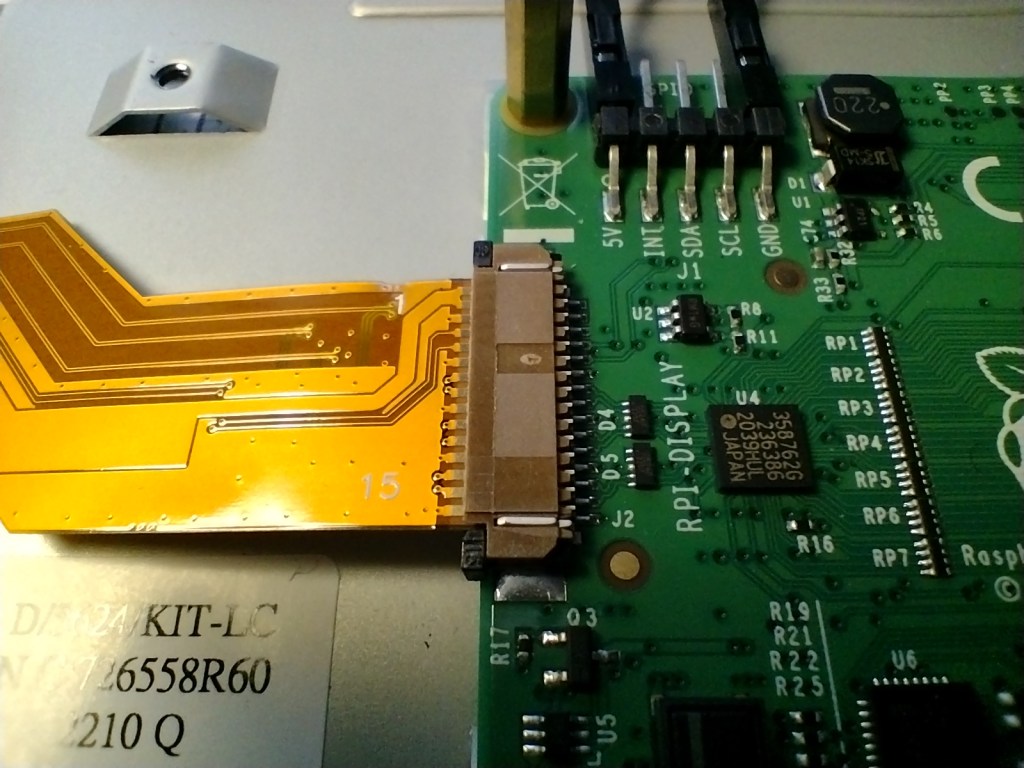
With the display facing downwards, connect the FPC Cable to the connector on the driver board attached to the back of the display.
ROCK 3A / 3C & 4SE boards
These all use the supplied FPC Cable as shown below:
- Gently pull back the black tab on the connector to open it.
- Insert the FPC Cable with the metal strips on the cable facing upwards and the blue marker strip facing down.
- Push evenly on the connector tabs until they are flush with the connector body to close.
ROCK 4C+ / 5A & 5B boards
These all use the FPC Adapter Cable as shown below. This is not supplied with the display:
- Gently pull back the black tab on the connector to open it.
- Insert the FPC Cable with the metal strips on the cable facing upwards and the black marker strip facing down.
- Push evenly on the connector tabs until they are flush with the connector body to close.
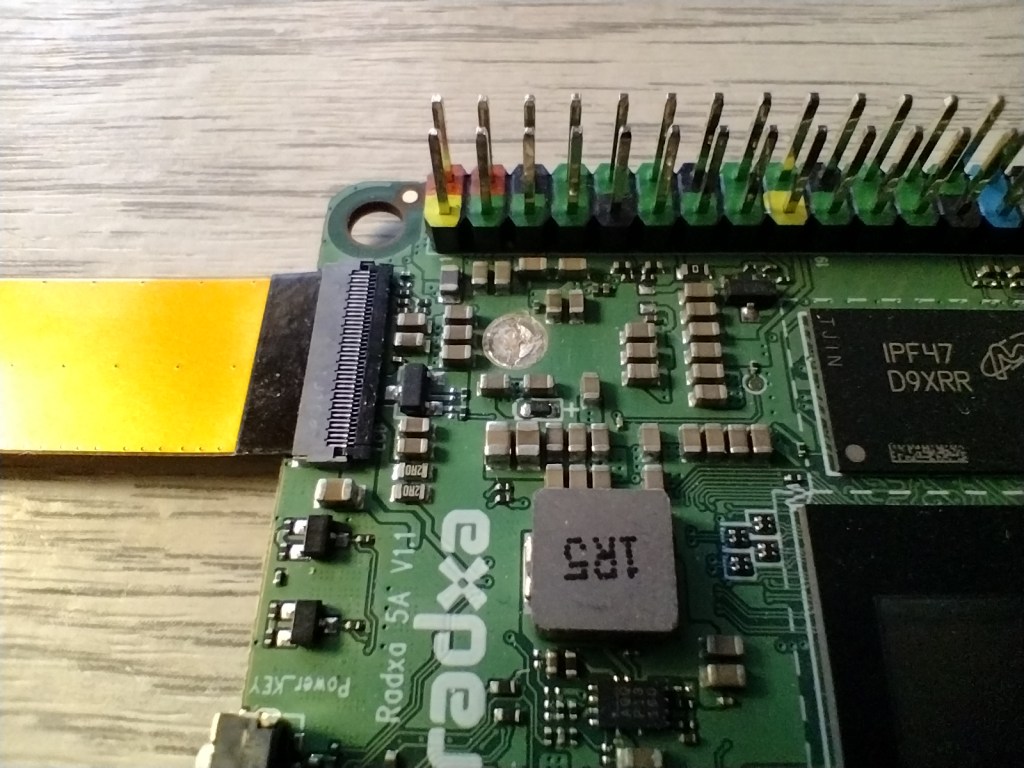
Connect the Black and Red power leads supplied with the display to the GND and 5V pins on the driver board’s 5-pin as shown below:
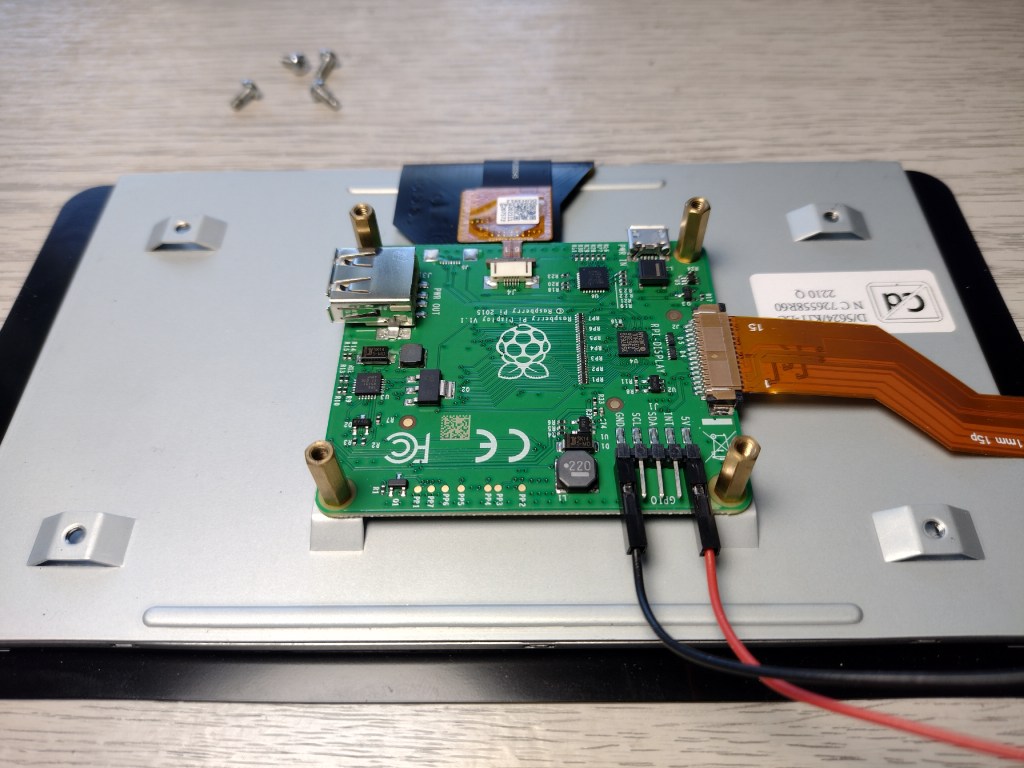
Now attach the ROCK board to the stand-offs before making the DSI connection.
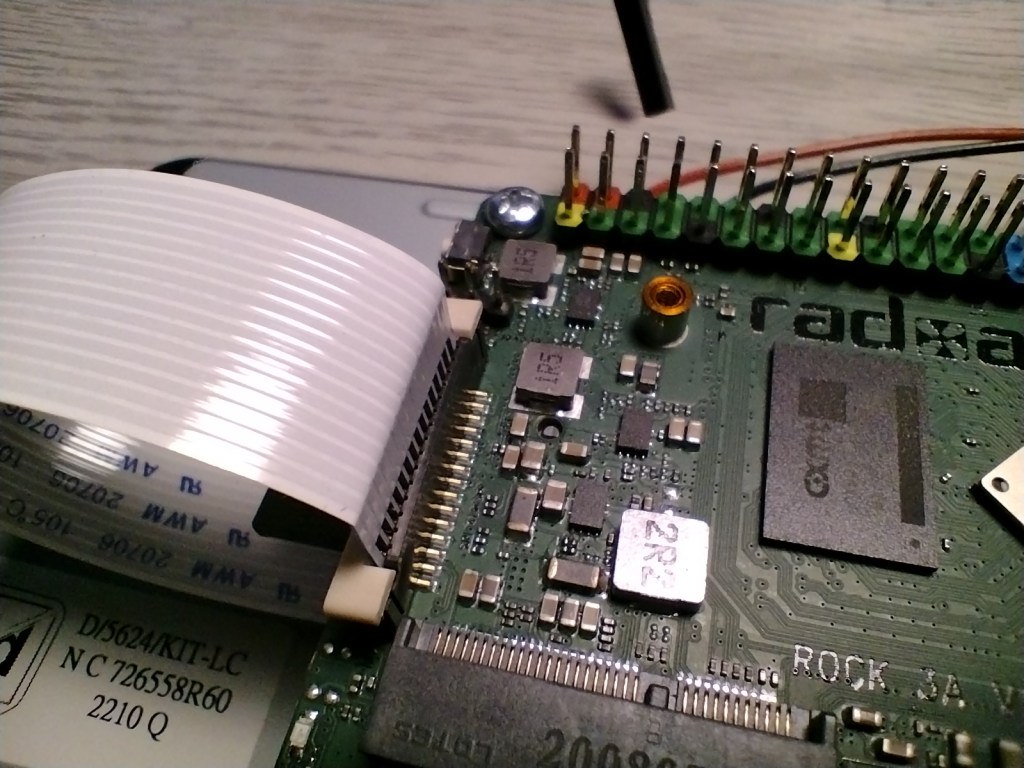
ROCK 3A / 3C & SE boards
These all have a full size MIPI DSI connector as shown below:
- Remove the SD card to avoid any damage.
- Gently pull up on the white tabs of the DSI connector to open it.
- Slide the FPC Cable into the connector with the metal strips facing towards the centre of the board and the blue marker strip facing away from the board edge.
- Push down evenly on the white tabs to close the connector.
ROCK 4C+ / 5A & 5B boards
These all have a mini MIPI DSI connector:
- Remove the SD card to avoid any damage.
- Flip up the black tab on the DSI connector to open it.
- Insert the FPC Cable into the connector with the metal strips facing downwards and the black marker strip facing upwards.
- Fold the black tab down until it is flush with the connector body to close it. This requires firm pressure.
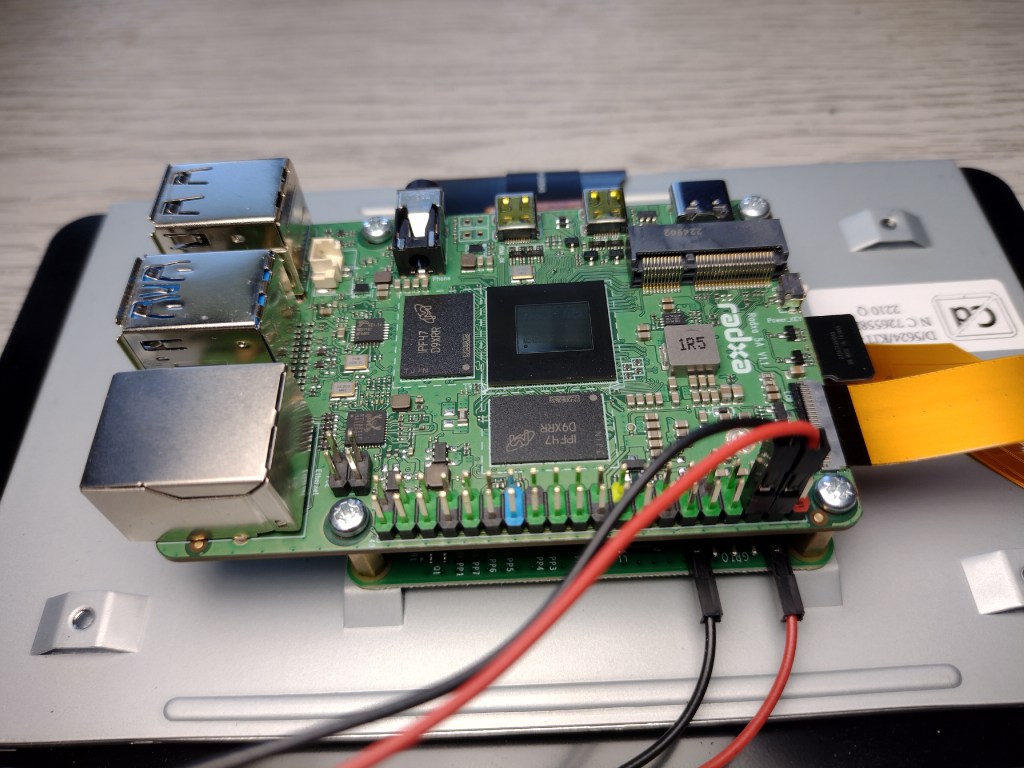
Step 4: Power
For all boards, connect the Red power lead to the 5V pin and the Black ground lead to the GND pin on the ROCK’s GPIO header.
Both the ROCK and the display are powered by the USB-C power connector on the ROCK board.
Step 5: Operating System
We recommend downloading the latest Debian Desktop OS release from the Radxa Build GitHub.
Visit the page above and select the Repo for your board then click the Latest Release link.
At the bottom of the page is the Assets section containing download links to the various OS images.
Click the link to one of the Debian images, download it and flash it to SD card media using BalenaEtcher.

Step 6: Rsetup
Start by attaching a monitor and keyboard to the ROCK which can be removed after setup if required.
Power on the ROCK and set it up as usual. You can refer to the OKdo Getting Started Hub for instructions for your ROCK board.
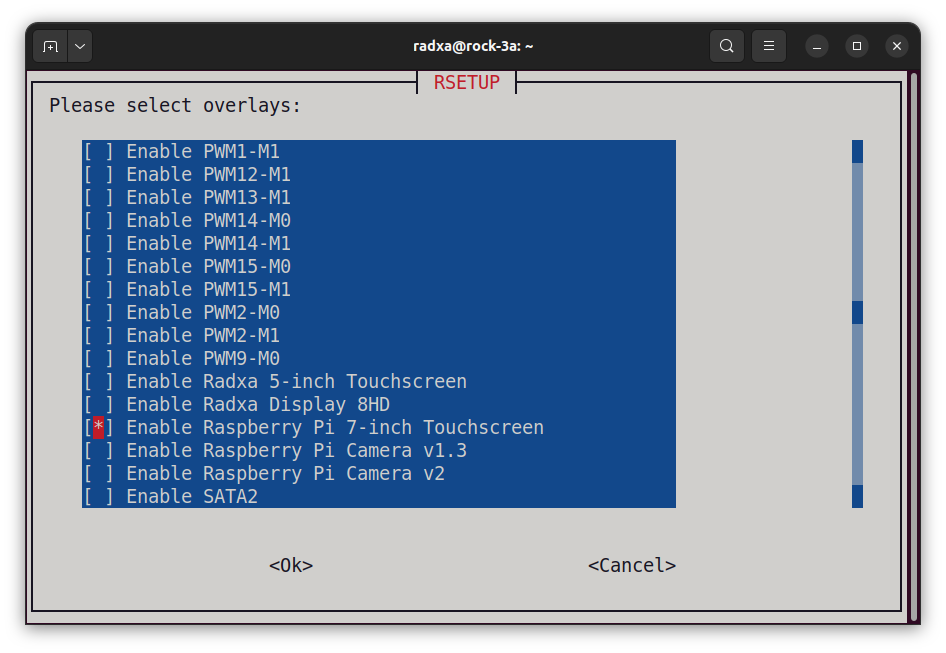
Open a Terminal window and execute the following command to start Rsetup which is the configuration utility provided by Radxa.
$ sudo rsetup- Choose System Maintenance then System Update and follow the prompts to pull in the latest updates. Sometimes this can take a few minutes depending on the number of packages needing updating.
- When the updates have been completed, press the Esc key several times to return to the terminal prompt.
- Now reboot the board.

When the board has rebooted, open a Terminal session again and re-enter Rsetup.
- This time choose Overlays, accept the Warning and select Manage Overlays.
- A list of overlays will display, scroll down to the Raspberry Pi 7-inch display and press the Space Bar to select it so that it is marked with an asterisk, then Tab to
- The overlay will be enabled after rebooting.
Step 7: Touch Screen
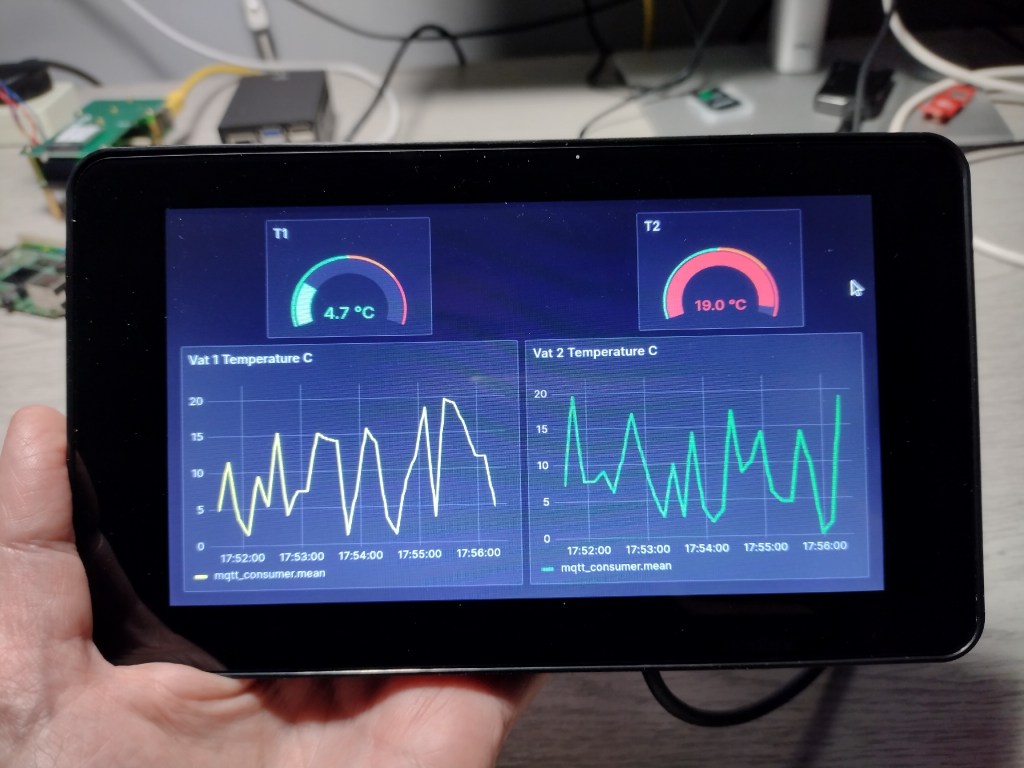
Power the board off, remove the HDMI monitor cable and reboot the board. You should now have a lovely high-resolution display on the 7-inch screen.
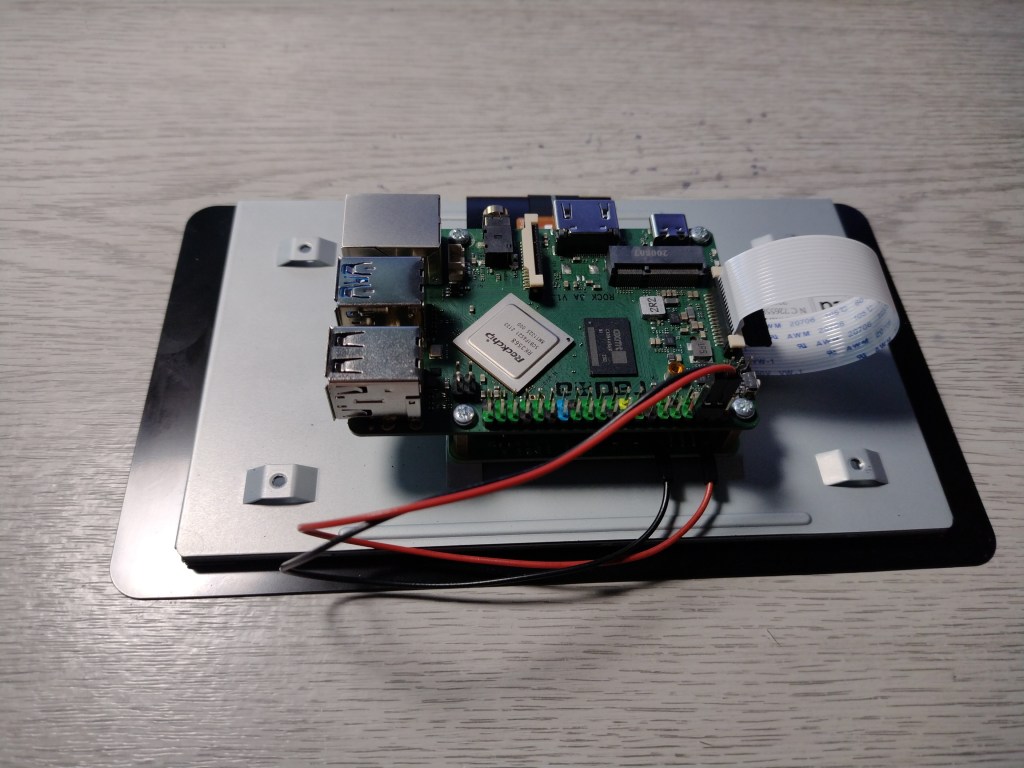
Here’s the display in the case being used with the ROCK 3A, showing sensor data built using Grafana.
The 7-inch 800 x 480 touch screen display is even sharper and more vibrant in real life.
Summary
In this project we have shown you how you can connect the ever popular Raspberry Pi 7-inch touchscreen display to ROCK SBCs.
![]()


Let’s invent the future together
What’s your challenge? From augmented reality to machine learning and automation, send us your questions, problems or ideas… We have the solution to help you design the world. Get in touch today.
Looking for something else? Discover our Blogs, Getting Started Guides and Projects for more inspiration!
Like what you read? Why not show your appreciation by giving some love.
From a quick tap to smashing that love button and show how much you enjoyed this project.

