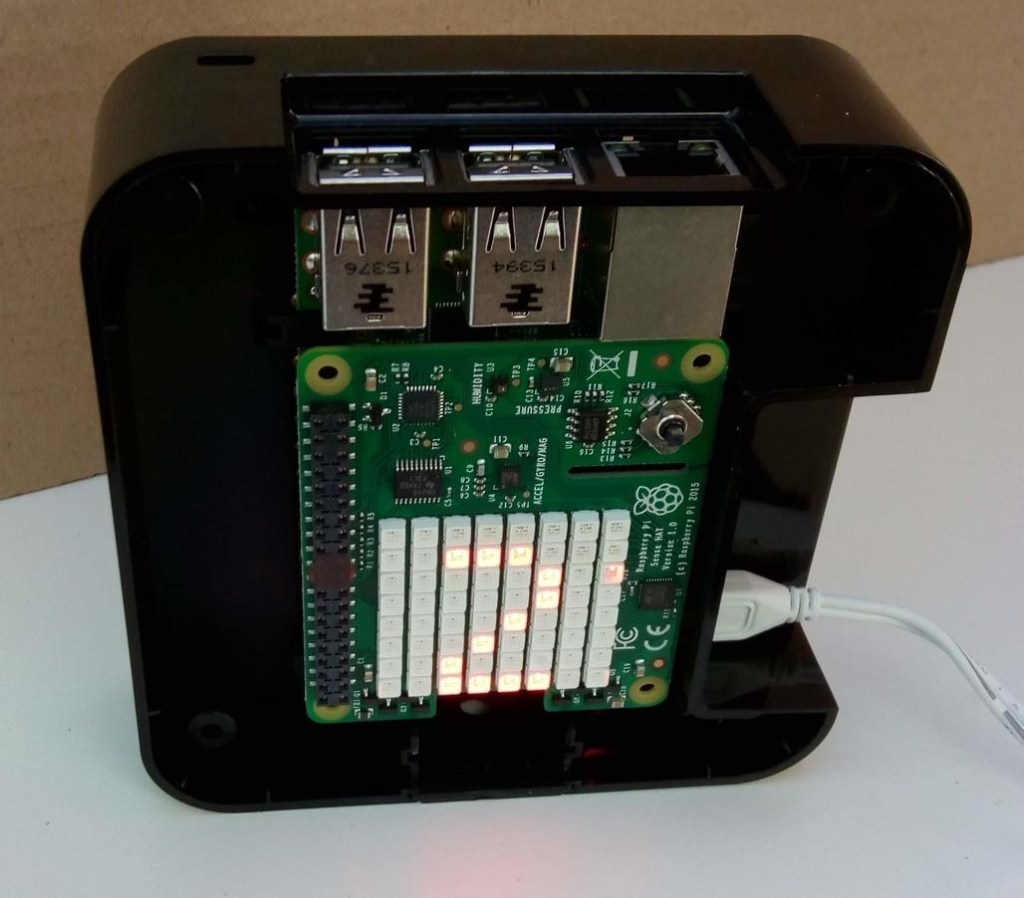
We love the Pi Sense HAT. Combined with your Pi it’ll give you a bucket-load of sensing functionality so you can learn all about your environmental conditions… well, you have a bit of tinkering to do first. So, let’s get the bad boy into action.
The Sense HAT has three environmental sensors. These can measure temperature, atmospheric pressure and relative humidity. But that’s not all it’s got – it has a small joystick that detects movement in five different directions: up, down, left, right and middle press. This project will shows how to create an Environmental Monitor using Python to display individual environmental sensor readings on the LED Matrix. Depending on how the joystick is moved, it will display readings from a particular sensor.
Here’s what we’re going to do:
- Set up a SenseHAT program in Python
- Reading the environmental sensors
- Creating functions in Python
- Handling Python data types
- Displaying readings on the LED matrix
- Capturing Joystick events
- And setting up a continuous loop of instructions
Ready? Then let’s begin.
Reading Sensors
Enter the following code into Thonny, being careful about upper and lower case letters as this matters in Python. Each statement must also be on a separate line. When you are finished, save your program as sense06.py
sense06.py code
# Print raw Temperature in degrees celsius
from sense_hat import SenseHat
sense = SenseHat()
temperature = sense.get_temperature()
print(temperature)
Now use the Run button to run the code and view the output. The code reads the SenseHAT’s temperature sensor and prints the result to the output. You should see the raw temperature sensor reading in degrees celsius, like this, displayed in the bottom window of Thonny.
sense06.py output
33.4627037048
All SenseHAT programs written in Python start in the same way, by importing the SenseHAT library and creating a SenseHAT() object that represents the real device. You can call yours whatever you want. This one is named “sense”.
from sense_hat import SenseHat
sense = SenseHat()
Each sensor has its own “get” method, so by replacing get_temperature() with get_humidity() and get_pressure(), it is easy to read the other environmental sensors.
Functions
You may have noticed from the previous temperature reading that it is much higher than the actual room temperature. This is because the temperature sensor is affected by heat generated from the Raspberry Pi processor. To compensate for this and to obtain a more realistic ambient temperature reading we can write a function to calibrate the sensor reading and adjust it.
Enter the following code as sense07.py and run it.
Sense07.py code
# Print calibrated sensor values
from sense_hat import SenseHat
sense = SenseHat()

def calibrateValue(value, calibration_value=0):
   value = value + calibration_value
   return value

temperature = sense.get_temperature()

print(temperature)
print(calibrateValue(temperature))
print(calibrateValue(temperature, 2))
print(calibrateValue(temperature,-10))
The output should appear in the bottom window of Thonny. The first line shows the raw temperature reading as previously. The second is the default with no calibration, the third is calibrated upwards by 2 degrees celsius and finally the last one is a realistic value, calibrated down by 10 degrees celsius.
Sense07.py output
33.5513305664
33.5513305664
35.5513305664
23.5513305664
As usual the code starts by importing the library and creating the SenseHat object. The next three lines define a function called calibrateValue(). Python functions are code blocks that can be used to simplify more complex programs. They remove duplicate code, make testing easier and help with understanding what your programs are trying to accomplish.
Functions starts with the “def” keyword, followed by the name of the function. The parentheses contain zero or more parameters which are used to pass values into the function. calibrateValue() has two parameters, the value to be calibrated, “value” and the value needing to be added or subtracted from the reading to obtain a realistic result, “calibration_value”. Functions can also return a value, this one returns the value of the sensor after it has been adjusted. The body of the function must be indented and completed by a blank line.
By using a signed calibration value, the reading can be increased or decreased, making the function more general. This function can now be used for any of the sensors when a calibrated reading is required.
def calibrateValue(value, calibration_value=0):
   value = value + calibration_value
   return value
Data Types
When variables are created in Python, the data type is assigned automatically. Values obtained from the environmental sensors are all floating point decimals. They contain many decimal places which are not suitable for display on the LED Matrix. Units should also be added to any output so that the viewer can understand what the values mean.
Rather than having to write code to do this each time a reading is output, a function can be written to round up a sensor readings to whole numbers and add units. The return value of the function will be a string value, so that it can easily be used with print() and show_message() functions, which require strings as parameters.
Enter the following code and save as sense08.py
Sense08.py code
# Print formatted sensor values
from sense_hat import SenseHat
sense = SenseHat()

# Function returning value as string rounded to whole number
def formatValue(value, units=""):
   value = round(value)
   value = int(value)
   value_str = str(value) + units
   return value_str

humidity = sense.get_humidity()
print(humidity)
print(formatValue(humidity,"%"))
sense.show_message(formatValue(humidity,"%"))

pressure = sense.get_pressure()
print(pressure)
print(formatValue(pressure,"kPa"))
sense.show_message(formatValue(pressure,"kPa"))
Run the code to see the raw humidity, formatted humidity, raw pressure and formatted pressure.
Sense08.py output
30.9355792999
31%
1022.14819336
1022kPa
formatValue() takes a sensor value, which is a floating point number as its first parameter and the units, which is a string, as the second. The value is then rounded using the round() builtin function, to the nearest whole number. Finally the value is converted to a string so that the units can be appended to the end. The string that is returned is now suitable for displaying on the LED Matrix.
def formatValue(value, units=""):
   value = round(value)
   value_str = str(value) + units
   return value_str
The remaining statements obtain readings from the pressure and humidity sensors and display them in various ways to test out the function.
humidity = sense.get_humidity()
print(humidity)
print(formatValue(humidity,"%"))
sense.show_message(formatValue(humidity,"%"))
Joystick Events
The small joystick generates Event objects when it is moved, held and released. An Event object contains the direction the stick was moved in, and the action that took place, whether the stick was pressed, held or released. The short code that follows prints out the direction and action, every time the stick is moved. Enter it and save as sense09.py
Sense09.py code
# Print joystick direction events

from sense_hat import SenseHat
sense = SenseHat()

# Loop checking joystick events
while True:
 for event in sense.stick.get_events():
     print(event.direction, event.action)
Run it and move the joystick to see the output in the bottom window of Thonny.
Sense09.py output
right pressed
right released
middle pressed
middle released
After the usual setup code, an endless while loop is created. A while loop tests its conditional statement at the start of each iteration. If it is true, the loop continues. In this case the condition is always true due to the “True” constant value, so it continues forever.
while True:
A “for” statement then gets any events that have occured and prints out the direction and action attributes before the loop returns.
 for event in sense.stick.get_events():
     print(event.direction, event.action)
Environmental Monitor
Now that we know how to read the environmental sensors, format their values and capture joystick events, we can combine these principles to create a program that displays sensor readings set according to the joystick actions.
sense10.py
# Show environmental sensor readings selected with Joystick

from sense_hat import SenseHat
from time import sleep
sense = SenseHat()

red = (255,0,0)
blue = (0,0,255)
green = (0,255,0)
white = (255,255,255)

def calibrateValue(value, calibration_value=0):
   calibrated_value = value + calibration_value
   return calibrated_value

def formatValue(value, units=""):
   value = round(value)
   value_str = str(value) + units
   return value_str

def showTemperature():
   value = calibrateValue(sense.get_temperature(),-10)
   message = formatValue(value,"C")
   sense.show_message(message, text_colour=red)
   print(value)

def showPressure():
   value = sense.get_pressure()
   message = formatValue(value,"kPa")
   sense.show_message(message, text_colour=green)
   print(value)

def showHumidity():
   value = sense.get_humidity()
   message = formatValue(value,"%")
   sense.show_message(message, text_colour=blue)
   print(value)

def show(sensor):
   sensor()

sensor = showTemperature

while True:
   show(sensor) # show sensor reading
   for event in sense.stick.get_events():
       # Check if the joystick was pressed
       if event.action == "pressed":
           # Check which direction
           if event.direction == "up":
               sensor = showPressure # Set to Pressure
           elif event.direction == "down":
               sensor = showHumidity # Set to Humidity
           elif event.direction == "left":
               sense.set_rotation(0)   # Rotate display
           elif event.direction == "right":
               sense.set_rotation(90) # Rotate display
           elif event.direction == "middle":
               sensor = showTemperature  # Set to Temperature

           sleep(0.5)
As well as the usual import statement, the time library is also used for its sleep() function which is used to create a delay between joystick readings. This helps the code run smoothly.
A series of colour RGB objects are then created for use in the display functions later on. These are followed by function definitions for calibrateValue() and formatValue() that were created and tested in earlier examples.
A series of helper functions are then defined for each type of environment sensor. These functions take no parameters and return no values. showTemperature(), showPressure() and showHumidity() contain all the statements to display a reading for that sensor on the LED Matrix. They also use the calibrateValue() and formatValue() functions to reduce duplicated code. This keeps “while” loop code as simple as possible, helping to make it easier to understand. Each “show” function gets its sensors value, formats it and displays it on the Matrix. It also prints the value raw value to the output which is useful when debugging any problems.
def showTemperature():
   value = calibrateValue(sense.get_temperature(),-10)
   message = formatValue(value,"C")
   sense.show_message(message, text_colour=red)
   print(value)
We want the display to continuously update and display the latest sensor readings, so a small but important show() function is defined. show() takes a single parameter which is the method object for the sensor that is to be displayed. The function’s single statement, sensor() executes the method object passed as the first parameter of the function. This causes the display to update.
def show(sensor):
   sensor()
Next the default display is set by creating a variable containing the temperature method object, showTemperature. Notice that showTemperature has no parentheses as it is a method object. The function is only executed when the show() function is called each time the “while” loop executes. This is a small but important distinction.
sensor = showTemperature
The while loop is entered and the show() function is executed as the first instruction. This contains the method object that has been set, causing the relevant reading to be displayed.
while True:
   show(sensor) # show sensor reading
A series of if / elif tests are then performed, to check for any joystick events that have occurred and if so which one. The “sensor” variable is then set to the appropriate method object and the display is changed and updated accordingly.
           if event.direction == "up":
               sensor = showPressure # Set to Pressure
There were a couple of spare action events left so these were set to rotate the LED Matrix back and forth.
Finishing Up
With the finished program running, the LED Matrix displays calibrated readings from the selected environmental sensor, scrolled across the screen. A different sensor display can be selected by moving the Joystick. The direction of the text can also be changed by 90 degrees and the display constantly updates to reflect the current environment.
The example has shown how a more complicated coding problem can be broken down into smaller, simple elements as functions that can be tested individually. These functions can than be incorporated into a much large program.
References
One of the reasons why Python is such a popular programming language is due to the excellent online documentation that is available. Here are some links to further information on the SenseHat library module and Python documentation:
Sense HAT Documentation: https://pythonhosted.org/sense-hat/api/
Python Documentation: https://docs.python.org/3/index.html
Sense HAT Projects from the Raspberry Pi Foundation: https://projects.raspberrypi.org/en/projects/getting-started-with-the-sense-hatAstro Pi Project: https://astro-pi.org/
Like what you read? Why not show your appreciation by giving some love.
From a quick tap to smashing that love button and show how much you enjoyed this project.

