We hate spaghetti. Not the Italian kind with a sun-dried tomato and basil sauce. We love that. No, we’re referring to the Gordian knot of wires that messes up our tech space. Not only does it collect dust like there’s no tomorrow, it’s also ugly as sin. And it’s virtually impossible to tease those wires apart if we ever choose to relocate things.
But there is an answer. Oh yeah. The Pi PoE Switch HAT. It’s an add-on board for your Raspberry Pi which brings Pi Supply Switch technology together with PoE all in one amazing package. So you can now power your Pi and provide an Ethernet connection absolutely anywhere with just a single cable.
So wave goodbye to that clutter of wires – and say hi to reliable internet in remote locations with our handy guide to assembling and setting up the Pi PoE Switch HAT.
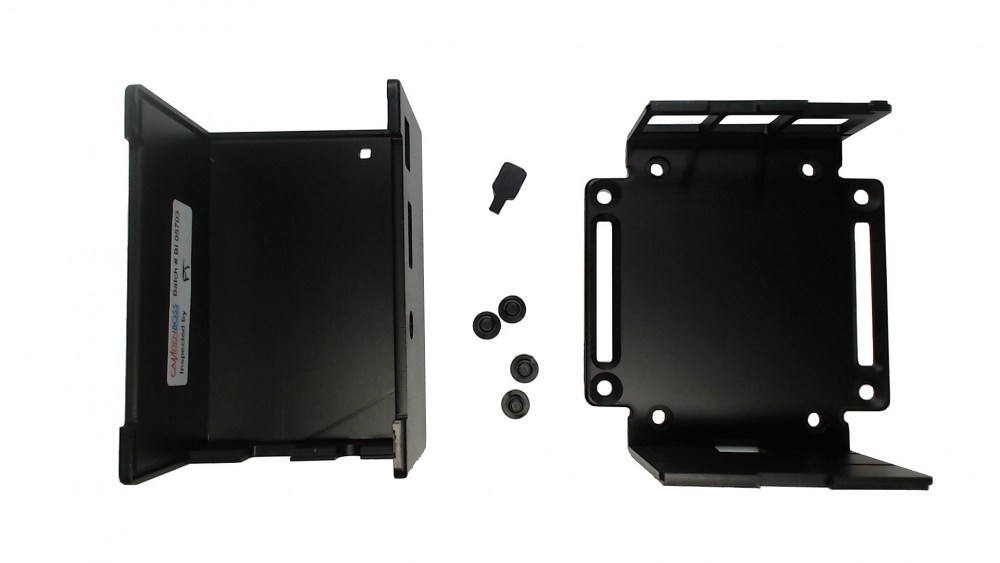
Before we start, here’s what you’ll find inside the Pi PoE Switch HAT box:
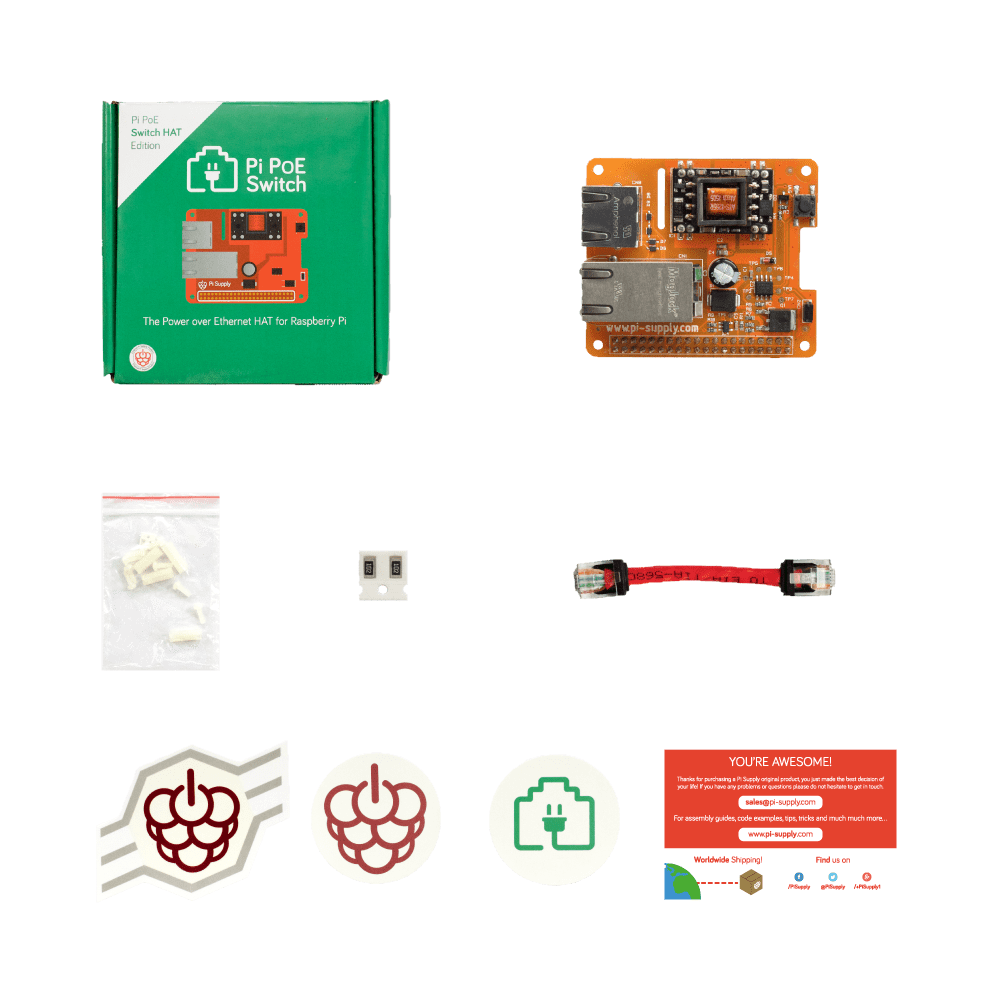
- 1 Pi PoE Switch HAT board
- 8 Plastic bolts
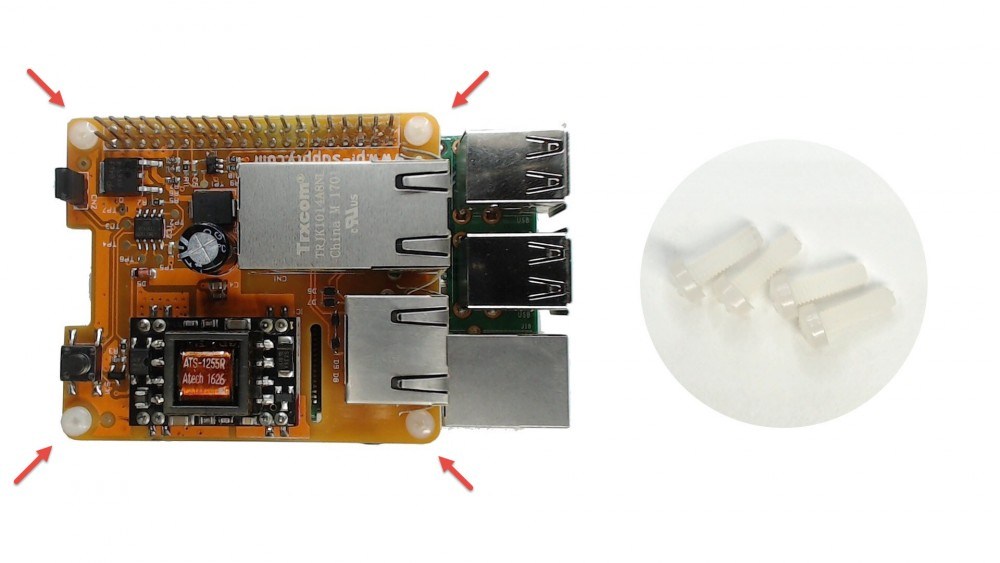
- 4 Plastic spacers
- 1 Ethernet cable
- 2 SMD resistors
- 3 Stickers
- 1 Info card
Ready? Then we’ll begin…
Prep you Pi
Unpack your Raspberry Pi.
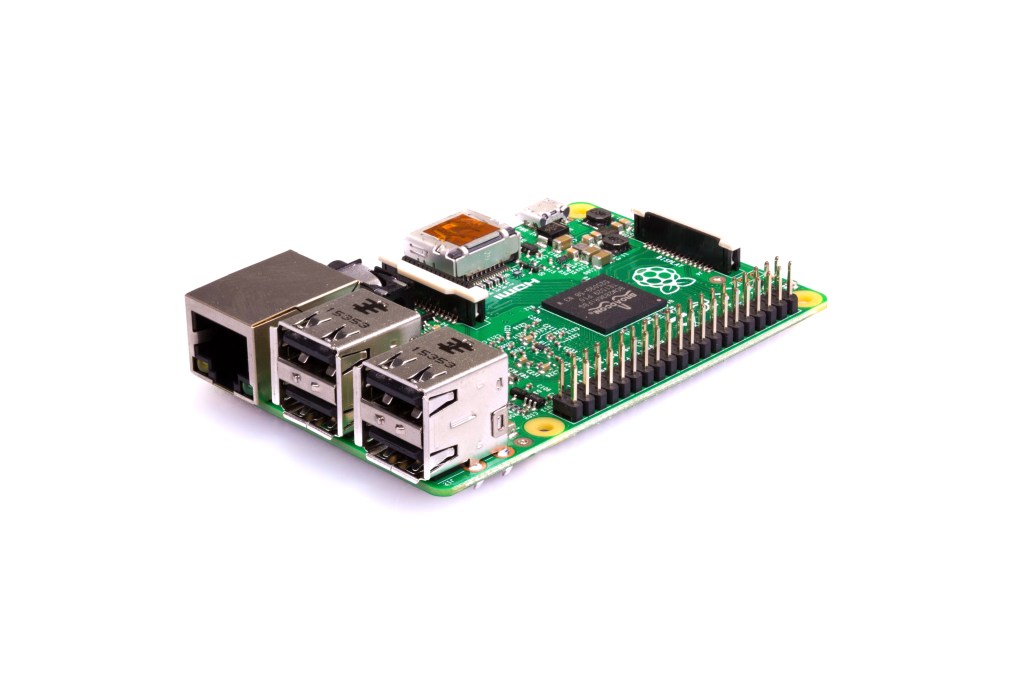
Admire its brilliant design, then install the spacers and secure them with the four plastic bolts beneath – like so:
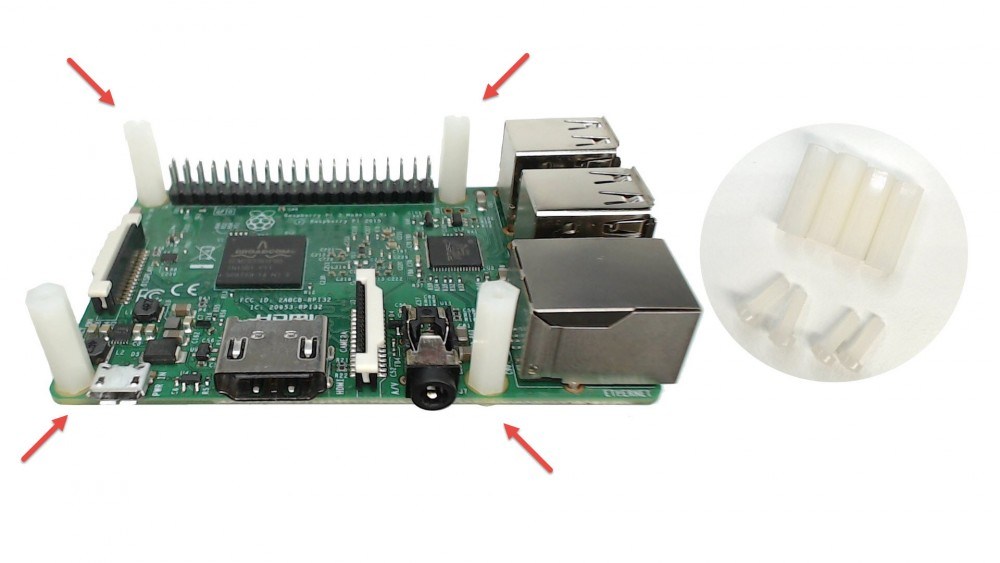
Top tip: if you’re struggling to screw-in the plastic bolt, try using a metal screw first – it’ll help loosen the rim of the spacer so screwing-in the plastic bolt will be easy.
Connect your POE HAT
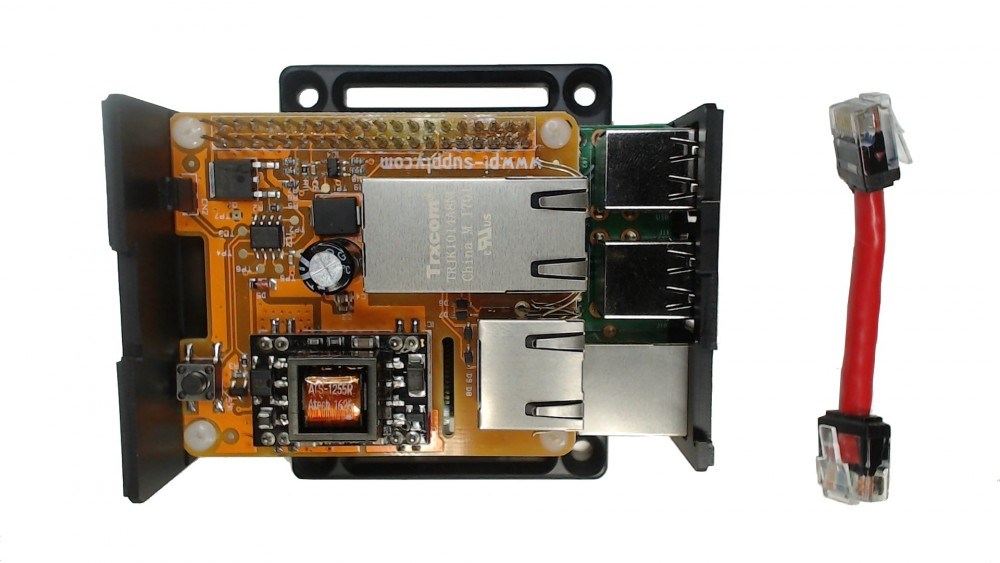
Now remove the Pi PoE from its anti-static bag…
…and fix the Pi PoE on top of the Raspberry Pi by gently pushing the female header onto the Pi male header.

Use the last of the plastic bolts to screw the Pi PoE HAT snugly in place.
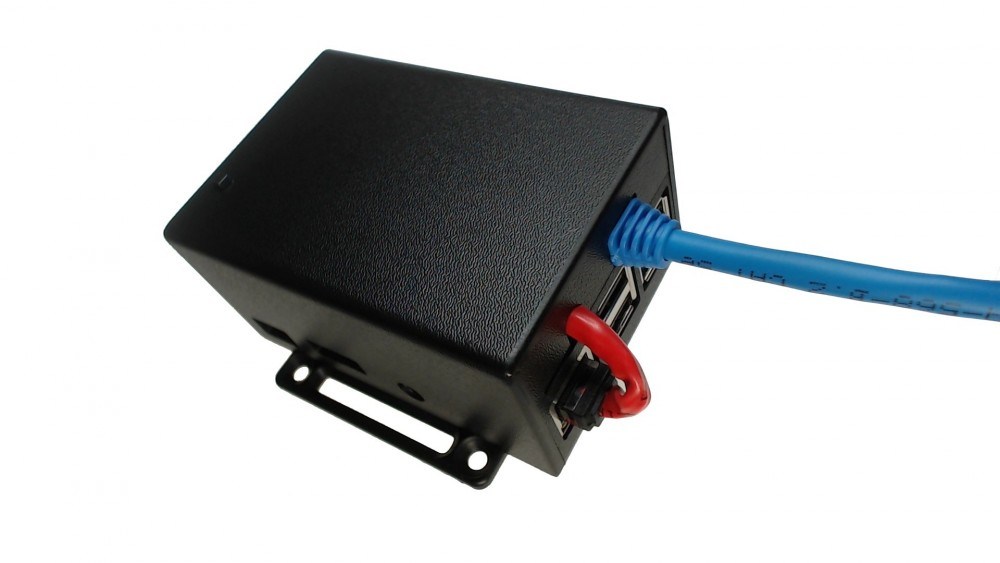
Have you managed to get hold of the Pi PoE case? If so, skip to the next where we’ll show you how to assemble everything with the case. If not, don’t worry – simply connect the Ethernet cables:
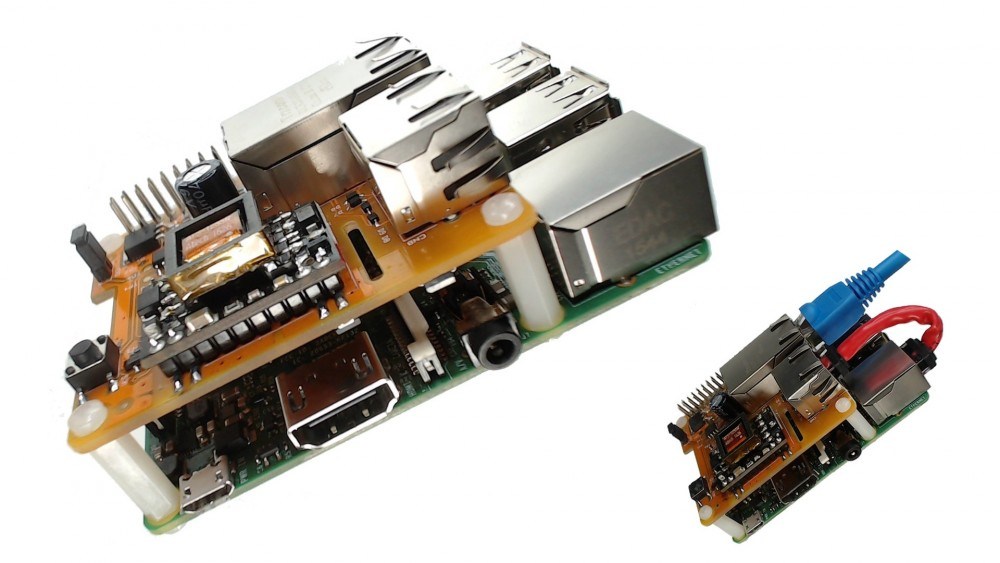
Electrical spike alert!!! Remember – ONLY apply the power to the Pi PoE from the managed switch or external injector AFTER the Ethernet cables have been connected. Yes, the current version of Pi PoE has been designed to protect it from spikes caused by plugging PoE cables whilst power is present – but better safe than sorry.
Now for assembling the case.
Put the case together
Your Pi PoE Swicth HAT is perfect for housing the HAT and Raspberry Pi. It’s even been designed so it can still let you access the power button. Which is just as well, really.
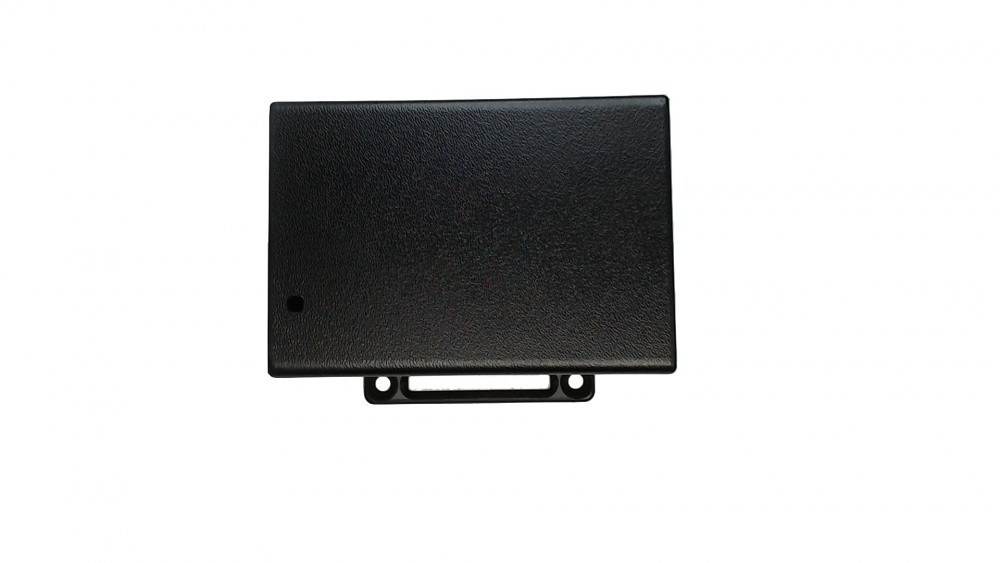
At this stage we gently removed the protective plastic pull from the two sides of the bottom part of the case and unhooked the top.
Next we just detached the top cover and popped the case apart.
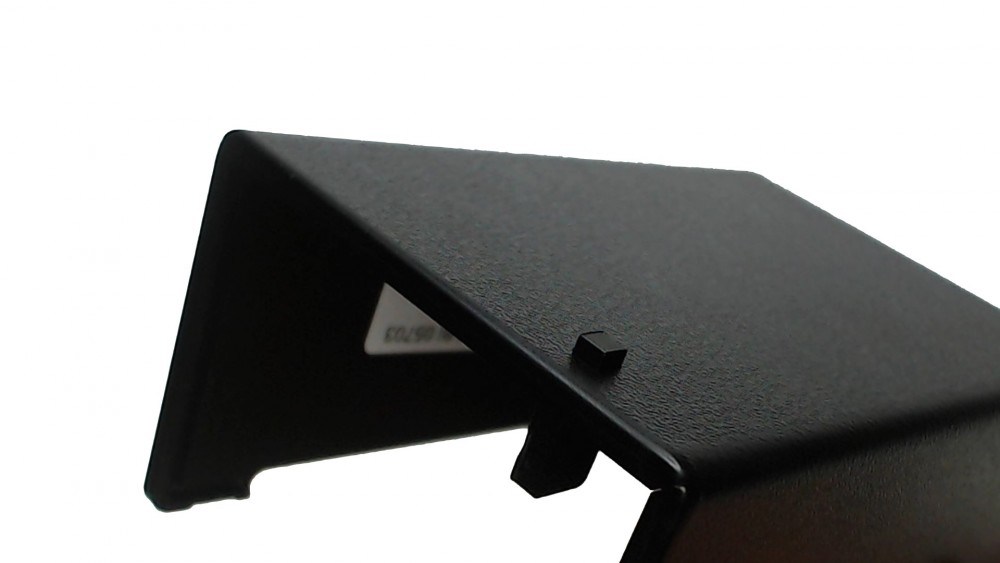
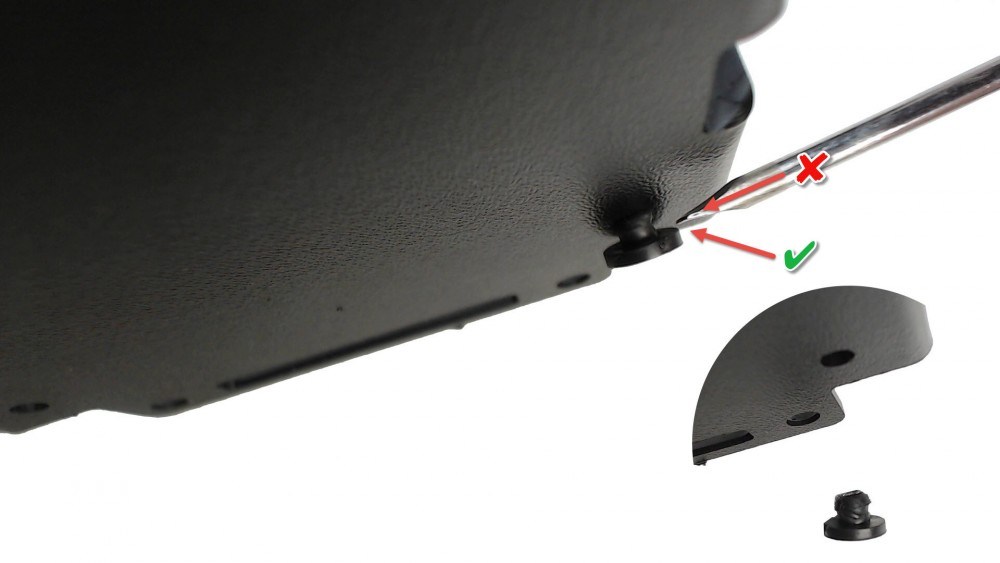
Inside were four rubber feet and a plastic bit used to provide access to the Pi PoE power button:
We then threaded the plastic button extender through the hole in the top of the case.
Fitting the rubber feet to the bottom of the case was kids’ play. We simply pushed and twisted them through the holes (we did use a small screwdriver to carefully tuck the top part of the feet into the hole though).
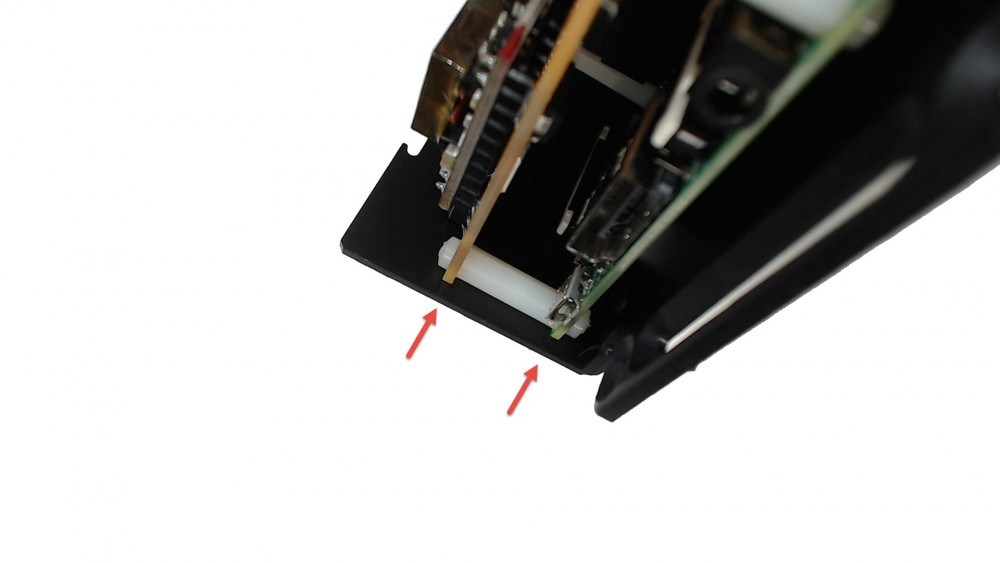
Then we placed the USB connectors into the case and slid the Raspberry Pi and Pi PoE into the bottom.
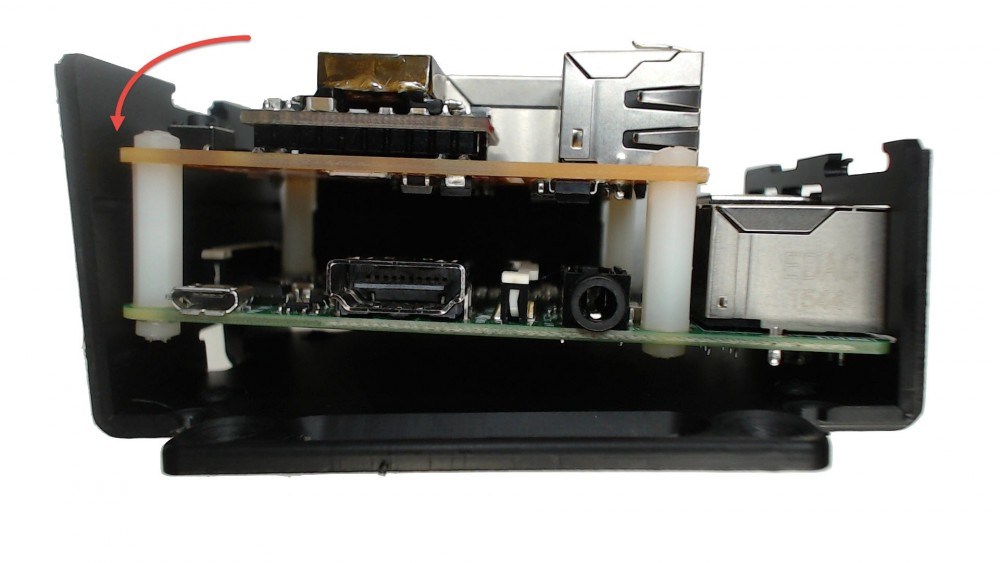
At this point, make double sure the PCBs of the two boards are aligned within the grooves of the panel.
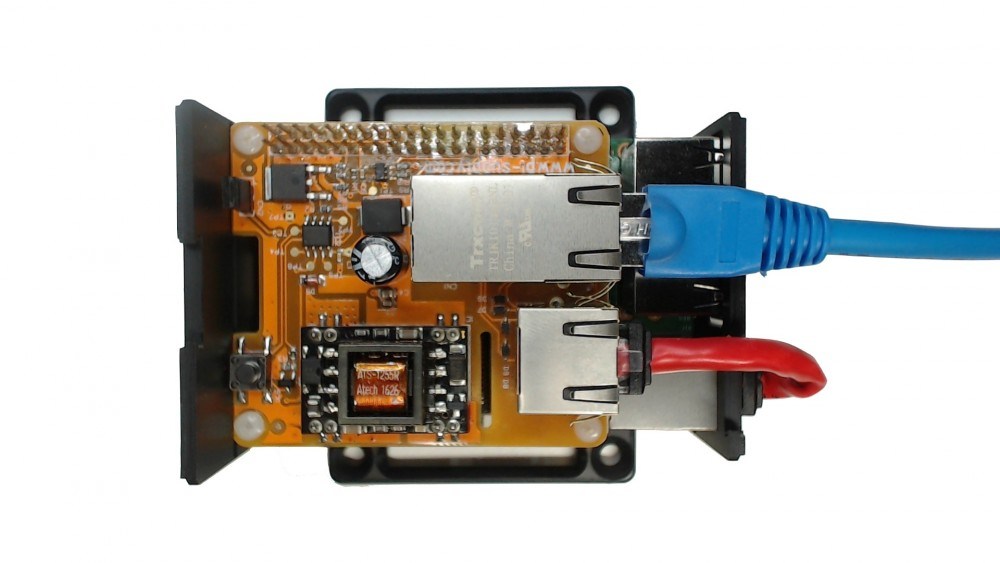
Then we took the small Ethernet cable and connected it between the Pi and the Pi PoE.
And connected the Ethernet cable coming from the PoE switch or from the injector.
And now we slid the top of the case back in place, gently flexing the case to create space for the connectors of the Pi to slot into place.
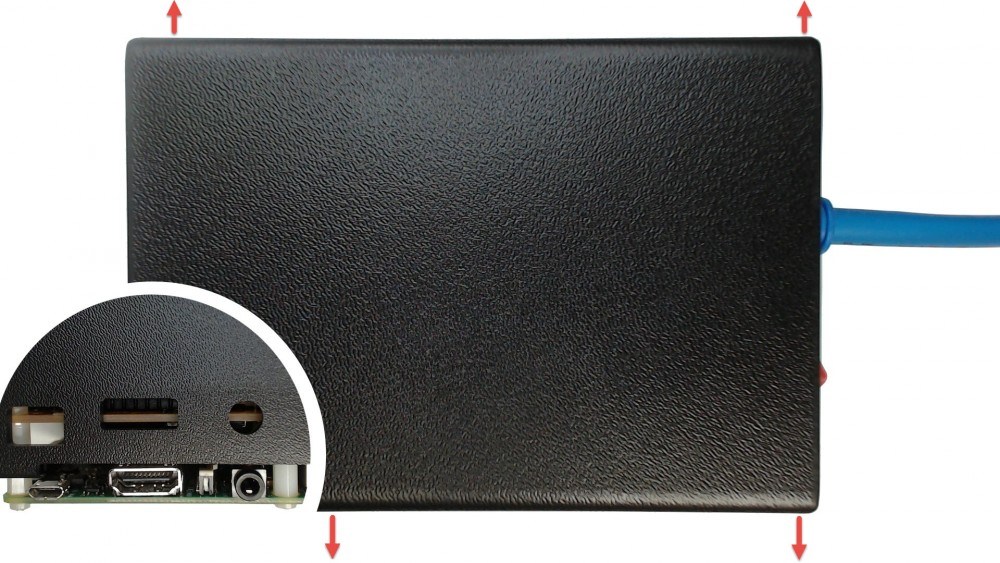
And…job done! Your Pi PoE Switch HAT is good to go.
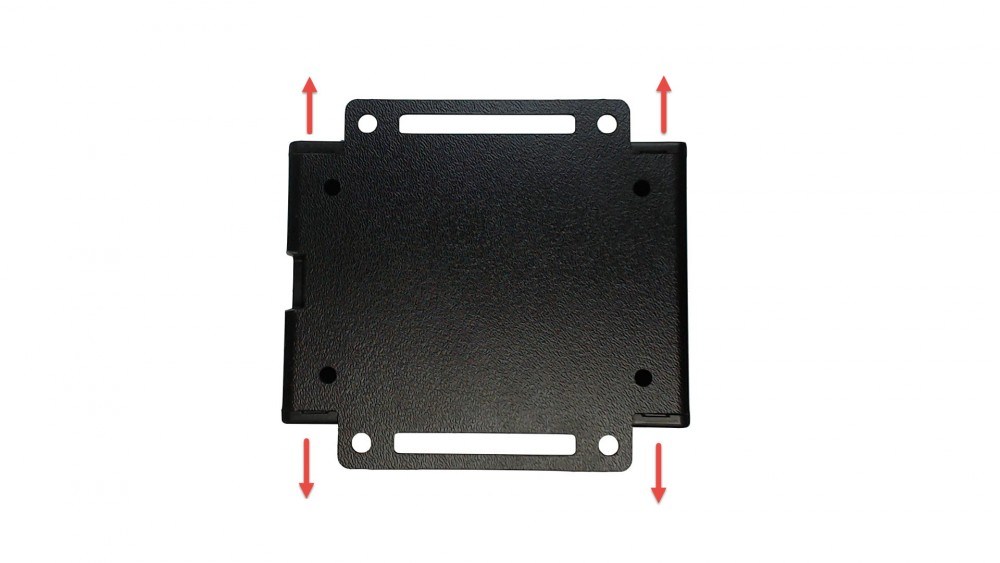
But before you do, notice how the case has been designed with wall fixing features…
So there you go. No more jumble of wires – and a great internet in remote locations.
Now for some answers to a few FAQs.
FAQ
How do I start my Raspberry Pi?
Don’t laugh, it’s a serious question. And the answer’s not as obvious as it maybe should be. For starters, there are three different ways to do this depending on your setup:
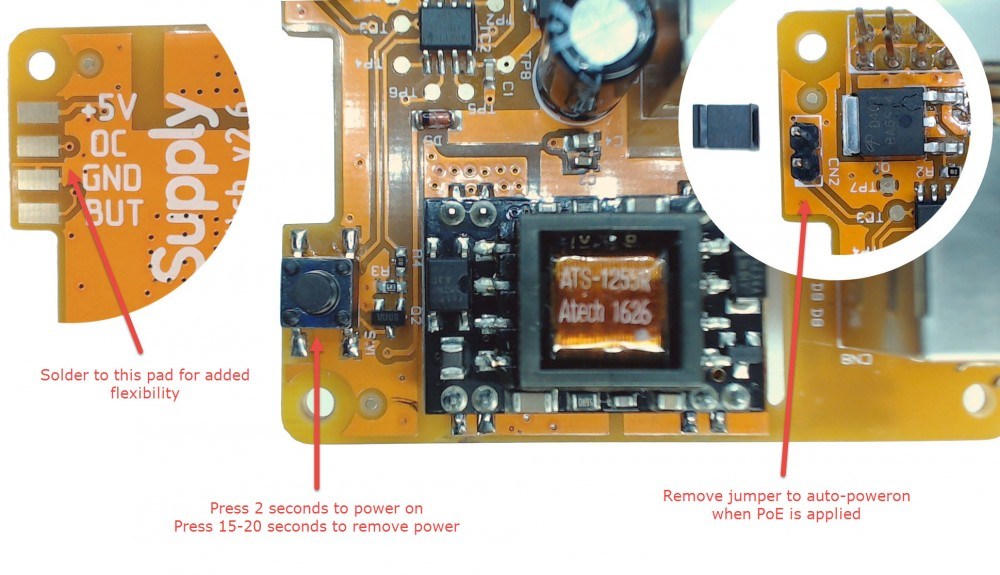
- Button – SW1
- Press SW1 for 2 seconds. To completely remove power from your Raspberry Pi, press SW1 for at least 15 seconds – until the Pi’s red LED switches off.
- Jumper – CN2
- To power things up with the jumper in place, you’ll need to operate SW1 without the jumper. As soon as the PoE line receives power, the board will power up the Raspberry Pi without the need to use SW1. This is really useful if the Raspberry Pi is in a remote location.
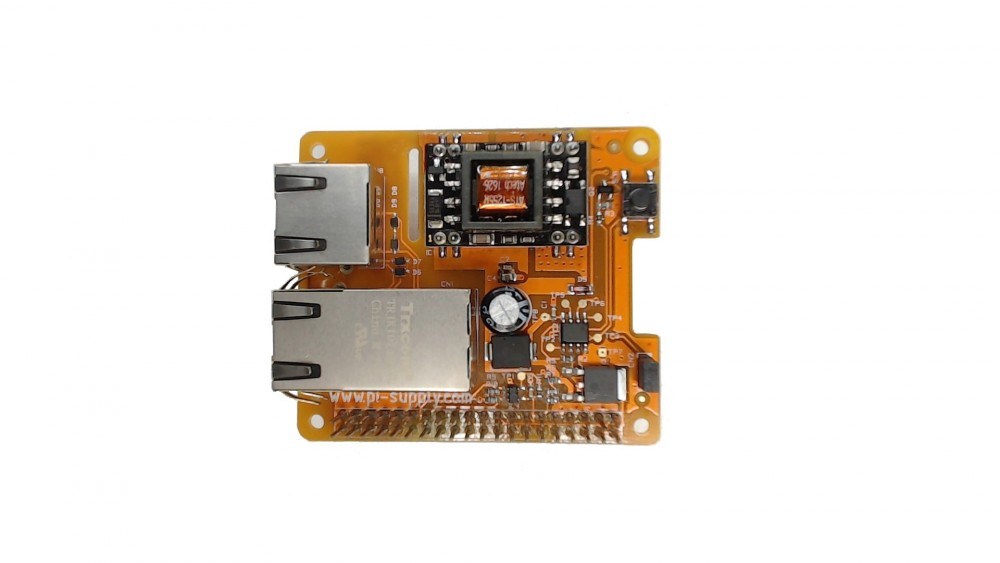
- Solder Pad
- Look on the reverse of the board and you’ll also find a solder pad. This lets you add flexibility to the Pi PoE – for example by using a custom-made button to power things on and off.
Can I add optional resistors?
The Pi PoE main Ethernet connector comes with two LEDs which can be connected to GPIO 22,23,24. To do this you have to solder the optional resistors provided. Make sure they’re placed on the reverse of the board where it reads R12 and R13.
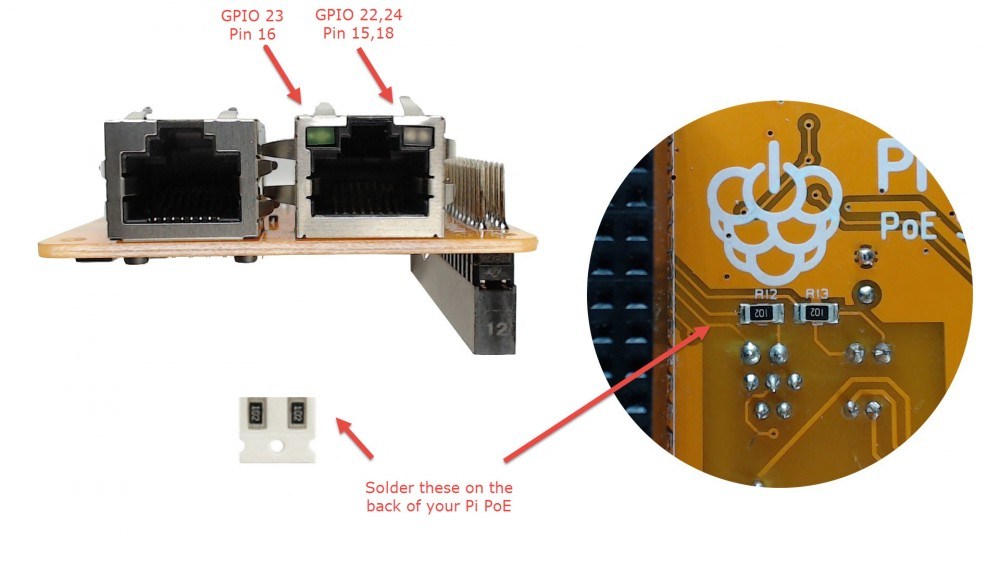
To drive the LEDs simply set the GPIOs as outputs. The LED on the left is a single green LED, the one on the right is a dual green/amber LED. To drive the green LED on the left just pull the corresponding GPIO 23 high, to turn it bring the GPIO low. For the dual LED, you’ll have to bring GPIO 22 high whilst having GPIO 24 low (to turn on the green LED); with GPIO 22 low and GPIO 24 high you’ll turn on the amber LED. Here’s a guide:
Help – my Pi PoE Switch HAT doesn’t power on
If this happens, get hold of a PoE switch or a PoE injector which delivers power evenly to the Ethernet cable. Now your Pi won’t need the usual PSU to be connected on its micro USB connector.
I can’t install an extra board on the pass-through header
The Pi PoE Switch HAT comes with a pass through header so an extra board can be stacked on top of it. But in some cases you’ll need to use an additional stacking header to provide more room between the additional board and the Pi PoE.
How can I use GP10 17?
Check out our GitHub repository – it’s loaded with sample code and further info.
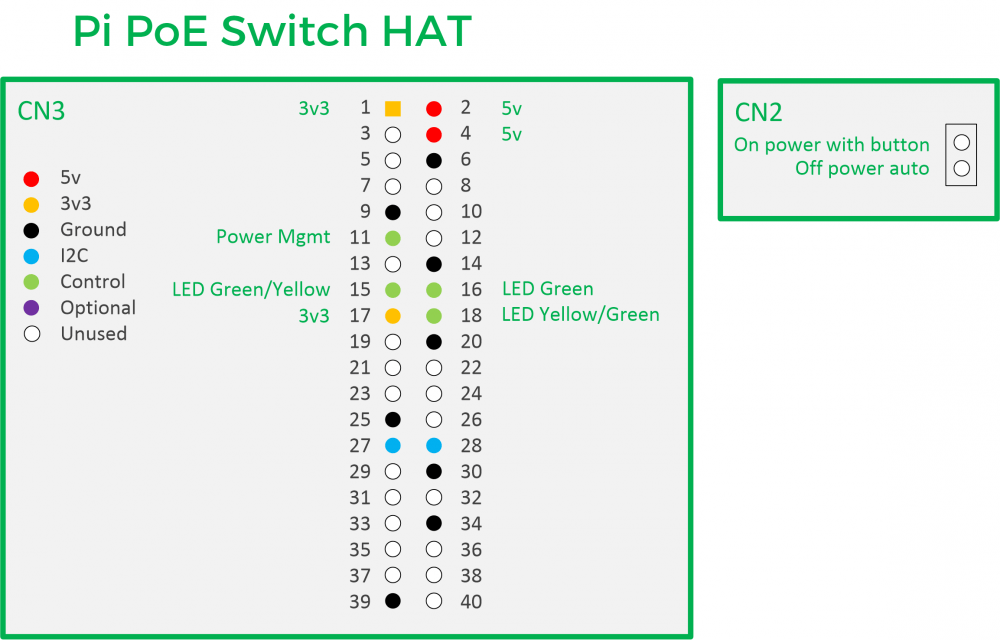
If I add another board on top, will they conflict?
Below we’ve given you a detailed pinout for the Pi PoE. Go to the Raspberry Pi Pinout website where you’ll be able to verify the pin compatibility with the various cards available from the main sellers.
Like what you read? Why not show your appreciation by giving some love.
From a quick tap to smashing that love button and show how much you enjoyed this project.

