In this project you will learn how to connect your Pi 4 to OKdo IoT Cloud and send sensor data using Python. The OKdo cloud allows you to view your sensor data from any connected device like a browser or smart phone.
1. Get your Pi ready
- Ensure that you have the latest version of Raspbian installed on your Pi. You can learn here how to do it with a micro SD card.
- Due to current compatibility issues when using Sense Hat on the Pi 4, after flashing your micro SD card, you’ll need to open config.txt from it with a text editor, add the line shown below at the bottom of the file and save it:
hdmi_force_hotplug=1- If you’re using an OKdo Pi Kit, you’ll have to remove the fan, as the Sense HAT used in this project connects to all the GPIO pins.
- Connect the Sense HAT to your Pi as shown below
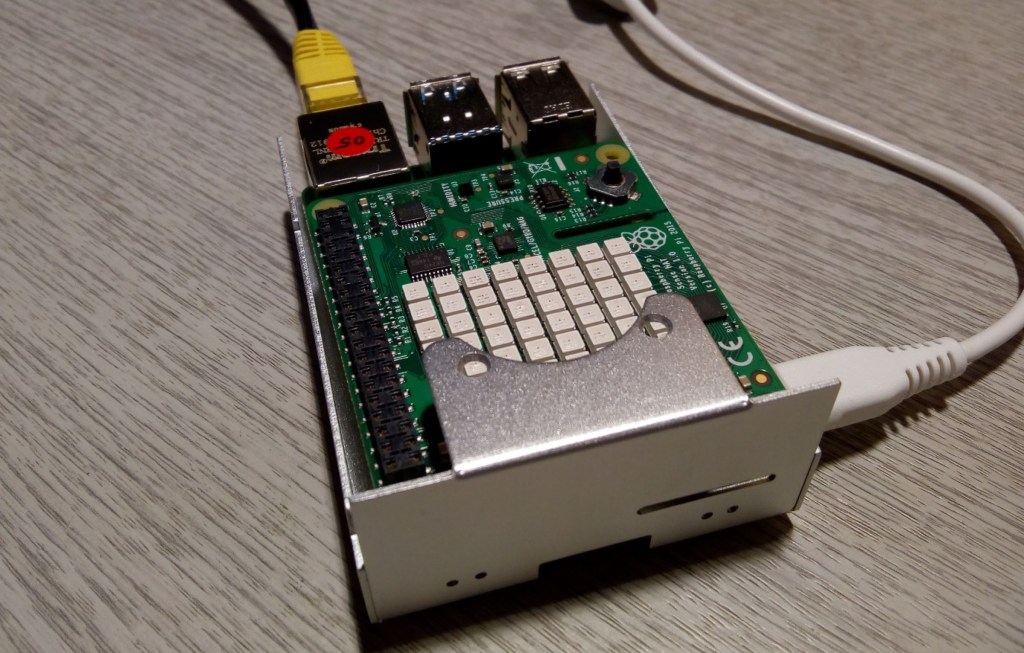
- Insert the freshly flashed micro SD card
- Connect a network cable from your host computer to your Pi and boot up the Pi
- The Sense HAT will flash white and then transition to multi-colour mode while the Pi 4 boots, then it should turn off. The standard desktop should appear on your monitor where you can run through the setup as directed.
2. Set up OKdo IoT Cloud account
On your host computer go to https://www.okdo.com/do-iot/ and sign up for a free account. Once that is complete it will take you to the Playground page where you can setup your devices
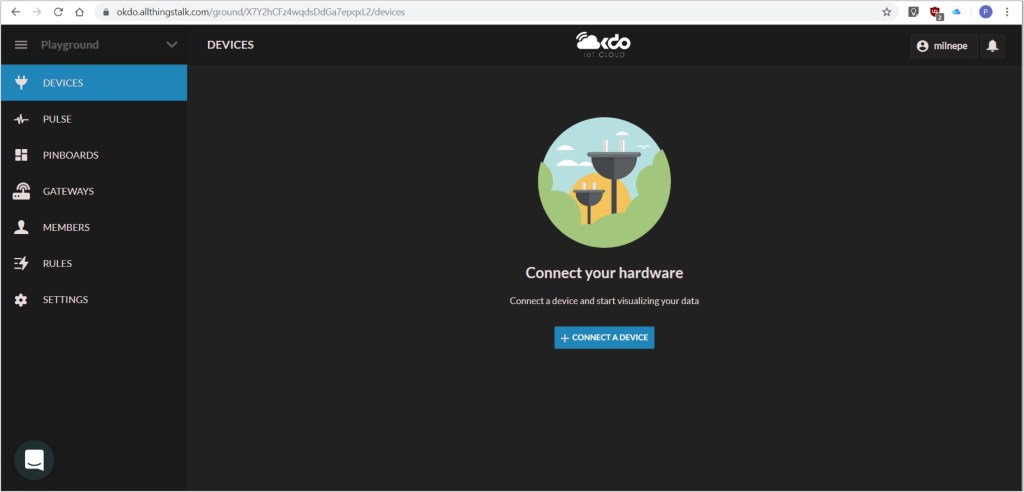
• Select Devices and click +Connect A Device
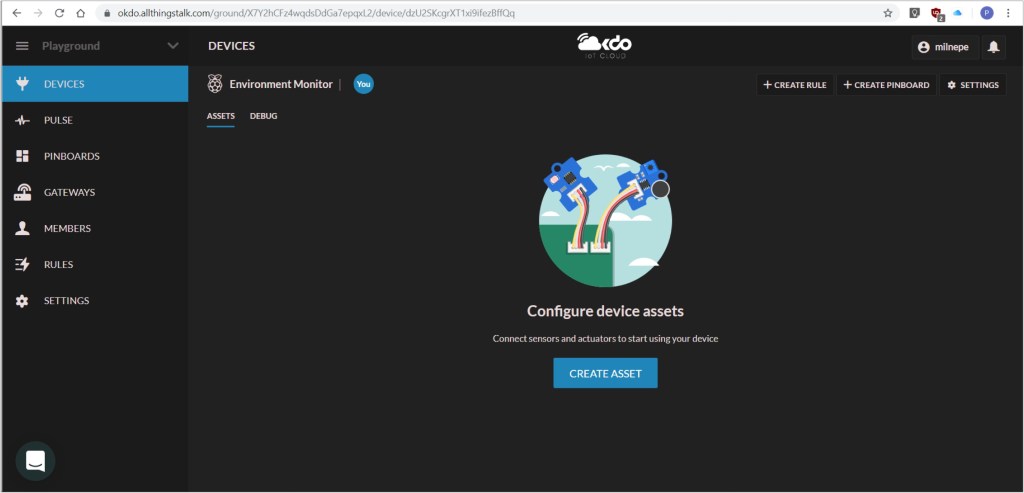
- Select the Raspberry Pi option from the pop-up and give the device a name. Once a device has been created, you will now be asked to create your assets. These represent the sensors connected to your device
- Create assets for temperature, pressure and humidity sensors, choosing sensor as the kind, giving them a name (case sensitive) and a profile type of number

3. Install AllthingsTalk SDK
OKdo uses the AllThingsTalk platform who provide a Python Library to make it easier to connect devices to the service.
- On the Pi open a Terminal window, type the following command an press Return
git clone git://github.com/allthingstalk/python-sdk.gitThis will clone AllThingsTalk Python SDK from Github
- Change into the directory created by typing the following and pressing Return
cd python-sdk/- Install the Python library globally with the following command
sudo pip3 installEverything is now setup to begin coding and sending data
4. Set up Python IoT client
- Open Thonny on your Pi and enter the following:
#!/usr/bin/env python

from time import sleep
from sense_hat import SenseHat

sense = SenseHat()
sense.clear()

import allthingstalk as talk

class t(talk.Device):
5. Add keys
The Python client has place holders for the DEVICE TOKEN and DEVICE ID that must be replaced with the ones from your OKdo IoT Cloud account.
- MISSING PICTUREGo to your Okdo IoT Cloud account select Settings / Authentication and cut and paste the Device Token and Device ID into the Python code replacing everything inside the brackets
6. Run the code
- Click Run in Thonny to test that everything is connecting and sending data. There is no output unless there is a problem
- Go to the Okdo IoT Cloud console
After a few seconds the asset fields in your console should update every few seconds with your sensor readings
MISSING PICTURE
If the web page doesn’t update, refresh your browser to see the latest data. If all is well it should update every 5 seconds.
If that doesn’t work, try reloading the file into Thonny and running it again.
You should now have your Pi connected to the OKdo IoT Cloud sending sensor readings for temperature, pressure and humidity every few seconds.
Using the principles learnt in this project you should be able to setup many different kinds of sensors connected to the Pi and send their data to the cloud.
Your data is accessible from other devices connected to the internet so you can access it from almost anywhere.
The OKdo service also has the ability to setup rules which can alert you if sensor readings reach a threshold value using web, email or push notifications.
Like what you read? Why not show your appreciation by giving some love.
From a quick tap to smashing that love button and show how much you enjoyed this project.

