You can easily turn a Raspberry Pi into a webcam for your PC. Whether your laptop’s camera is broken or you need to place the camera looking away from you, this simple solution has you covered. You’ll configure your Pi to make its camera stream available to any computer on your network.
Note: The camera requires Raspberry Pi OS (Legacy) with desktop.
1. Get your Pi ready
- You should start with a switched-on Raspberry Pi connected to mouse, keyboard and monitor.
- Ensure that your Raspberry Pi is running the latest Raspbian. You can learn how to update your Pi’s OS here.
- Connect your Pi to the same WiFi network as your PC is connected to.
2. Assemble the Pi and camera
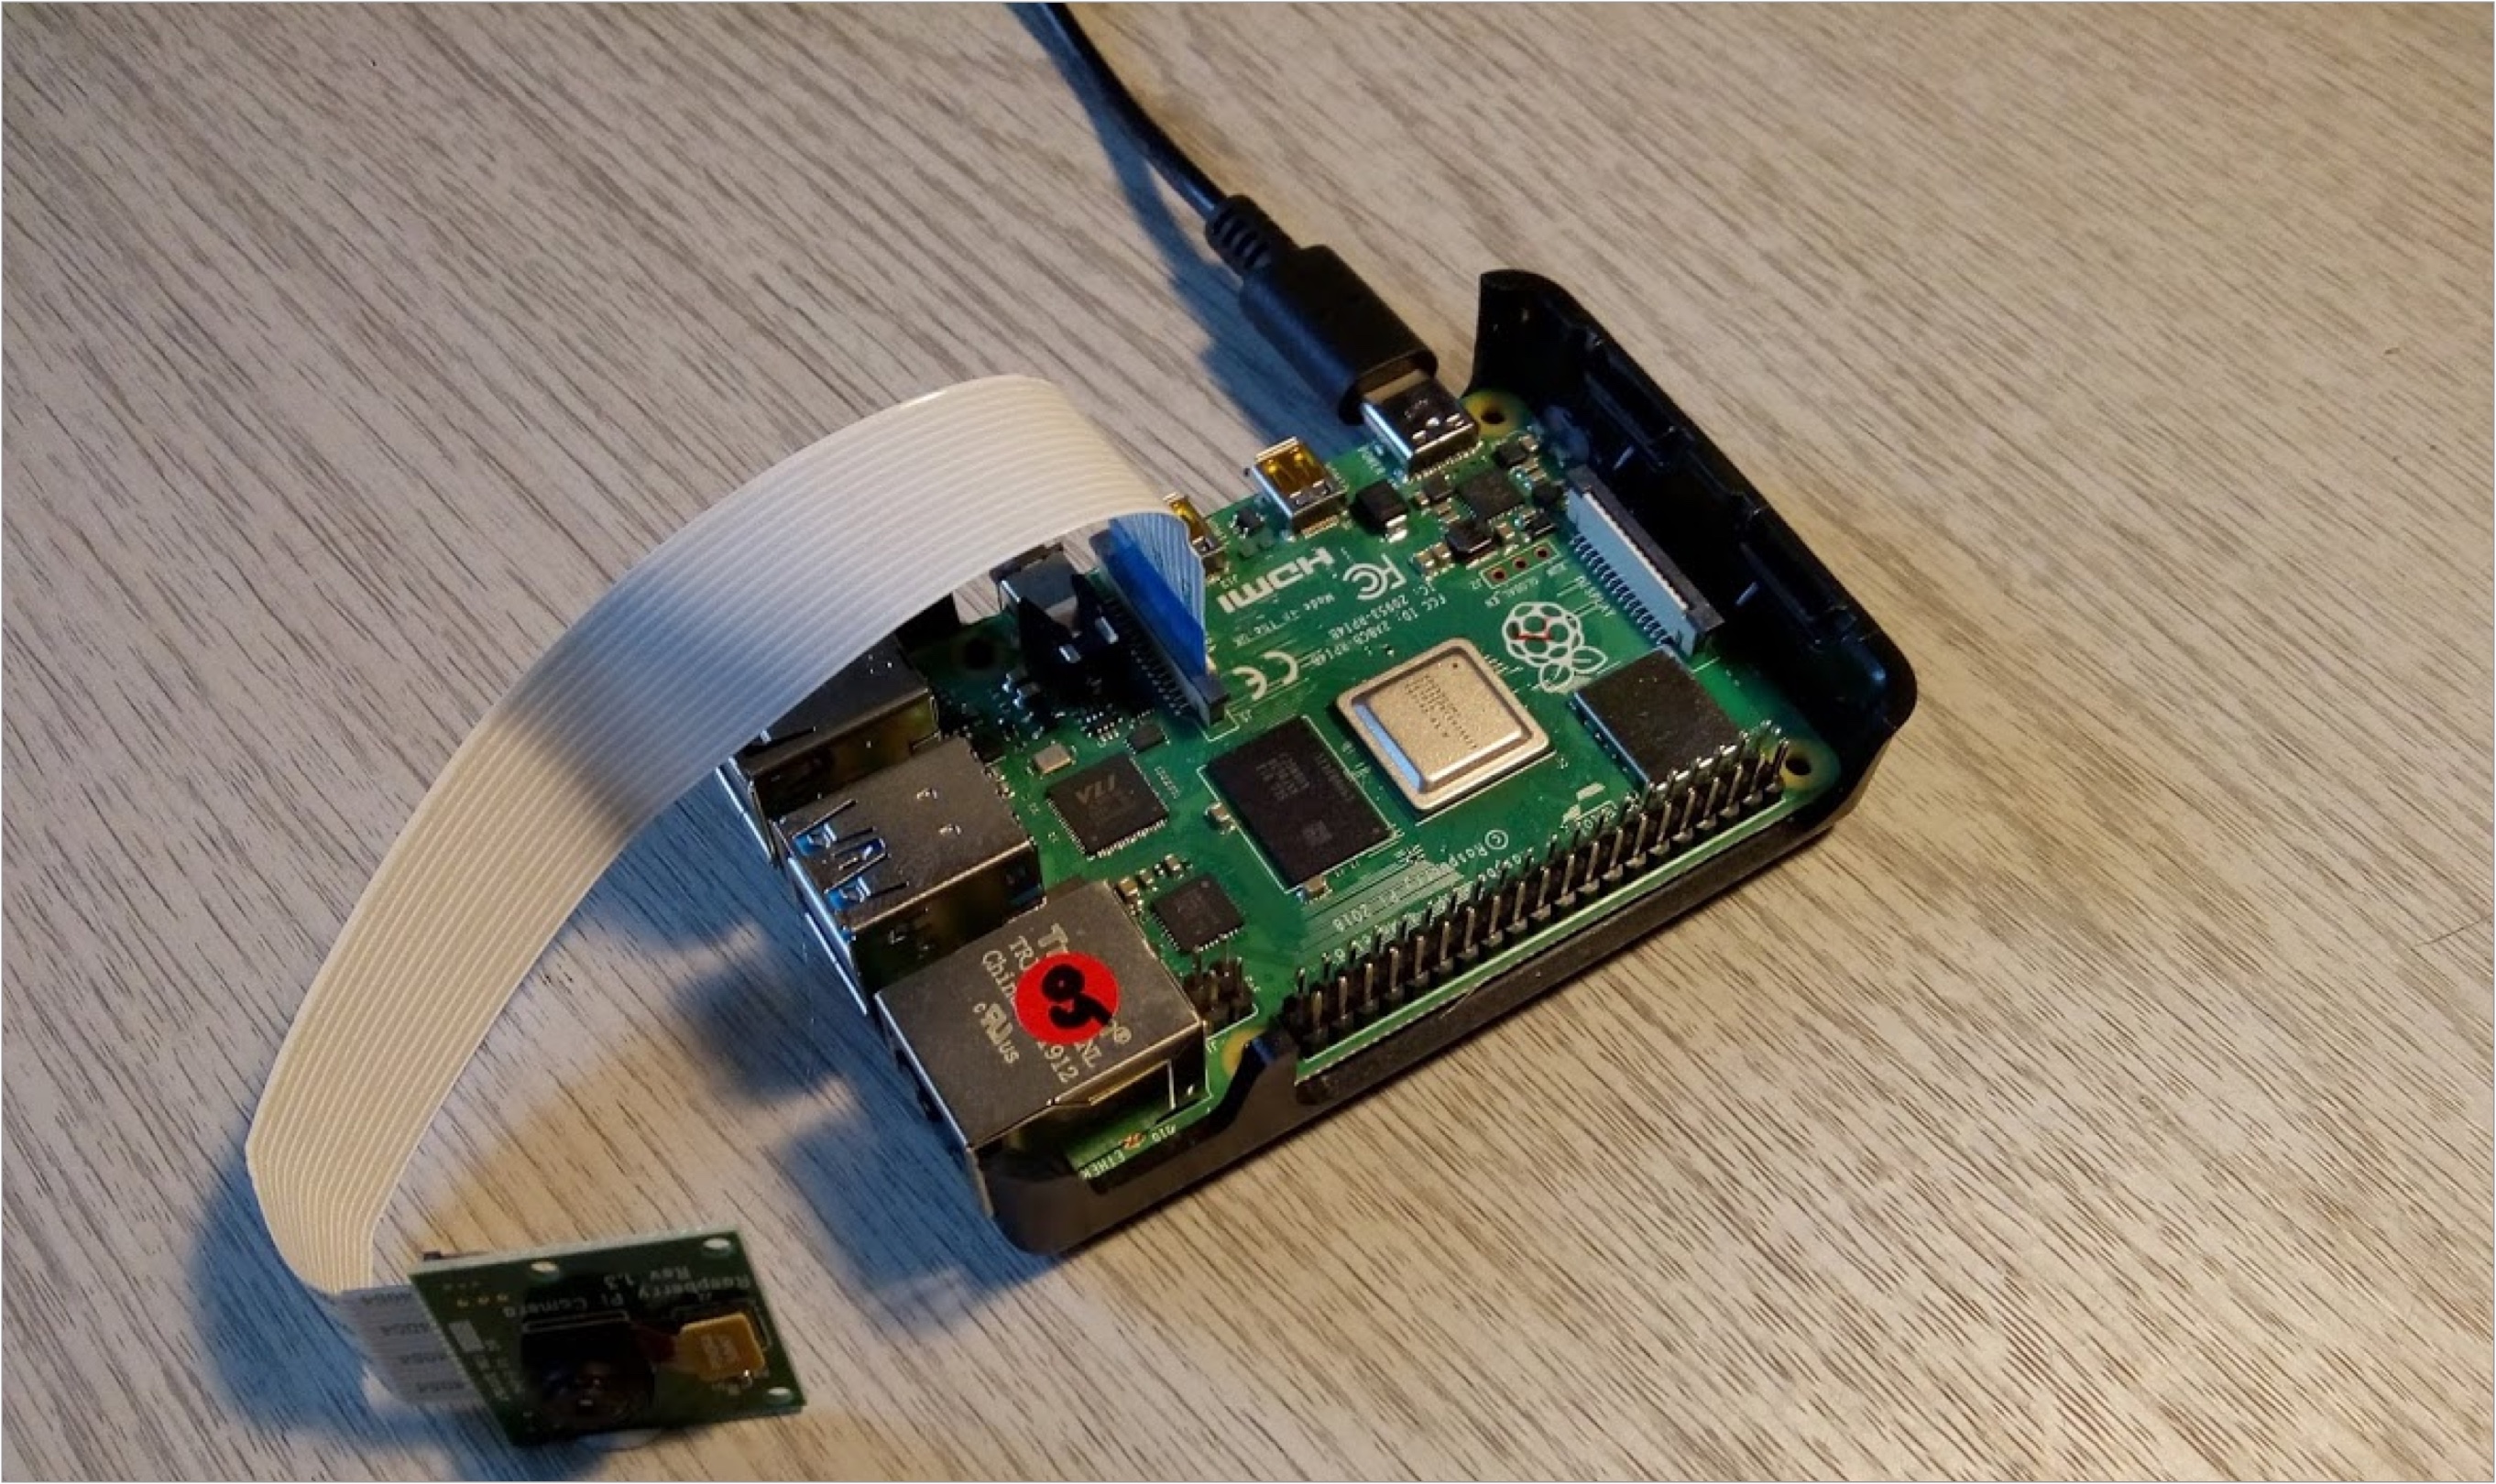
- Connect the camera module to the PI’s camera connector using the ribbon cable provided with the camera. Make sure that the silver contacts on the cable face towards the mini HDMI connectors. Gently pull the connector lock up, slide in the cable and push the lock back down.
- Start up your Pi.
- Go to PI menu> Preferences >Raspberry Pi configuration.
- Select the interfaces tab and enable camera.
- Reboot your Pi.
You can now test that the camera is working.
- Open a Terminal window and enter
raspistill -o testimage.jpgThis will momentarily bring up a window displaying the camera’s view and after a few seconds, it will take a photo. You can find the photo in Home> Pi> testimage.jpg.
3. Configure the camera software
- Open a Terminal window and enter the following to install the required libraries:
sudo apt-get install cmake libjpeg8-dev -ysudo apt-get install gcc g++ -yNow you’ll install the program that takes the camera’s input and shares it on the network.
- To download and install it enter:
git clone https://github.com/jacksonliam/mjpg-streamer
cd mjpg-streamer/mjpg-streamer-experimental && make && sudo make install
Mjpeg streamer should now be installed and ready to run.
Start Mjpeg streamer by entering the following:
mjpg_streamer -i input_raspicam.so -o output_http.soYou can test the stream on your PC or on your Pi by opening a browser and going to: http://[raspberrypihostname]:8080?action=stream
The default hostname for the Pi if you haven’t changed it is http://raspberrypi:8080/?action=stream.
Once all this is working, you can tweak the camera’s settings to optimise its performance for your network setup. You can see below the syntax to specify the camera’s settings. You can use whatever works for you but we found 1280×720 at 12 frames per second to be good for our purposes. If your camera feed is stuttering, you can try lower resolution settings like 640×360.
mjpg_streamer -i "input_raspicam.so -x 1280 -y 720 -fps 12" -o output_http.so
4. Automating the camera
Having to start the camera using Terminal is not very convenient. It’s a good idea to set it up so that the camera comes on whenever the Pi starts up.
- Use your editor to create a file named mjpg_streamer.service with the following contents:
[Unit]
Description=IP camera streaming service
After=network.target

[Service]
ExecStart=/bin/sh -c 'mjpg_streamer -i "input_raspicam.so -x 1280 -y 720 -fps 12" -o output_http.so'
Restart=always
RestartSec=30

[Install]
WantedBy=multi-user.target- As superuser, copy the file to /etc/system/system:
sudo cp mjpg_streamer.service /etc/systemd/system/- Reload systemd config:
sudo systemctl daemon-reload- Start mjpg_streamer service:
sudo systemctl start mjpg_streamer.service- Enable on startup:
sudo systemctl enable mjpg_streamer.service
Set up your PC
Now, you’ll need to connect the camera stream to a recognisable webcam to your Windows 10 system.
- Download and install IP Camera Adapter.
- Launch IP Camera Adapter,
- Enter your Pi’s stream URL into the Camera Feed URL field. You can ignore the user name and password.

- Enter the video size.
- Click Autodetect. If all is well you’ll get a confirmation message.
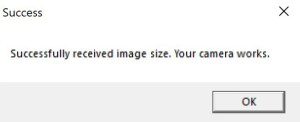
- Click Apply and OK.
You should now have an available camera stream to use with your choice of video conferencing app.
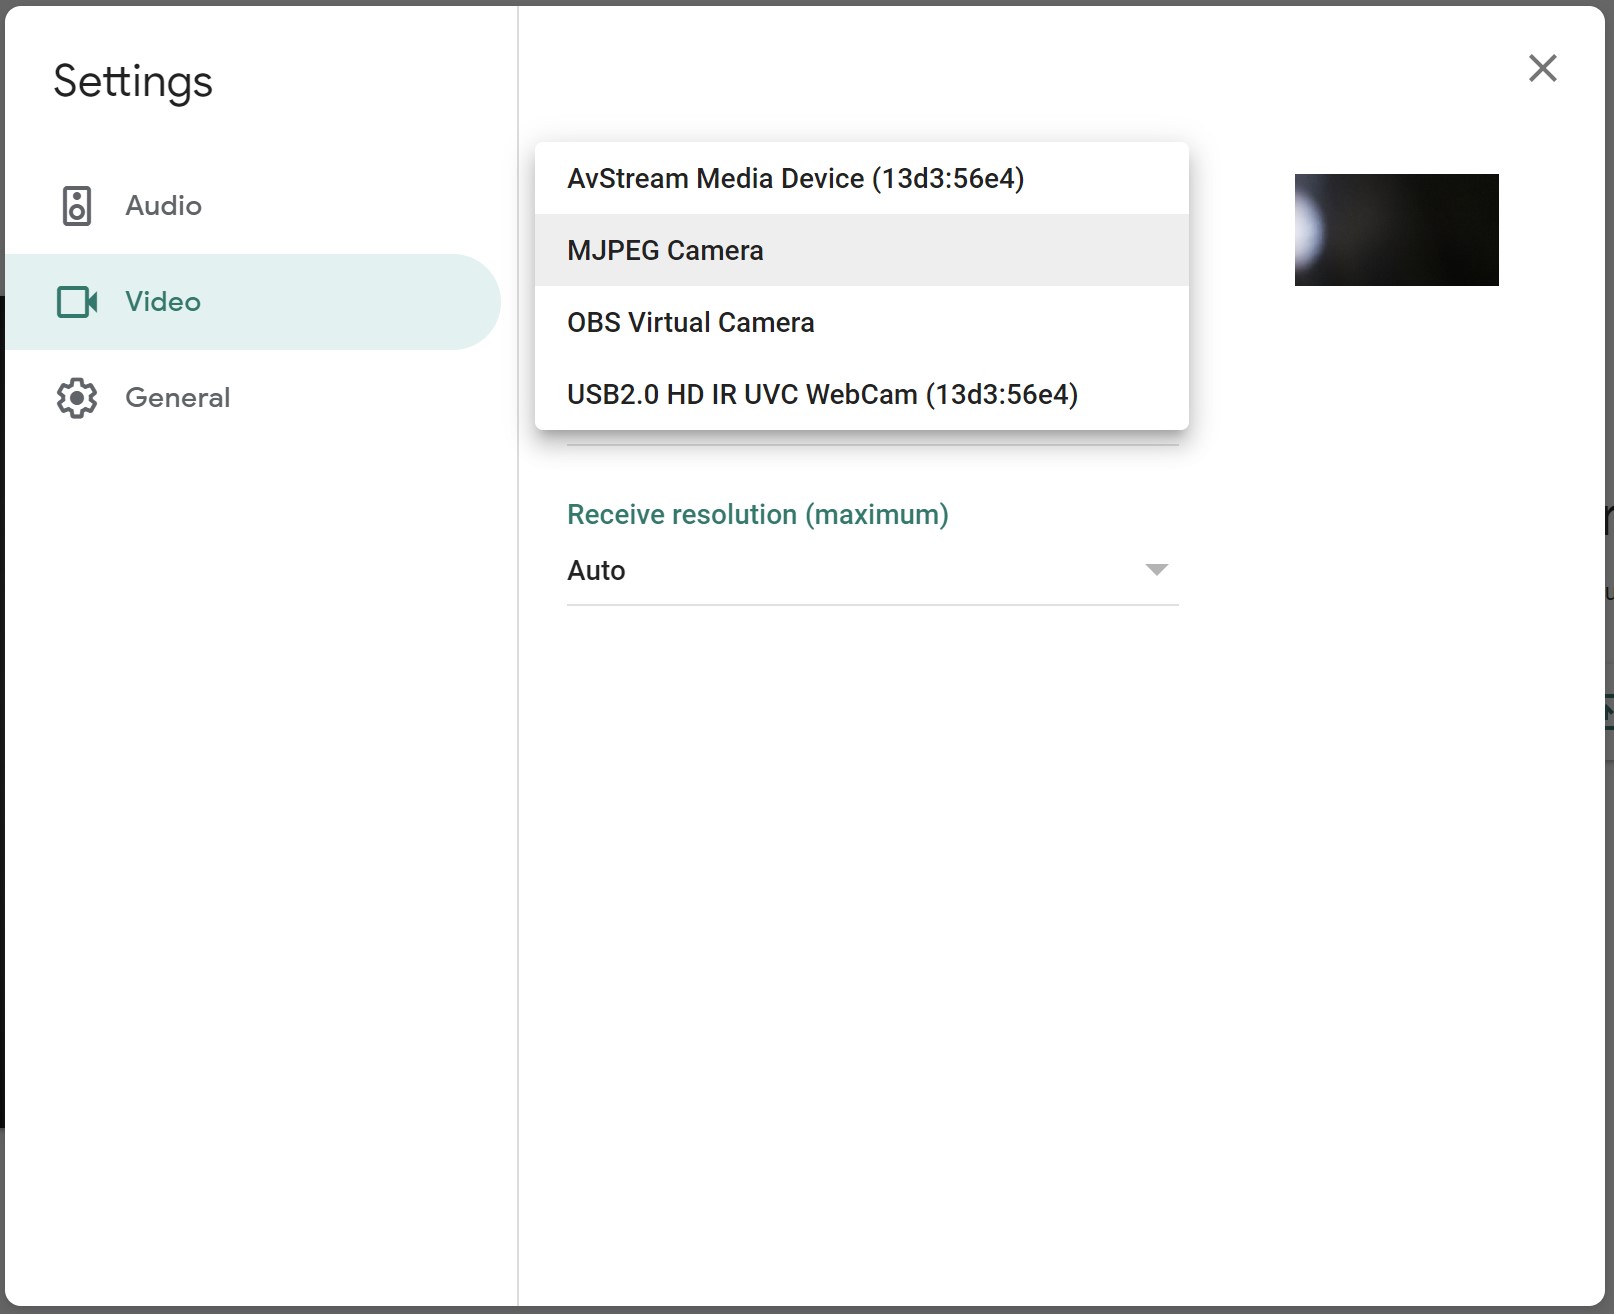
Your camera will appear under the name MJPEG Camera. Below you can see this in Google Meet.
Like what you read? Why not show your appreciation by giving some love.
From a quick tap to smashing that love button and show how much you enjoyed this project.

