In this project, you’ll learn to configure the one-wire interface on your Raspberry Pi to provide power and data from a single pin. You will be integrating this with sensors while learning some basics of Python programming.
1. Get your Pi ready
You should start with a switched-on Raspberry Pi connected to mouse, keyboard and monitor, you can learn here how to do it using an Okdo Pi kit
2. Build the circuit
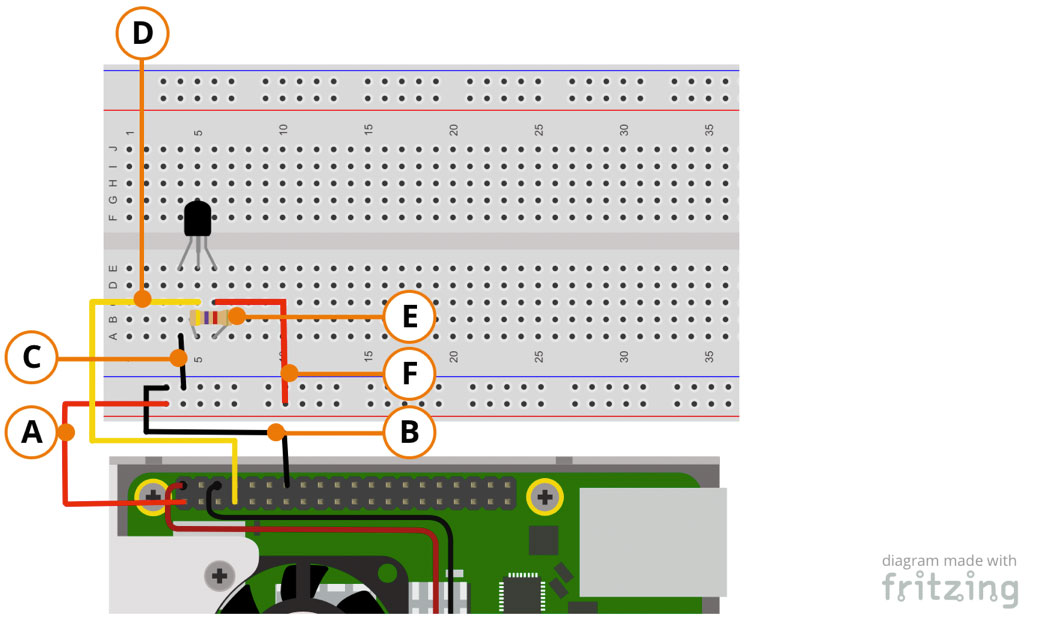
- Connect a female-male jumper A from the 1st pin on the bottom row of the Pi to the Red Rail (live) of the breadboard
- Connect a female-male jumper B from the 7th pin on the top row of the Pi to the Blue Rail (ground) of the breadboard
- Connect a male-male jumper C from the Blue Rail (ground) on the breadboard to A4
- Connect a female-male jumper D from the 4th pin on the bottom row of the Pi to C5
- Bridge the the 4.7k Ohm resistor E between A5 and A6
- Connect a male-male jumper F from the Red Rail (live) to C6
- Identify the pins of the temperature sensor. The curved part of the component is the back and the pins are positioned as in the diagram below
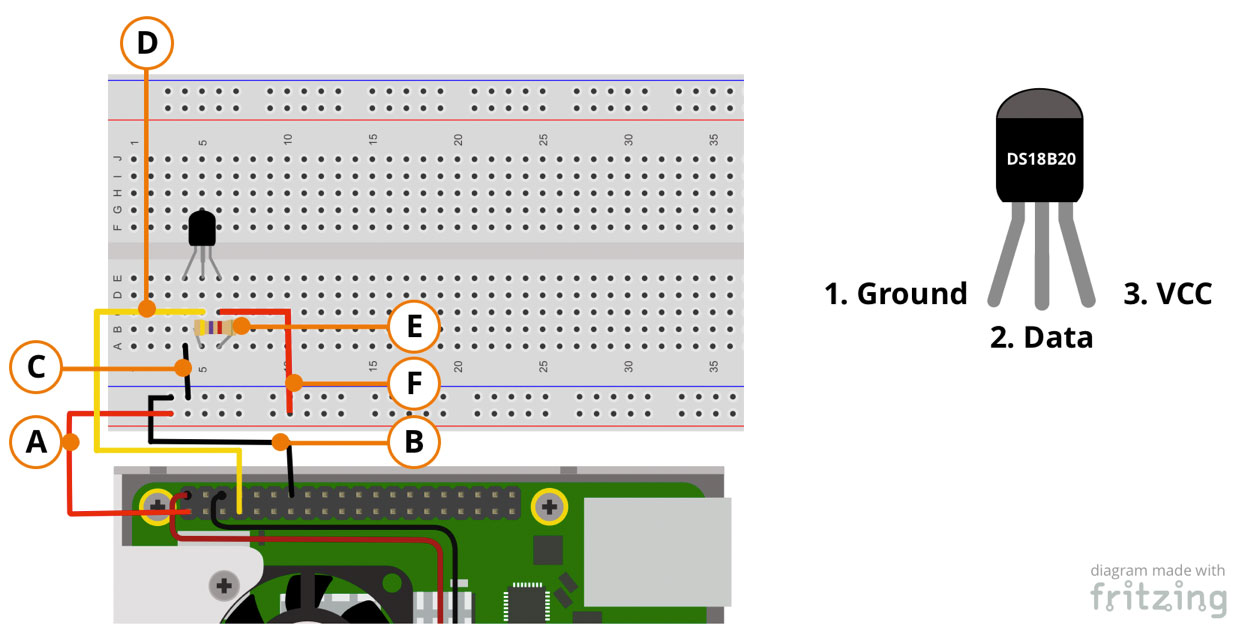
- Place the temperature sensor’s Pin 1 in 4E
- Place the temperature sensor’s Pin 2 in 5E
- Place the temperature sensor’s Pin 3 in 6E
3. Enable the sensor
The temperature sensor will be read by the Pi using what’s known as 1-wire interface. This is a single connection through which data is transfered.
- From the Raspberry menu select Preferences/Raspberry Pi Configuration
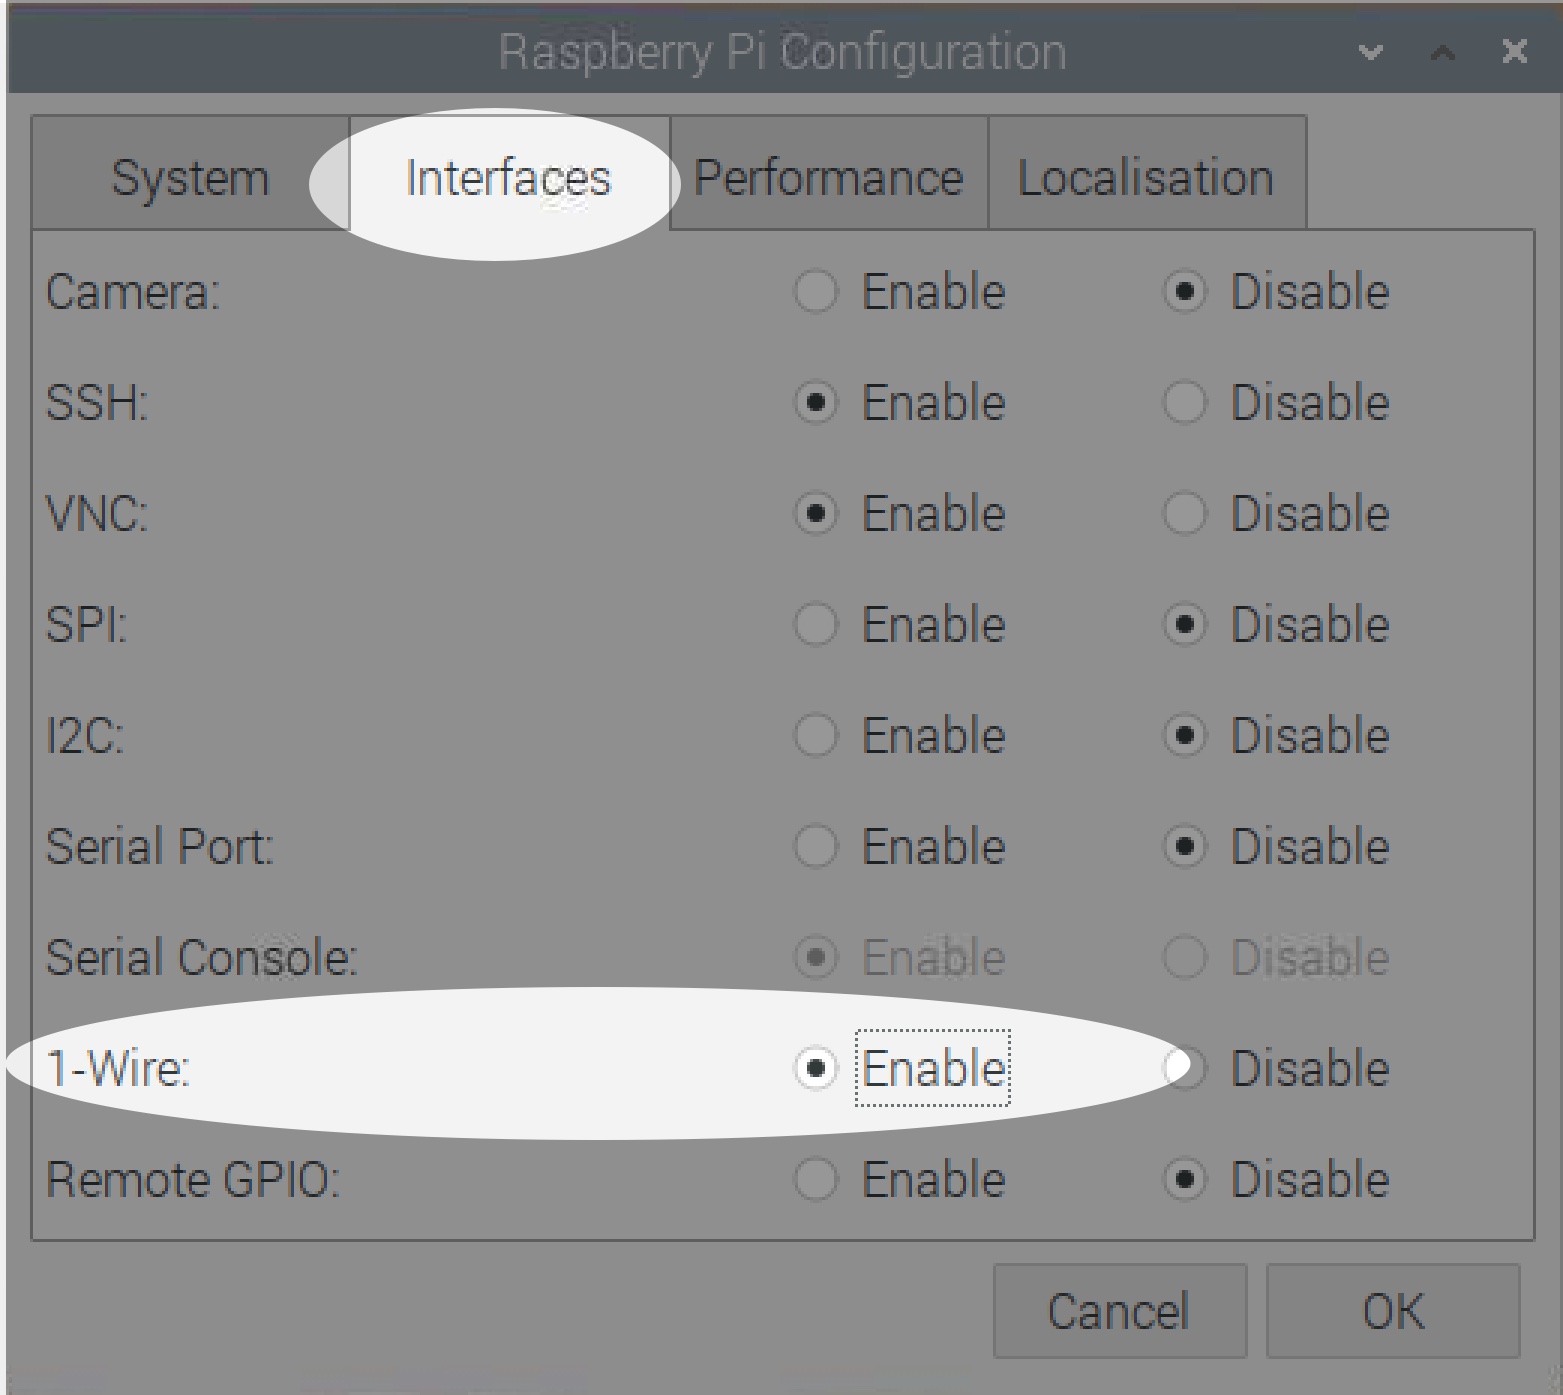
- From the Configuration menu select the Interfaces tab and enable 1-Wire
- Reboot your Pi and open Terminal and enter the following commands followed by Return after each one
cd /sys/bus/w1/devicesls
- This will check whether the one-wire interface is defined or not . If it is you’ll see something like this:
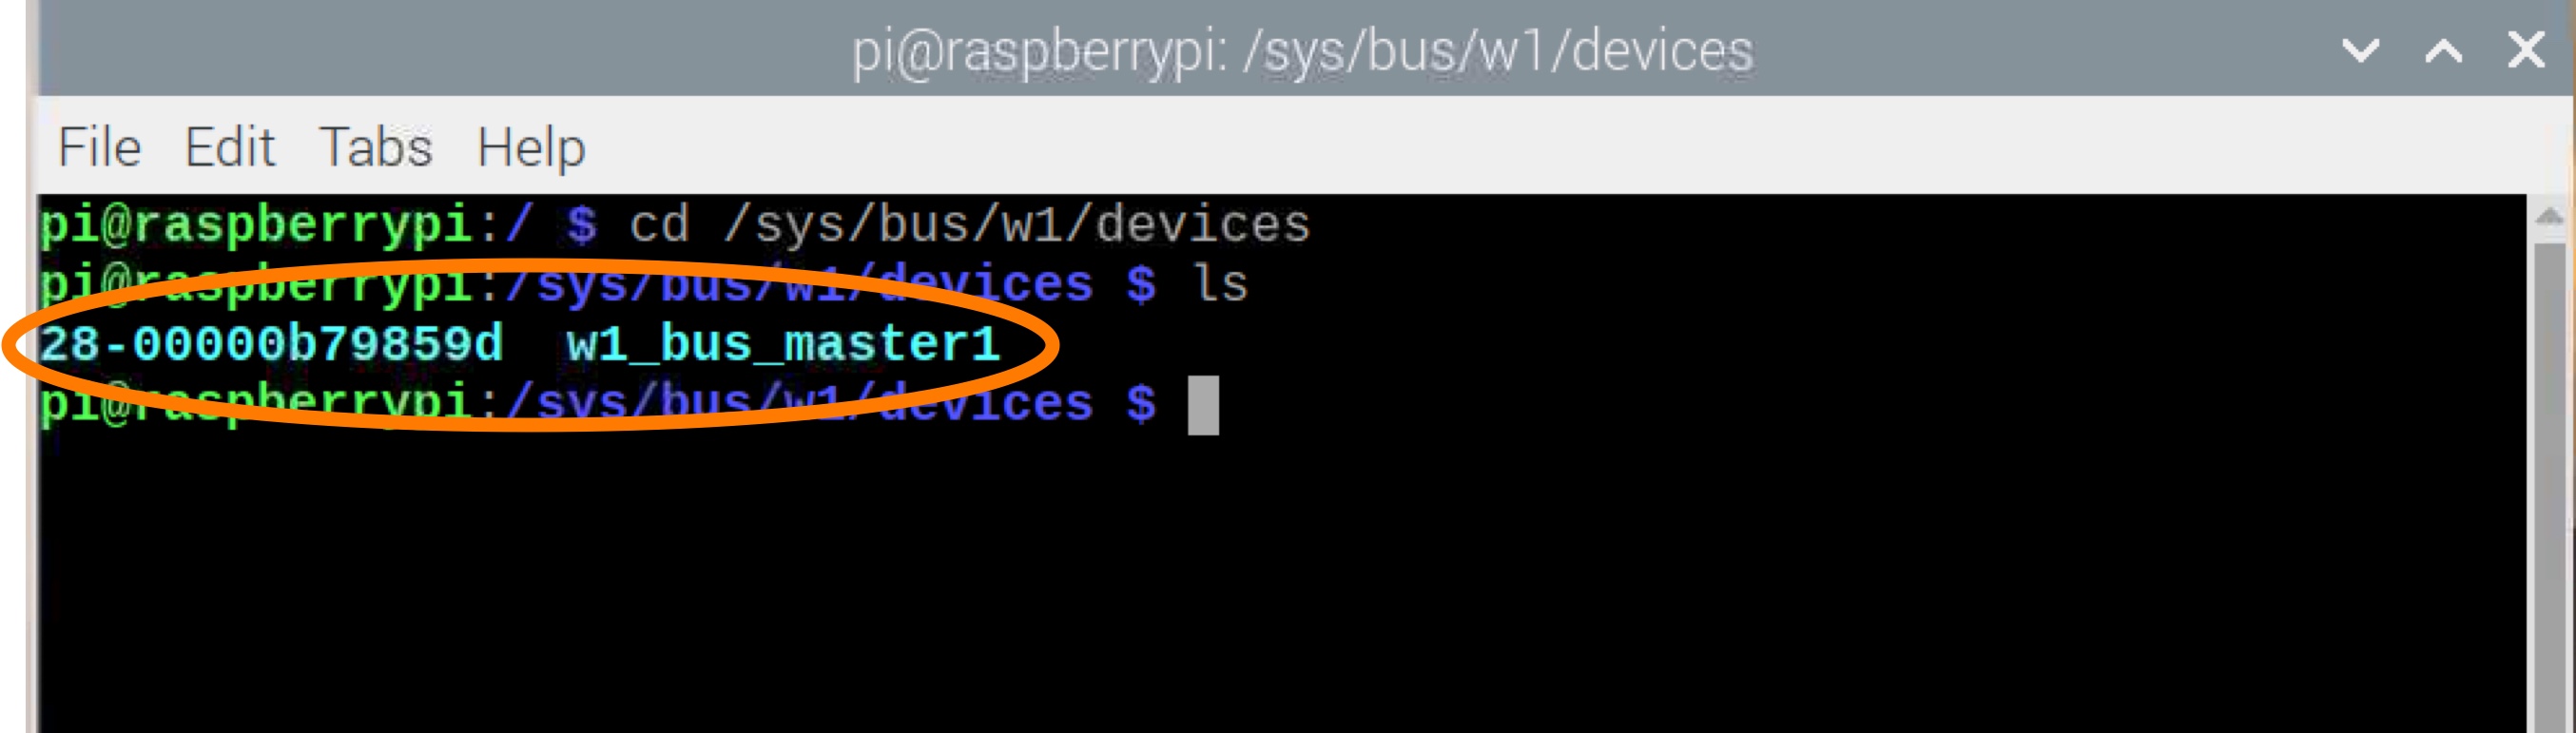
In my case the One-Wire interface is listed as: 28-00000b79859d
- Go to the 1-Wire directory directory by typing the following command using the number you got and pressing Return
cd 28-00000b79859dThe sensor stores the temperature in a file called w1_slave, to list its contents, type the following command and press Return.
cat w1_slave
In my case the temperature listed was 22375 which is the temperature in Celsisus without the decimal point. This should be read as 22.375° C
4. Programme with Python
From the main menu select Programming/Thonny Pythone IDE
import os
import glob
import time
os.system('modprobe w1-gpio')
os.system('modprobe w1-therm')
base_dir = '/sys/bus/w1/devices/'
device_folder = glob.glob(base_dir + '28*')[0]
device_file = device_folder + '/w1_slave'

def read_temp_raw():
f = open(device_file, 'r')- Paste the commands above into Thonny’s editor window and press Return
- Save the Python script you just created as temperature.py
- Click Run.
You should now see the temperature readings printed at the bottom of the window in both Celsius and Fahrenheit

Like what you read? Why not show your appreciation by giving some love.
From a quick tap to smashing that love button and show how much you enjoyed this project.

