For millennia people have used the force for good and evil and just to lift things up and move them about. Then when Sir Isaac Newton invented gravity in 1687 everything got much harder and it fell into disuse. Nowadays only a handful of knights still remember how to use it properly.
The good news is we have found quite a large amount of force inside the micro:bit, enough in fact to lift small, everyday objects. If you want to find out how to lift things much like the masters, this project will show you how.
1. Stepper motor assembly
The project uses a small but powerful stepper motor to apply the force to small objects so that they can be lifted very rapidly into the air and held there. When the force is released, they drop back down to earth.
The hybrid stepper motor used was a NEMA 17, 4-wire motor with a 1.8° step angle (200 steps/revolution) rated at 1.68A @ 2.8V.
We built a 65mm radius spool out of two 3mm fibreboard plates held together with M3 nuts and bolts, spaced out with 7mm lengths of plastic tube. The spool was attached to the 5mm motor shaft with a brass hub.
This size spool will lift about 400mm per revolution or 200 steps.
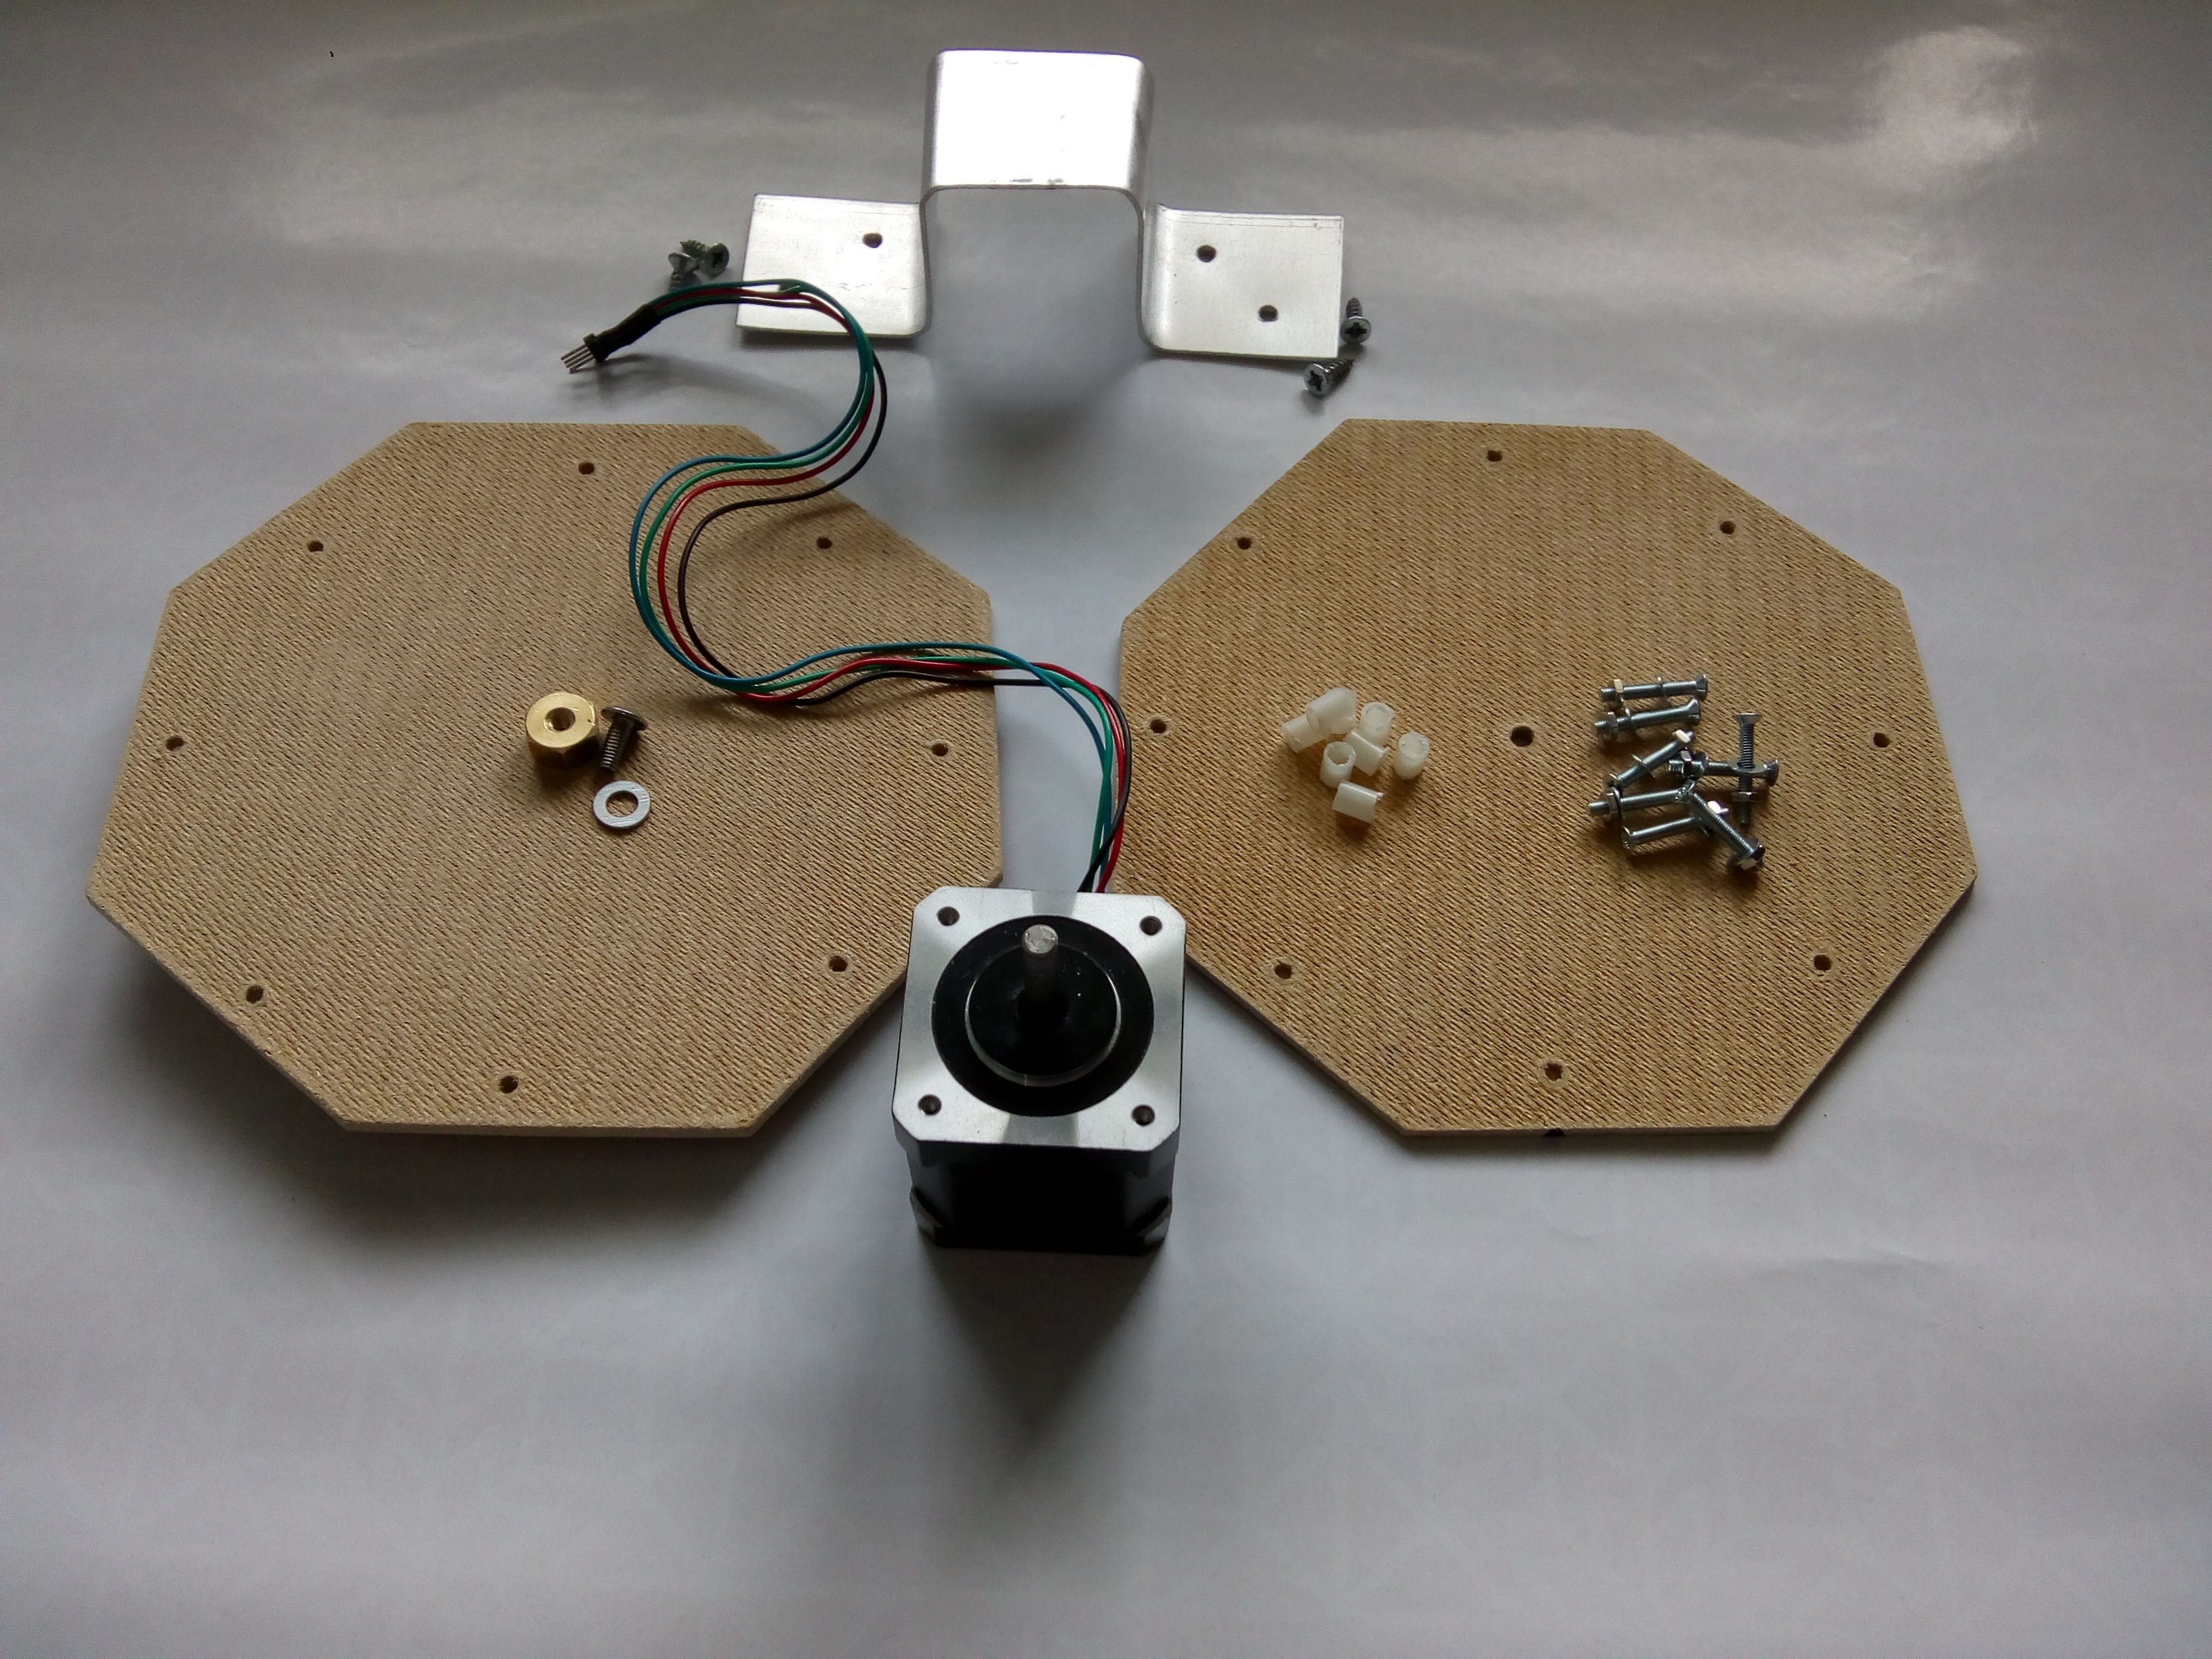
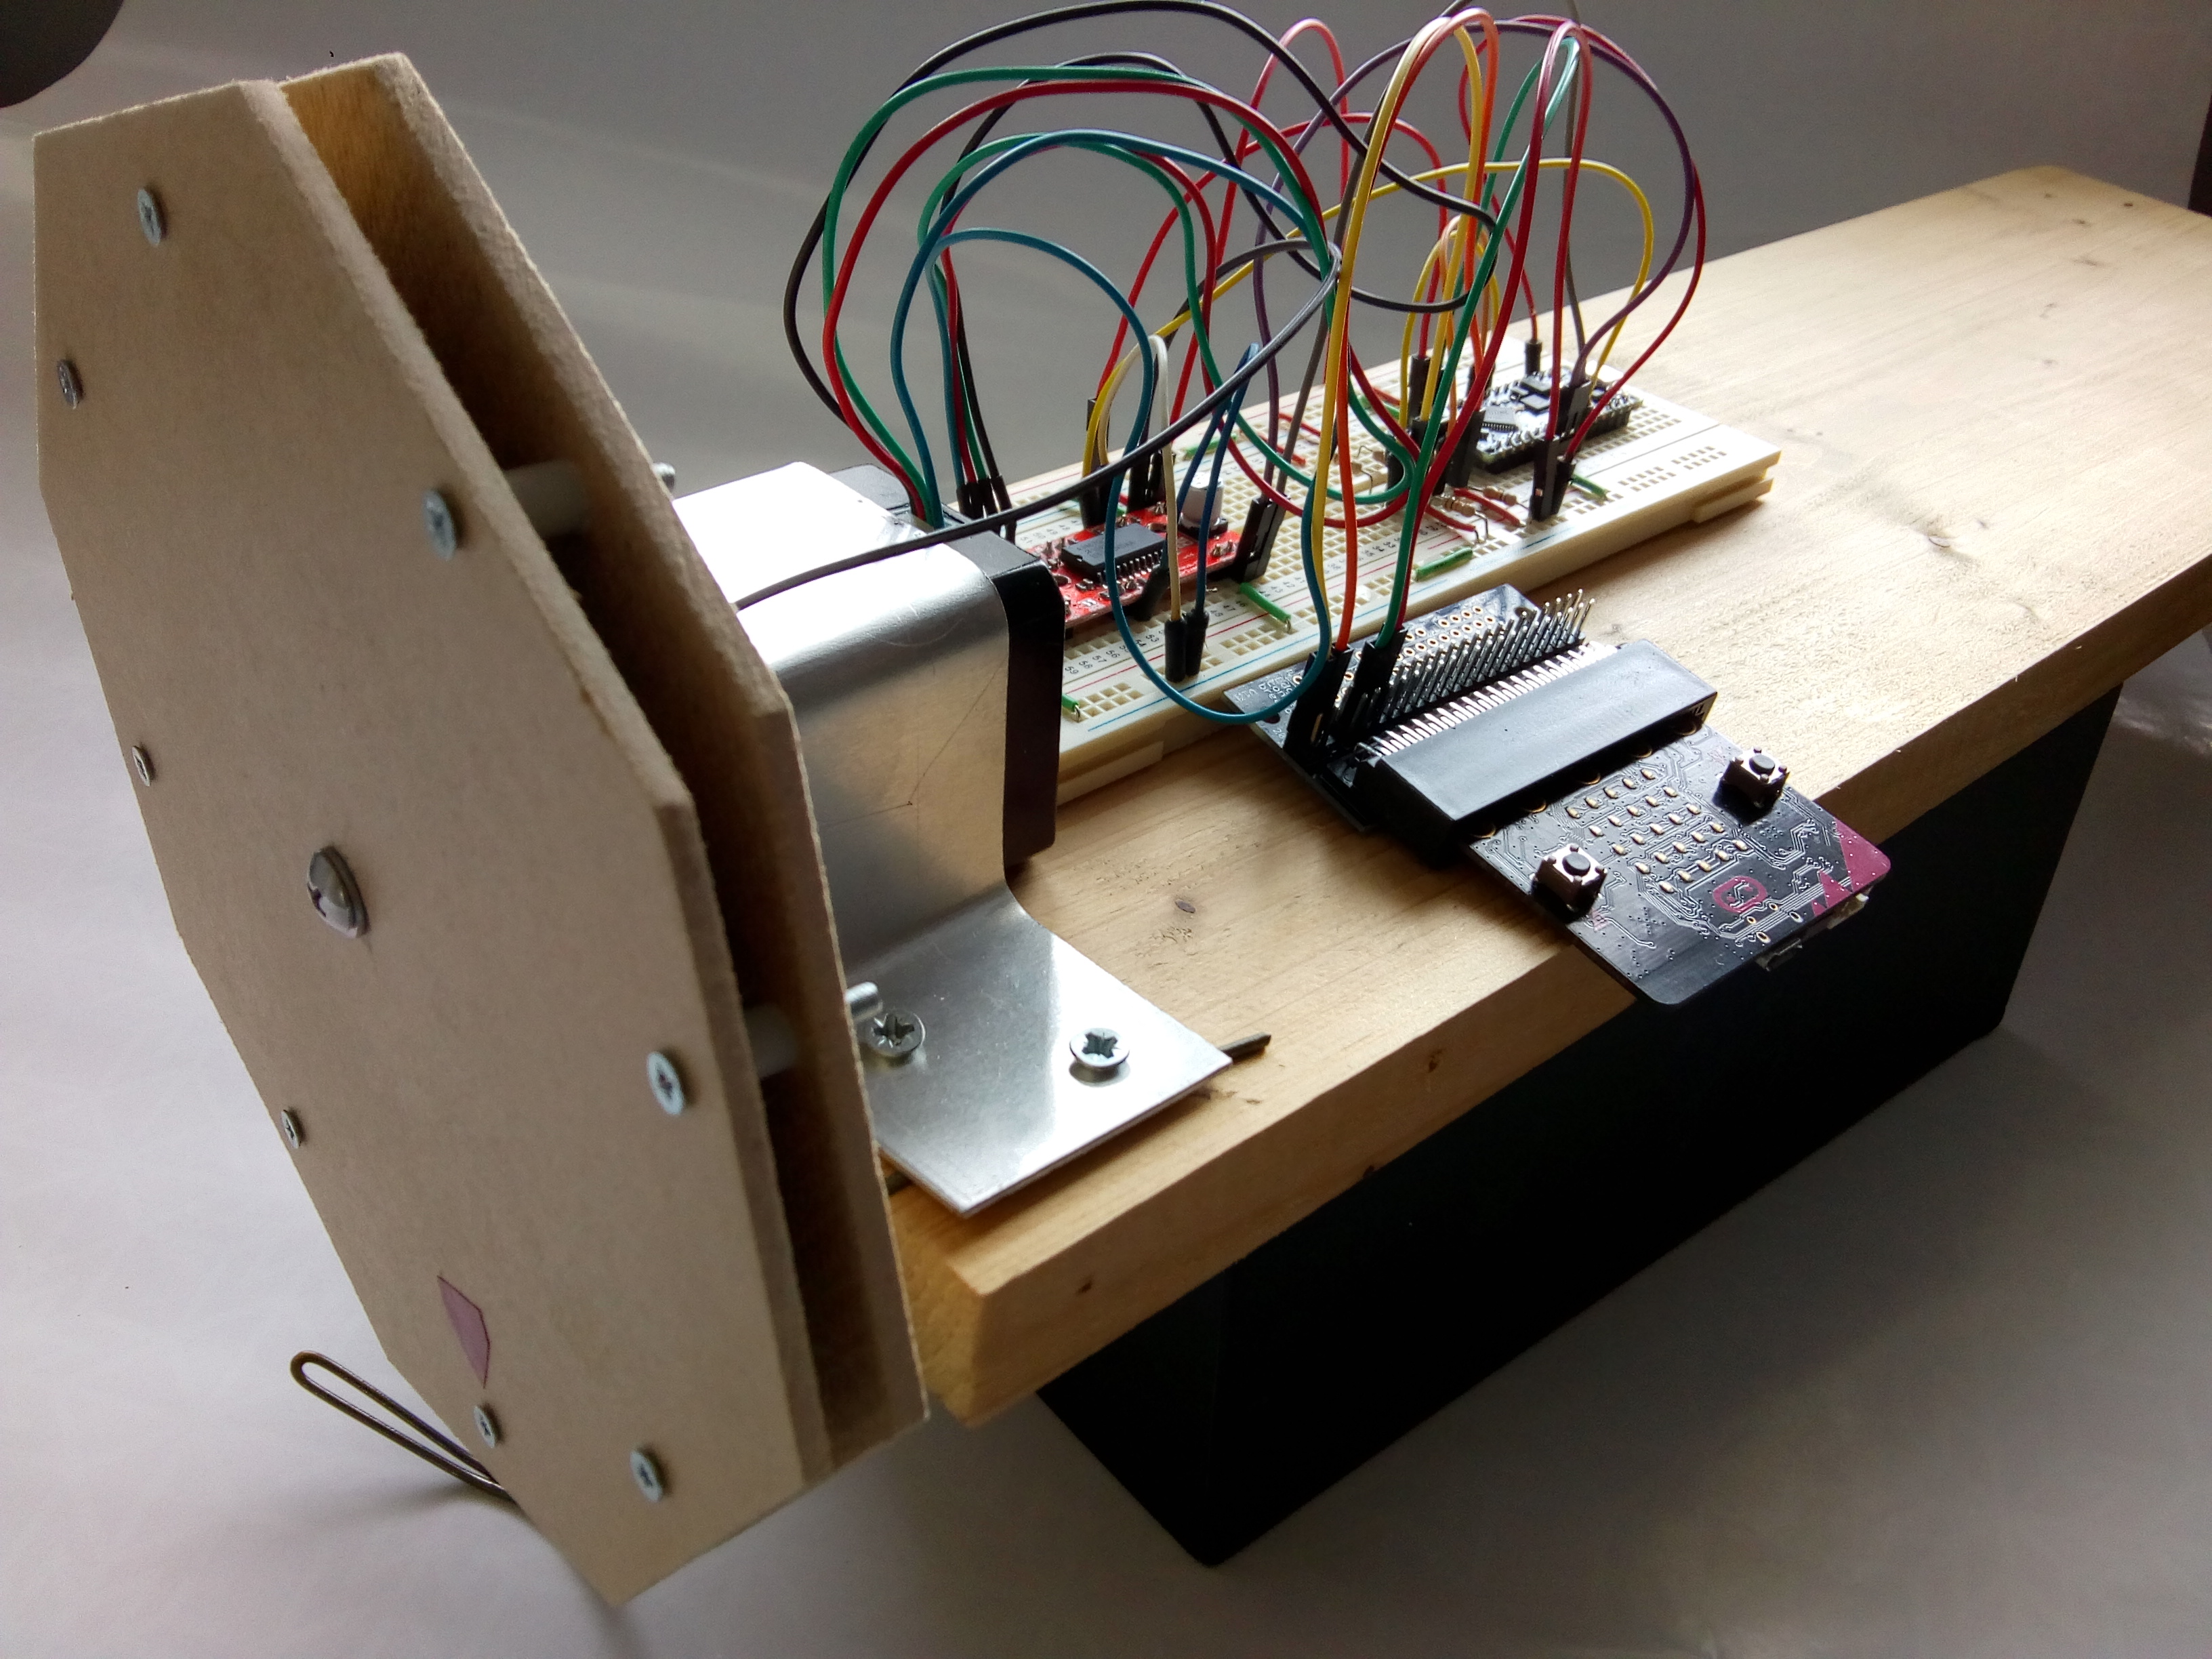
The motor assembly was fixed to a wooden board using a bracket bent from aluminium strip which also held in place a guide made from a cut-down wire coat hanger.
Two lengths of almost invisible fine nylon line are used to attach to the object you want to apply the force to.
Refer to our stepper motor how-to for more information on stepper motors.
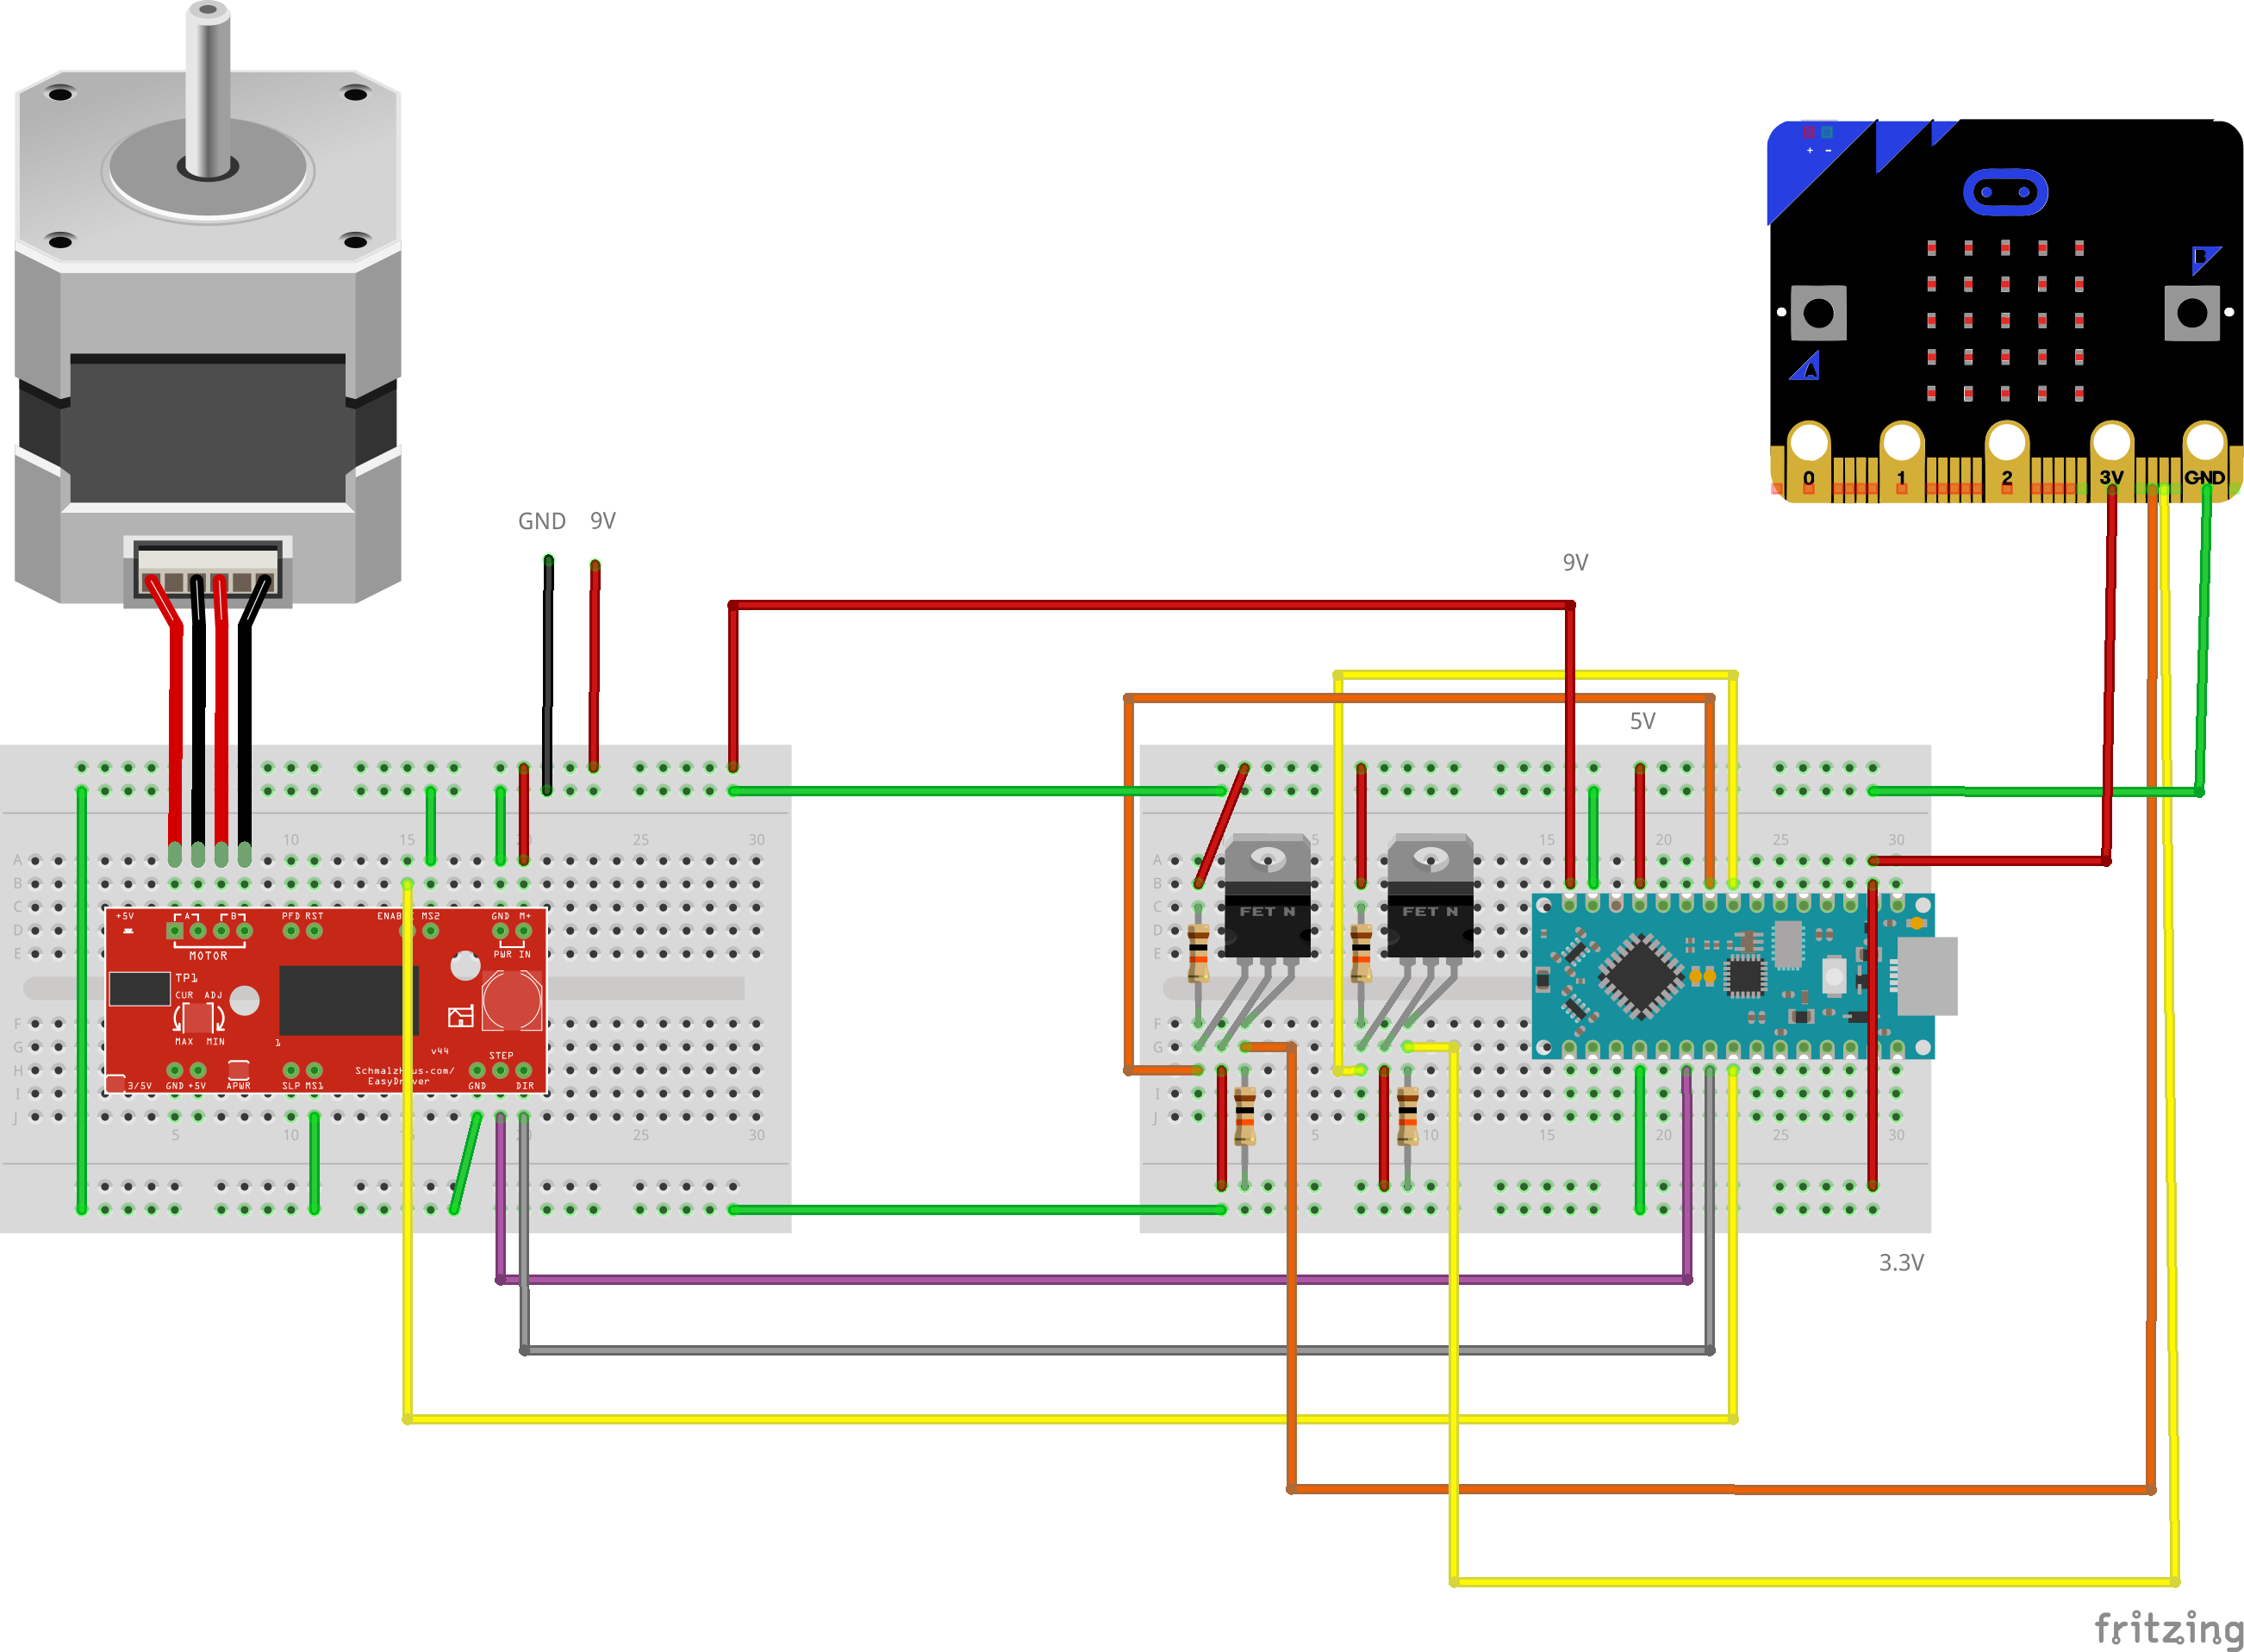
2. Stepper motor circuit
Although it’s possible to control stepper motors using a micro:bit and EasyDriver board directly, we wanted to accelerate the motor very rapidly (in a force-like way) so we used an Arduino Nano Every running the SpeedyStepper driver code to control the EasyDriver.
Because both the Arduino and EasyDriver use 5V signals, they can be connected directly. We used a bench power supply set to 9V / 1A as input to the EasyDriver and Arduino VIN:
| Arduino pin | Colour | EasyDriver pin |
| D3 | Purple | Step |
| D4 | Grey | Dir |
| D5 | Blue | Enable |
| VIN | Red | 9V input |
| GND | Green | GND |
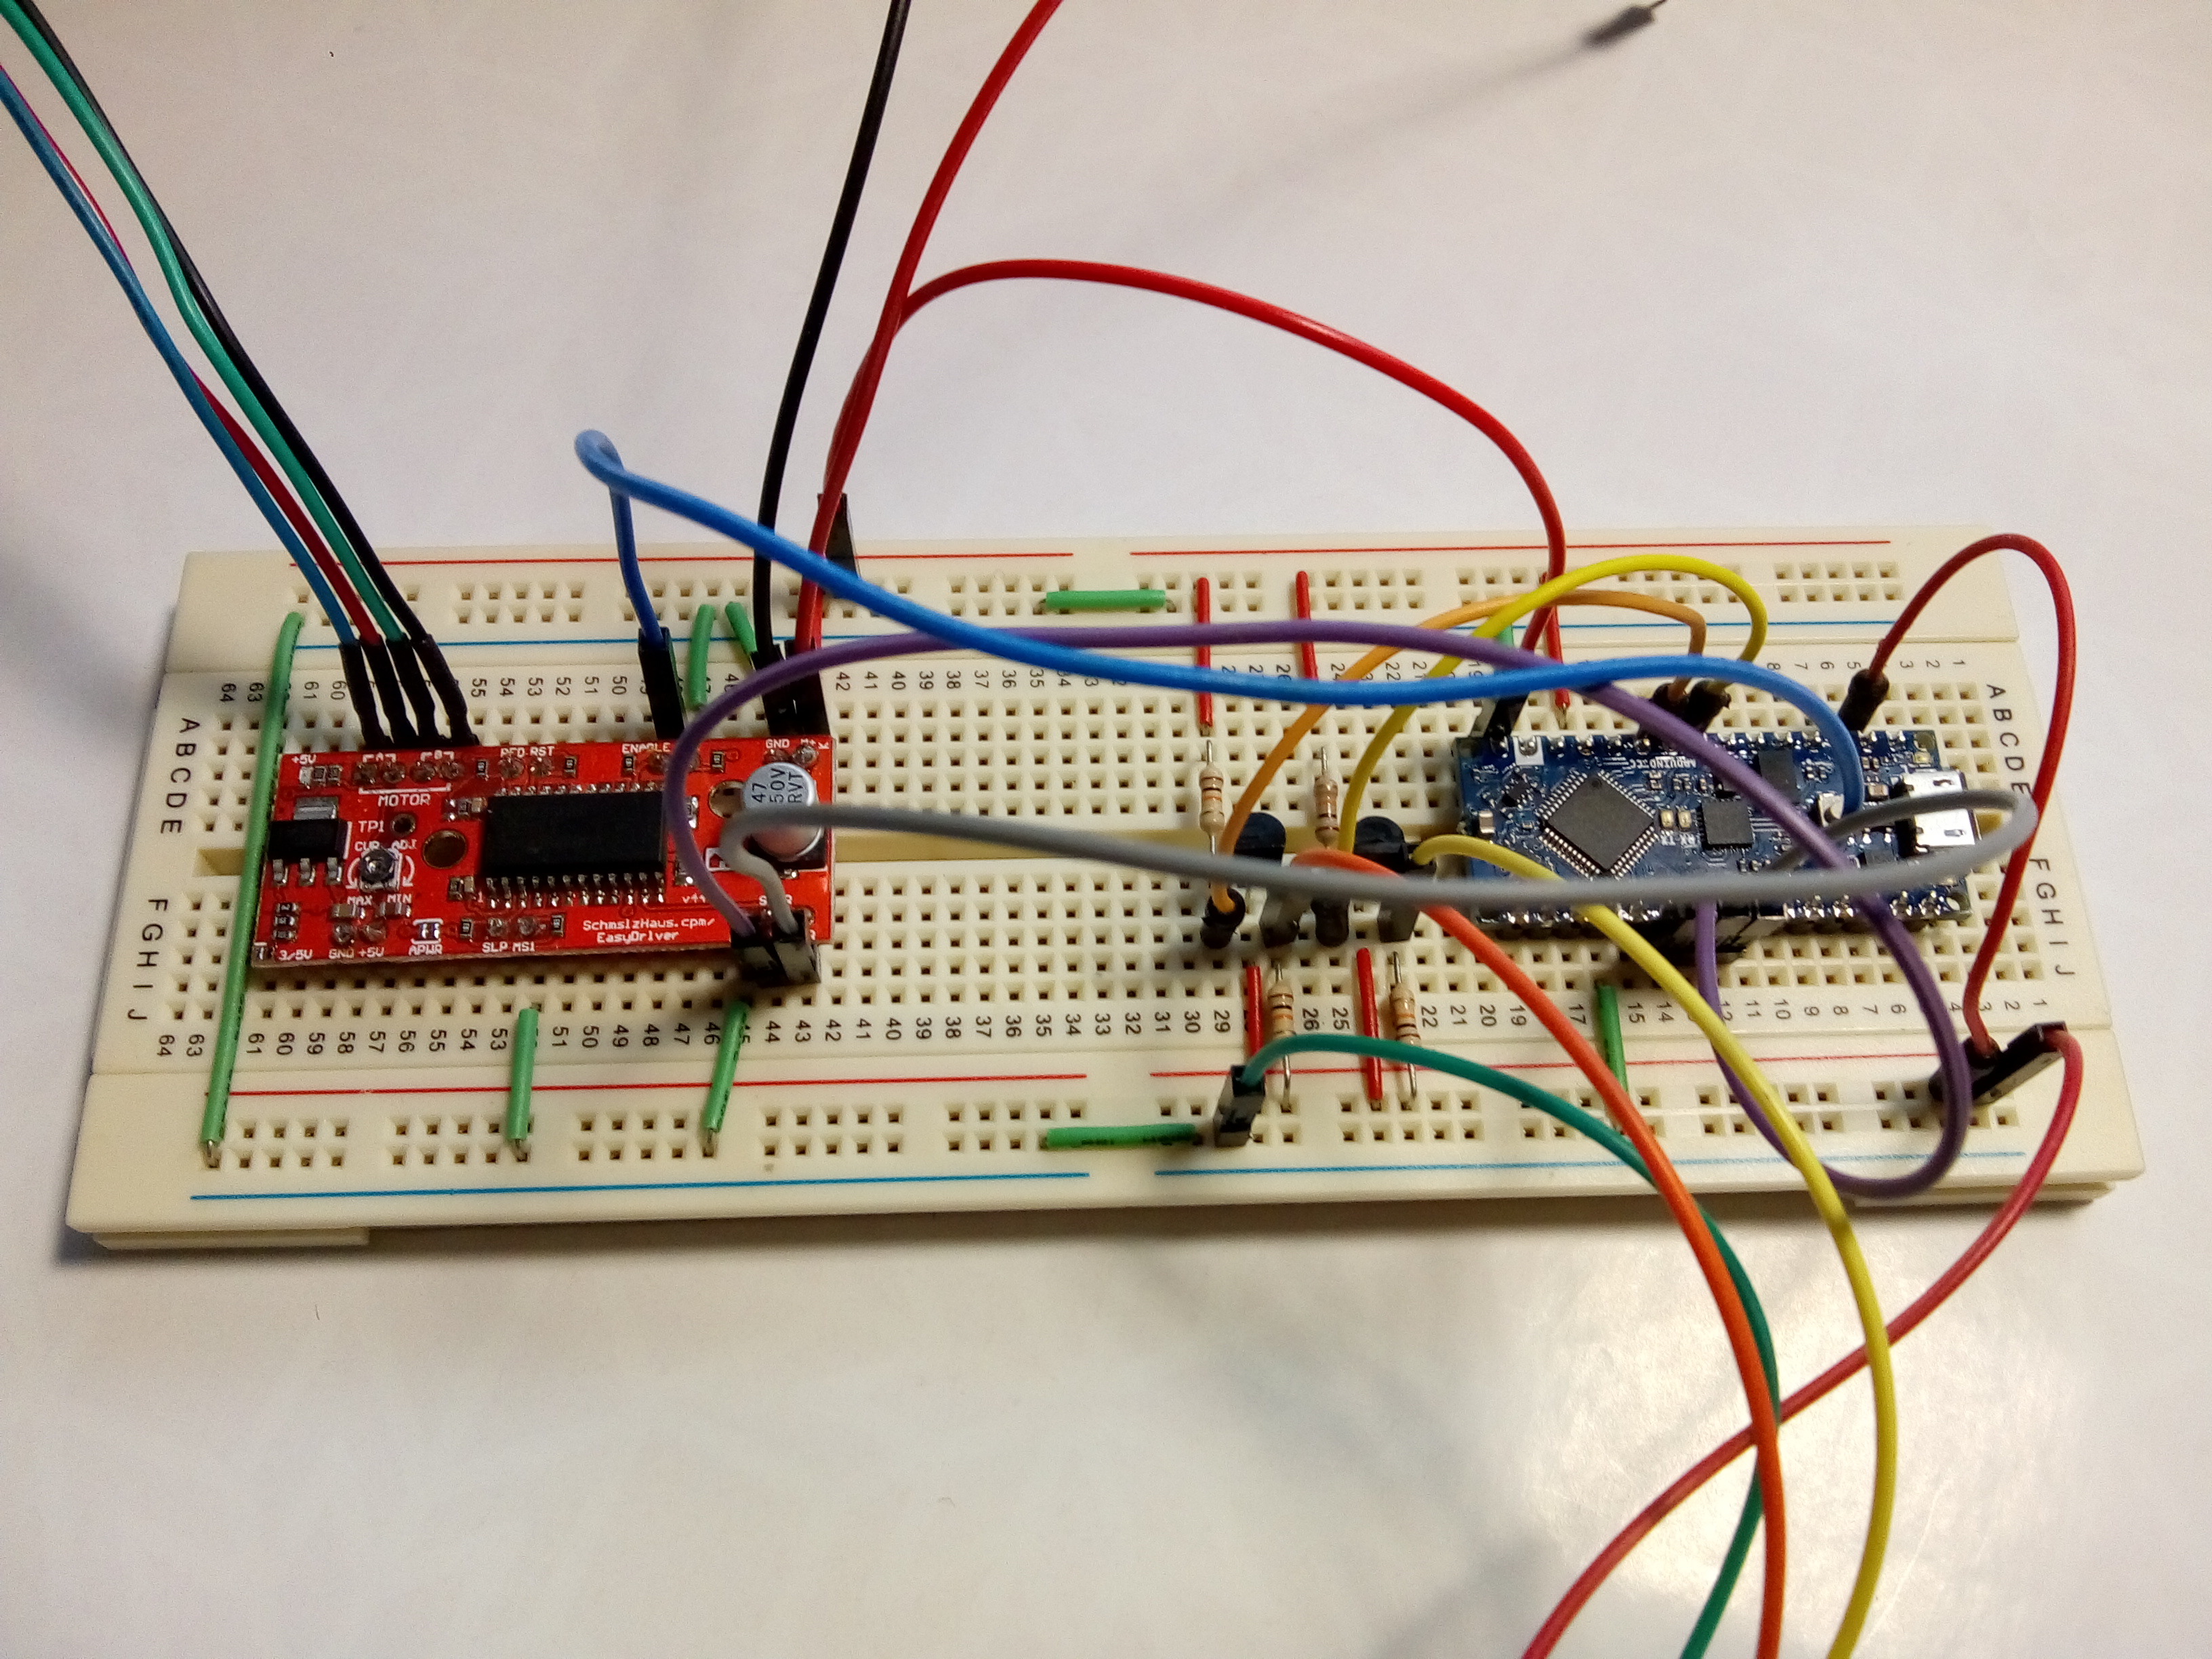
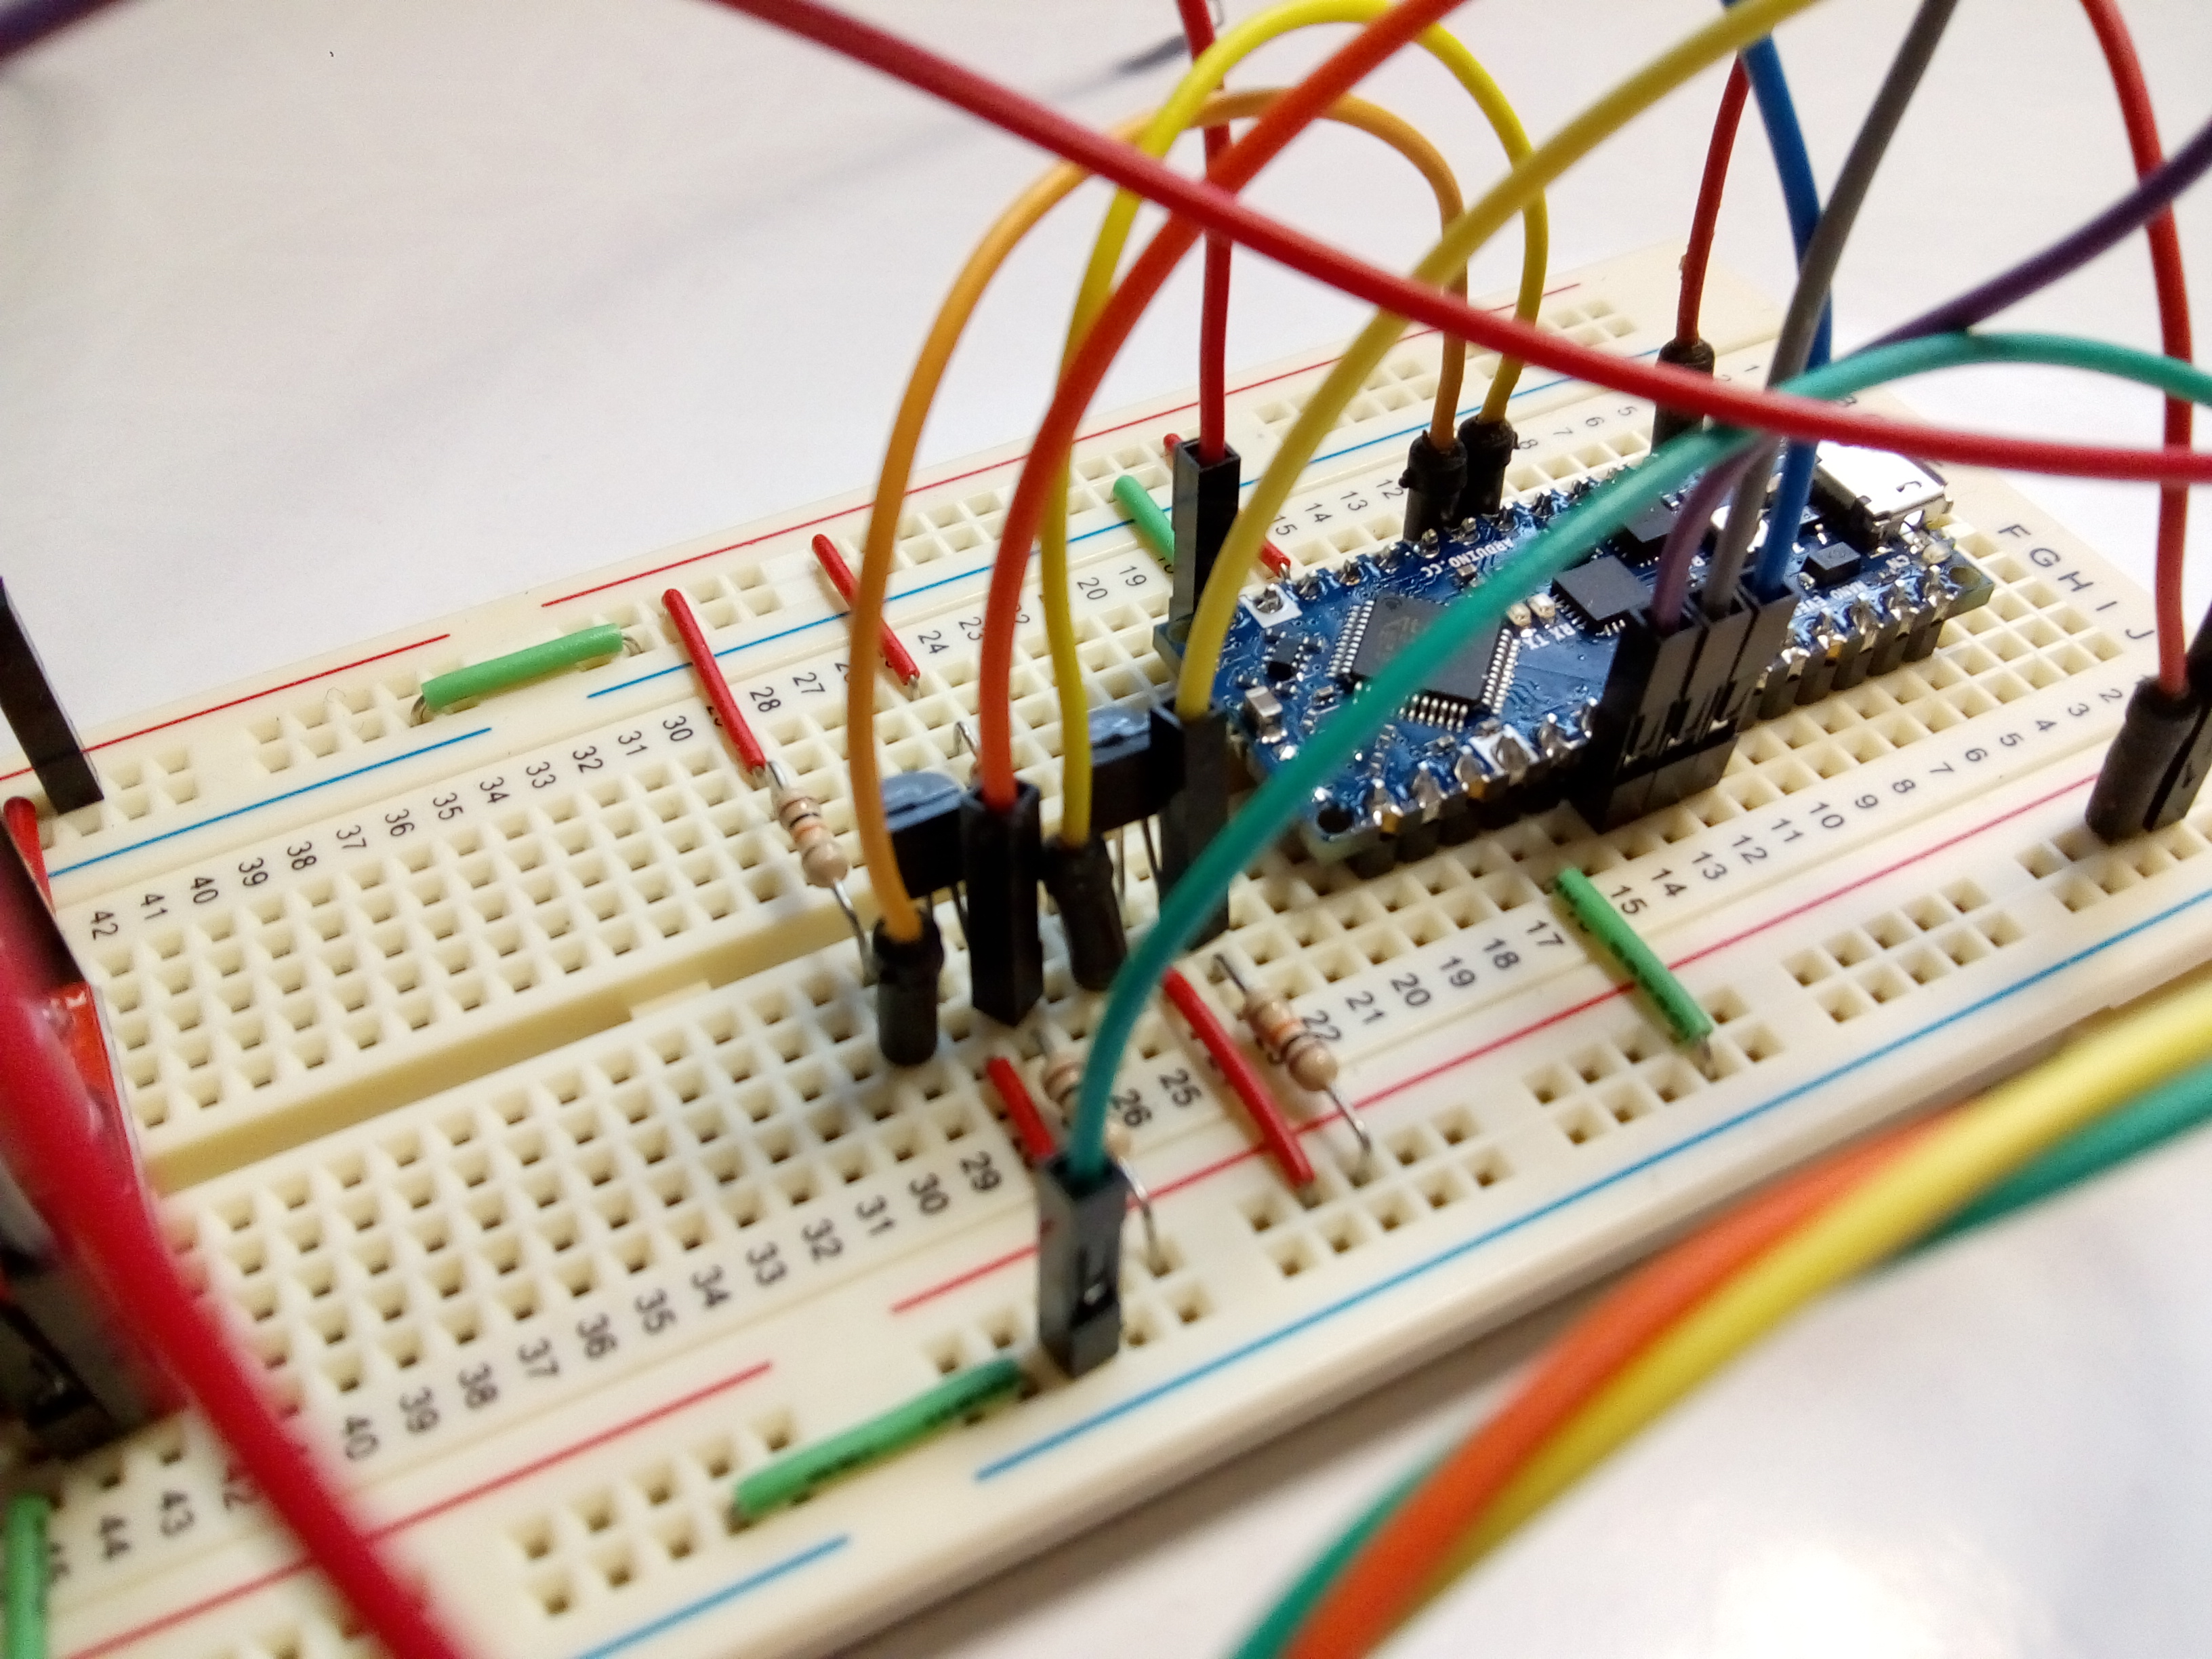
micro:bit operates at 3.3V and the Arduino Nano Every at 5V so care is needed when connecting these to avoid damaging the micro:bit. To be safe the I2C lines on the devices are connected via two BS270, N-Channel MOSFETS. The Arduino SDA & SCL are connected to the high side (5V) via 10k pull-up resistors and the micro:bit SDA & SCL lines are connected to the low side (3.3V) via 10k pull-up resistors. Both MOSFET gates are connected to 3.3V. The connections are shown below:
| Arduino pin | Colour | MOSFET |
| SDA | Yellow | TR1 DRAIN |
| SCL | Orange | TR2 DRAIN |
The micro:bit is attached using an edge breakout connector and powered by the Arduino 3.3V output – we had to solder male headers for the SDA (Pin 20) & SCL (Pin 19) as they are not installed on the standard breakout board.
| micro:bit pin | Colour | MOSFET/Arduino |
| SDA | Yellow | TR1 SOURCE |
| SCL | Orange | TR2 SOURCE |
| 3V | Red | Arduino 3.3 OUT |
| GND | Green | Arduino GND |
3 different voltage levels are used in this circuit, which will damage the boards if connected wrongly – please check your circuit carefully before applying power. The single breadboard shown in the photographs has separated power and ground rails – not all breadboards are like this!
3. Stepper motor control
Stepper motors are controlled by signal pulses, each pulse moves the motor one step. While It’s possible to generate these pulses using the micro:bit, to accelerate the motor to a high speed from standstill requires a dedicated driver program. We chose an Arduino Nano Every because there are great libraries available which can control the speed and acceleration of motors to give the effect we wanted.
- Open the Arduino IDE and search for SpeedyStepper in the Library Manager then install it. Follow our Nano Every Getting Started Guide if you don’t know how to do this.
- Open a new Arduino Project
- Go to OKdo GitHub and copy the arduino-stepper-i2c-receiver.ino file as Raw at: https://github.com/LetsOKdo/arduino-stepper-i2c-receiver
- Paste the code into the project and save.
- Upload project to Arduino Nano.
Several settings might need adjusting, according to the properties of your motor, spool and the speed and height that you want to lift objects.
Our stepper did 200 steps per revolution in full-step mode to make it move as fast as possible. By calculating the circumference of the spool this works out at about 0.5mm per step. We found it would not accelerate at much more than 800 mm per second but you can try changing this to see if it works for your setup.
#define MAX_SPEED 800.0 // mm per second
#define ACCELERATION 800.0 // mm per second squared
#define DIST_OF_TRAVEL 800.0 // mm
#define STEPS_PER_MM 0.5 // 65mm radius at 200 steps per revolution = 200 / 2 x pi x 65
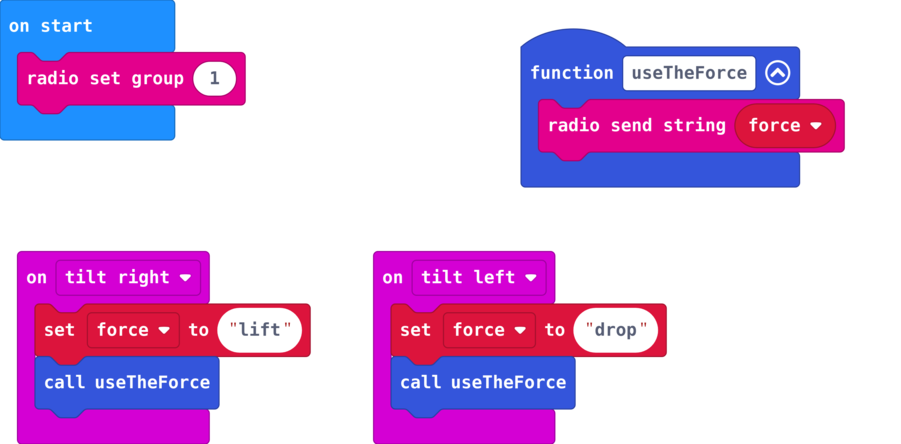
4. micro:bit commander
Triggering for the force comes from a battery-powered micro:bit which is attached to your arm. It’s best to put it under a sleeve so no one knows it’s there.
The accelerometer on the micro:bit can detect gestures like up, down and tilt. We used the tilt gesture to trigger a useTheForce function which sends a command string over the radio to the receiver micro:bit attached to the Arduino.
The code can be added as an extension in MakeCode.
- Open https://makecode.microbit.org/
- Click on New Project.
- Click on Extensions under the gearwheel menu.
- Search for https://github.com/LetsOKdo/microbit-force-commander and import.
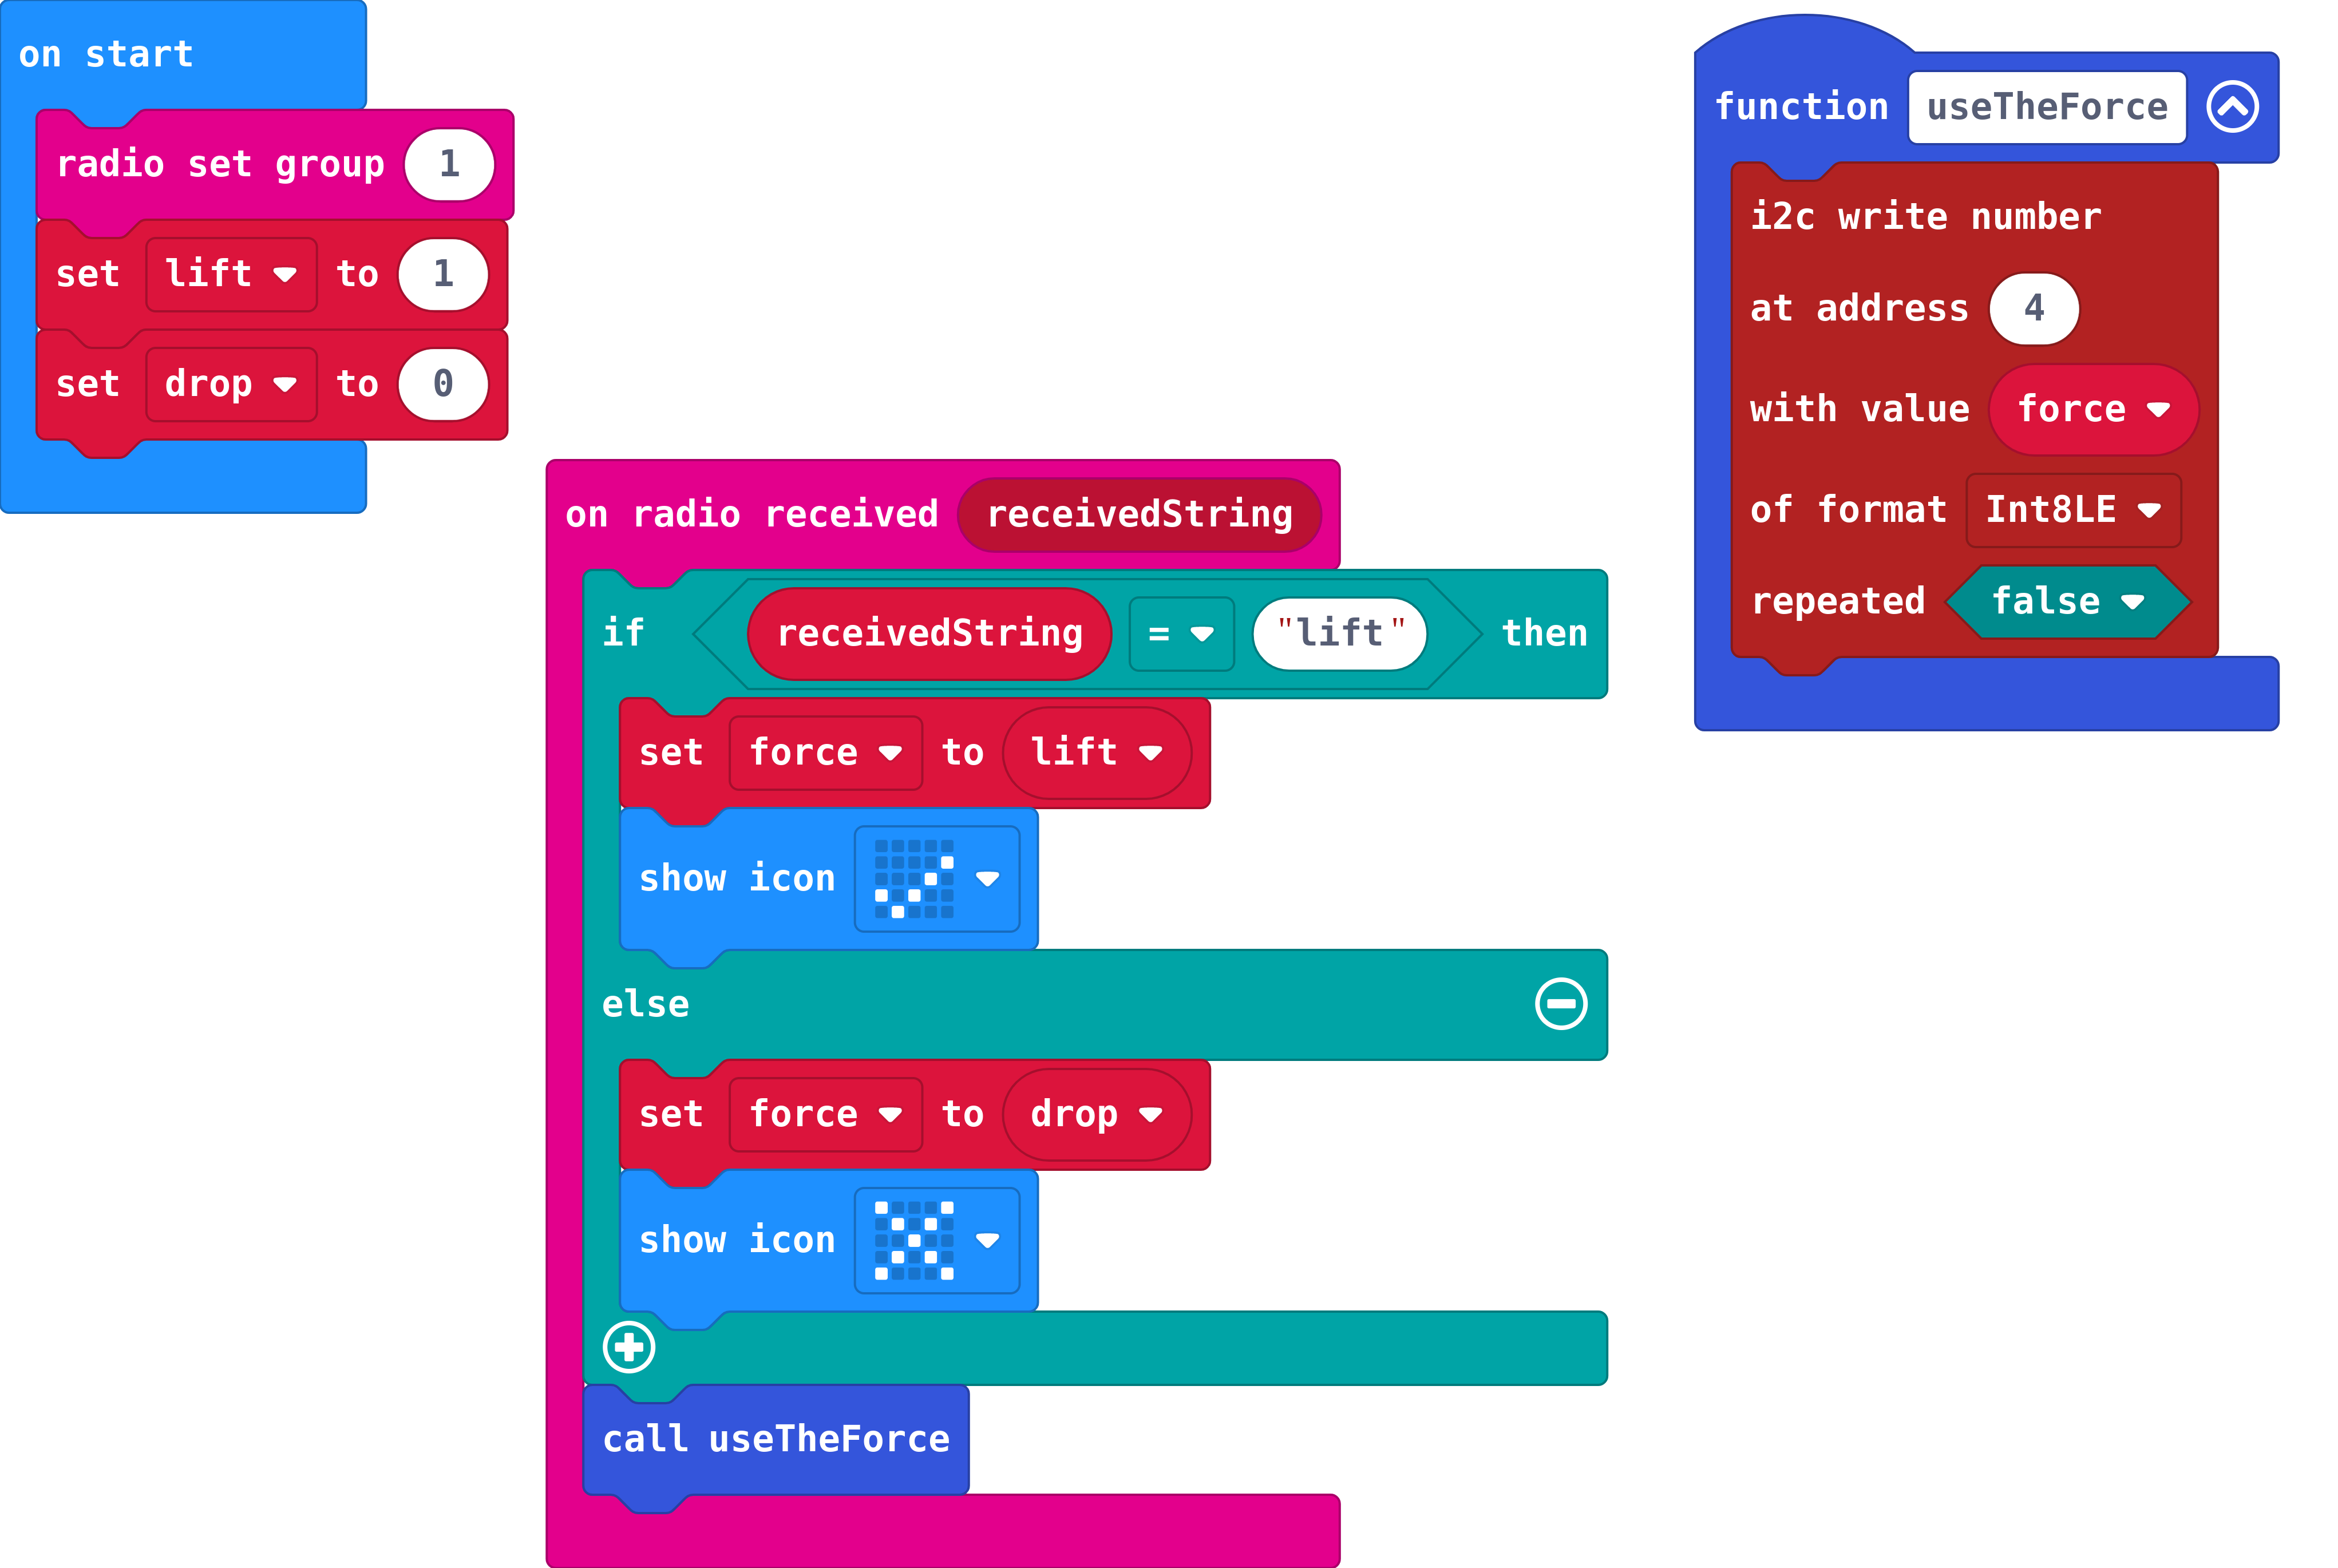
5. micro:bit receiver
The micro:bit receiver listens for commands coming from the Commander micro:bit and when it receives a message it checks to see if it’s a lift or drop command. It then calls another useTheForce function which generates a signal to send to the Arduino over the I2C bus. It sends a byte of value 1 to lift the object and a zero to drop it.
The code can be added as an extension in MakeCode.
- Open https://makecode.microbit.org/
- Click on New Project.
- Click on Extensions under the gearwheel menu.
- Search for https://github.com/LetsOKdo/microbit-force-actor and import.
Make sure you set both your micro:bits to the same radio group.
With a bit of practice and lots of concentration, it’s possible to lift all sorts of small objects with just a flick of your arm, just like a Jedi. You can hold them up in the air for as long as you like, then with another flick remove The Force and they will fall back to earth. Be careful not to try this with anything breakable or it will end badly!
Summary
There’s a lot going on in building this project and although it’s a bit of fun for Star Wars Day many parts of it can be applied to other robotics projects.
Learning to control stepper motors allows very accurate repeatable movements which is why they are used in CNC machines, 3D printers and many robots. Stepper motors also have a high holding torque so they can hold their position when stationary.
micro:bit is really easy to program and has nice features like gesture sensing which is fun to experiment with. It’s also simple to set up radio communication and send information from one micro:bit to another so they can be used as components in more complex projects.
You can find more information and resources for your micro:bit here: https://microbit.org/
Like what you read? Why not show your appreciation by giving some love.
From a quick tap to smashing that love button and show how much you enjoyed this project.

