
When you need to display information on a small screen, this project using XinaBox modules might be of interest. It combines an OLED display with a touchpad module to give a modal screen that changes at the touch of a button. The demonstration code provided displays different system information on the Oled depending on which button is touched.
At the end of the project, you will know how to set up and combine the XinaBox touchPad with an Oled display. You will also have a Python code framework that can be used in your own projects to link custom actions to control a display with a touchpad.
What you'll need
1 x Raspberry Pi Mouse Red/White
1 x Raspberry Pi Keyboard UK Layout Red/White
1 x Xinabox Br01 – Raspberry Pi Bridge
1 x Xinabox Sh01 – Capacitive Touch Sensor Controller (Cap1296)
1 x Xinabox Od01 – Oled Display 128X64 (Ssd1306)
1 x Host PC
1 x WiFi or Ethernet cable
1 x AVX BTB Series, MalePCBEdge Connector, SMT Mount, 10 Way, 2 Row, 2mm Pitch, 2.5A
Assembly
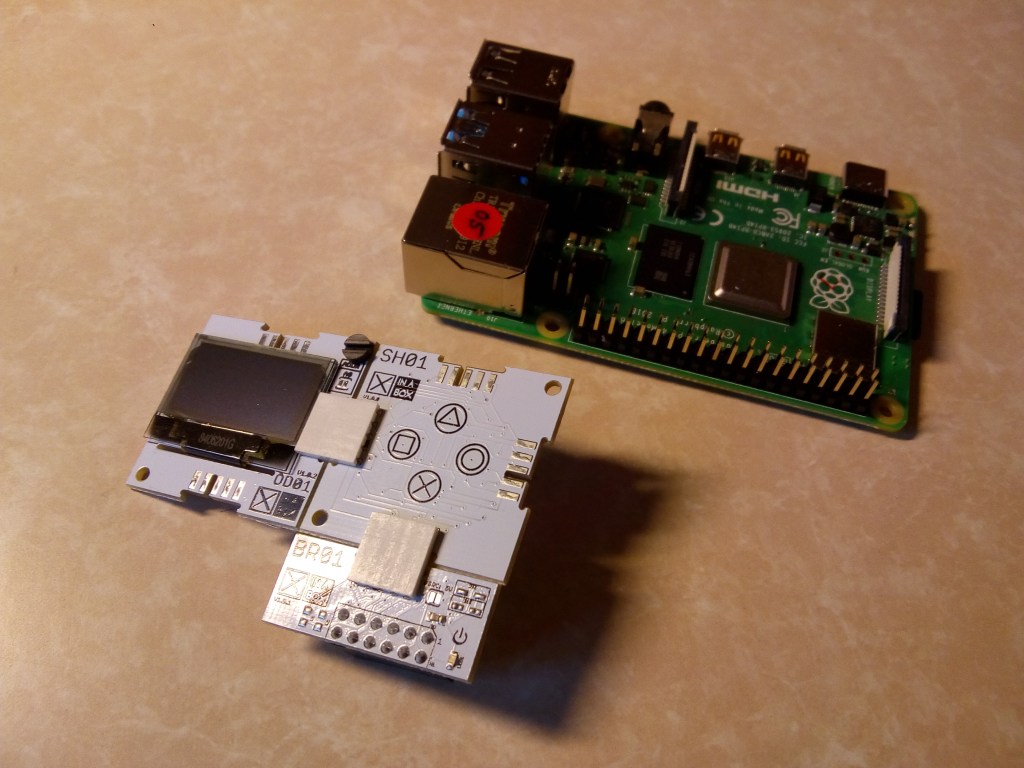
- Using the module connectors, clip the modules together as shown in the picture.
- Align the connectors so that they fit with the slot in the board connector. It can be quite tight so take care.
- Add a stand-off to the Oled and fit the assembly on to the Pi’s GPIO connector. It should align with the pins furthest from the Ethernet connector (pins 1 -12).
Get your Pi ready
- Use the Full Desktop version of Raspbian. If this is not already installed on your system, follow the steps here to download and set it up.
- When your Pi has started up, follow the on-screen instructions until you are at the desktop.
- Open Terminal from the menu bar and run raspi-config to enable I2C from the Interface section.
sudo raspi-config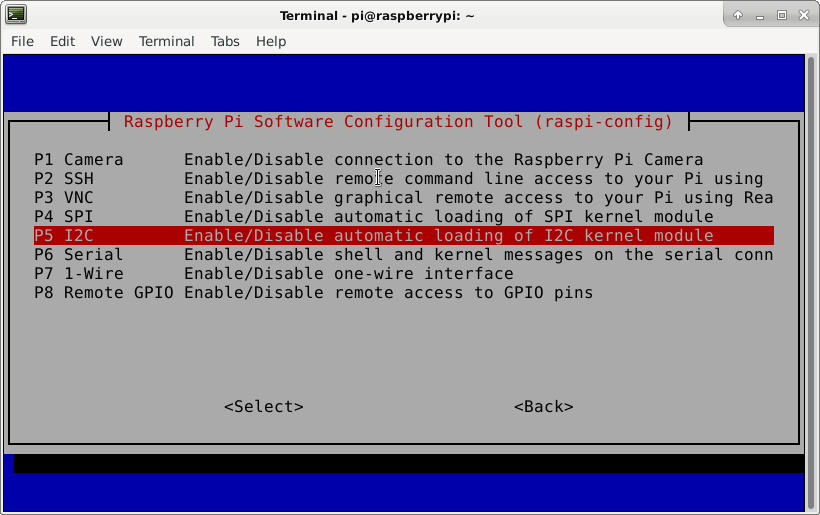
- Update the system
sudo apt update && sudo apt upgrade- Install Debian packages
sudo apt install python3-dev libfreetype6-dev libjpeg-dev build-essential libopenjp2-7 libtiff5 i2c-tools- Install Python Oled & Smbus packages
pip3 install luma.oled smbus2- Clone luma example code
git clone https://github.com/rm-hull/luma.examples.git- Setup fonts & images
mkdir xinabox
cp -r luma.examples/examples/images/ xinabox
cp -r luma.examples/examples/fonts/ xinabox
Python example code
- On your Pi, open Thonny, enter the following code and save it as touch.py in the xinabox directory:
import os, time, datetime, smbus2
from gpiozero import CPUTemperature
from luma.core.interface.serial import i2c
from luma.core.render import canvas
from luma.oled.device import ssd1306
from PIL import ImageFont, Image
TOUCH_ADDR = 0x28
OLED_ADDR = 0x3C
I2C_PORT = 1
CAP_TOUCH_INPUT_STATUS = 0x03
def get_cputemp() -> str:
    """Return CPU temperature"""
    return f'{CPUTemperature().temperature:0.1f}'
def get_date() -> str:
    """Return formatted date"""
    return datetime.datetime.now().strftime("%d %b %y")
def get_time() -> str:
    """Return formatted time"""
    return datetime.datetime.now().strftime("%H:%M:%S")
def get_clear() -> str:
    """Return empty string"""
    return ""
def get_oled() -> 'device':
    """Return an Oled display"""
    serial = i2c(None, I2C_PORT, OLED_ADDR)
    return ssd1306(serial)
def init_touch(bus):
    """Initialise Touch Pad"""
    bus.write_byte_data(TOUCH_ADDR, 0x27, 0x0)
    bus.write_byte_data(TOUCH_ADDR, 0x21, 0x39)
    bus.write_byte_data(TOUCH_ADDR, 0x0, 0x0)
def main():
    bus = smbus2.SMBus(I2C_PORT)  # Create I2C bus
    init_touch(bus)  # Create Touch Pad
    device = get_oled()  # Create Oled display
    # Create image
    img_path = os.path.abspath(os.path.join(os.path.dirname(__file__),
                               'images', 'pi_logo.png'))
    splash = Image.open(img_path)
        .transform((device.width, device.height),
                   Image.AFFINE, (1, 0, 0, 0, 1, 0),
                   Image.BILINEAR).convert(device.mode)
    # Create font
    font_path = os.path.abspath(os.path.join(
        os.path.dirname(__file__), 'fonts', "C&C Red Alert[INET].ttf"))
    font = ImageFont.truetype(font_path, 30)
    device.display(splash)
    time.sleep(5)
    device.clear()
    func = get_cputemp
    while True:
        with canvas(device) as draw:
            button = bus.read_byte_data(TOUCH_ADDR, CAP_TOUCH_INPUT_STATUS)
            if (button & 0x08):  # Cross
                func = get_cputemp
            if button & 0x10:  # Square
                func = get_time
            if button & 0x20:  # Circle
                func = get_date
            if button & 0x01:  # Triangle
                func = get_clear
            bus.write_byte_data(TOUCH_ADDR, 0x0, 0x0)
            draw.text((20, 20), func(), fill="white", font=font)
        time.sleep(0.1)
if __name__ == "__main__":
    try:
        main()
    except KeyboardInterrupt:
        exit()
The code starts by importing various modules to support the screen and touchpad.
XinaBox Oled and Touch pad modules connect to the Pi’s i2c bus so they are addressed using hexadecimal values, 0x28 for the touchpad and 0x3C for the Oled display.
Four functions are defined, each of which returns a text string containing a system value. They are associated with the four touchpads in the main function.
At the start of the main function, the i2c bus is set up and the display and touchpad are initialised. An image is created to demonstrate the use of a splash screen and a custom font is created and sized.
The splash image is then displayed for a few seconds before clearing the display and setting the func variable to the default CPU temperature function. This will display until the first button is touched.
Now the code goes into a continuous loop checking for button presses. When a touch is detected, the func variable is changed to contain the function associated with the button that was just pressed. When draw.text gets called, it executes the function held by the func variable, changing the display until the next button is touched.
Button touches are detected by checking the CAP_TOUCH_INPUT_STATUS register on each iteration of the loop. The single register is one byte long (represented by a hex value), the lowest four bits represent the state of each touchpad. The hex value is bit masked to obtain either an on or off value for the button. The register is reset each time a button is touched.
Run the code
- Click Run in Thonny. The display will show the Raspberry Pi splash screen before changing to the Pi’s CPU temperature, which will update constantly. Touching each button will cycle through the CPU temperature, current date and time and a blank display.
Summary
XinaBox modules are a very fast way to prototype an Oled display with a Touch Pad that can be programmed to perform different actions. The example code showed how to display a splash screen and to link functions to each button on the touch pad to control what’s shown on the screen.
By writing your own functions, the code framework can be re-used in your own projects to associate different touch pad actions. If the action takes some time to execute, you may want to run it in its own Python thread.
There are many more XinaBox modules available to choose from, that can be added to this project to extend its capabilities even further.