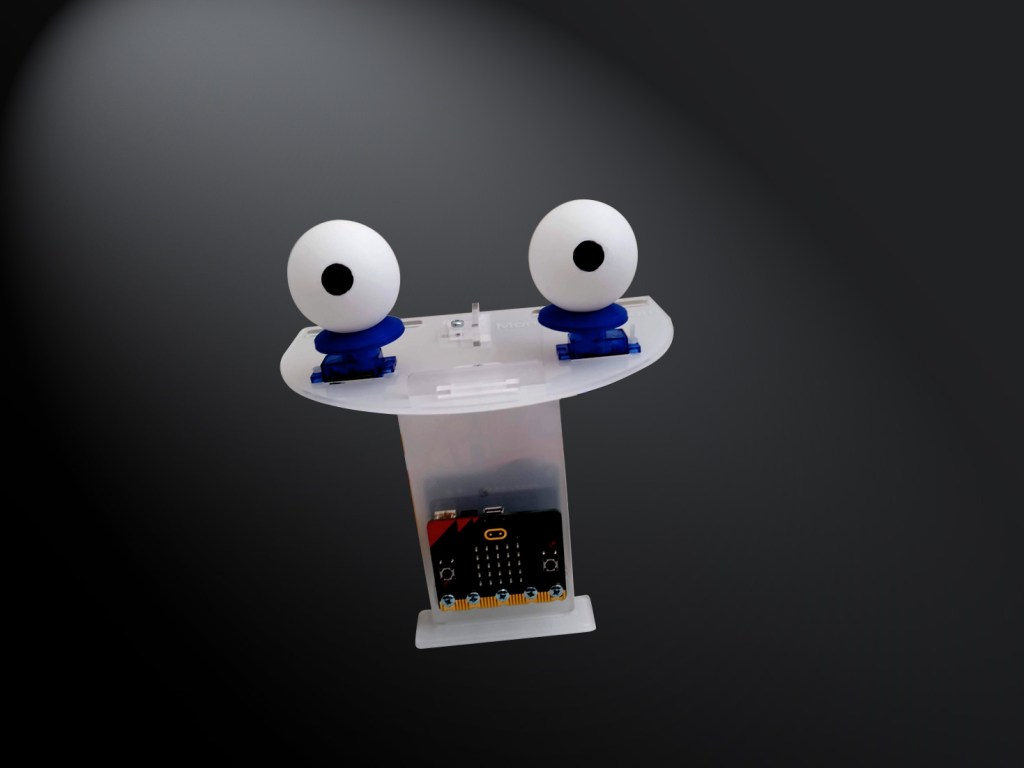
This animatronic head for micro:bit guide, will take you through the necessary steps to get your animatronic head up and running. The kit even includes miniature tools to ease assembly. Once built, you can use the micro:bit’s sensors very creatively to make whatever freaky creature you can imagine.
Great for Halloween!
Assemble the front panel
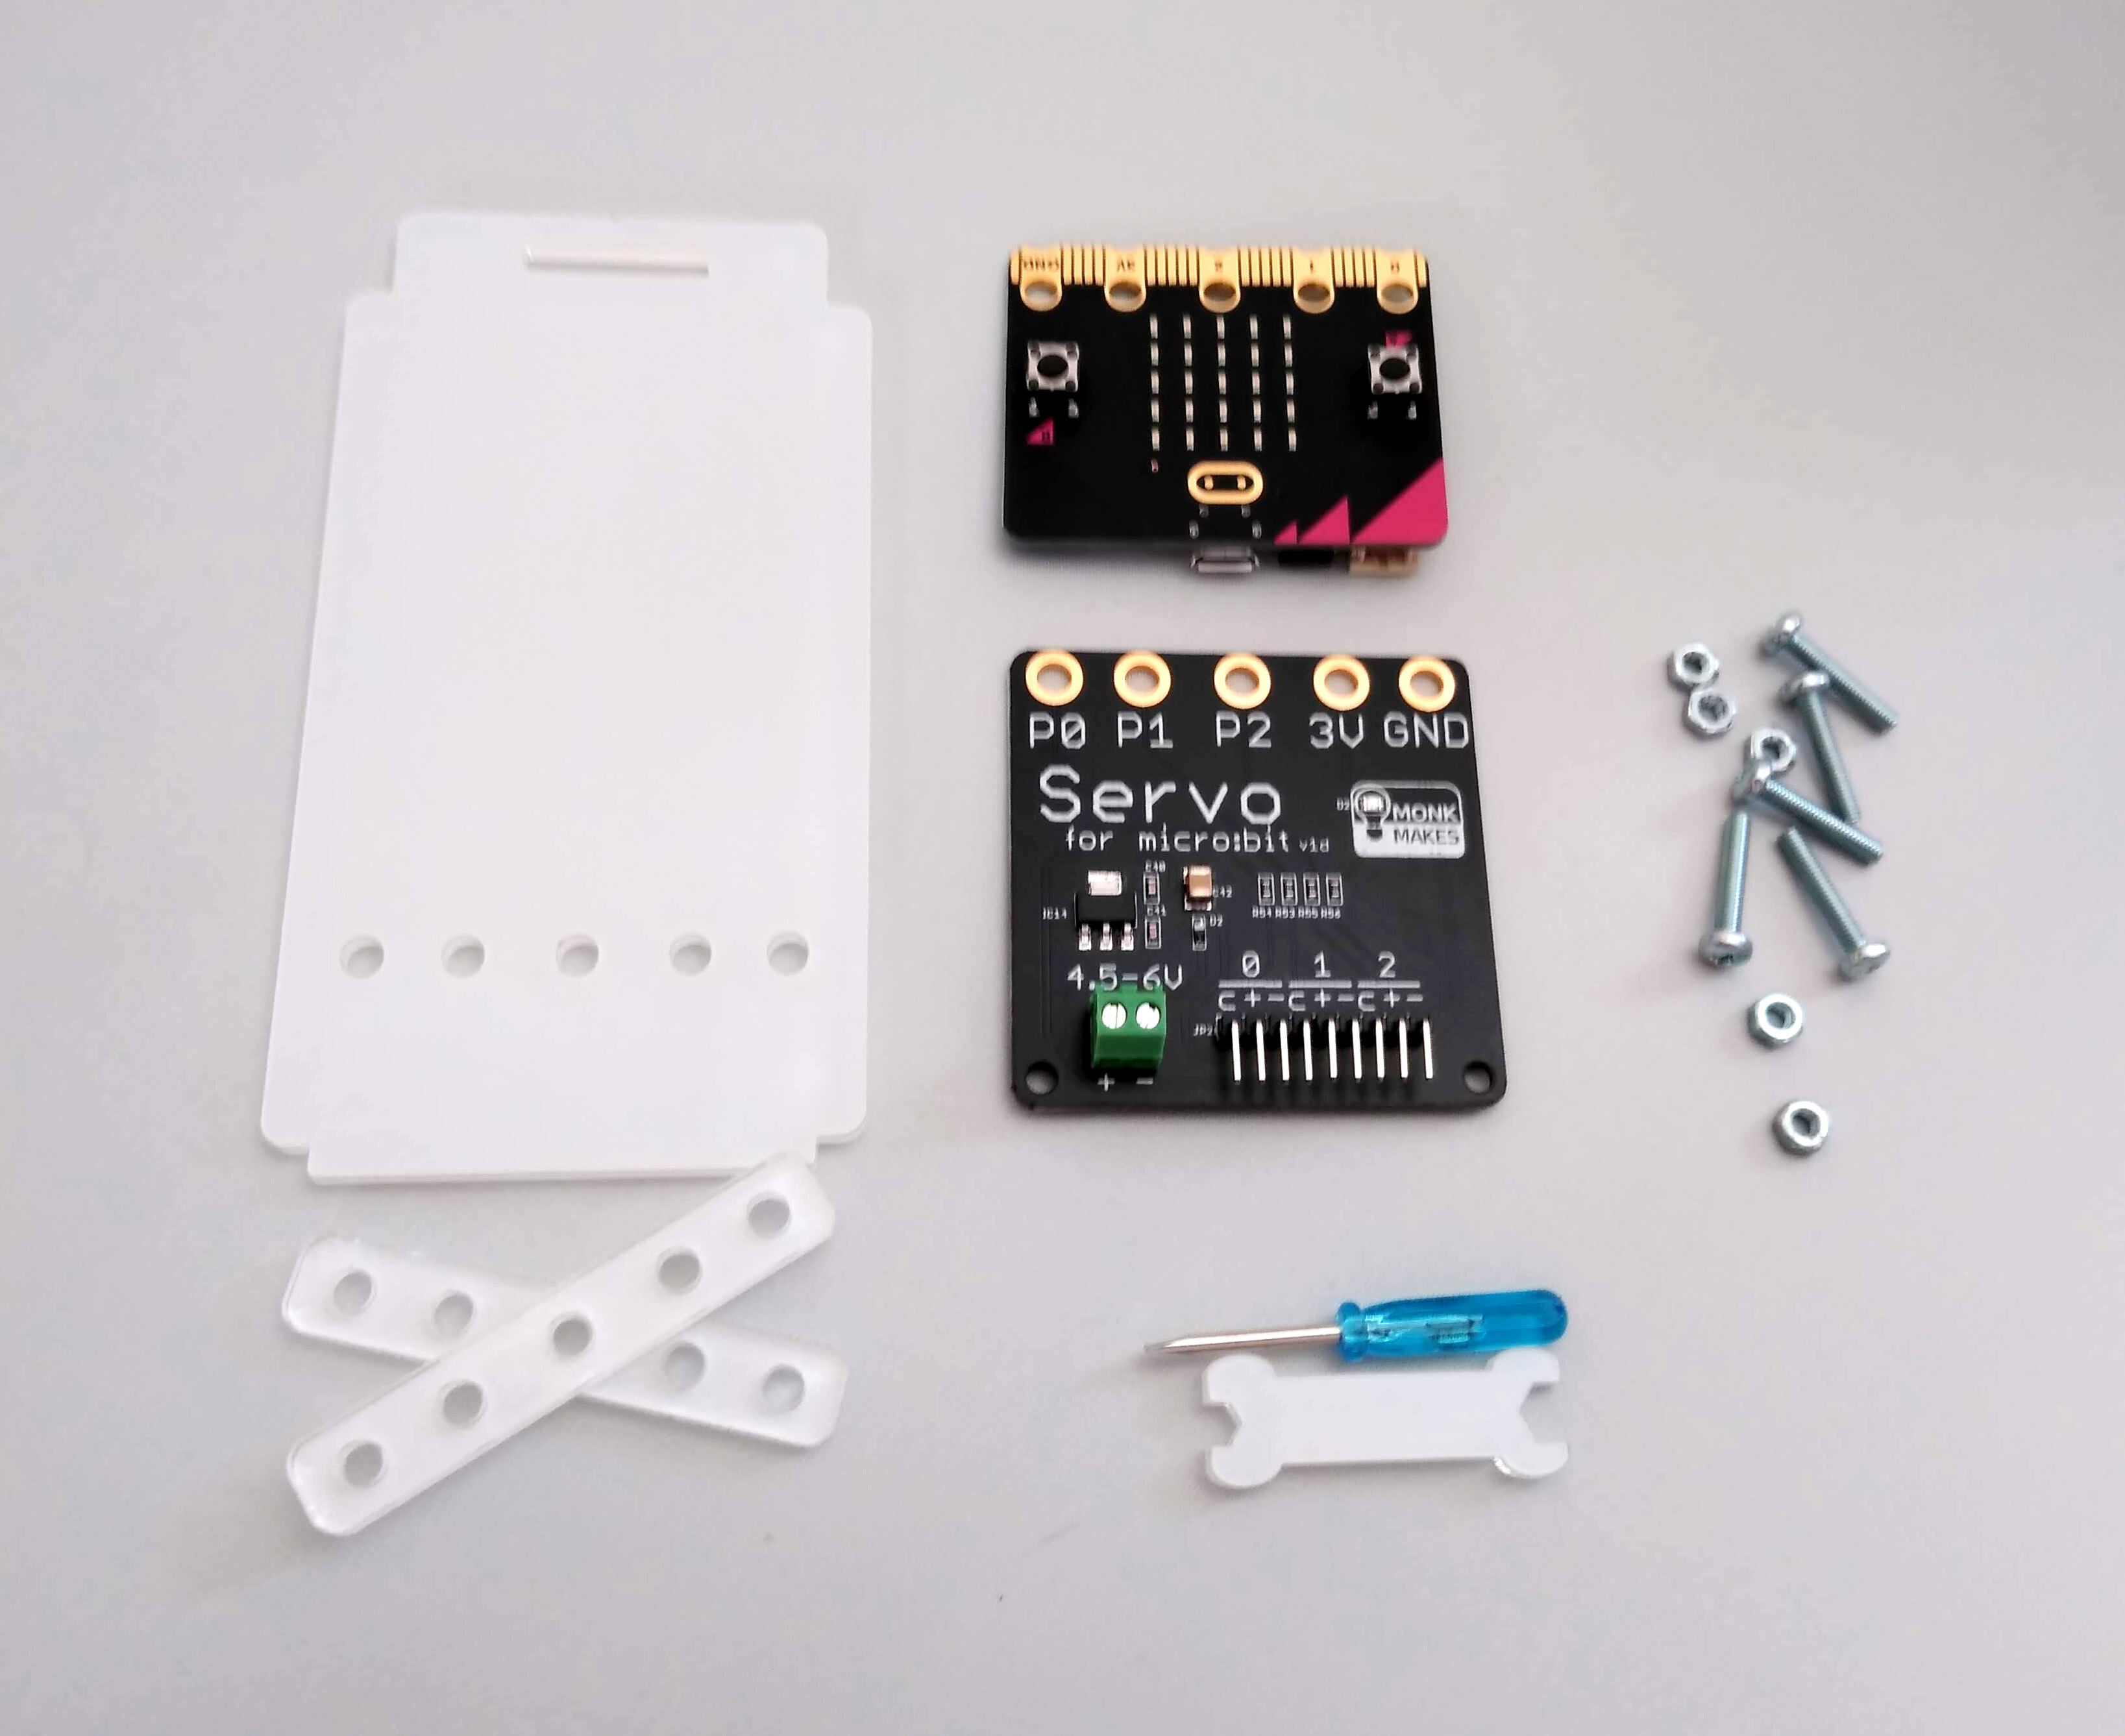
To start off, unbox the animatronic head kit and ensure that you have all the parts according to the included manual.
- Gather acrylic piece A, the 2 spacers marked D, the servo board, the micro:bit and 5 nuts and bolts.
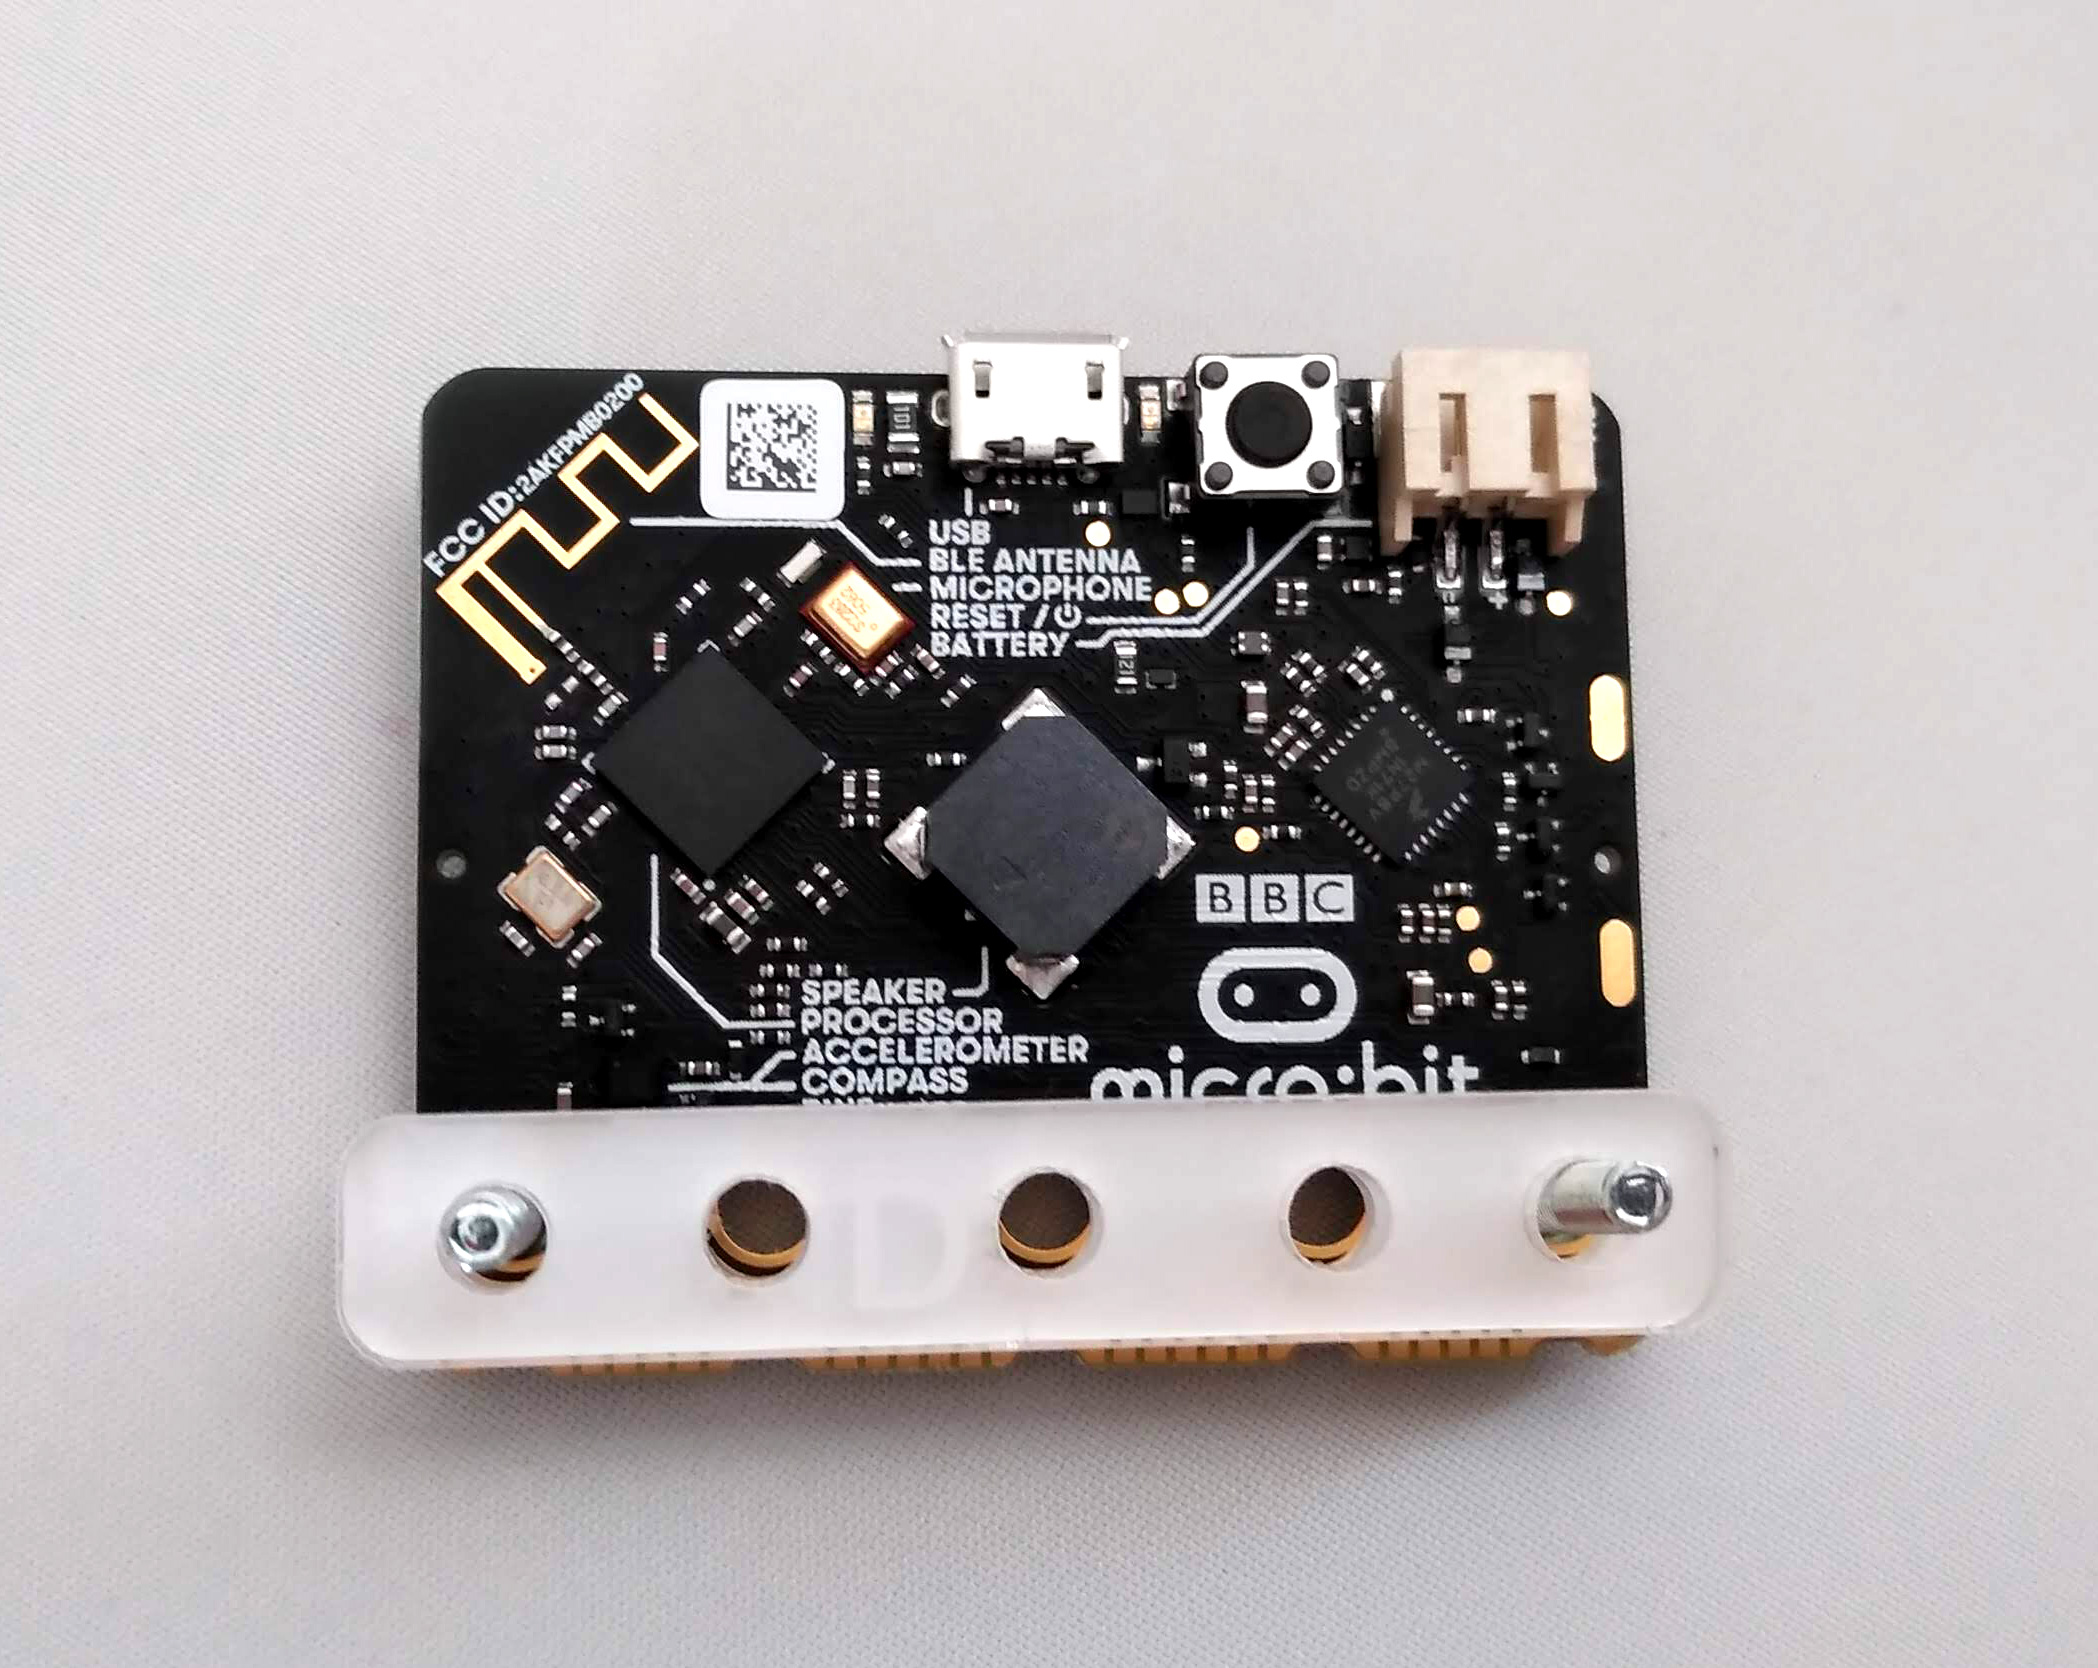
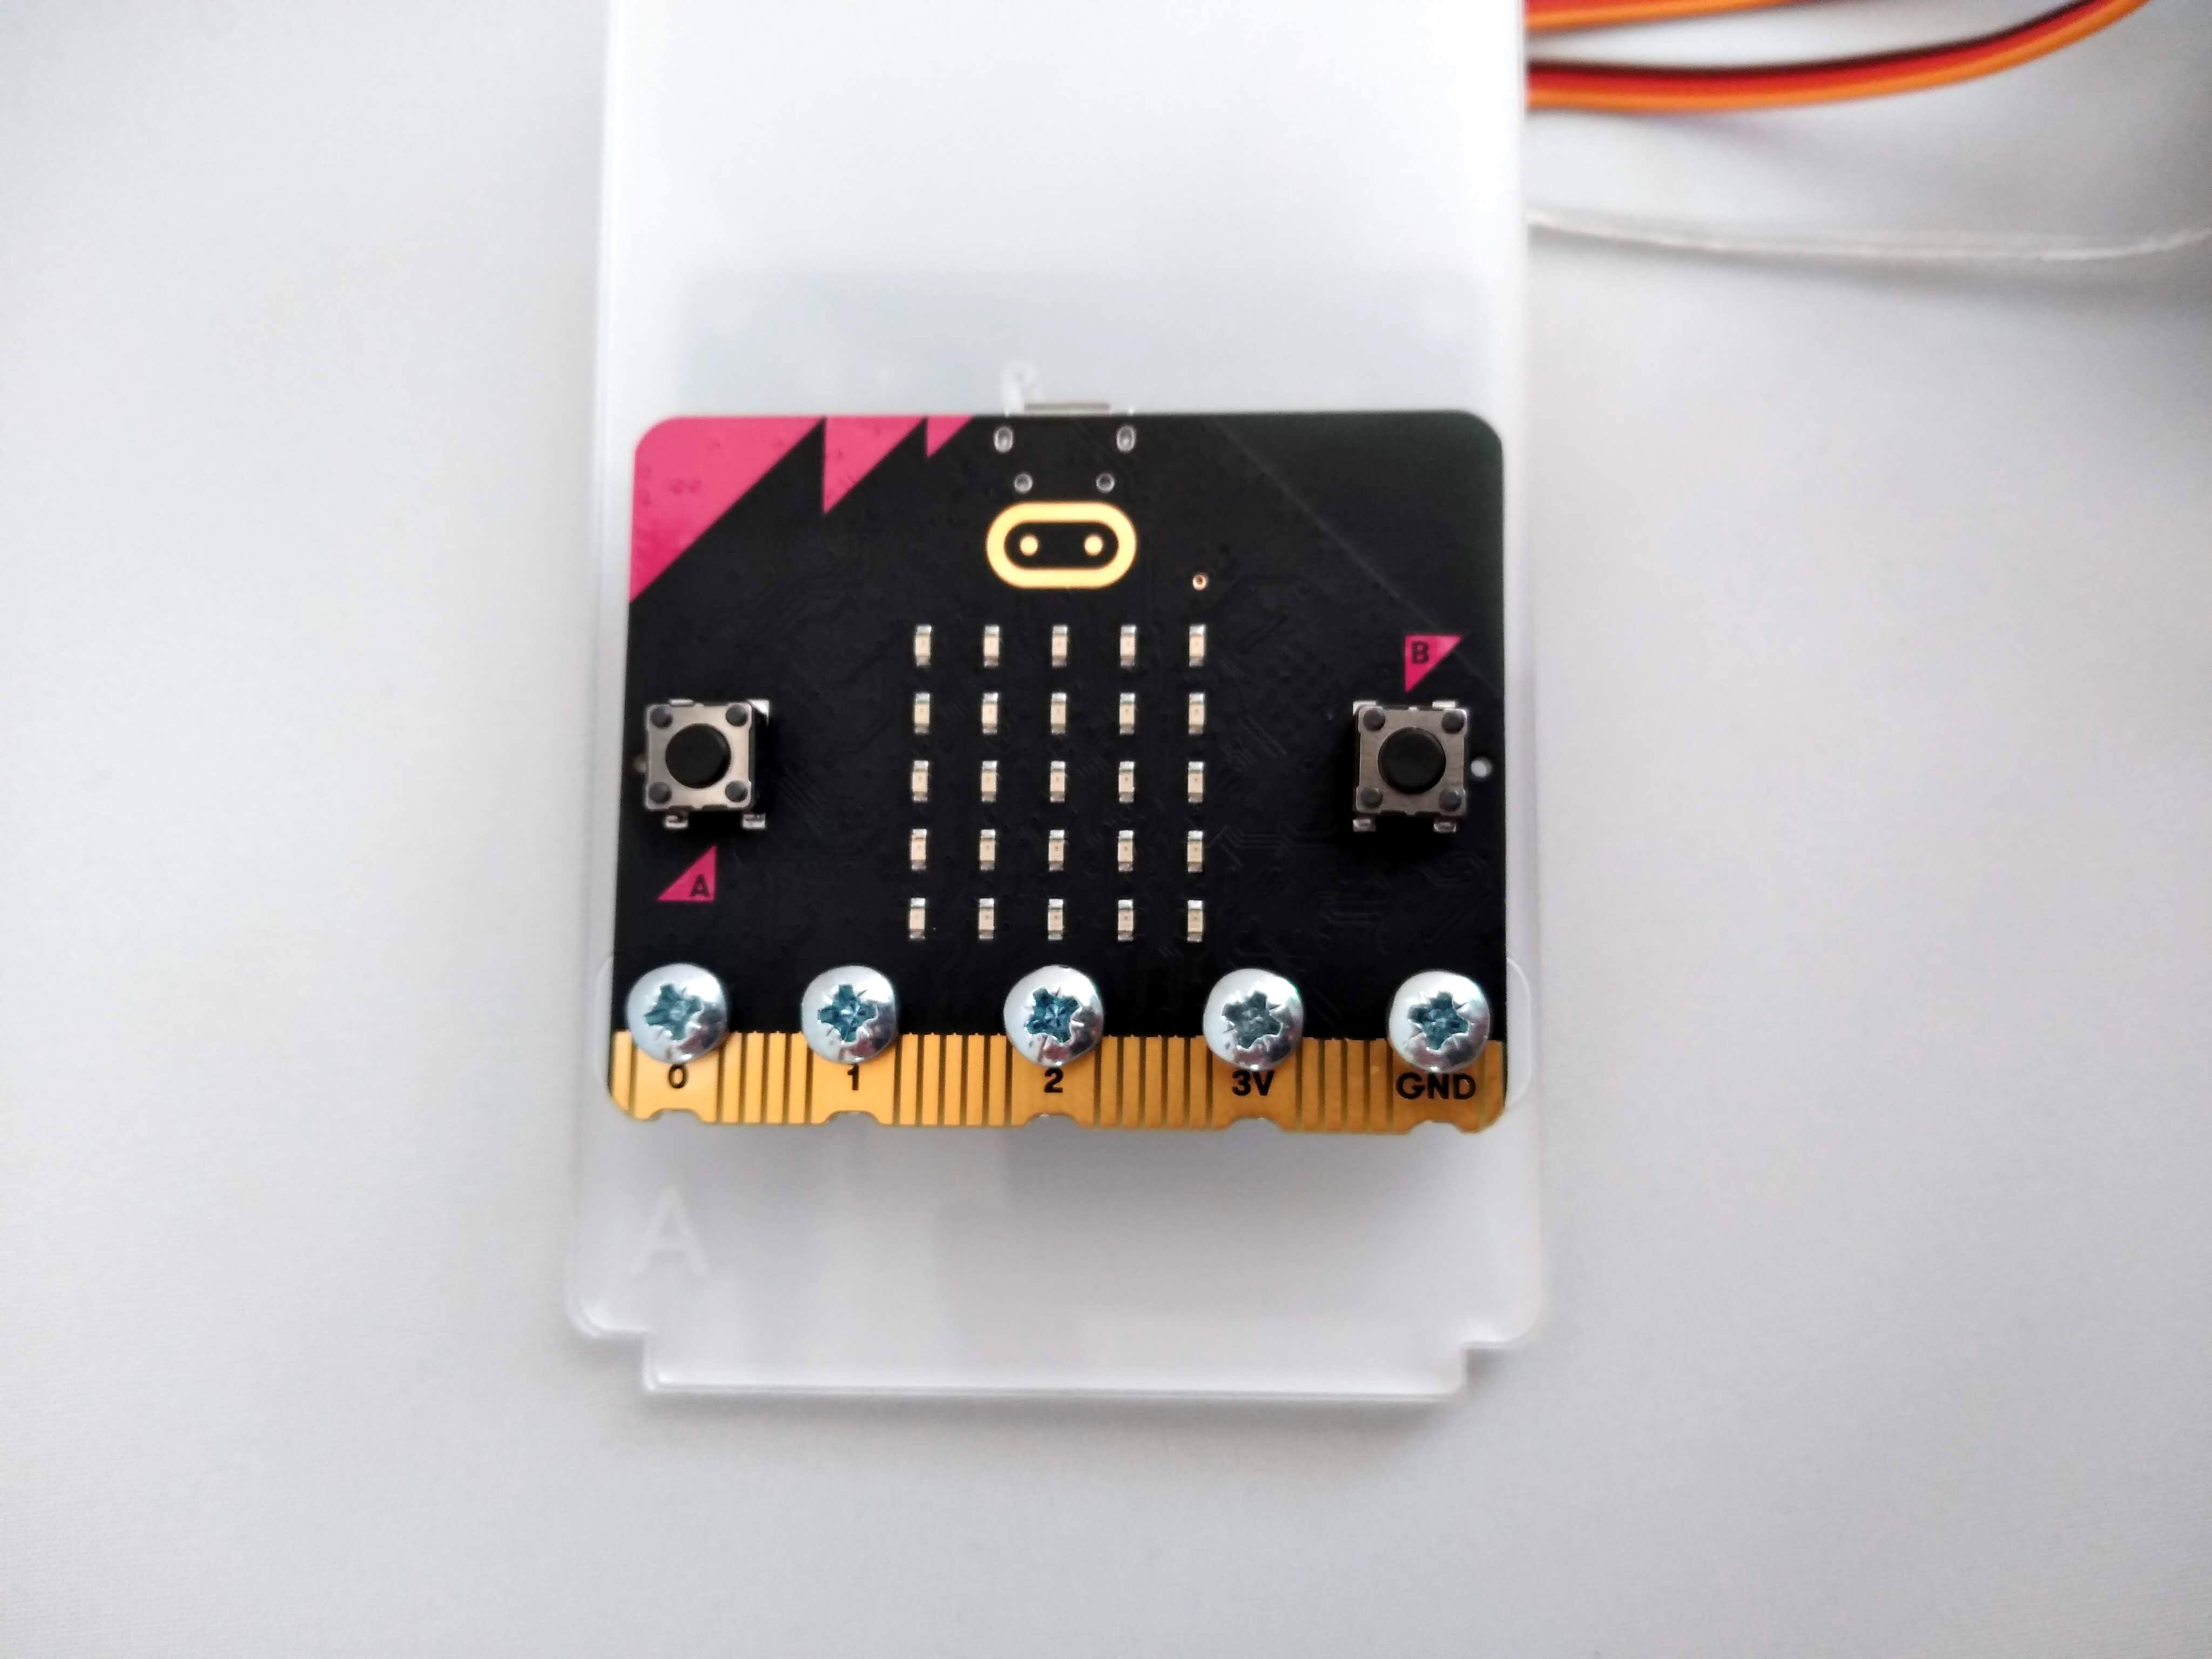
- Place the 2 spacers on the micro:bit as shown below and place 2 screws through the 2 outer holes.
- Place piece A on top of the spacers.
- Place the servo board on top of piece A.
- Secure everything with 2 nuts.
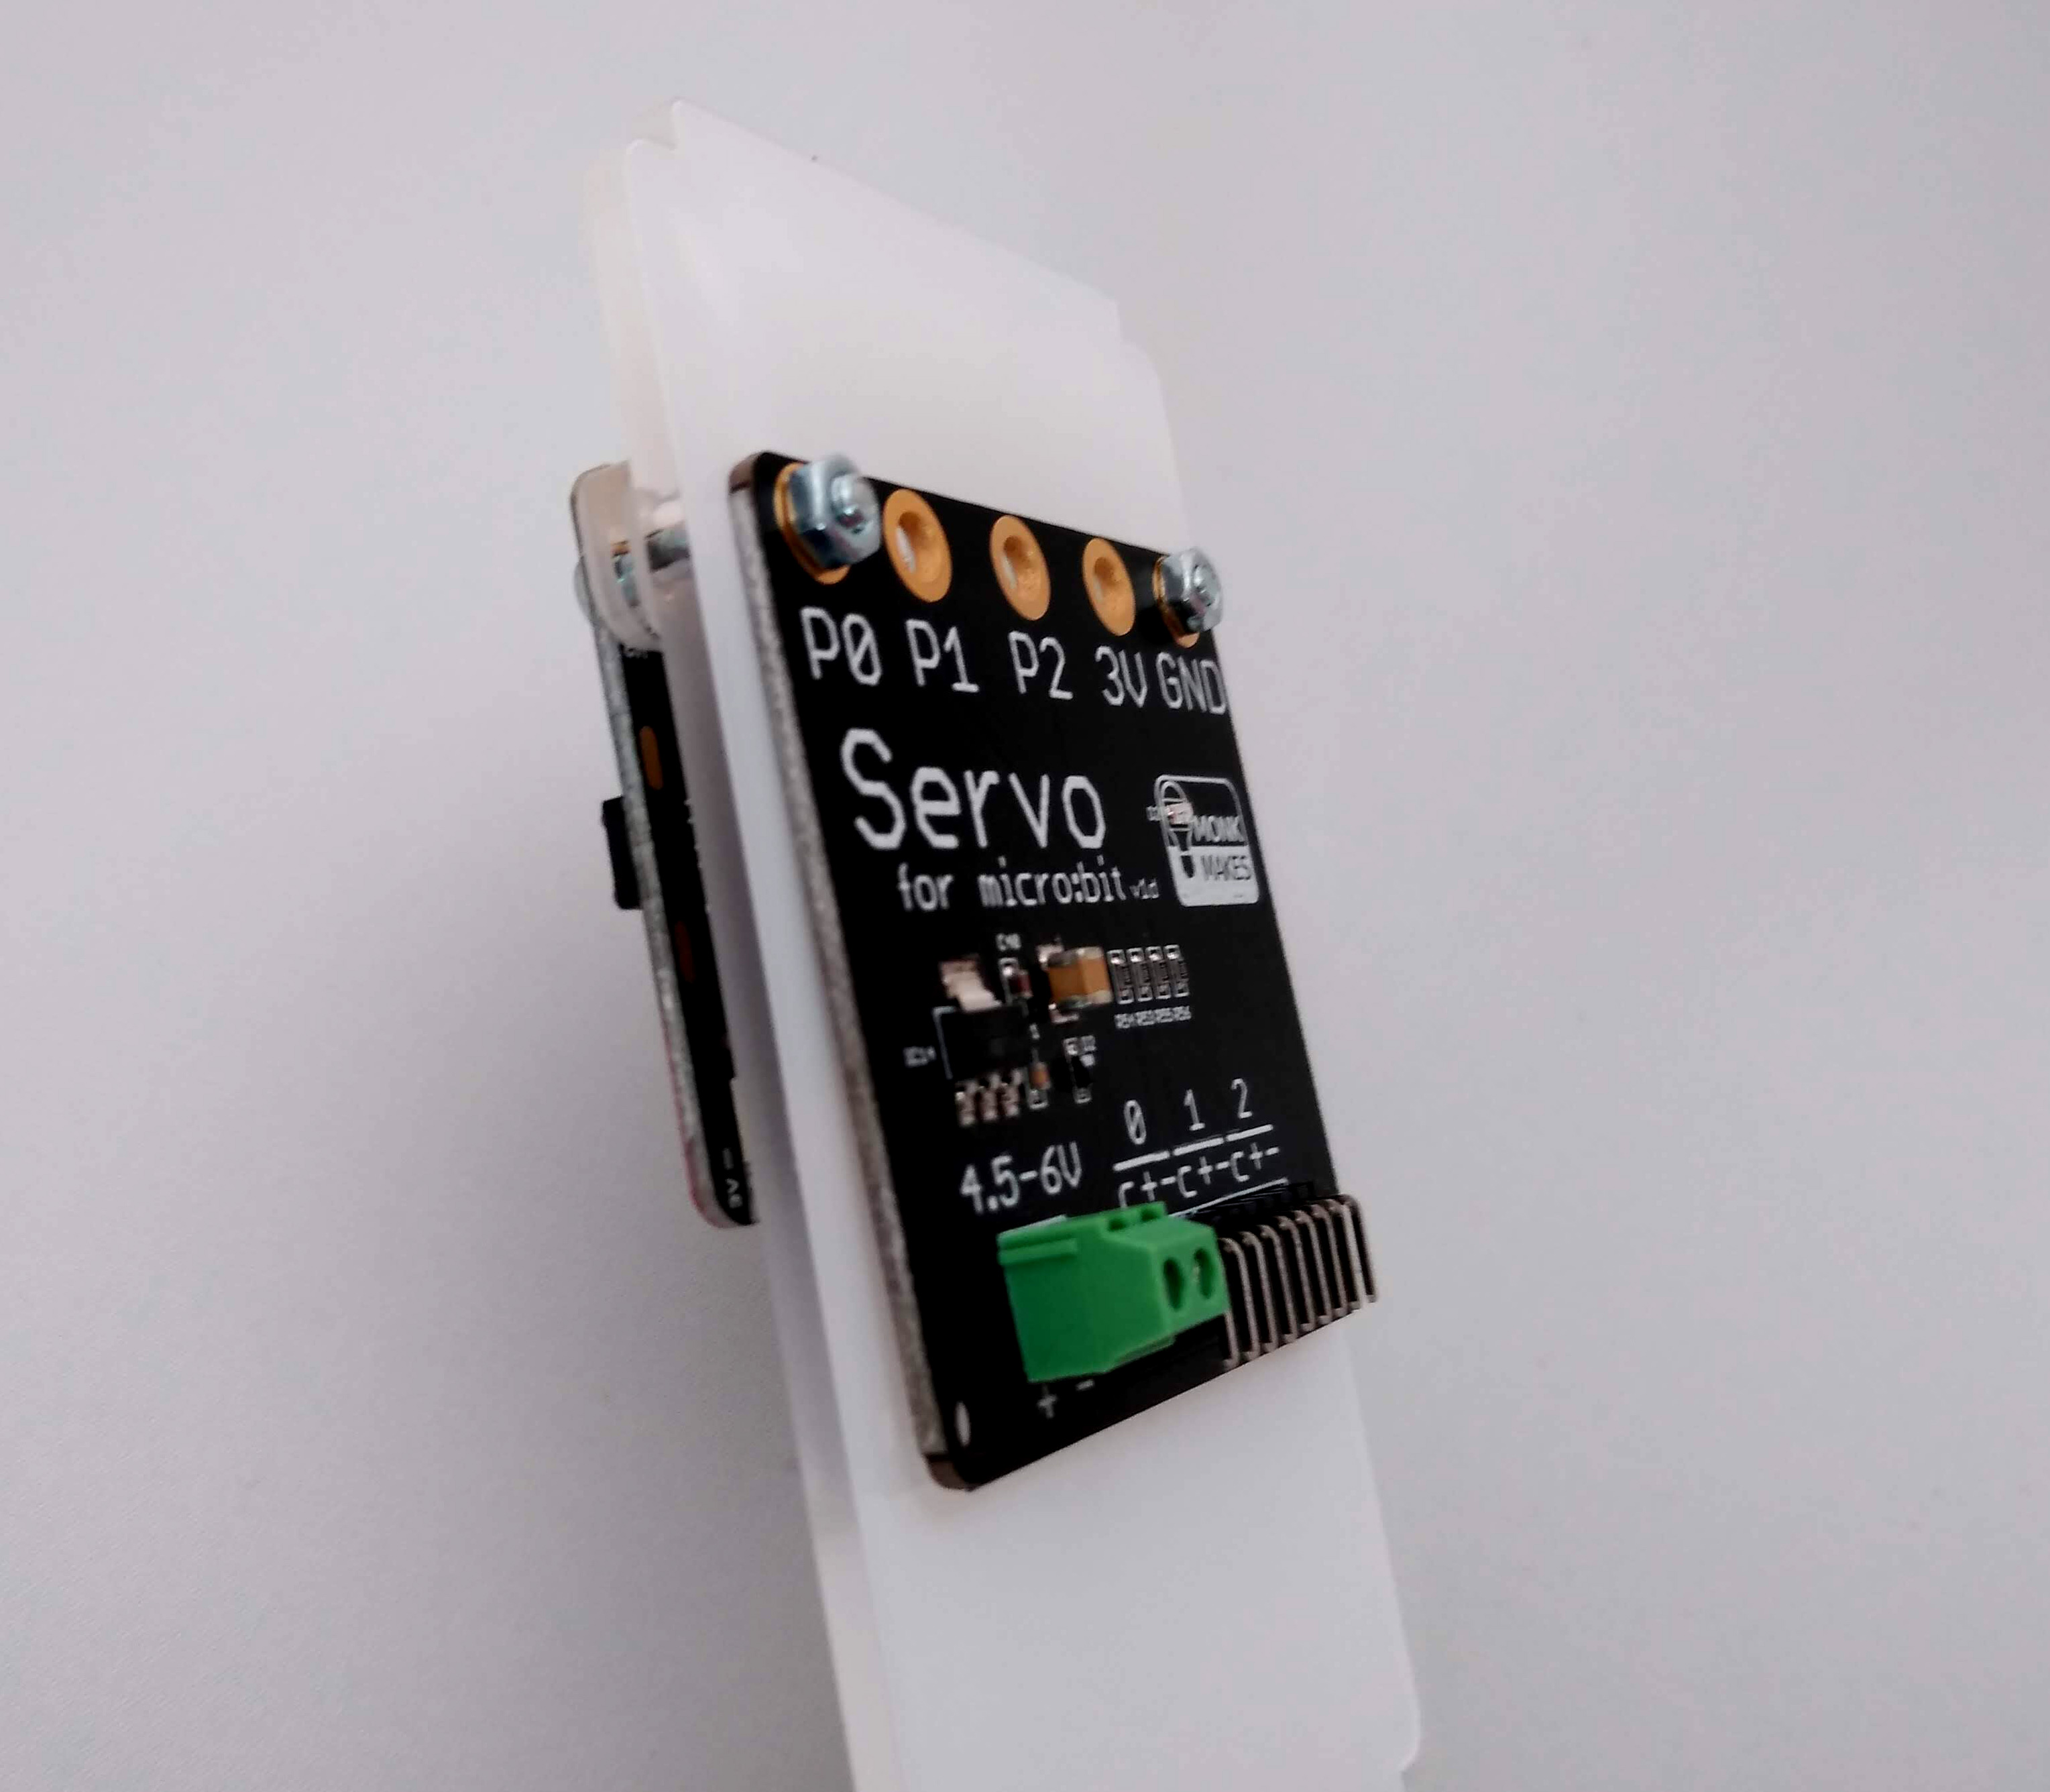
- Secure the remaining 3 nuts and bolts through the remaining holes.
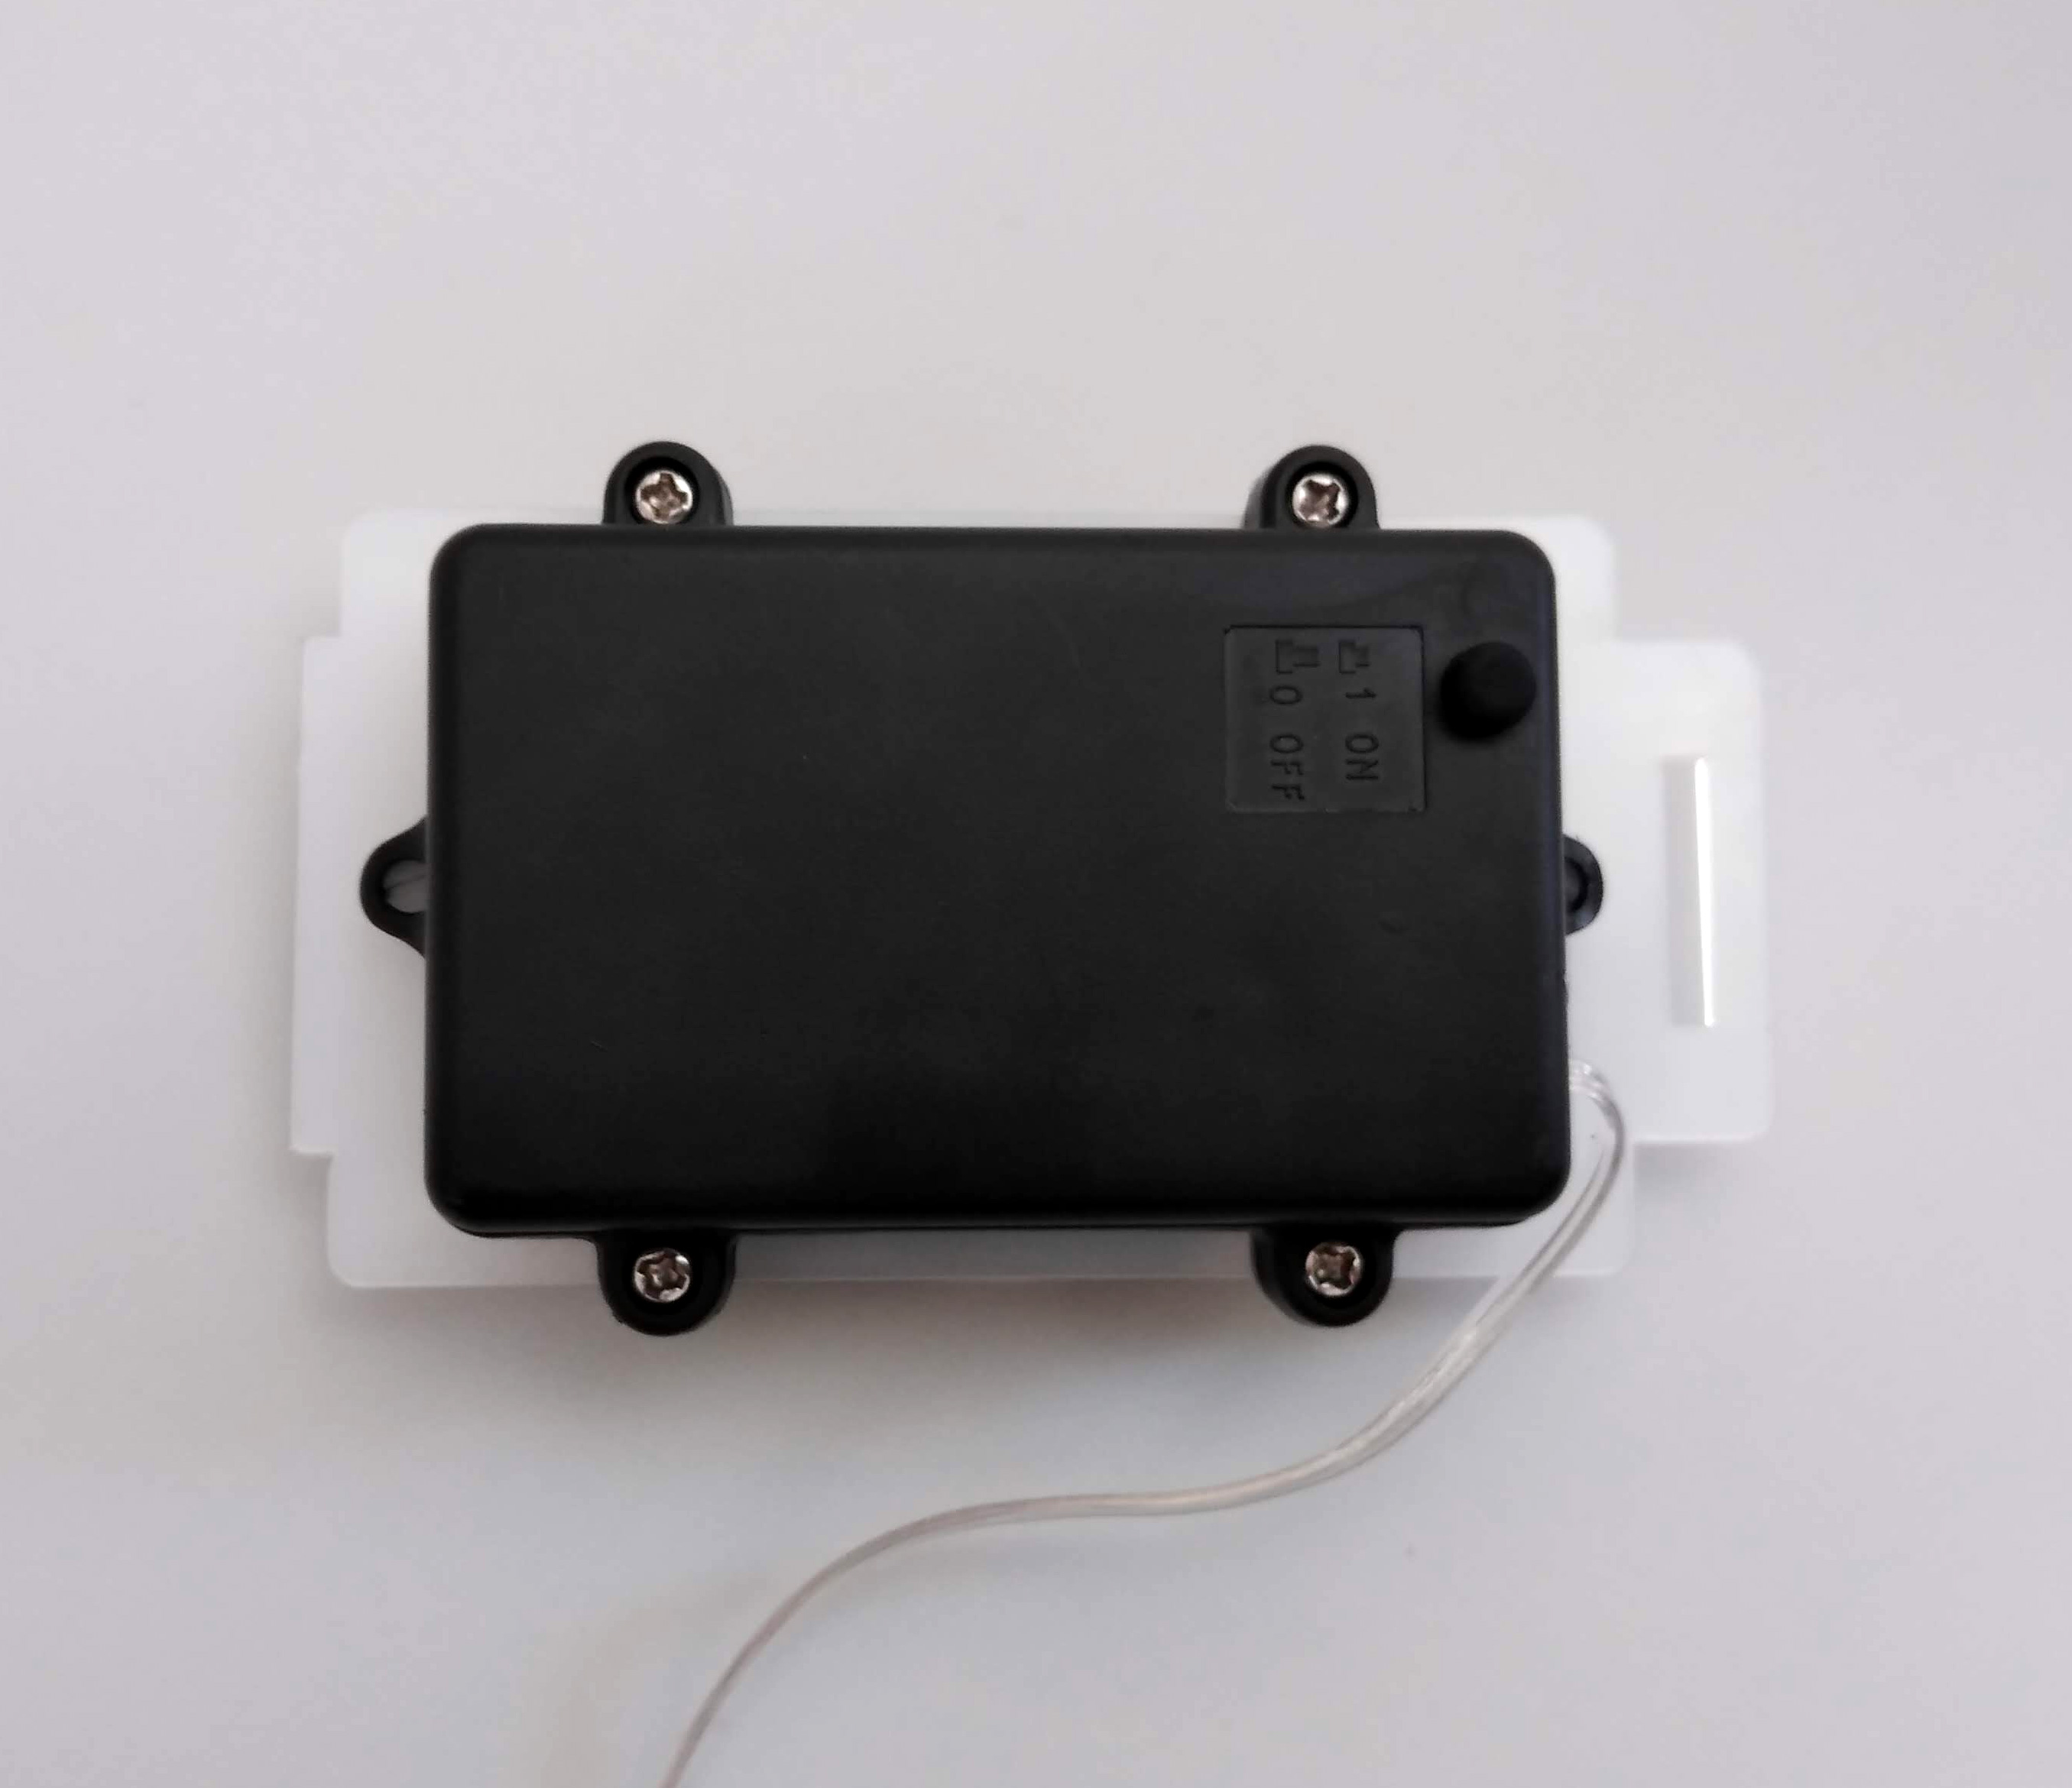
Insert the batteries
The battery box has a handy switch to turn the head on and off. Start by ensuring that the switch is off. This is the position where the switch is protruding more.
- Unscrew the four screws that hold the lid.
- Insert the 3 batteries ensuring thatthey are all the correct way around.
- Secure the battery box lid with the 4 screws.
Assemble the back panel
The back panel holds the speaker and battery box. You’ll also need 3 nuts and bolts and 2 nylon nuts and bolts.
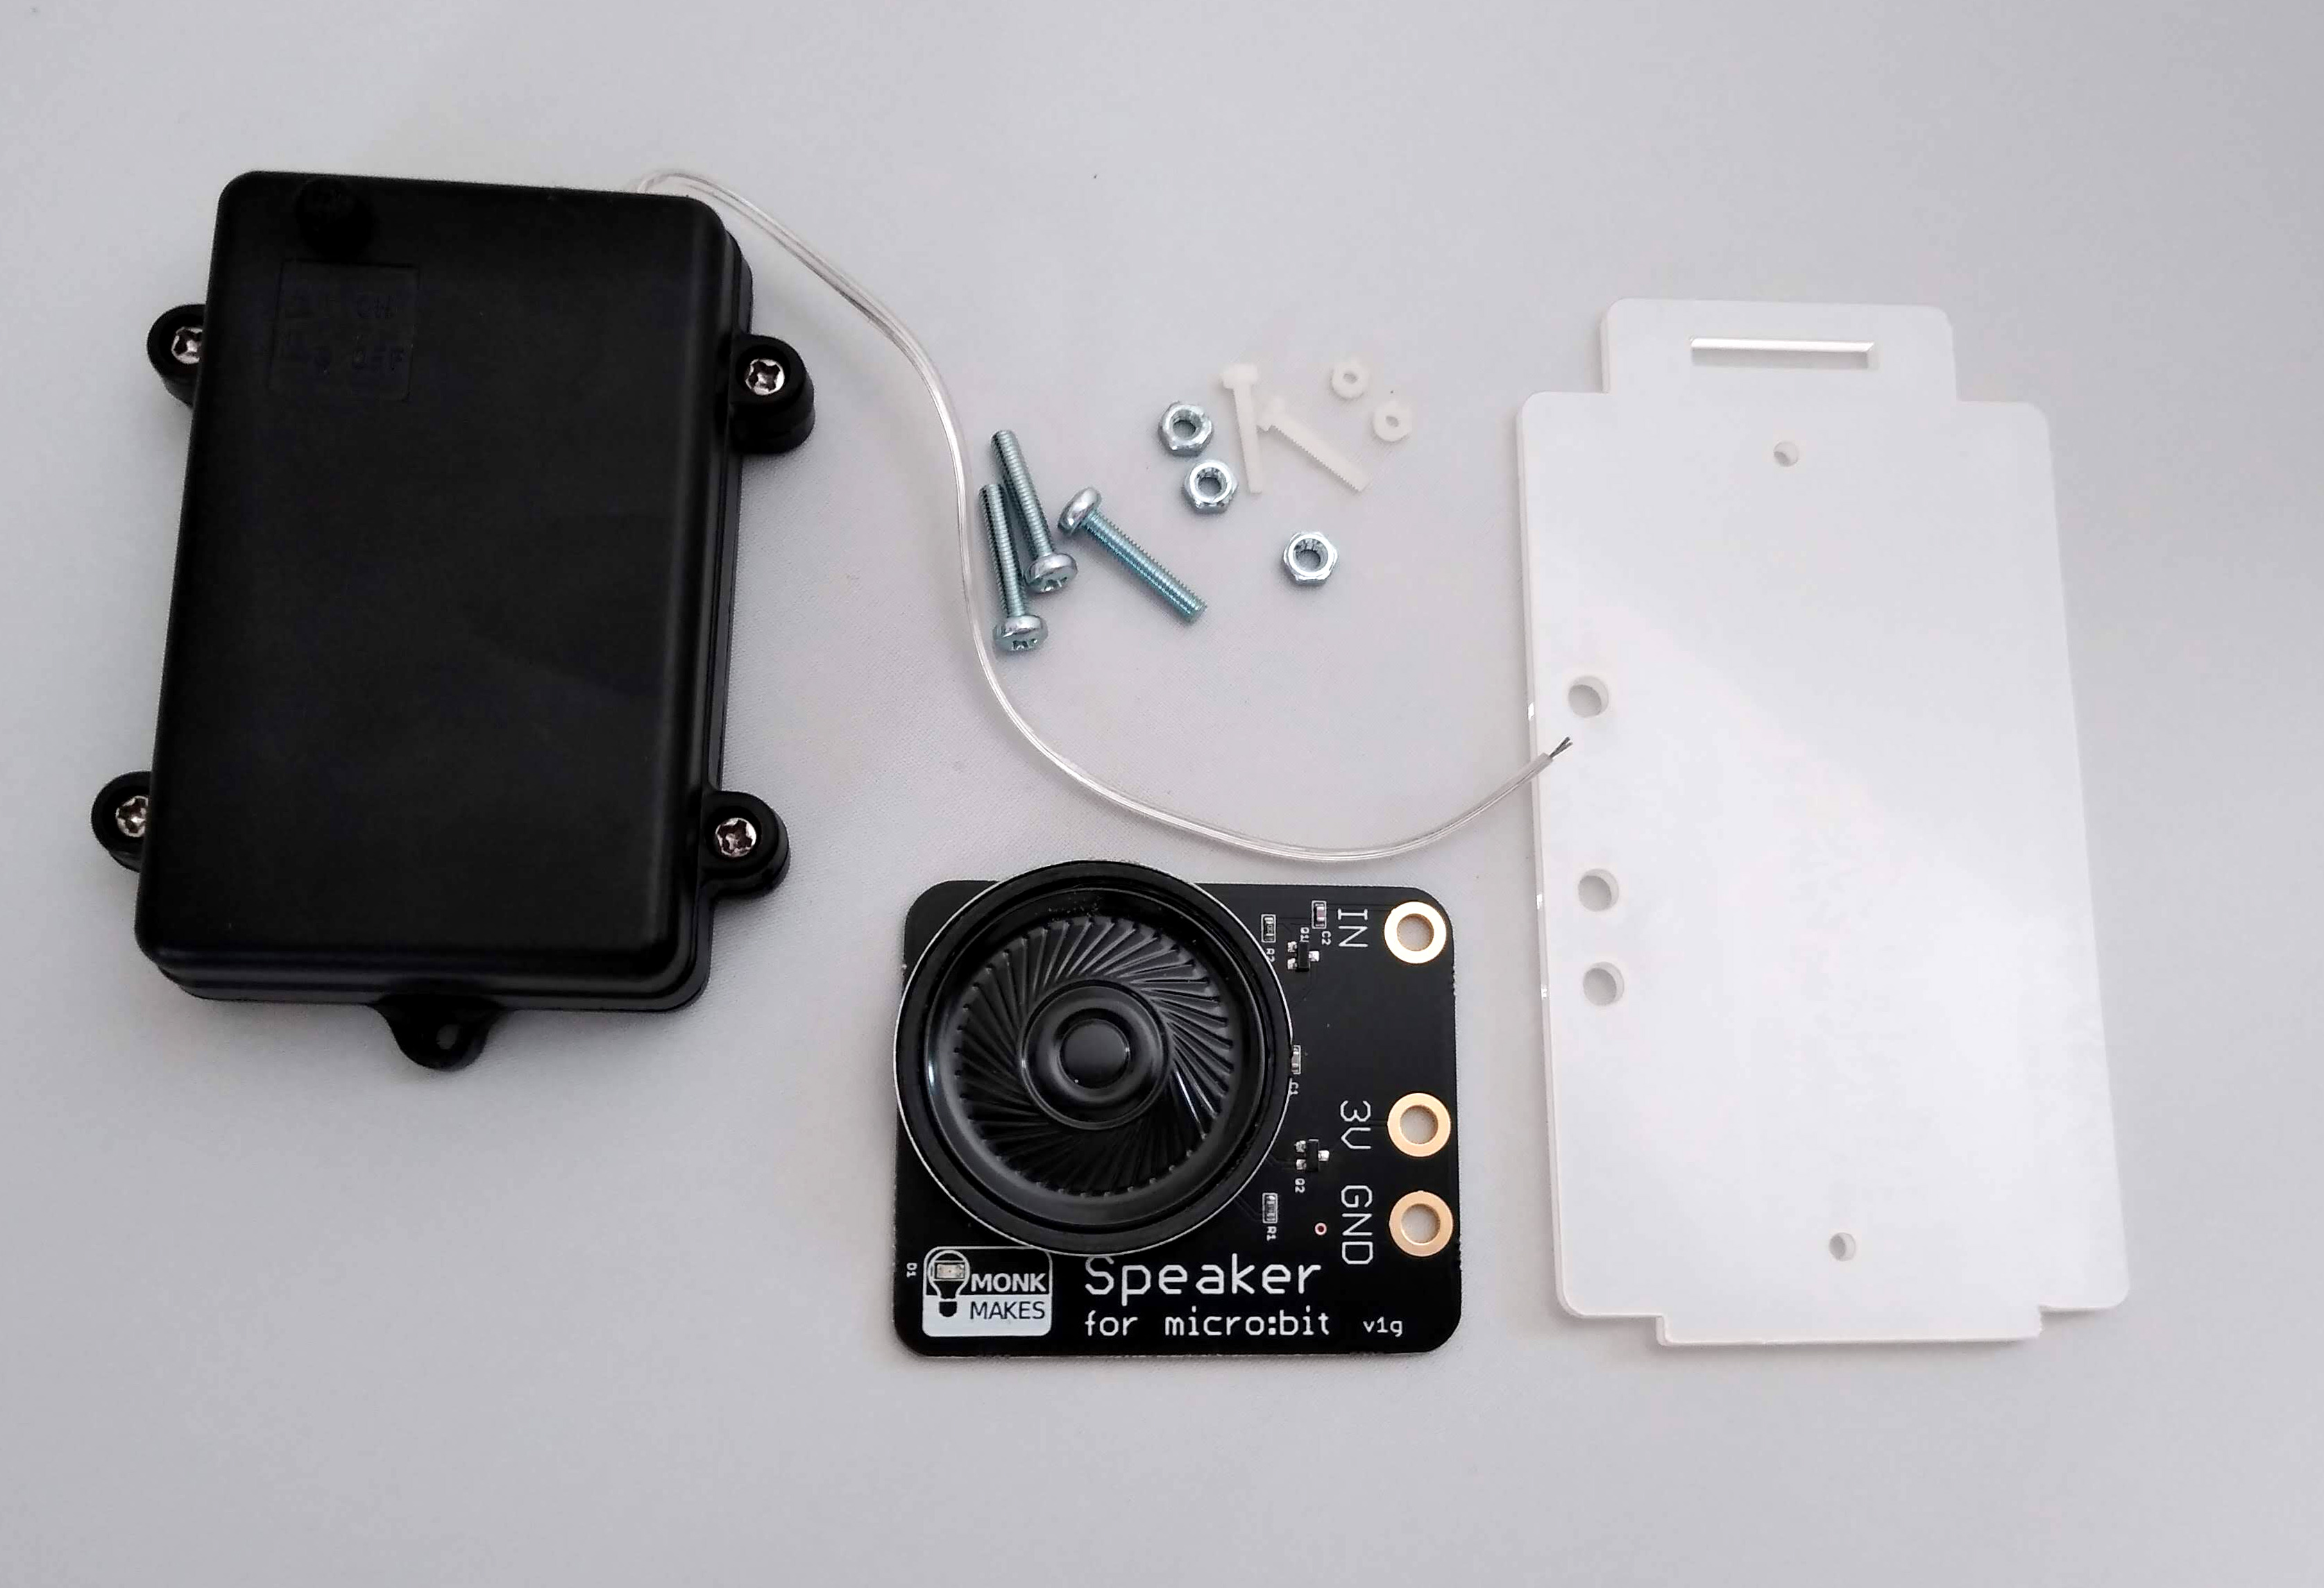
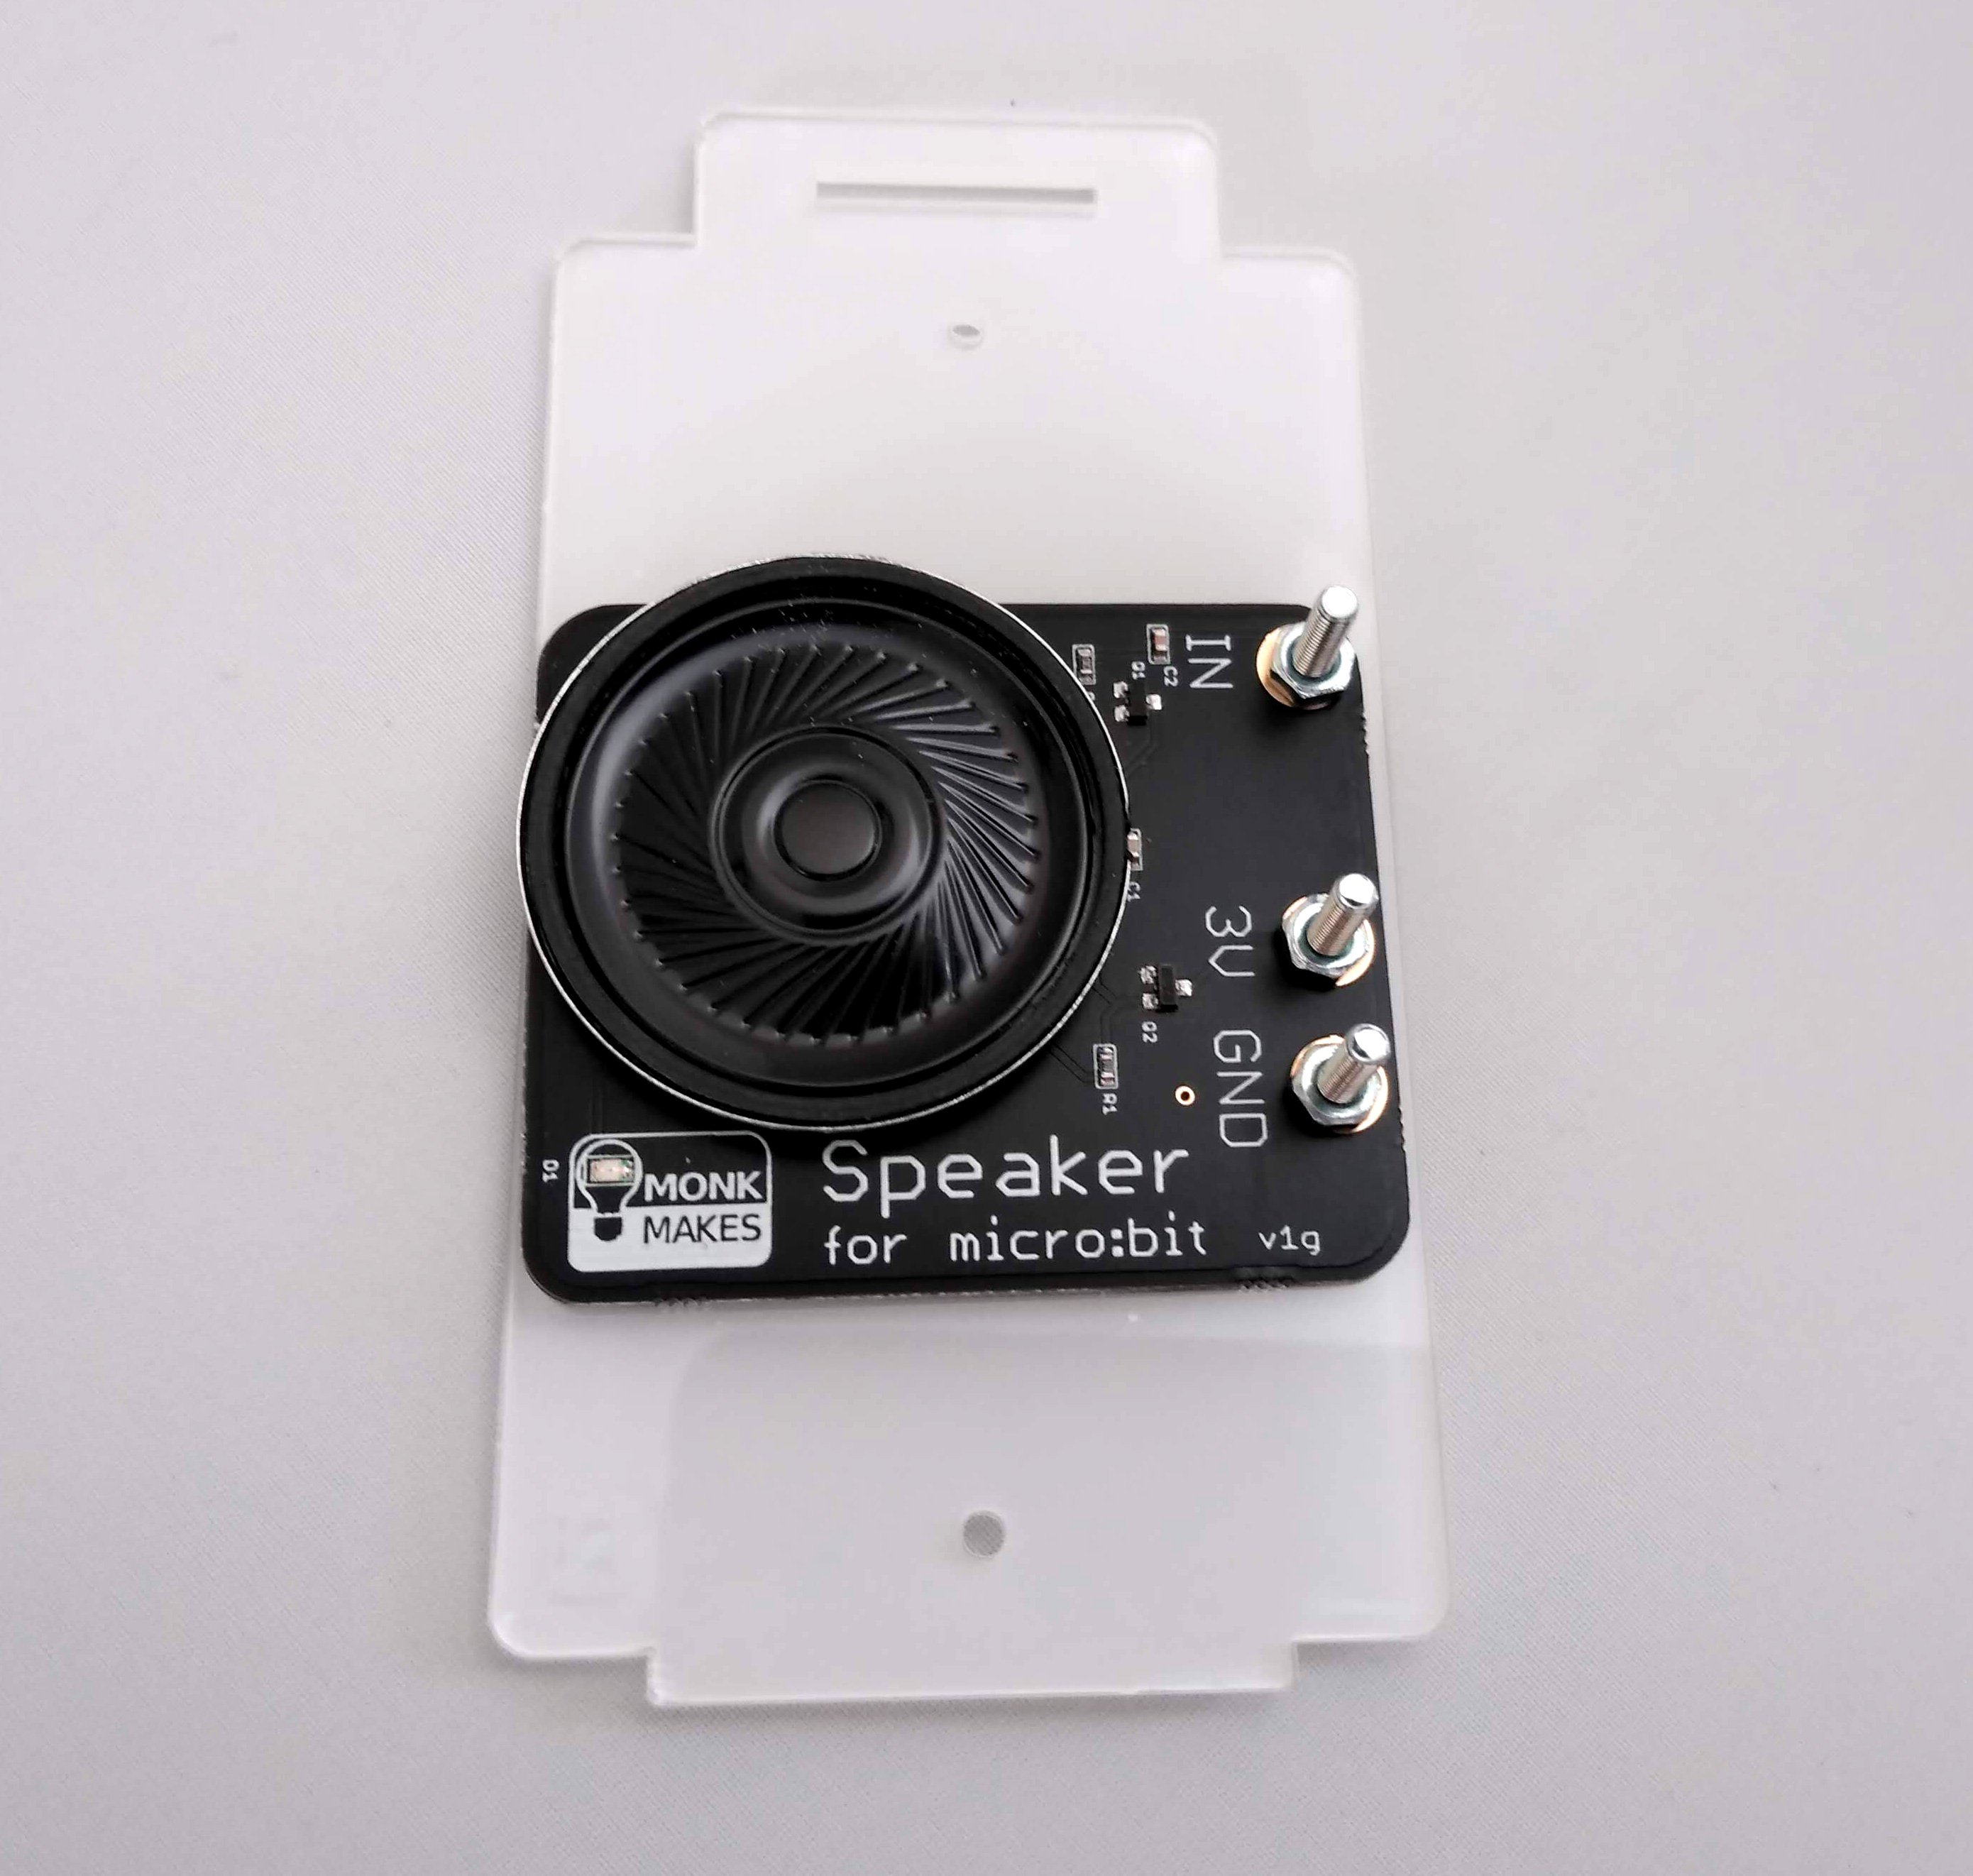
- Place the speaker on acrylic piece B as shown below and secure with 3 nuts and bolts. Ensure that the nuts are at the front .
- Turn the whole thing around and place the battery box on top.
- Secure the battery box with the nylon nuts and bolts. Be careful not to over-tighten them.
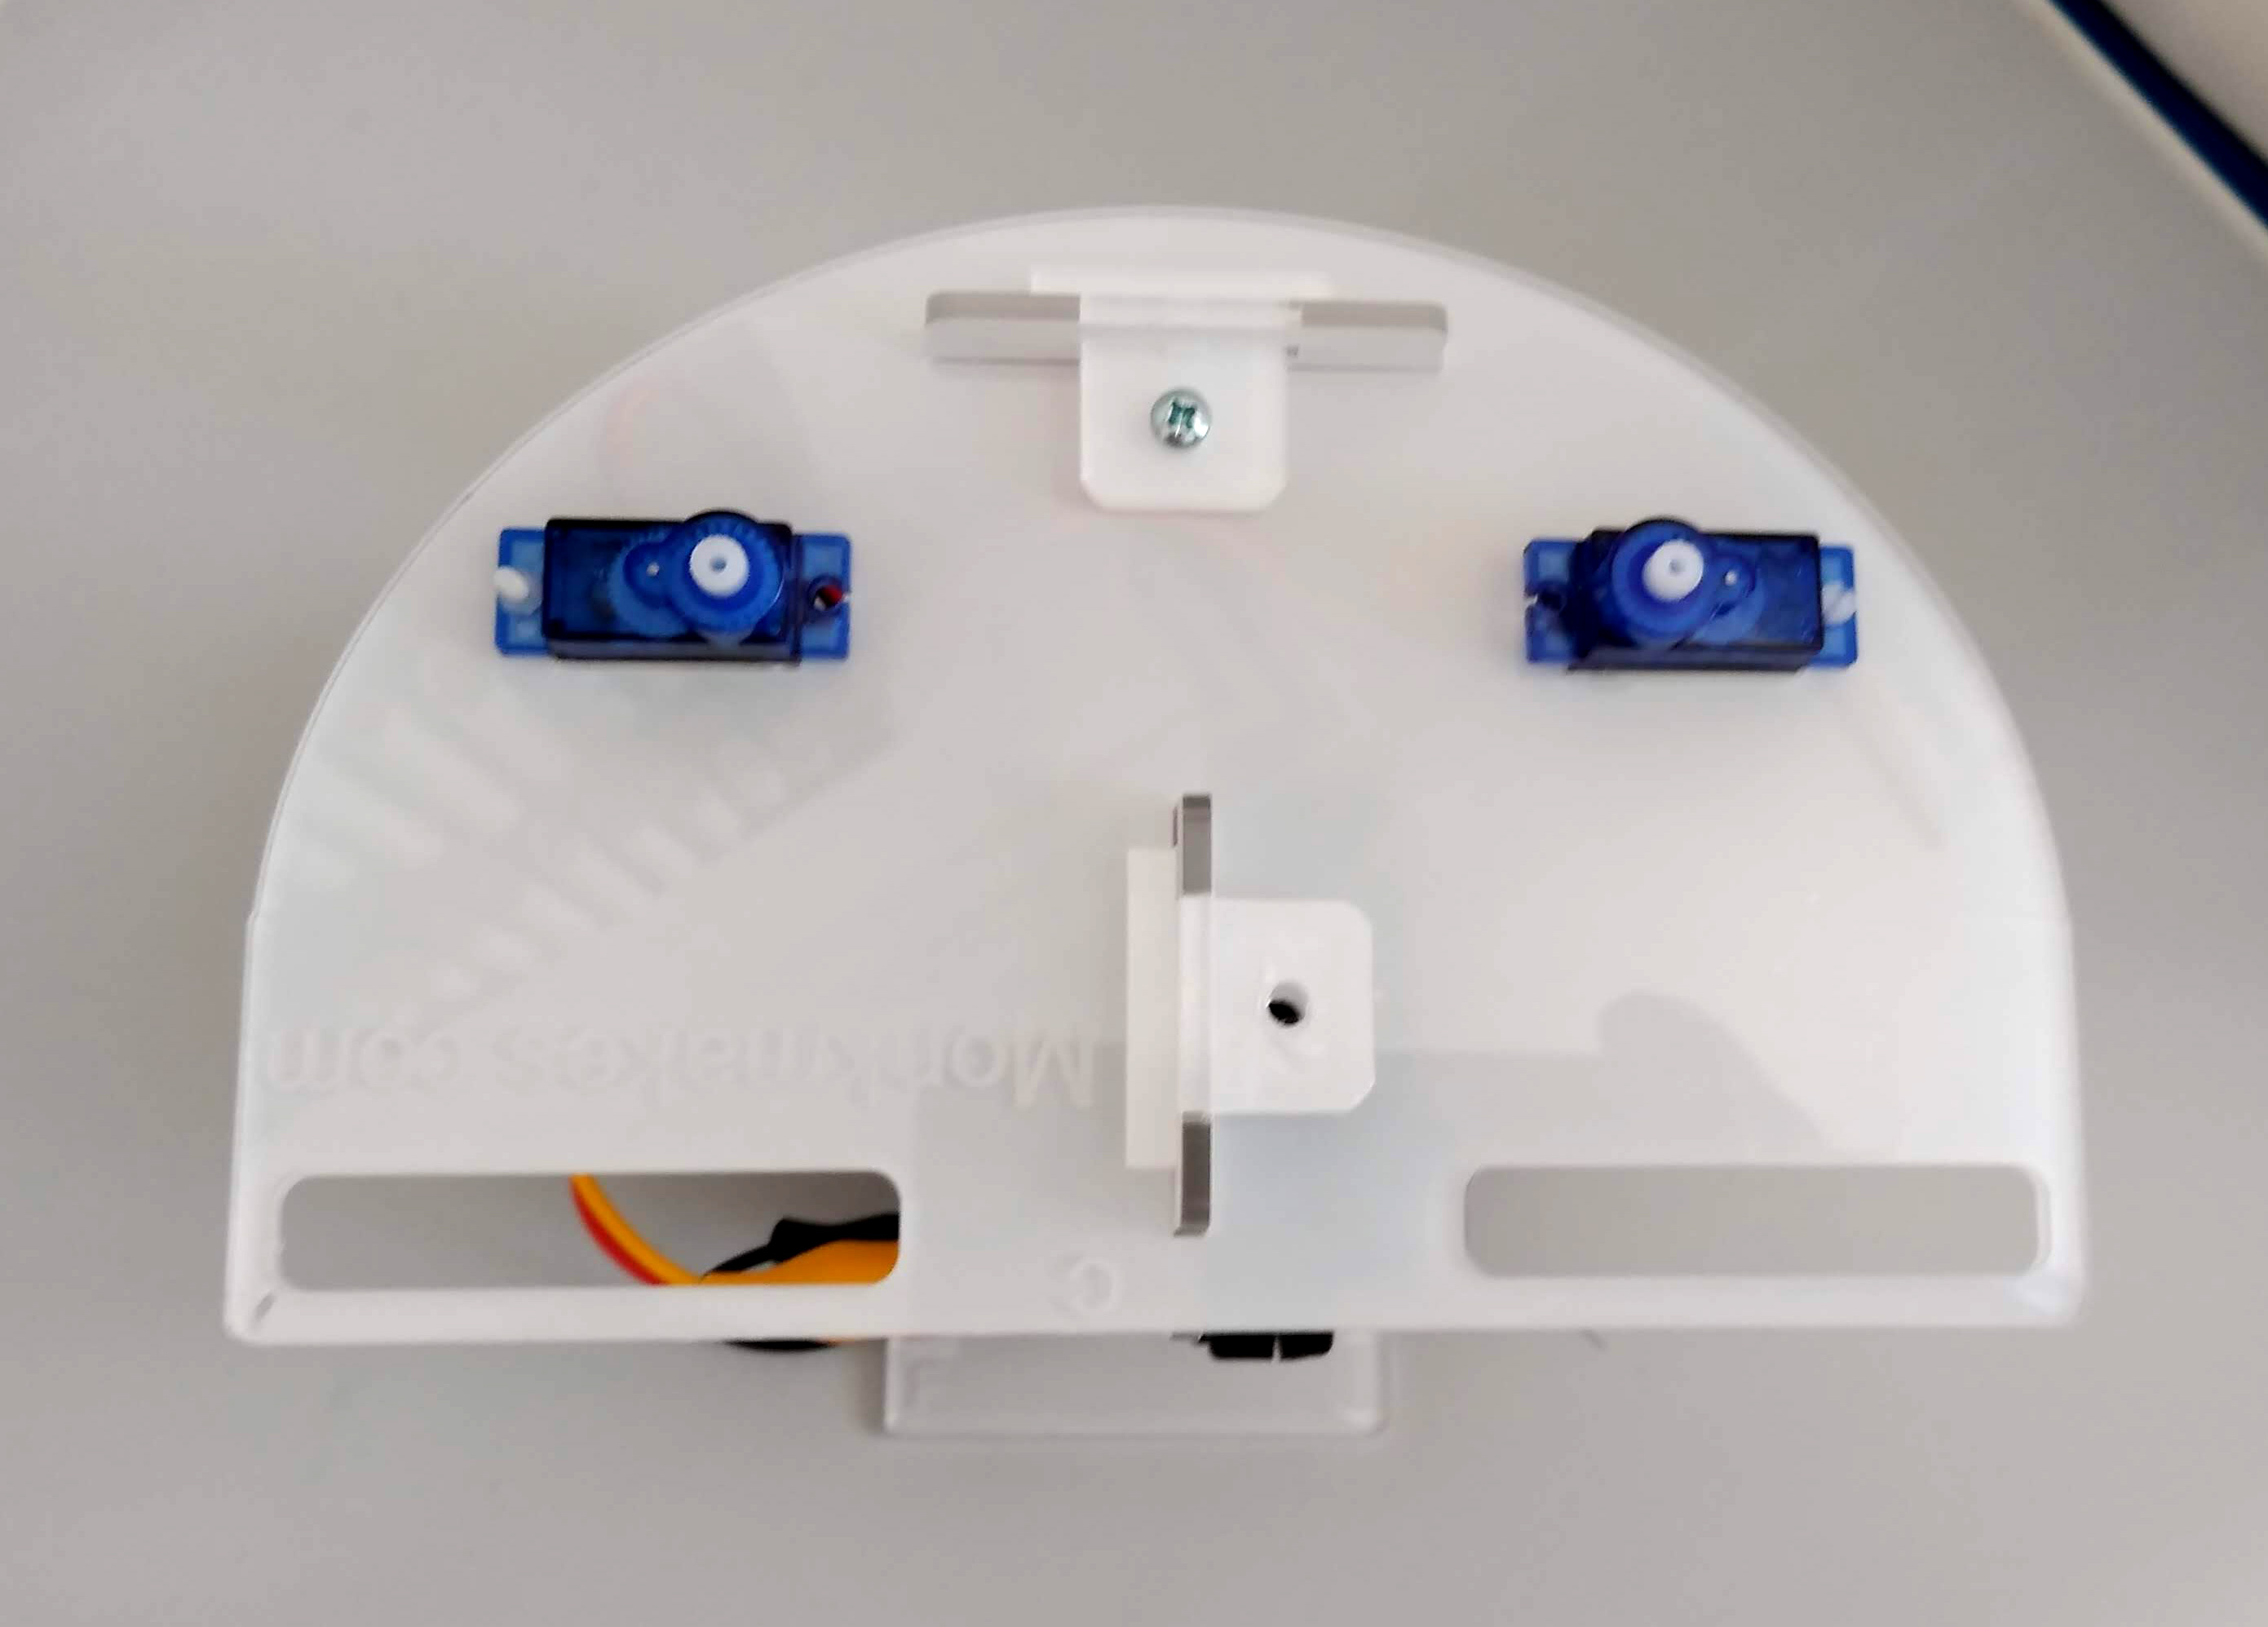
Assemble the top panel
The top panel houses the servos and holds the front and back panels together.

- Piece C can go up either way.
- Insert the 2 servos through the cutouts on acrylic piece C, inserting the wires first. Make sure to position them the correct way around. This is with the white motor attachments towards the inside of panel C.
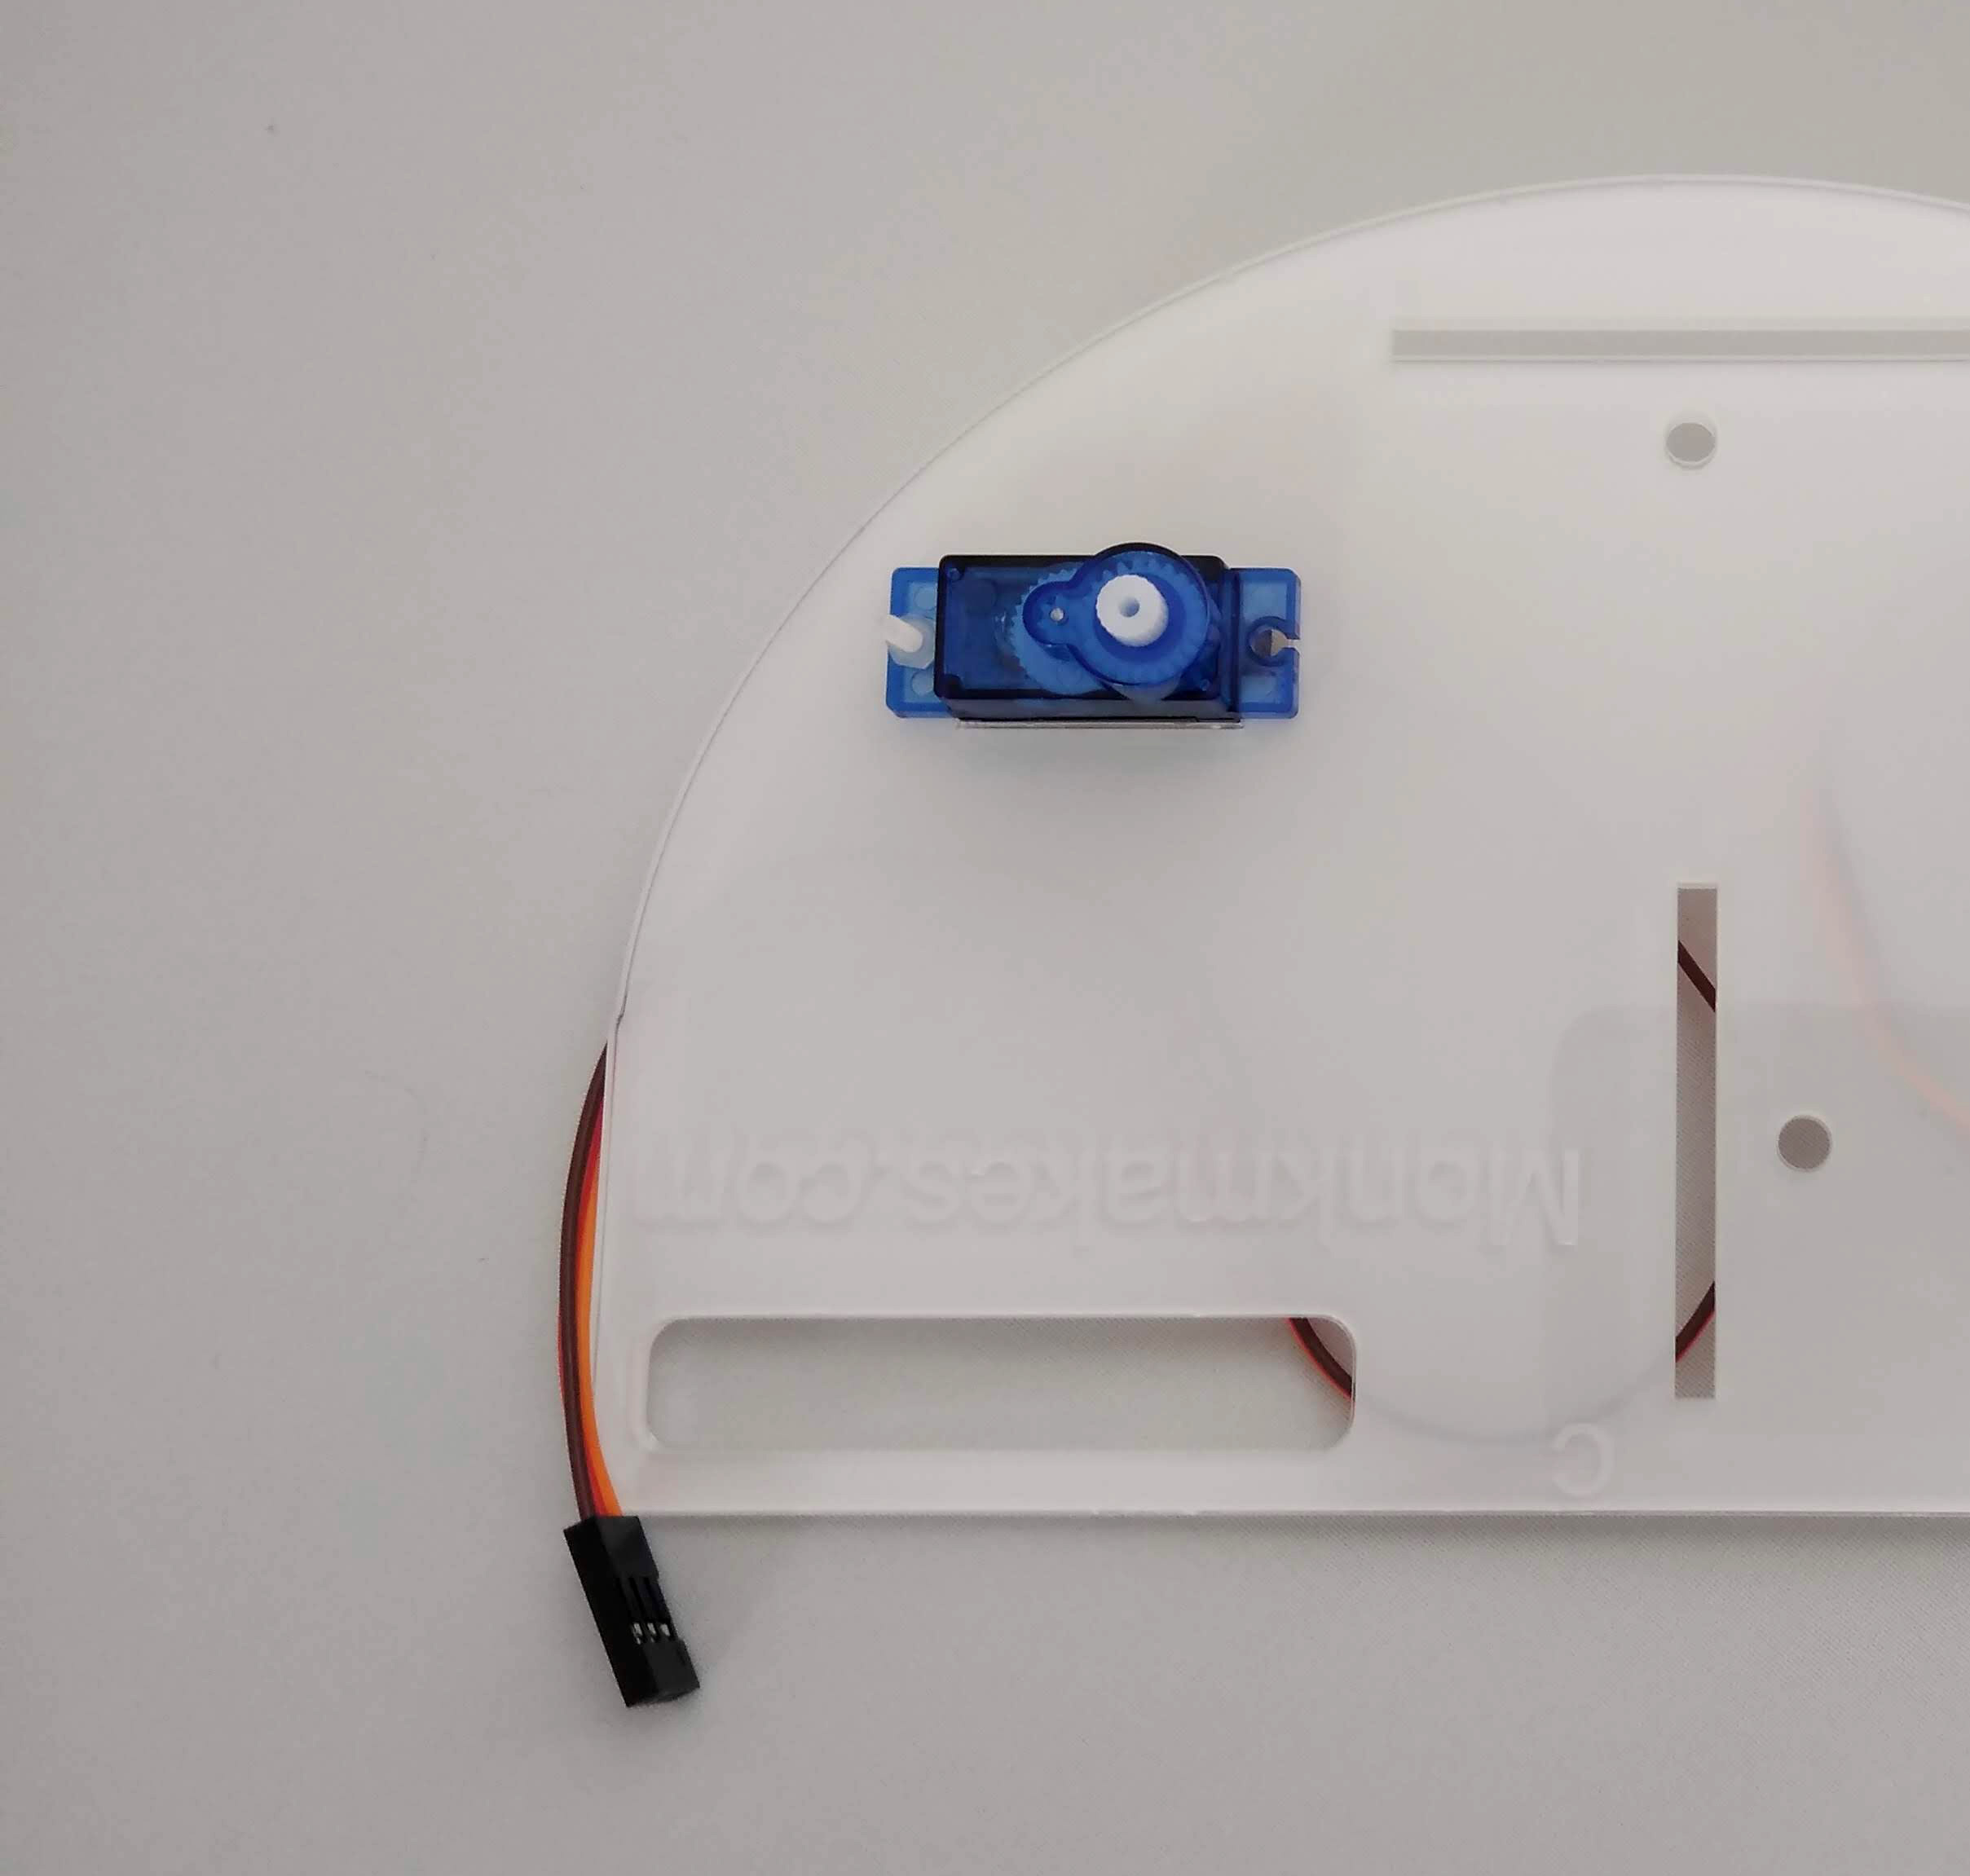
- Secure the servos using a single nylon nut and bolt for each one.
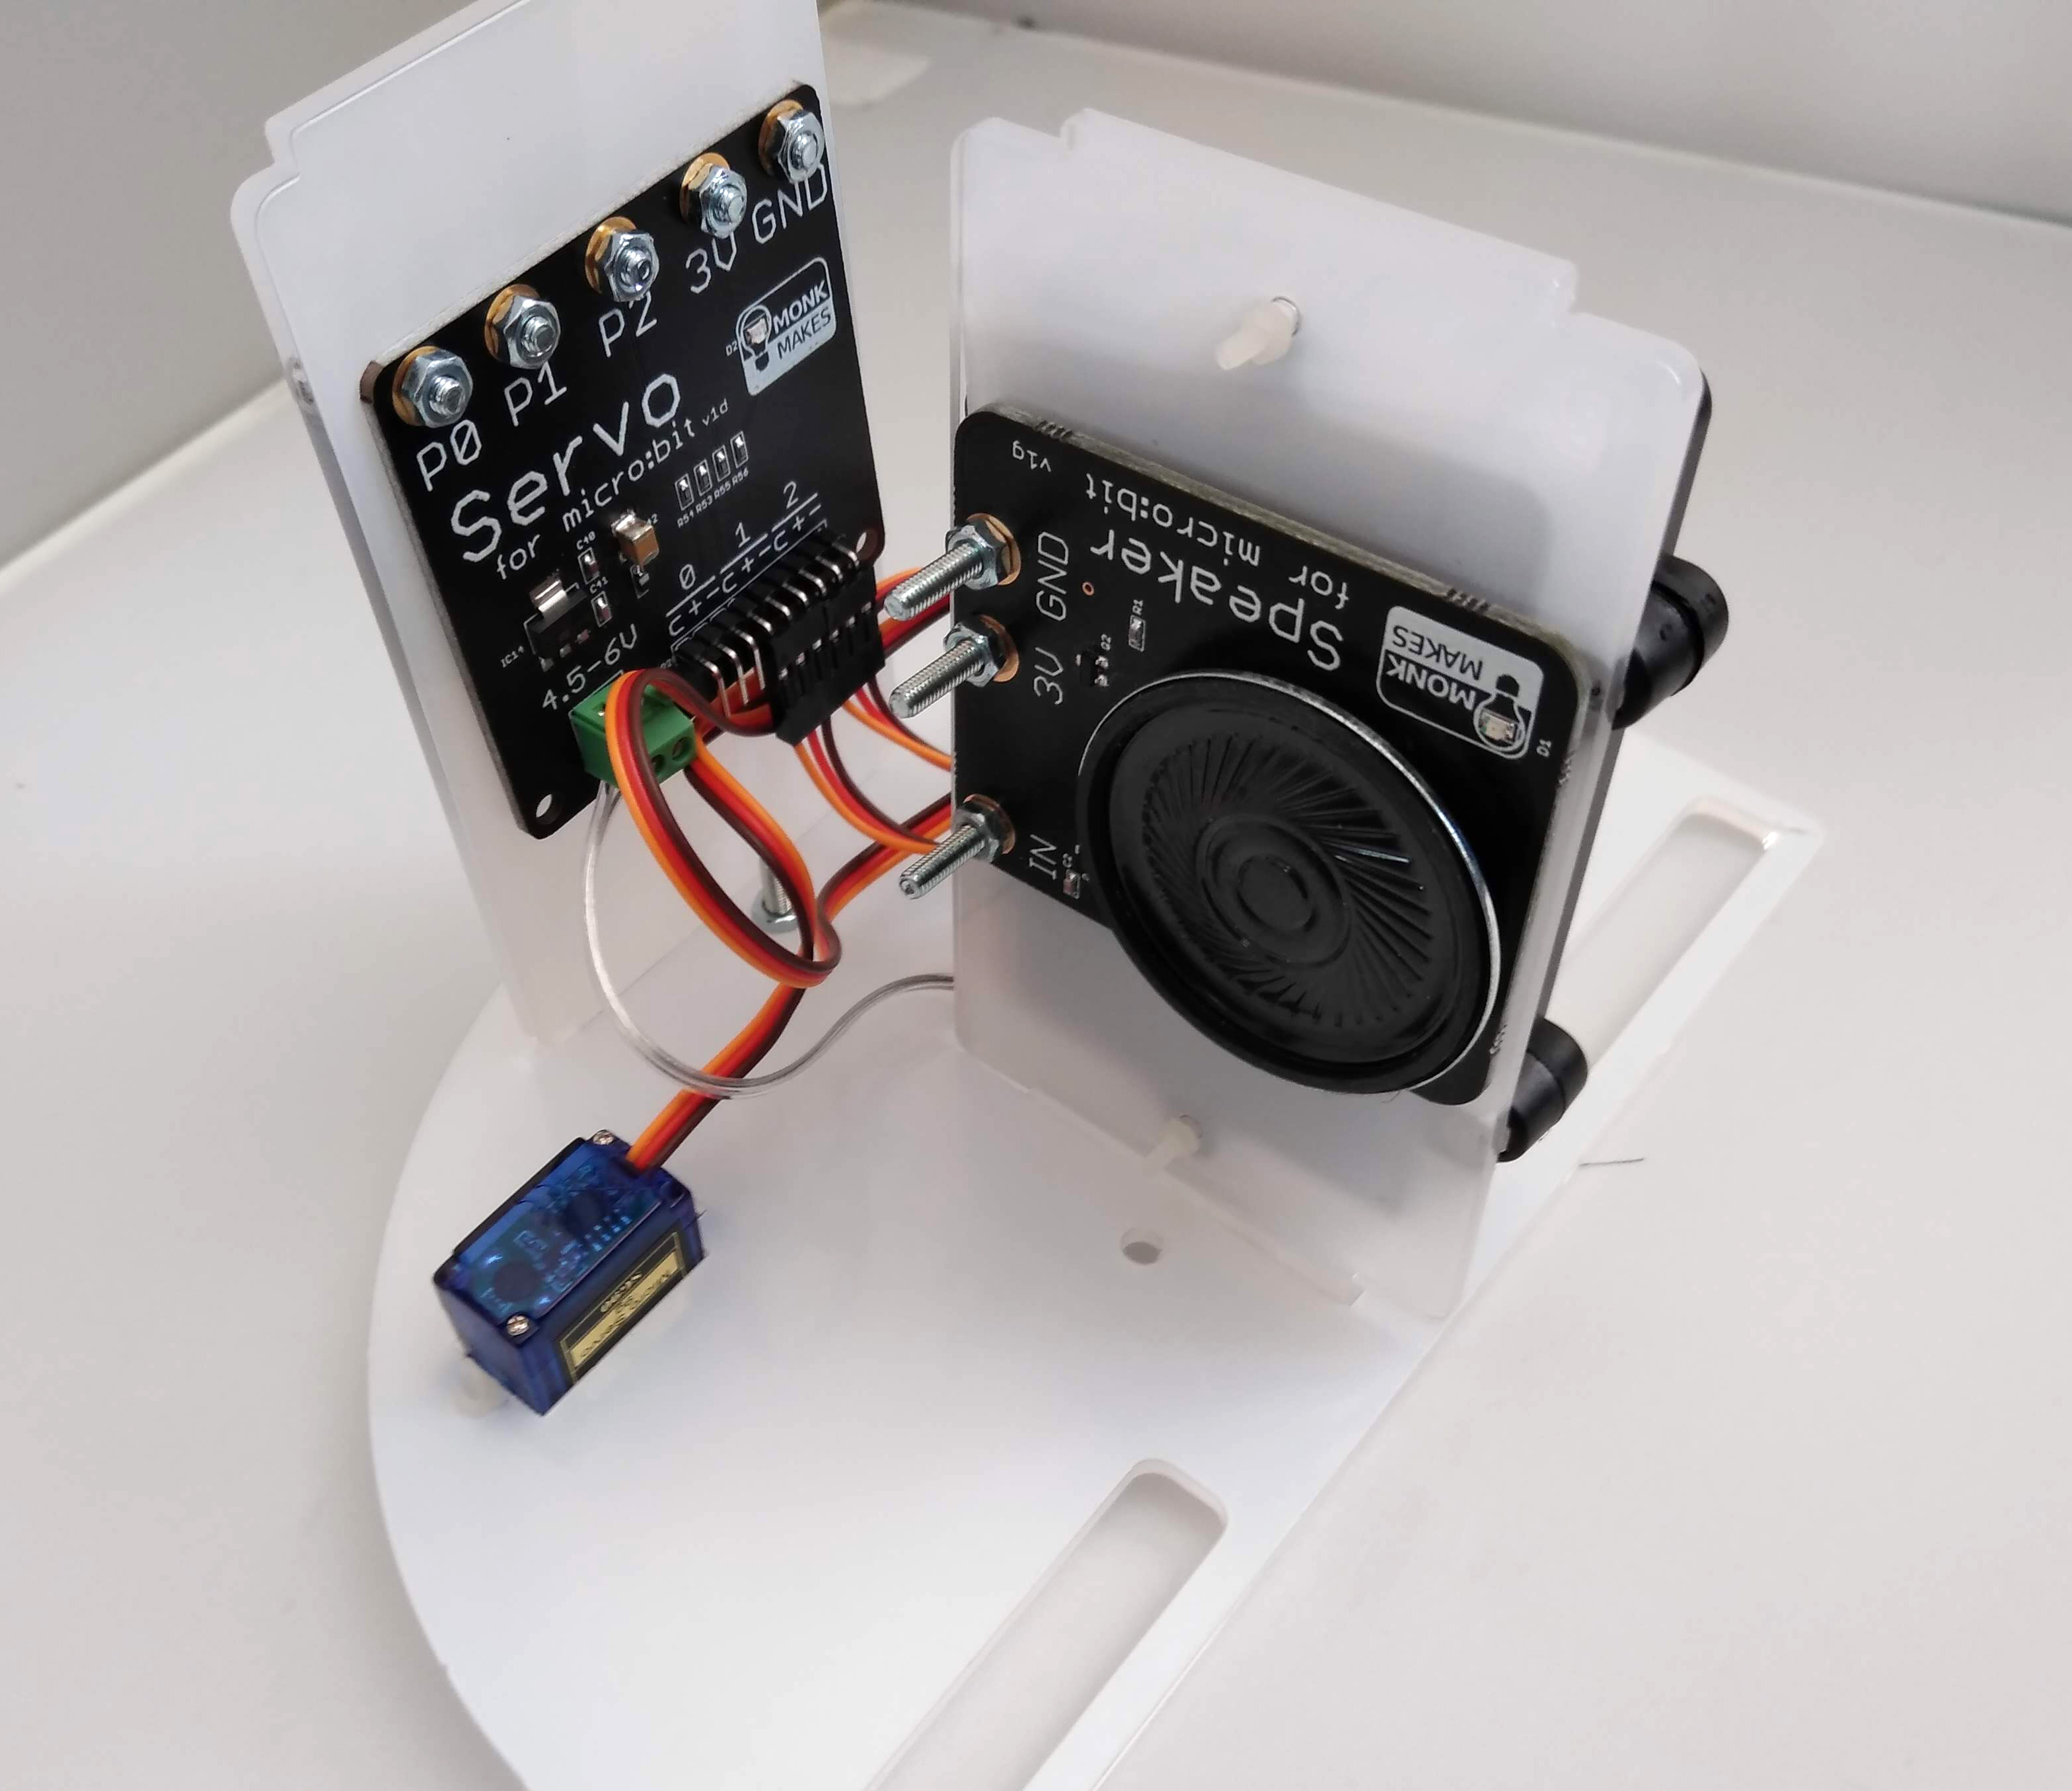
Connect servos & battery box.
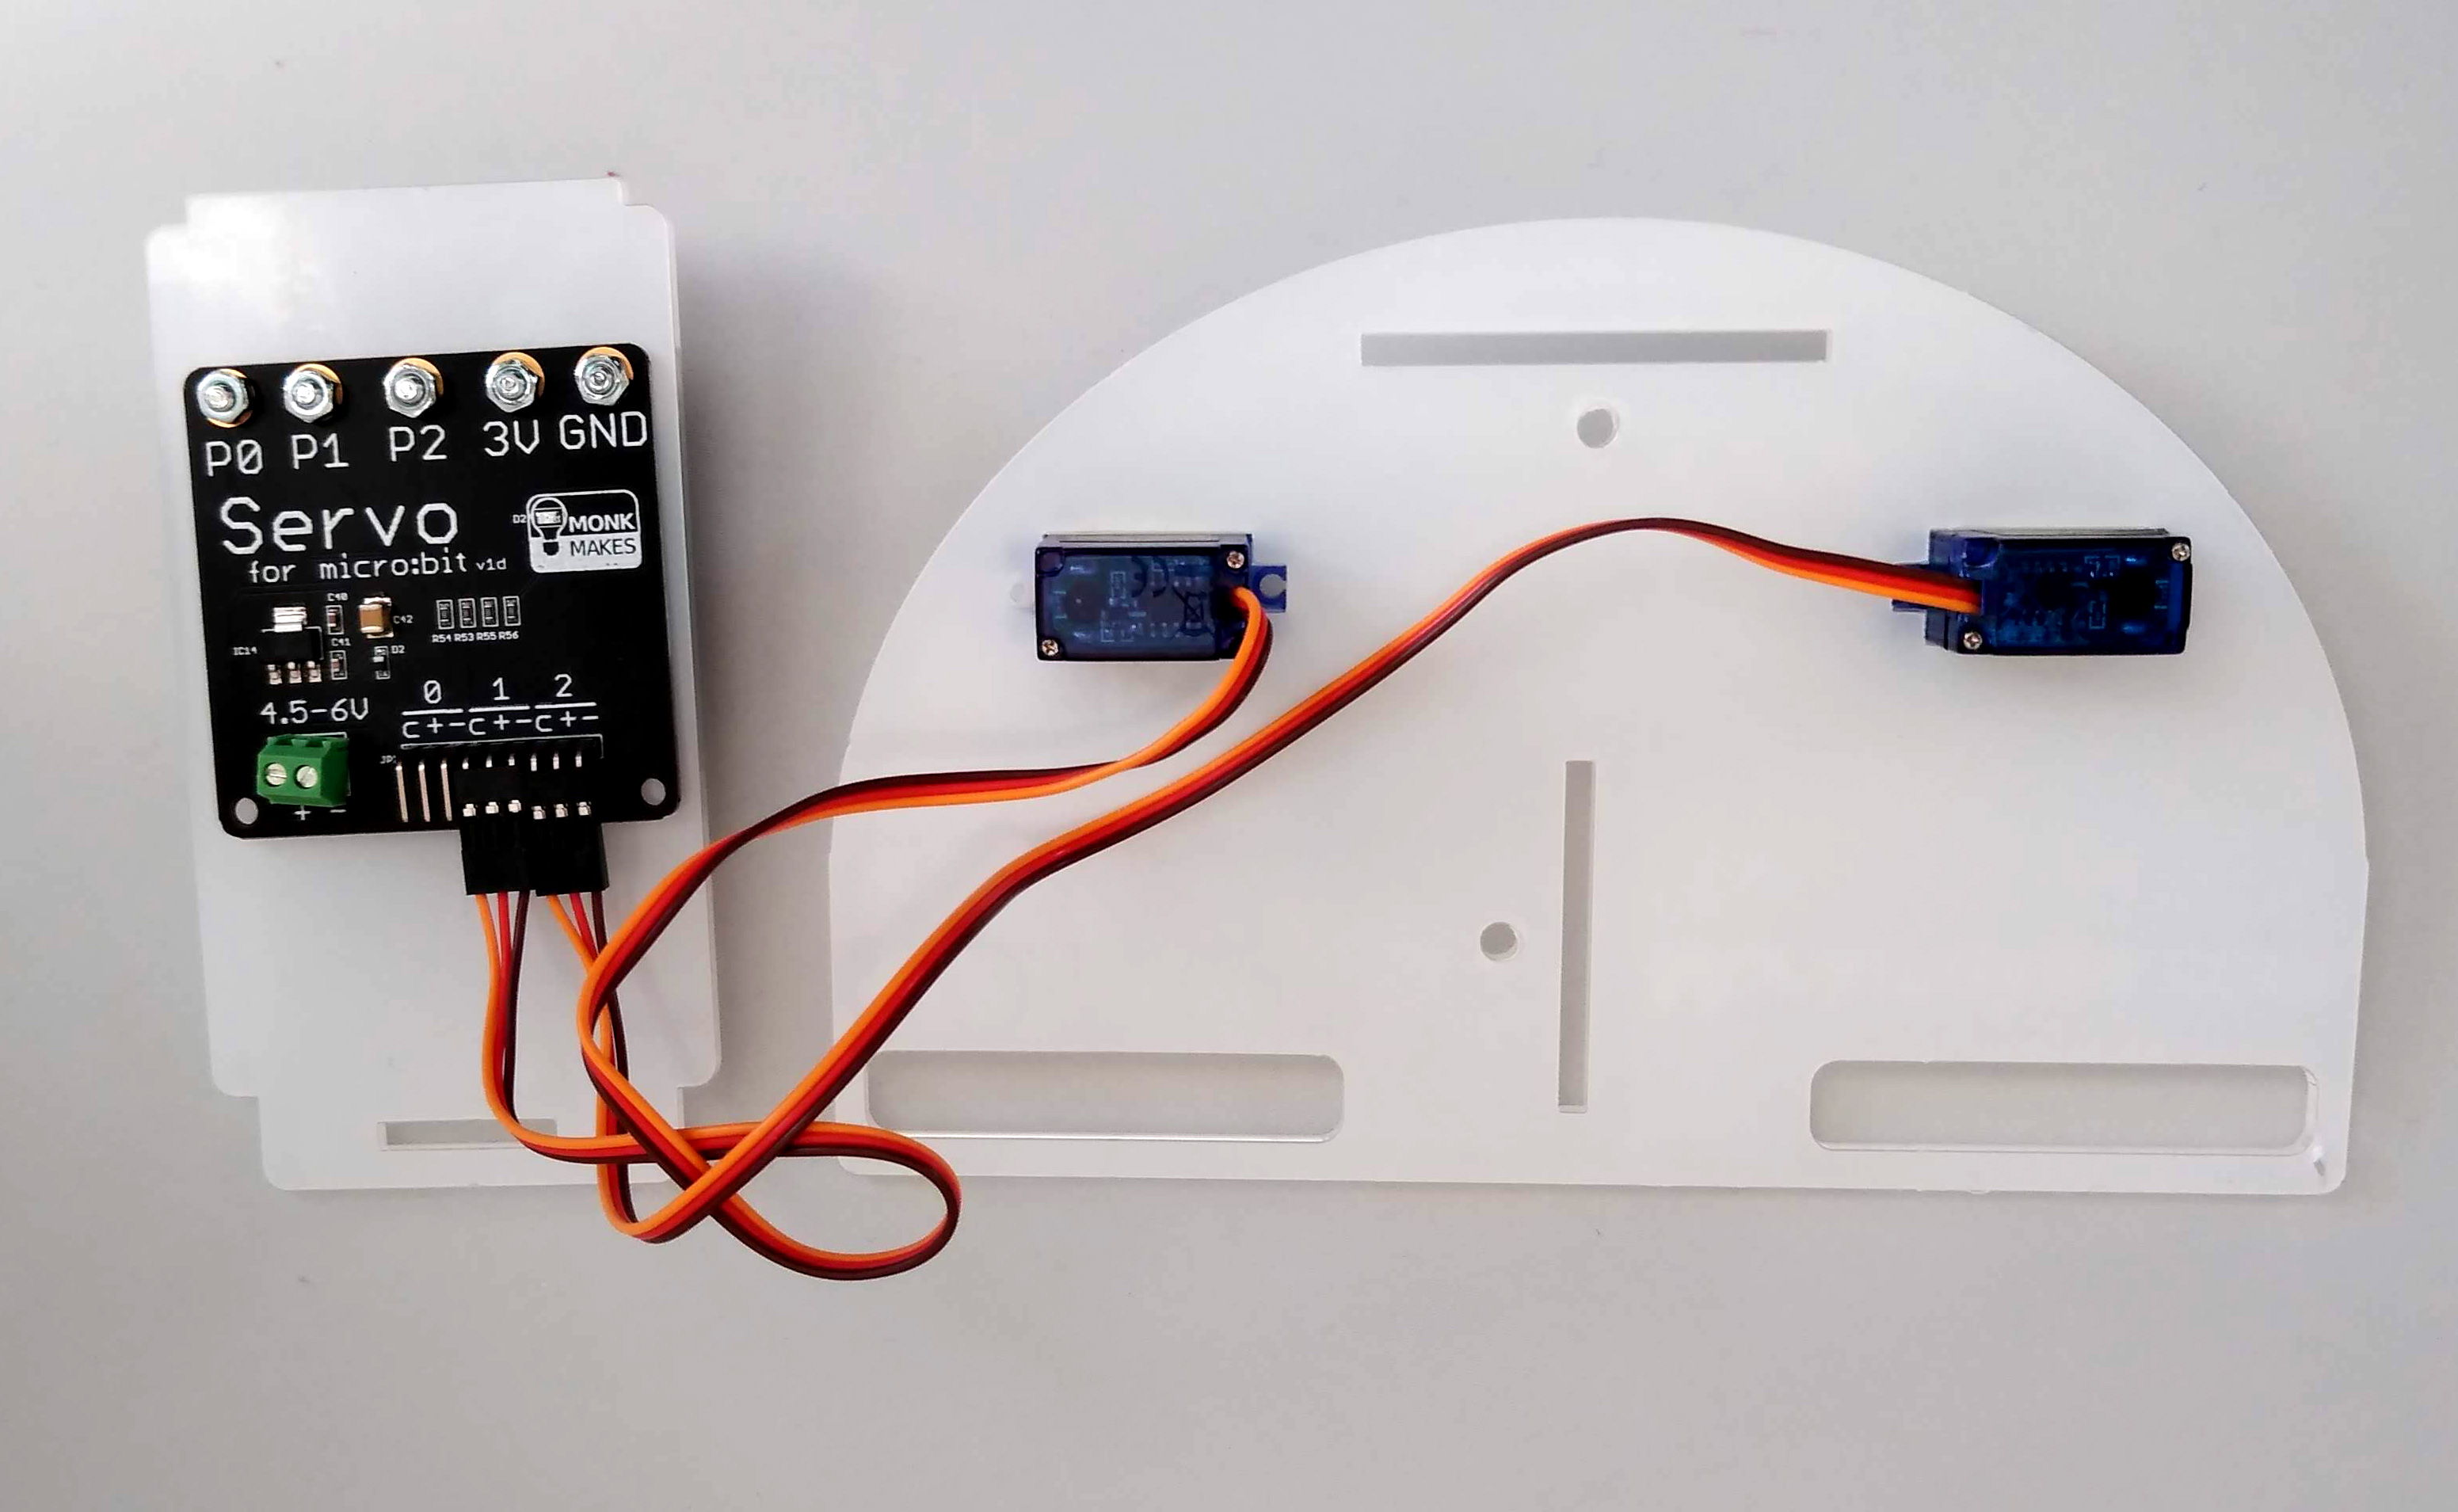
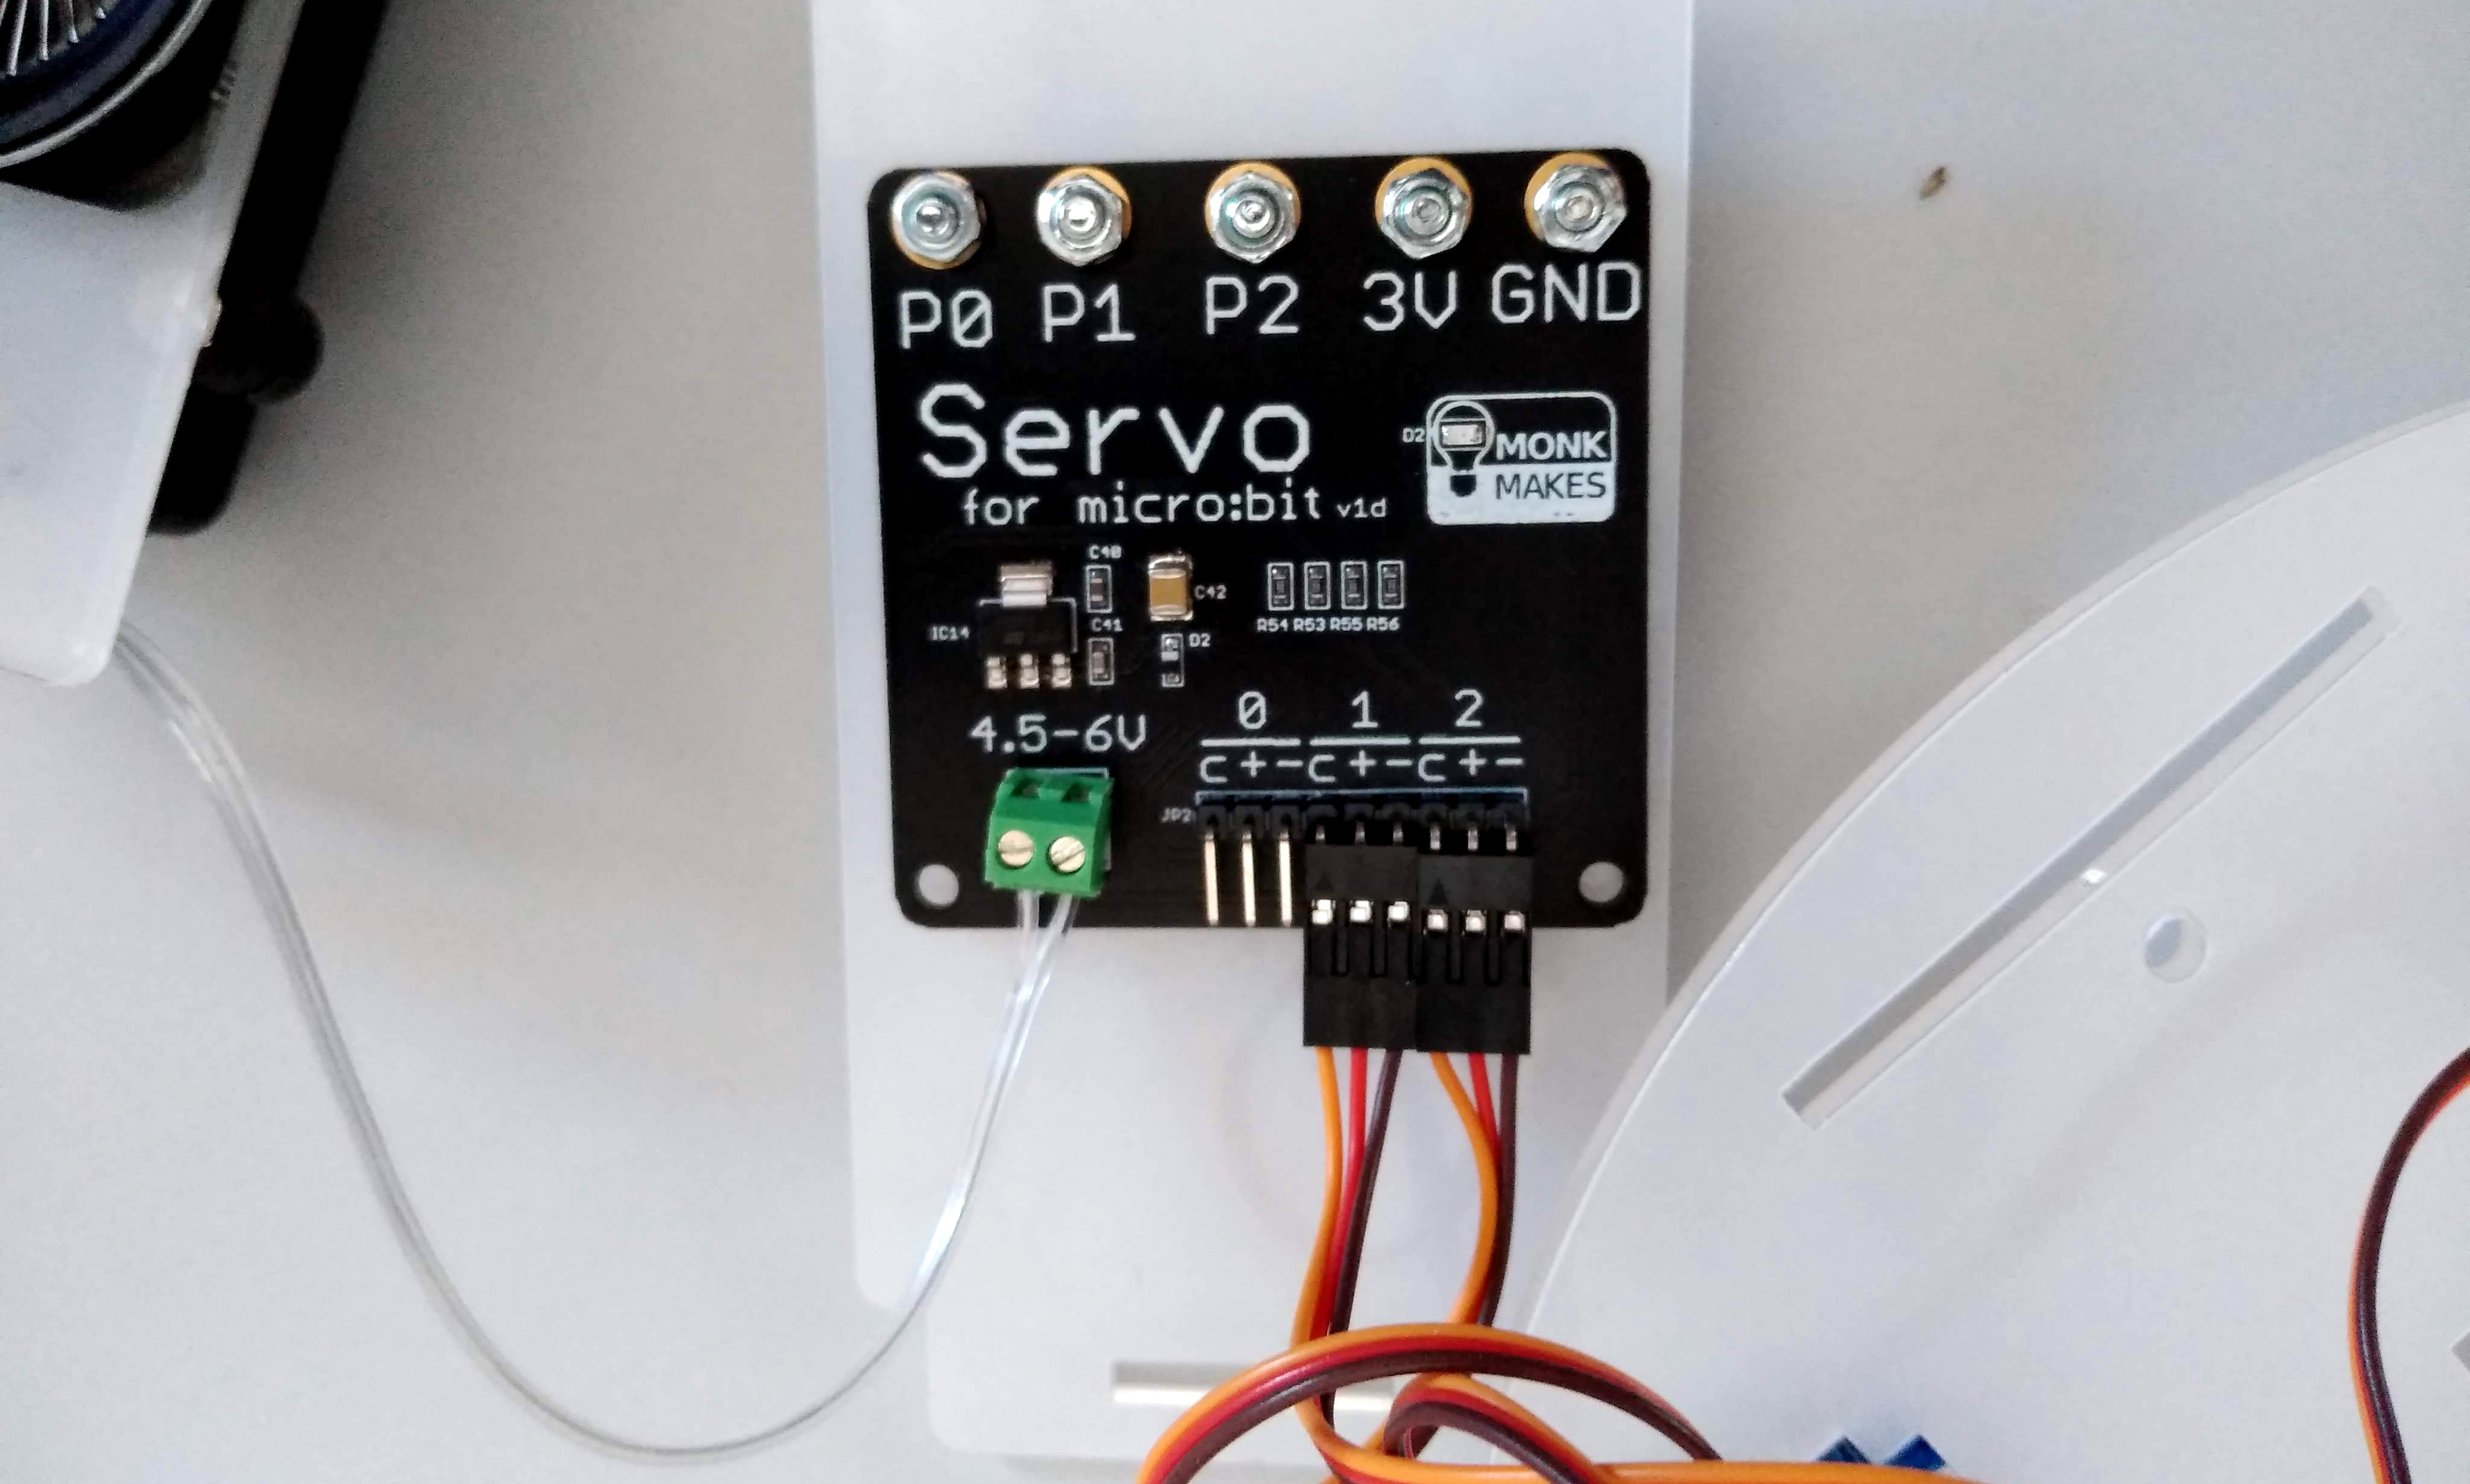
- Connect the servos to the servo board as illustrated above. Ensure that the coloured wires are in the correct order ie. from left to right: yellow, red, brown.
- Using the mini-screwdriver, undo the 2 screws on the green connector block of the servo board.
- Observing the polarity of the battery wires (+ should have a red marker, if not, the – wire will have ——- printed on it) insert them into the green block connectors and tighten the screws after ensuring that the wires are properly inserted.
- If the battery switch is set to ON, the servo board LED will light up. This is a a good sign as it shows that all is well so you can switch it off for now. If the LED doesn’t light up, try switching the battery pack on to test that all is well.
Assemble all the panels.
- Find panel C and insert panels A and B into the relevant slots as shown below.
- Secure panels A and B using the 2 tabs marked E and some nuts and bolts.
- Turn the whole thing so that it’s resting on C.
- Using the crocodile clips, connect the speaker and servo board together. GND to GND, 3V to 3V and IN to 0.
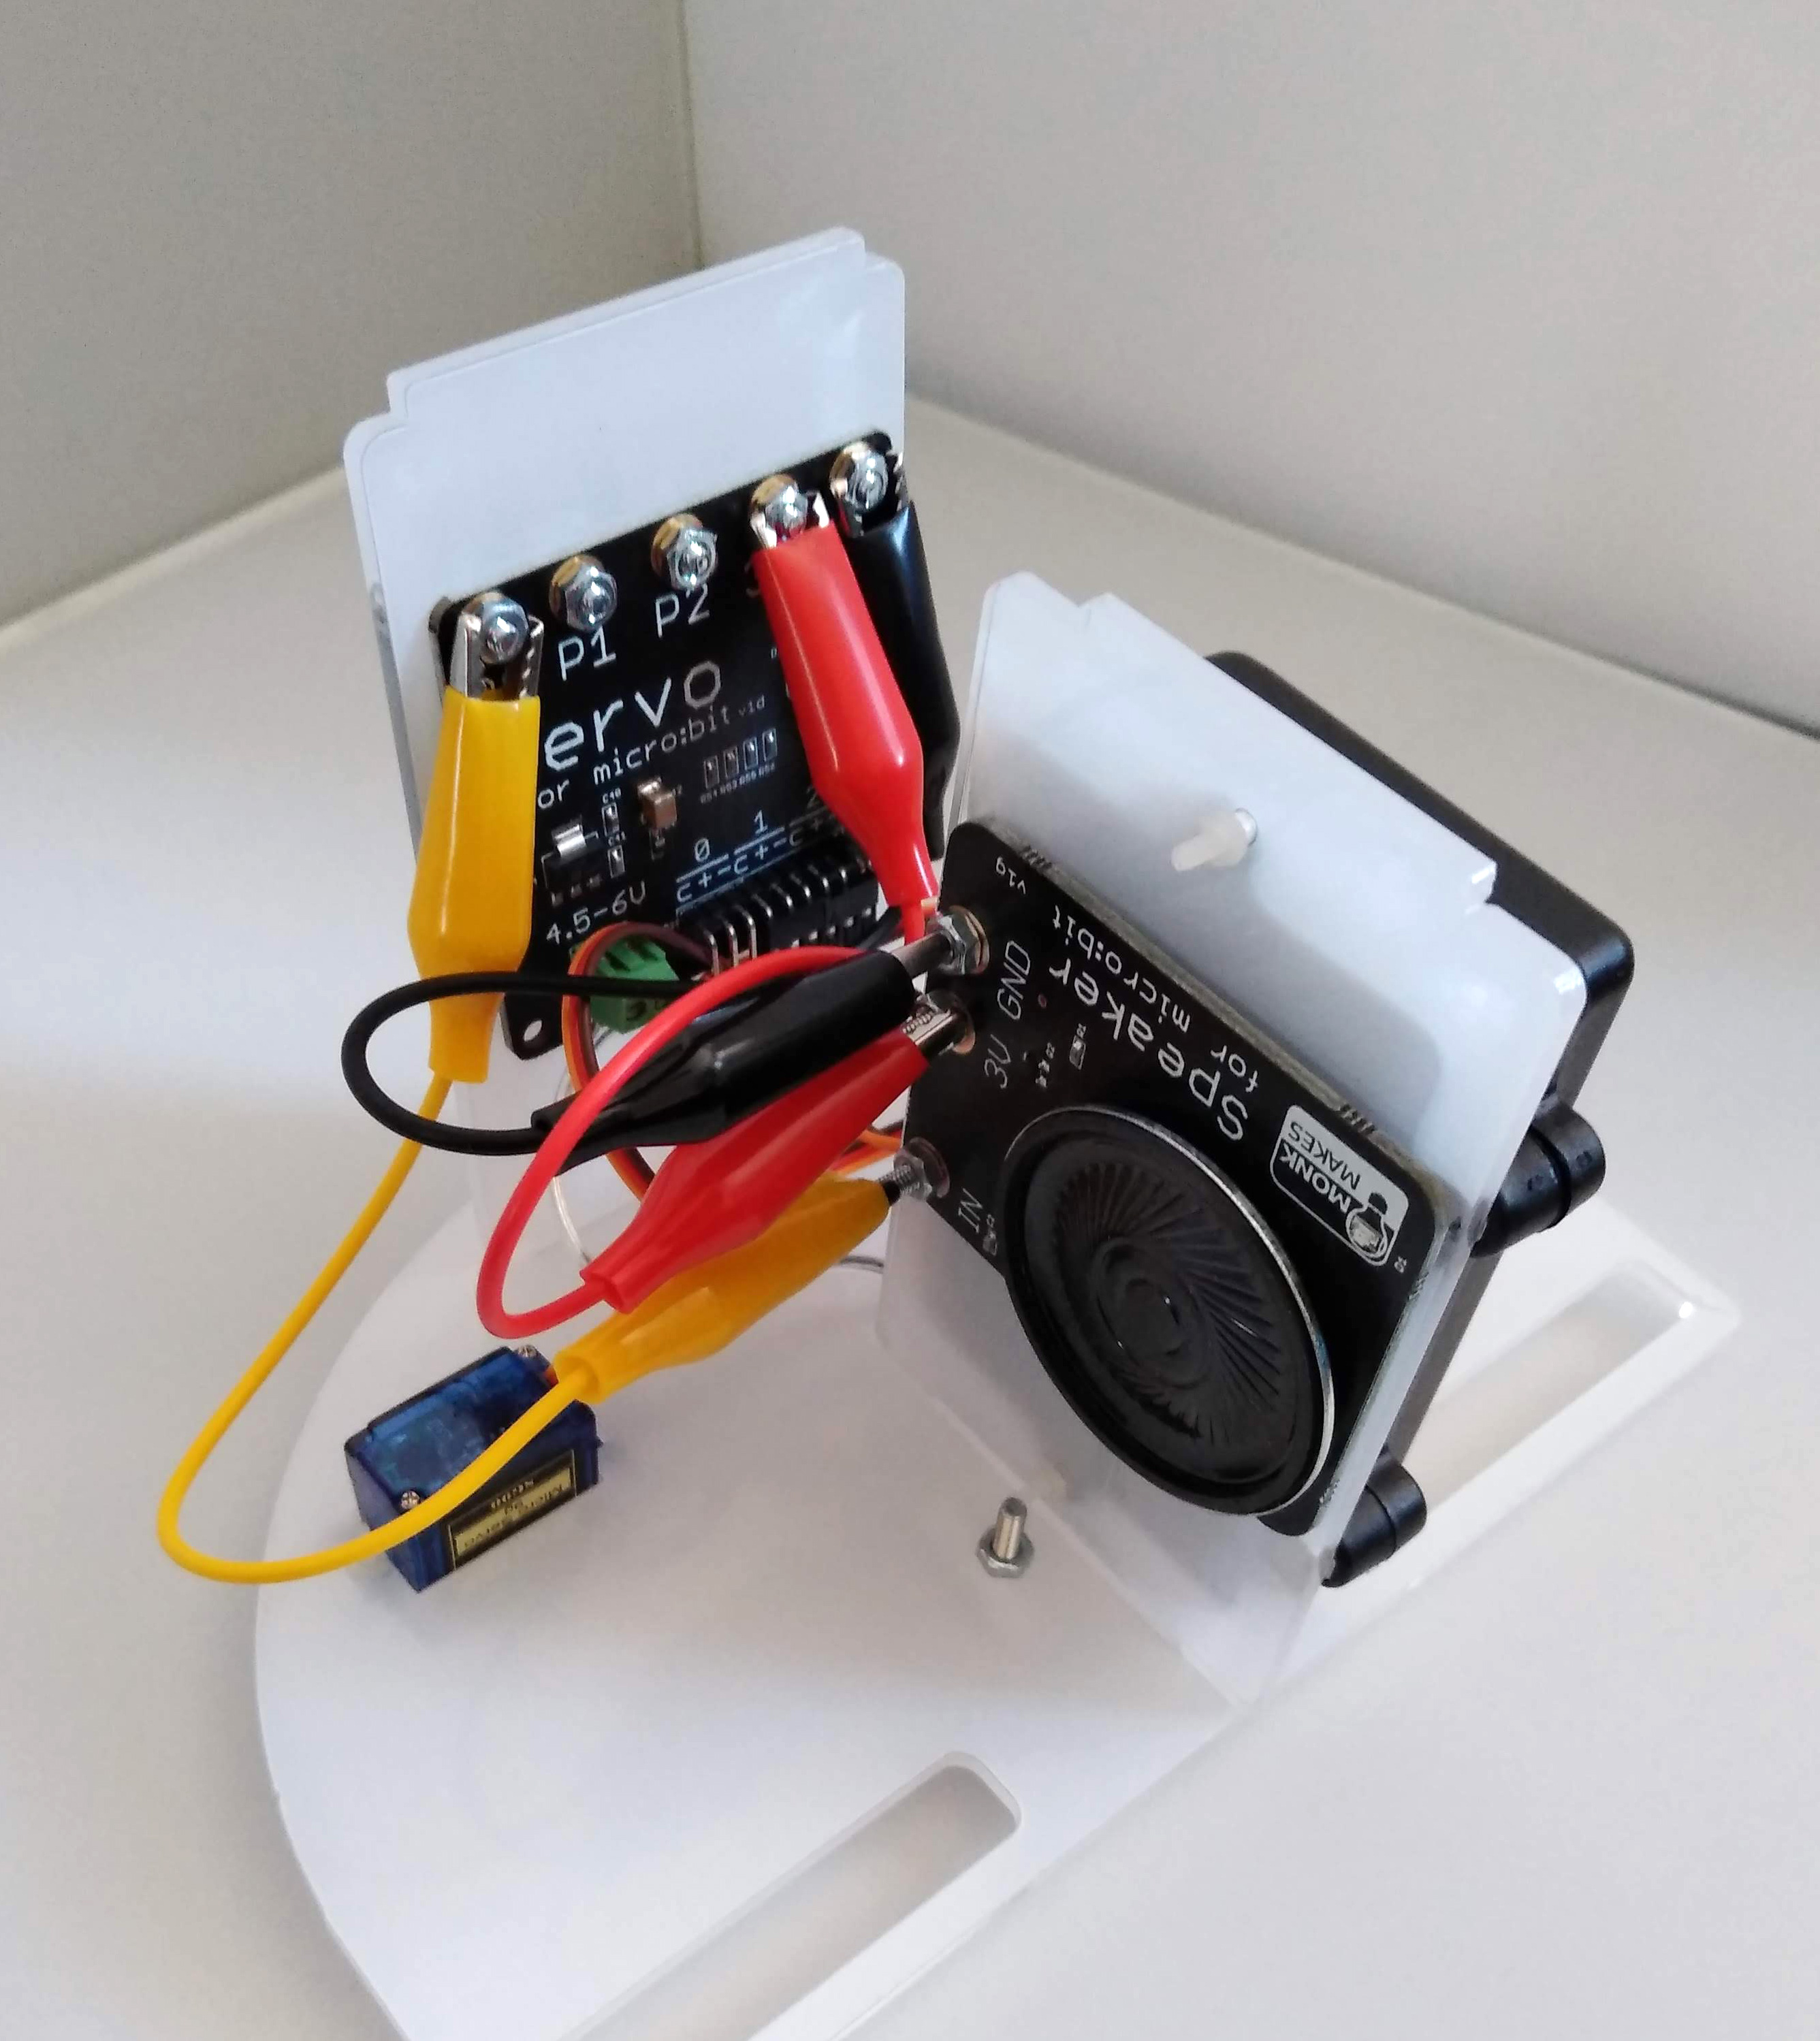
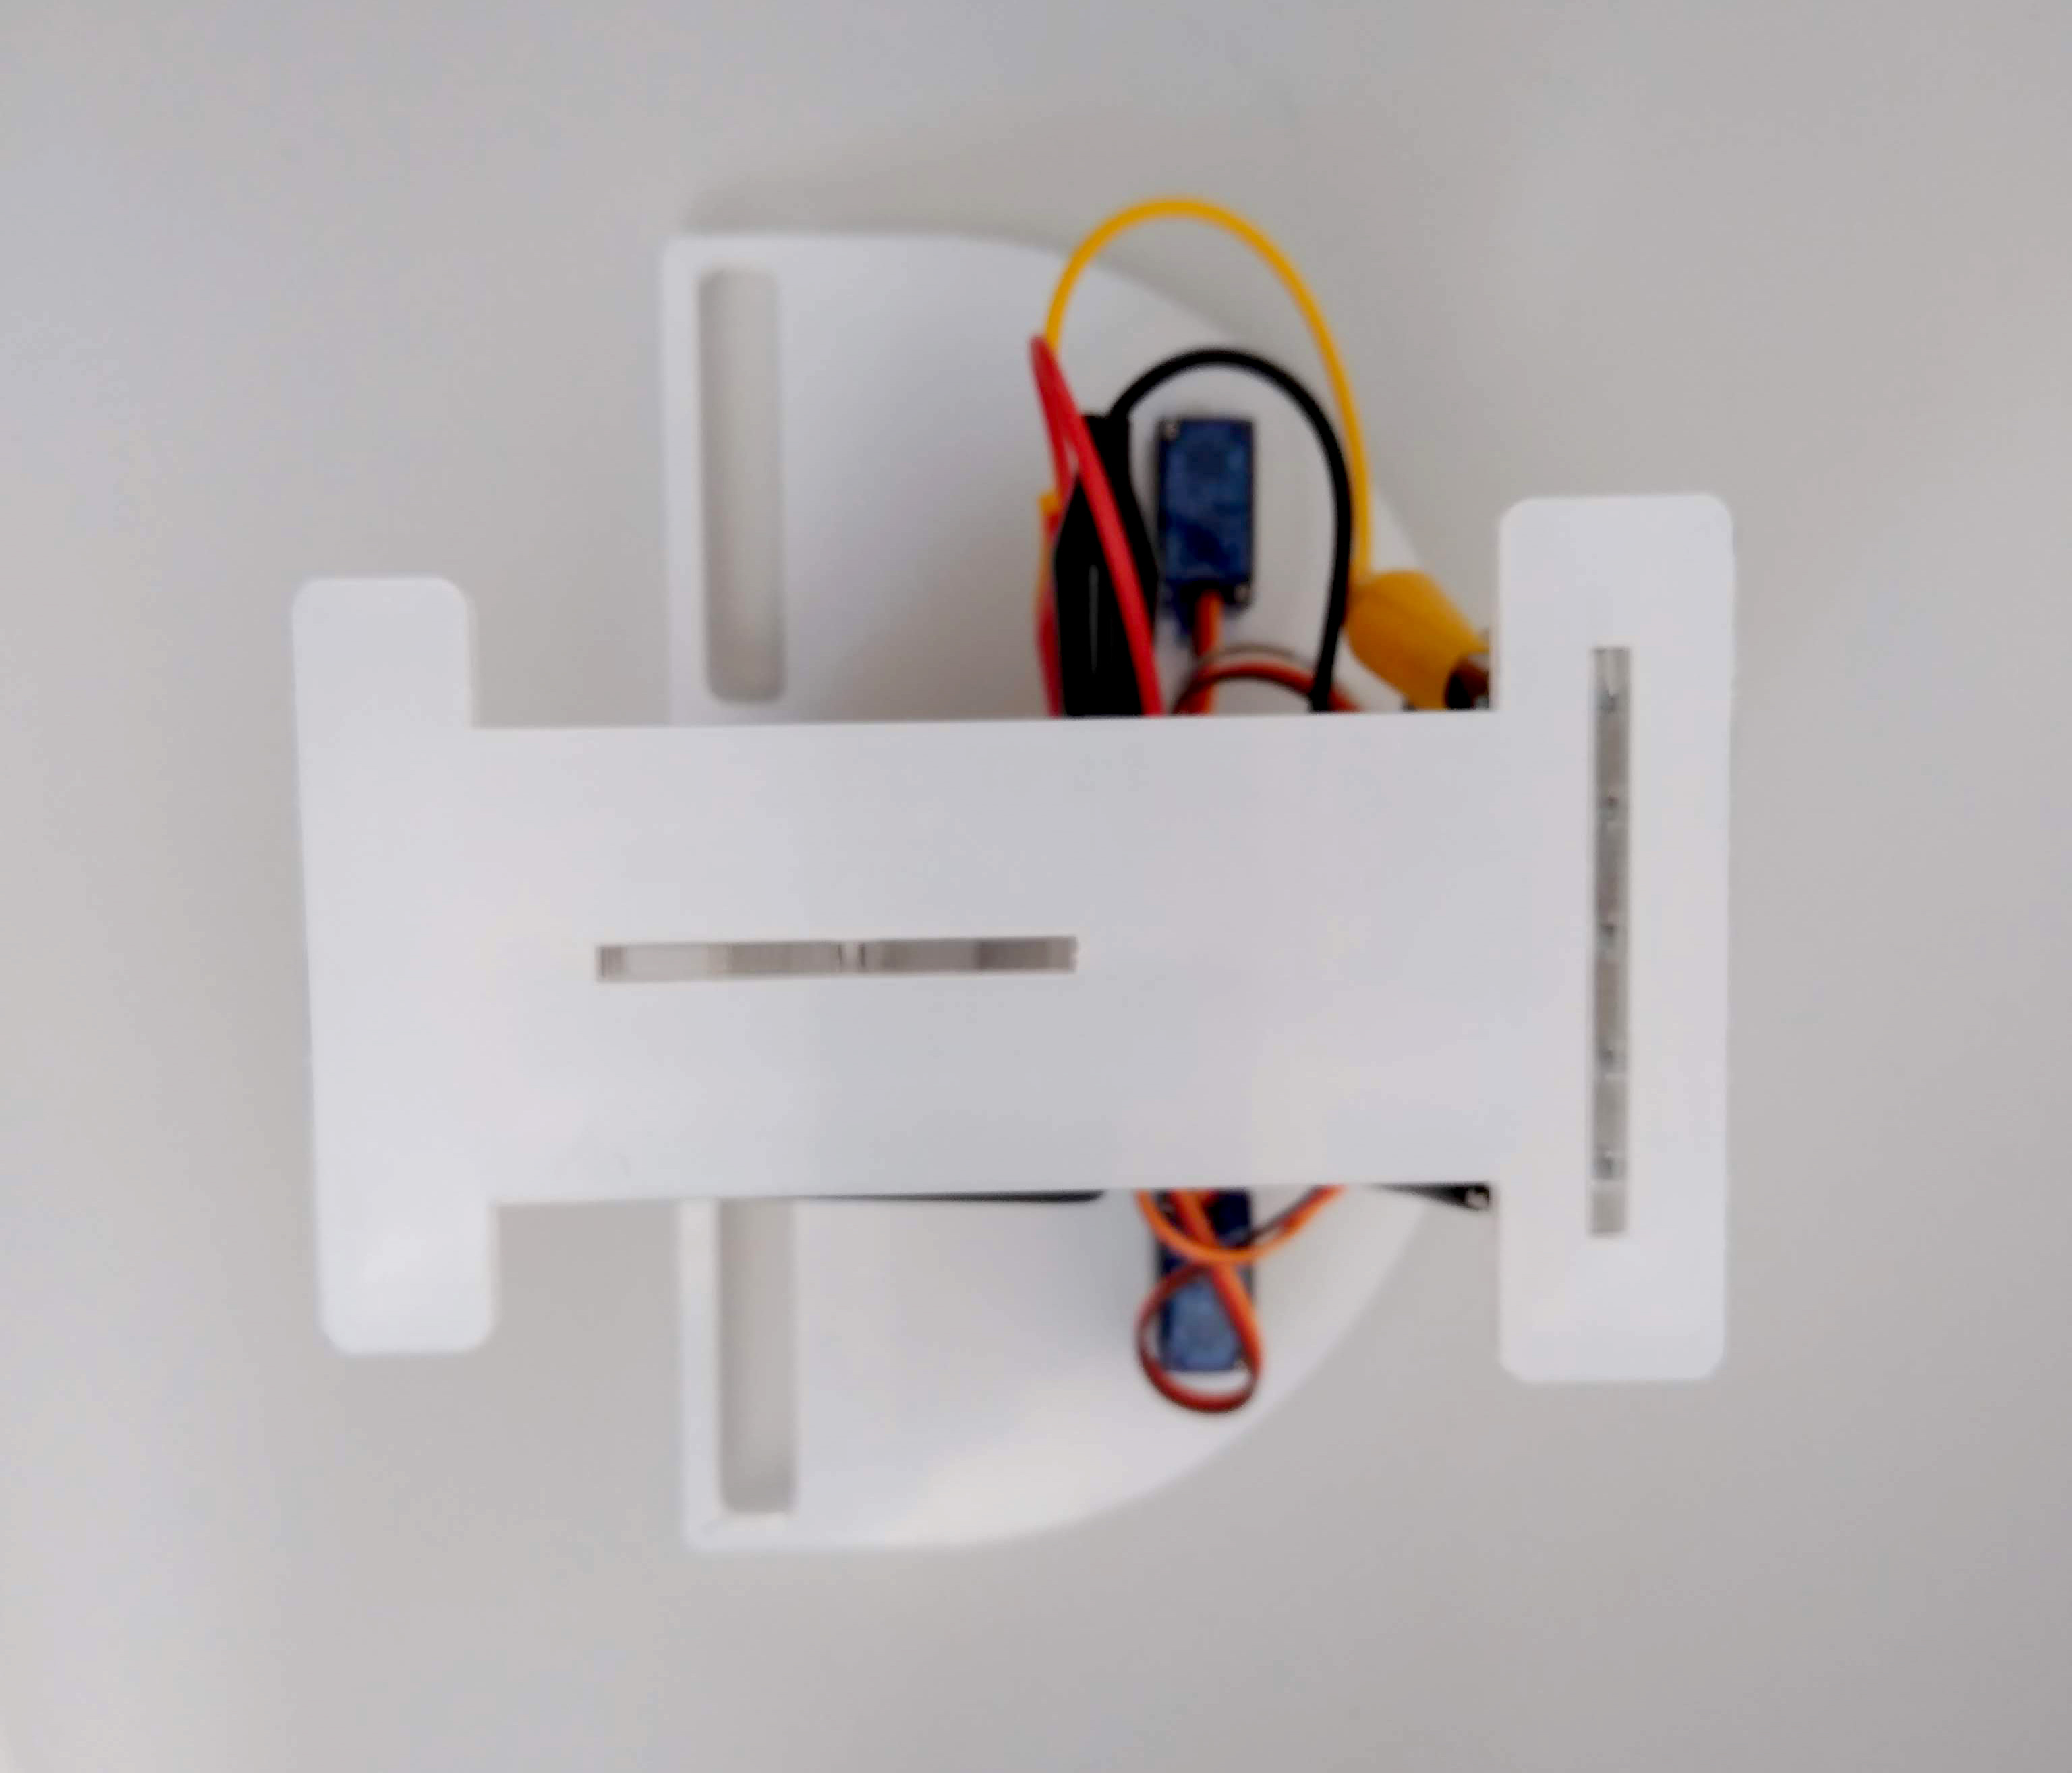
- Place part F over the whole structure so that it holds everything in place.
At this point, you might want to secure part F in place using some glue to make the whole thing more sturdy.
Decorate the eyes
Now that the main structure is complete, you need to decorate the eyes but to do this you need to ensure that the eyes are facing forward! To do this you need to run a small programme that will centre the servos.
- Push the eyes on to the servo motors.
- Connect the micro:bit to your computer using a micro USB cable.
- The micro:bit will start running whatever is already loaded on it. We’ll be deleting this.
- Open a browser and go here.
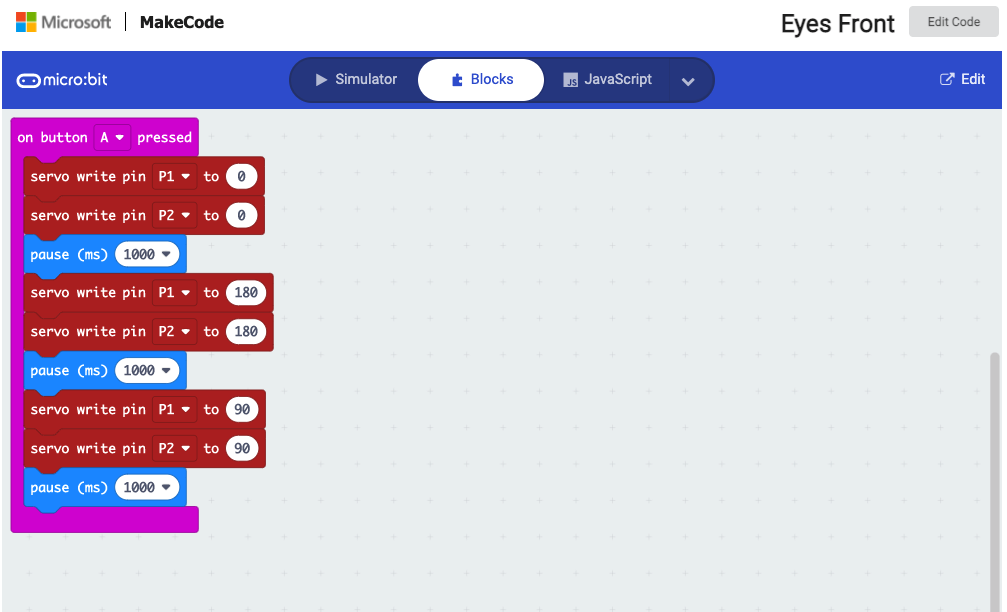
You’ll be presented with the Eyes Forward programme in MakeCode.
- Click on Edit on the top blue bar.
- You’ll now be in the MakeCode editor, from here you can load the code to your micro:bit.
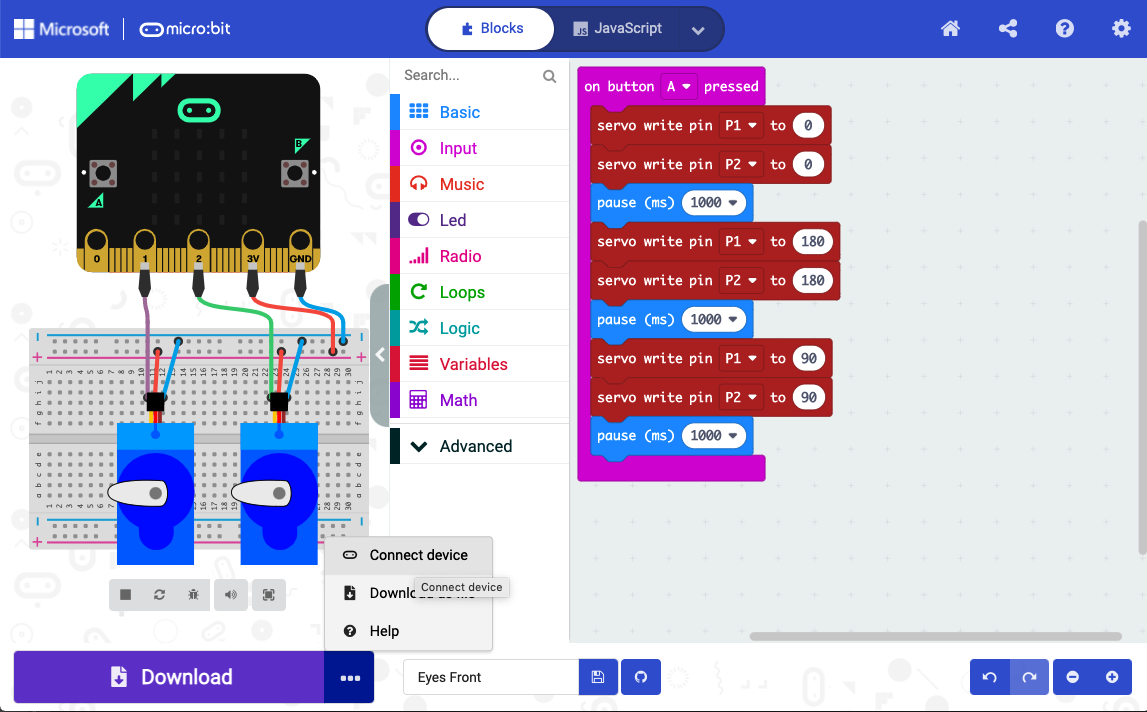
- Click on the 3 dots next to Download and the on Connect device. This will take you through a series of steps to connect your micro:bit.

- Once connected, simply click Download to load the code to your micro:bit.
- After a few seconds, the micro:bit will be loaded with the new code.
- Disconnect the USB cable from the micro:bit.
- Switch the battery pack on.
- Press button A on the micro:bit.
The servos will rotate fully one way and then the other, to then settle on the centred position.
- Using a pencil, lightly mark the position of where the pupil should be on the eyeballs.
- Take the eyes off the servos.
- Use a permanent marker or acrylic paints to style your eyes. From a simple black pupil to technicolour crazyness, the choice is yours!
- Re-attach the eyes to the servos.
Programme the head
We will now make the head speak and move. To do this you’ll be using the MicroPython editor. MicroPython is way more powerful than the blocks used to centre the eyes ealier.
- Go here. It will take you the MicroPython editor.
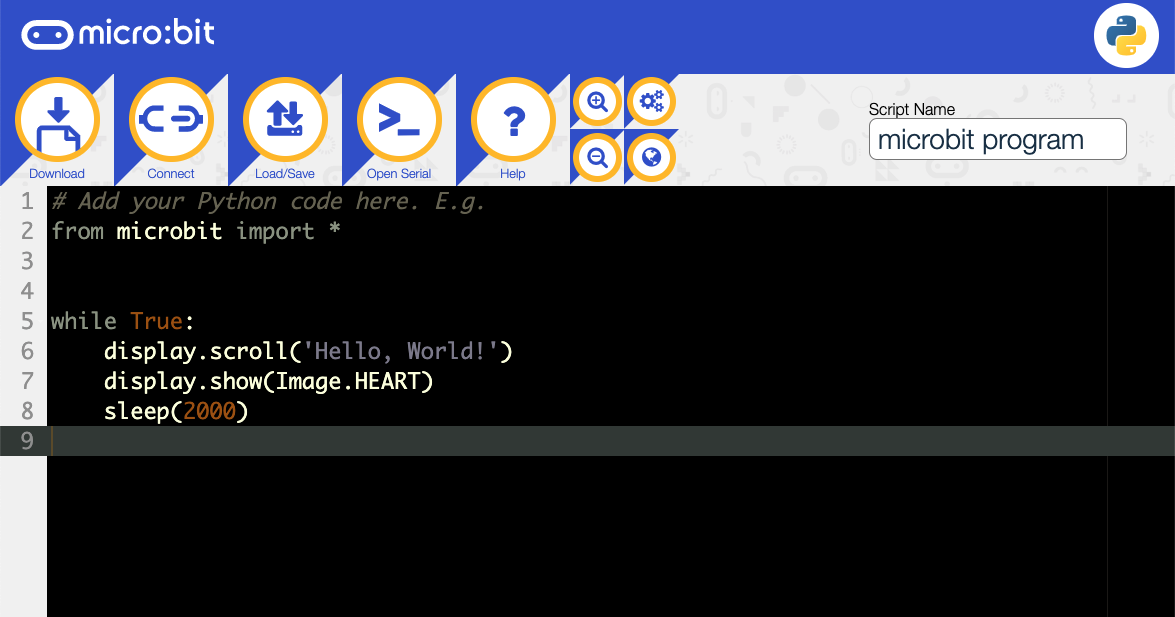
- In the editor windo, paste the following code:
from microbit import *
import random, speech

sentences = [
    "Hello my name is Mike",
    "What is your name",
    "I am looking at you",
    "Exterminate exterminate exterminate",
    "Number Five is alive",
    "I cant do that Dave",
    "daisee daisee give me your answer do"
    ]

lips0 = Image("00000:"
             "00000:"
             "99999:"
             "00000:"
             "00000")

lips1 = Image("00000:"
             "00900:"
             "99099:"
             "00900:"
             "00000")

lips2 = Image("00000:"
             "09990:"
             "99099:"
             "09990:"
             "00000")

lips = [lips0, lips1, lips2]

def set_servo_angle(pin, angle):
    duty = 26 + (angle * 51) / 90
    pin.write_analog(duty)

def speak(sentence):
    words = sentence.split()
    for i in range(0, len(words)):
        display.show(random.choice(lips))
        speech.say(words[i])
    display.show(lips0)

def act():
    angle = random.randint(0, 180)
    set_servo_angle(pin1, angle)
    set_servo_angle(pin2, angle)
    sleep(300)
    speak(random.choice(sentences))
    set_servo_angle(pin1, 90)
    set_servo_angle(pin2, 90)
    sleep(1000)

base_z = 0

while True:
    new_z = abs(accelerometer.get_z())
    if abs(new_z - base_z) > 20:
        base_z = new_z
        act()
    if random.randint(0, 1000) == 0: # say something 1 time in 1000
        act()
sleep(100)- Connect the micro:bit to your computer using the micro USB cable.
- Ensure that you don’t have any browser tabs open with MakeCode.
- Click Connect on the MicroPython editor and go through the steps to connect your micro:bit.
- Click Flash. This will upload the code to the micro:bit which will then start running the programme.
Do more
With the animatronic up and running it’s now easy to customise it to your liking. Here’s a few tips:
- Edit the code to replace its sentences with your own ones.
- Make a mask for it to give it more personality. You could even carve a pumpkin specially for this!
- Play with the different sensors of the micro:bit to trigger the device. You could have a darkness triggered animatronic or one that reacts to noise…or both!